

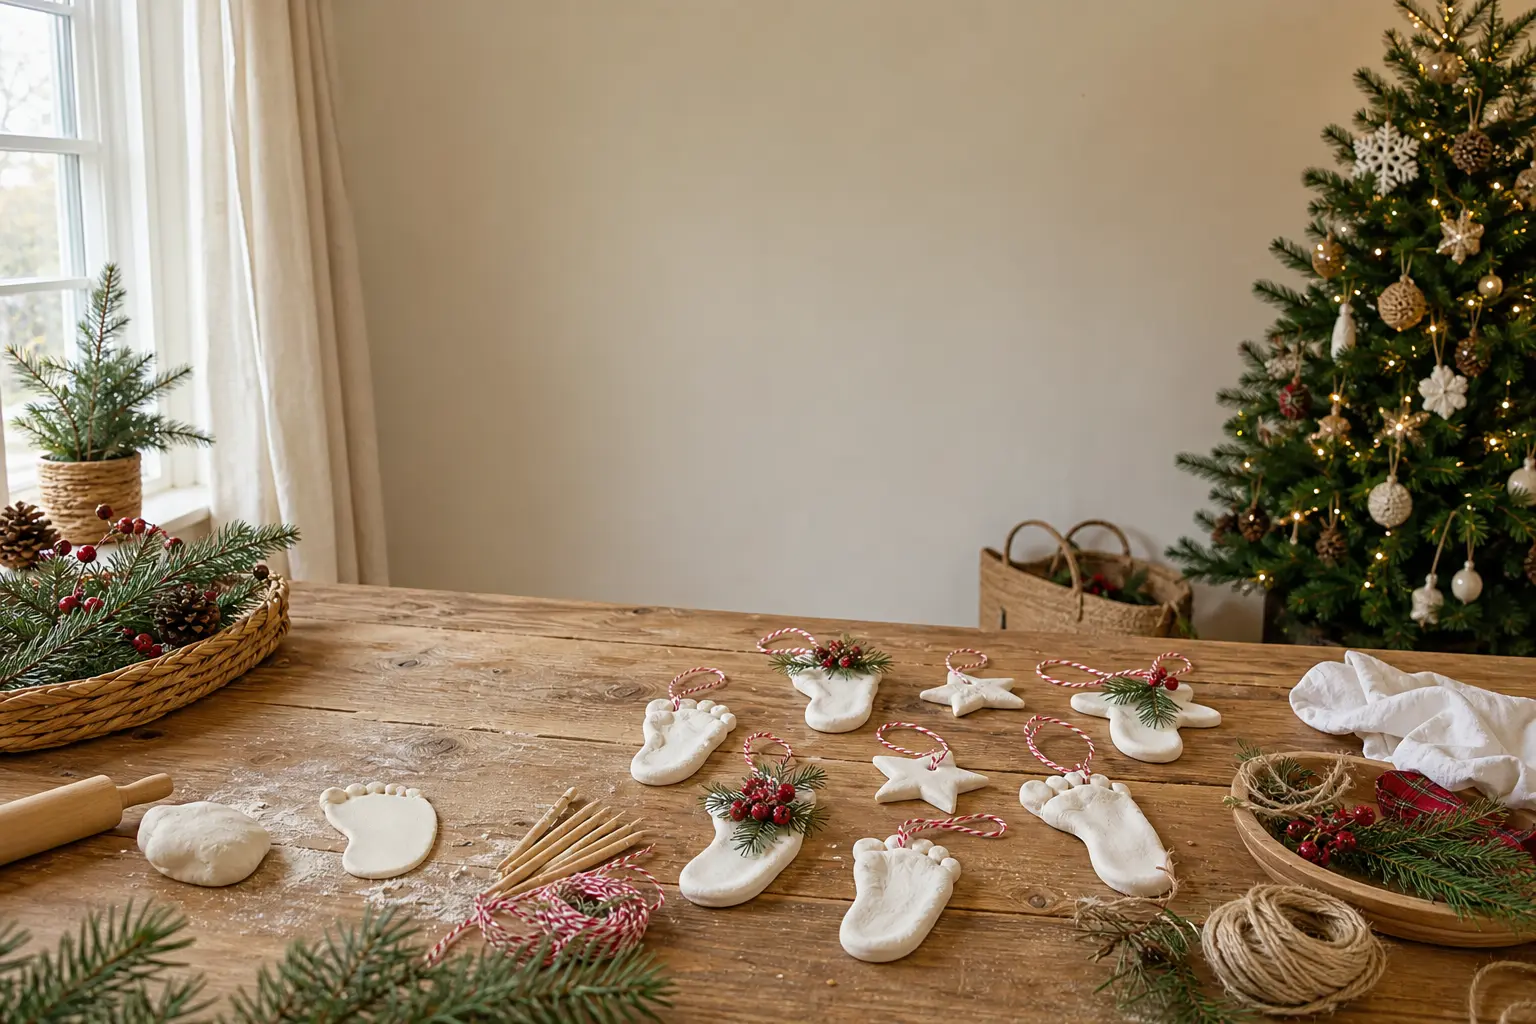
Christmas crafts for babies do not have to mean thirteen identical handprints lined up on the mantelpiece.
The thirteen projects here each use a different medium, so the baby contributes a hand, a foot, a smear, or simply the warmth of their tiny presence, and the finished pieces look like a curated collection rather than one idea run into the ground.
Every project uses materials that are safe on new skin, every method names the steps an adult handles, and every finished piece is worth keeping or gifting.
A note before you start: for any step that involves paint directly on skin, use a water-based, non-toxic tempera or finger paint labeled safe for babies. It washes off skin in seconds and comes out of a babygro in a cold rinse before it sets.
Keep a warm damp cloth within reach before you even open the paint, and work fast, because a relaxed baby is a cooperative one and that window is shorter than you think.
If the older children in the house want in on the making, the hub article on christmas crafts for kids has projects scaled to every age. For the preschool set specifically, christmas crafts preschool has ideas they can lead themselves.
And if any of these end up under someone else’s tree, the roundup on diy christmas gifts grandparents will give you wrapping and presentation ideas worth stealing.
This post contains affiliate links. If you buy through them, I may earn a small commission at no extra cost to you.
- Footprint Reindeer in Paint on Card
- Hand Impression Pressed Into Salt Dough
- Ink Pad Thumbprint Gift Tags
- Air Dry Clay Disc with the Date Pressed In
- Photo Bauble with the Year
- Fabric Paint Handprint on a Tea Towel
- Plaster Foot Cast
- Contact Paper Suncatcher the Baby Presses Tissue Onto
- Ribbon Cut to the Baby’s Length and Framed
- Stocking with an Iron-On Name
- Edible Paint Smear Framed as Abstract Art
- Scrap Fabric Sensory Ribbon Tag Ornament
- Paint Rolled Inside a Clear Bauble
- Frequently Asked Questions
Footprint Reindeer in Paint on Card
This is the classic for a reason, but the card format lifts it above a scrap of paper rolled up in a drawer.
A cream or kraft card, printed with one brown footprint and two thumbprint eyes, becomes a proper keepsake card that grandparents actually frame.
The heel is the reindeer’s head, the toes are the antlers, and the whole thing takes ten minutes once the baby is cooperating.
What You Need
- 1 sheet A5 kraft or cream card, 300 gsm
- Brown water-based tempera paint (baby-safe, non-toxic)
- Red and black non-toxic ink pad or finger paint, small amounts
- Fine black marker pen
- Damp cloth for immediate cleanup
How to Make It
- Lay the card on a firm, flat surface and squeeze a coin-sized pool of brown paint onto a spare piece of card to use as a palette.
- With the baby lying on their back, press your palm gently but firmly across the sole of their foot to coat it evenly, then press the foot heel-down onto the centre of the card and lift cleanly. Immediately wipe the foot with the damp cloth.
- Leave the print to dry for at least 20 minutes. The paint is ready when it no longer looks wet or shiny at the edges.
- Once dry, use the red ink pad or a tiny dot of red finger paint on your own fingertip to add a circular nose at the heel end.
- Dip a fingertip into black ink to add two small circular eyes just above the nose. Let dry for another 5 minutes.
- With the fine marker, draw two short curved lines from the toe prints to suggest antler branches. Write the baby’s name and the season lightly at the bottom.

Hand Impression Pressed Into Salt Dough
Salt dough is the most forgiving medium in the whole list. If the first impression smudges, you press it flat, smooth it out, and try again.
The finished disc, baked hard and hung with ribbon, is the kind of thing that outlasts everything else in the memory box. It feels weighty and permanent in a way that paint on paper simply does not.
What You Need
- 1 cup plain flour
- 1/2 cup table salt
- 1/2 cup cold water
- Rolling pin
- A drinking straw or pencil (for the hanging hole)
- 30 cm thin ribbon or twine for hanging
- Baking tray lined with parchment
How to Make It
- Mix flour and salt together, then add cold water a little at a time, stirring until a smooth, non-sticky dough forms. If it clings to your hands, add a pinch more flour.
- Roll the dough to about 1 cm thick on a lightly floured surface. Cut or shape a circle roughly 12 cm across by hand, or use a large round cutter.
- Place the disc on the lined tray. Press the baby’s open hand gently but firmly into the centre, fingers spread, then lift cleanly. The impression should be 3 to 4 mm deep.
- Use a straw to punch a clean hole near the top edge, about 1 cm from the rim. Remove the straw plug of dough.
- Adult step: bake at 100 C (fan) or 120 C (conventional) for 3 hours. The disc should come out hard, dry, and a pale biscuit colour with no soft spots when you tap the back.
- Leave to cool completely on a wire rack, at least 30 minutes. Thread ribbon through the hole and tie a loop.

🛍 Shopping guide
Ink Pad Thumbprint Gift Tags
A set of six gift tags printed with the baby’s thumbprint and signed with their name turns a plain parcel into something that will be kept rather than thrown away. The ink pad does all the work, the baby supplies the thumb, and you supply the steadiness. These take under fifteen minutes and make every gift under the tree personal.
What You Need
- 6 blank kraft gift tags with string, at least 6 x 9 cm
- 1 non-toxic, baby-safe ink pad in red or green
- Fine black marker pen
- Damp cloth for cleanup
How to Make It
- Lay all six tags face up on the table before you bring in the baby, so you can work through them quickly.
- Press the baby’s thumb gently onto the ink pad, just enough to coat the pad of the thumb without flooding it. Immediately press the inked thumb onto the centre of the first tag, hold for two seconds, then lift cleanly. Wipe the thumb with the damp cloth.
- Repeat for each tag, re-inking the thumb each time. The print should look solid and oval, not smeared. If it smears, you pressed too hard: use a lighter touch and a single firm motion.
- Leave all tags to dry for 15 minutes. The ink is set when it no longer transfers to a fingertip pressed against it.
- Use the fine marker to add two tiny legs below each thumbprint to turn it into a robin, or simply write “From [baby’s name]” underneath in small neat letters.

🛍 Shopping guide
Air Dry Clay Disc with the Date Pressed In
This one requires no oven, no flour, and no mixing.
Air dry clay comes out of the packet ready to use, and the finished disc is smooth, slightly translucent at the edges when it dries, and looks like something from a high-end gift shop rather than a kitchen table.
Press the baby’s footprint in and stamp the date around the rim using letter stamps, and the result is genuinely beautiful.
What You Need
- 200 g white air dry clay
- Rolling pin or smooth glass
- Alphabet stamp set (small, 6 mm)
- A drinking straw for the hanging hole
- Fine sandpaper (220 grit) for smoothing after drying
- 30 cm thin ribbon
How to Make It
- Knead the clay for two minutes until it is smooth and has no cracks when you fold it. If it sticks to your hands, let it air for one minute.
- Roll to 8 mm thick and cut or shape a disc roughly 10 cm across. Smooth the edges by running a damp fingertip around the rim.
- Place on a non-stick surface. Press the baby’s bare foot gently into the centre, then lift the foot straight up rather than peeling it off sideways. The print should be 3 to 4 mm deep and show the toe pads clearly.
- Use the alphabet stamps to press the season and year around the rim, pressing each letter firmly and removing it straight up. Work in a circle leaving a 1 cm gap from the edge.
- Punch a hanging hole near the top with the straw. Leave the disc completely flat on a non-stick surface for 48 hours. Do not move it during the first 24 hours or it will warp.
- Once bone dry, sand any rough edges gently with the fine sandpaper. Thread ribbon through and tie a loop.

Photo Bauble with the Year
A clear fillable plastic bauble gives you a two-minute ornament that will be on the tree for the next twenty years.
The trick is choosing the right photo: a close crop of the baby’s face against a plain background, printed to exactly the size the bauble needs, curled gently so it sits inside facing outward. No glitter, no filler, just the face.
What You Need
- 1 clear fillable plastic bauble, 80 mm diameter
- 1 printed photo of the baby, 7 x 7 cm (print at home or at a pharmacy kiosk)
- Fine black permanent marker
- Thin ribbon, 30 cm, for hanging
How to Make It
- Pull the two halves of the bauble apart at the equator seam. Set the top half (the one with the hanging loop) to one side.
- Write the season and year in small neat lettering along the bottom edge of the photo with the permanent marker. Let the ink dry for 60 seconds.
- Curl the photo gently into a loose tube, image facing outward, and lower it into the bottom half of the bauble. Release it slowly so it unfurls and presses against the inside curve, face visible through the clear plastic.
- Press the two halves back together firmly until you hear or feel the seam click. Thread ribbon through the hanging loop and tie a bow.

🛍 Shopping guide
Fabric Paint Handprint on a Tea Towel
A plain white or cream linen tea towel printed with the baby’s hand in red or green fabric paint becomes a Christmas kitchen staple that people actually use. Fabric paint fixes permanently in the tumble dryer, so this is a gift that survives real life.
Pick a tea towel with enough body to hold the print flat, and iron it smooth before you start so there are no fold ridges under the print.
What You Need
- 1 white or cream cotton or linen tea towel, pre-washed and ironed flat
- Red or green fabric paint, non-toxic, baby-safe (such as Tulip Soft or any water-based fabric paint labeled skin-safe)
- A small foam brush or sponge
- Scrap card to slide inside the towel
- Damp cloth for cleanup
How to Make It
- Slide a piece of scrap card inside the tea towel under the area where the print will go. This stops the paint bleeding through to the back layer.
- Use the foam brush to apply a thin, even coat of fabric paint to the baby’s palm and spread fingers. Too much paint causes the print to bleed at the edges, so less is more here.
- Press the hand firmly onto the tea towel with your hand over the baby’s, hold for three seconds, then lift cleanly and straight up. Immediately wipe the baby’s hand with the damp cloth.
- Leave the print to air-dry for 24 hours. Remove the card from inside after the first hour once the surface is touch-dry.
- Adult step: once fully dry, place a piece of thin cotton fabric over the print and iron on a cotton setting for 30 seconds to heat-set the paint. This makes it machine-washable.

Plaster Foot Cast
This is the one people point to twenty years later and say: look how small.
A plaster cast of the baby’s foot, made with alginate casting powder and filled with plaster of Paris, captures the exact contour of the sole, the wrinkles across the heel and the precise curl of each toe in a way no print on paper can.
The process looks daunting and is genuinely straightforward if you read the method once before you start.
What You Need
- 1 packet alginate casting powder (dental-grade or craft-grade, both are skin-safe)
- Plaster of Paris powder, enough for approx 200 ml mixed
- A container slightly larger than the baby’s foot, at least 8 cm deep (a clean 500 ml yoghurt pot works well)
- A mixing bowl
- Warm water (temperature affects setting speed: warmer sets faster)
- A spoon or spatula
How to Make It
- Mix the alginate powder with warm water according to the packet ratio, usually 1 part powder to 2 parts water. Stir quickly and continuously for 30 to 60 seconds until you have a smooth, lump-free mixture about the consistency of thick yoghurt. Pour it immediately into the container.
- Working quickly (alginate begins setting in 2 to 3 minutes), lower the baby’s bare foot into the alginate, sole down. Hold the foot completely still in the centre of the container, not touching the sides, for 3 minutes. The alginate will set around the foot and feel firm but slightly rubbery.
- Gently rock the foot from side to side to break the seal, then lift the foot straight up. You will now have a perfect mould of the foot. Check inside: the impression should show individual toes. Leave the mould in the container.
- Mix plaster of Paris with cold water to a double-cream consistency, no lumps. Pour slowly into the mould, tapping the container gently on the table to release any air bubbles. Fill to the top of the mould.
- Leave undisturbed for at least 24 hours. When the plaster is set, peel the alginate away from the outside. The plaster cast underneath will be the exact shape of the foot, sole upward. Sand any rough edges gently.

🛍 Shopping guide
Contact Paper Suncatcher the Baby Presses Tissue Onto
This is the one where the baby actually does something visible and joyful. A sheet of clear self-adhesive contact paper, sticky side up and taped to a tray, becomes a canvas the baby pats torn tissue paper squares onto.
When it is done, you lay a second sheet on top, trim it to a star or circle, and hang it in the window where the light turns it into a stained glass effect that is genuinely pretty.
No paint on skin, no waiting for dry time to do the next step.
What You Need
- 2 sheets A4 clear self-adhesive contact paper (also sold as sticky-back plastic)
- Tissue paper in red, green and gold, torn into 3 to 5 cm irregular pieces (roughly 30 pieces total)
- Masking tape to secure contact paper to tray
- Scissors (adult only) or a star or circle shaped template plus scissors
- 30 cm thin ribbon or thread for hanging
- A flat tray or chopping board as backing
How to Make It
- Adult: peel the backing off one sheet of contact paper and lay it sticky side up on the tray. Tape the four corners to the tray so it cannot move or curl.
- Tear the tissue paper into irregular pieces if you have not already. Lay the tray on a surface the baby can reach, and let the baby pat, press and wave tissue squares onto the sticky surface. They do not need to be neat: the randomness is the point. Fill most of the surface.
- Adult: once the surface is well covered (or the baby is done), peel the backing off the second sheet of contact paper and lay it carefully over the top, sticky side down, smoothing from the centre outward to avoid air bubbles.
- Adult: trim the sandwich to a star, circle, or tree shape using scissors. Use a hole punch or the tip of a pencil to pierce a small hole near the top edge.
- Thread ribbon through the hole and hang in a window. The light coming through the tissue layers creates the stained-glass effect.

Ribbon Cut to the Baby’s Length and Framed
This one needs no paint, no mess, and no baby cooperation whatsoever, because the baby is the measurement.
Cut a length of satin ribbon to exactly the baby’s height on their first Christmas morning, fold it in half, mount it vertically on a piece of card with the date and name written beneath, and frame it.
It is the simplest idea in the list and consistently the one that makes people catch their breath when they see it.
What You Need
- Cream satin ribbon, 25 mm wide, cut to the baby’s exact length (measure against the baby while they sleep)
- 1 sheet white or cream card, A4, 300 gsm
- A deep box frame to fit A4 card (at least 2 cm depth to accommodate the folded ribbon)
- Double-sided tape
- Fine black marker or calligraphy pen
How to Make It
- Measure the baby’s length in centimetres while they sleep on their back, placing the ribbon alongside them from crown to heel. Mark the ribbon lightly with a pencil at both ends and cut cleanly.
- Fold the ribbon in half so both ends meet. Press a short strip of double-sided tape to the fold point on the back of the ribbon.
- Centre the folded ribbon vertically on the card and press the taped fold onto the card surface. Open the two layers of ribbon out into a neat flat band running top to bottom, and press each end to the card with another small piece of double-sided tape.
- Below the ribbon, write the baby’s name, the date, and their length in centimetres in small neat lettering with the marker. Leave a 1 cm margin from the card edge.
- Place the card in the box frame. The slight depth of the ribbon means a standard glazed frame will press the ribbon flat, which looks neat; a deep box frame lets it sit naturally, which looks more luxurious.

🛍 Shopping guide
Stocking with an Iron-On Name
A plain felt or knitted stocking from a craft or home shop becomes a personalised first-Christmas keepsake in about ten minutes with an iron-on letter set. No sewing, no hand-lettering, no calligraphy skills required. The letters fuse to the fabric and survive years of annual use, which is the whole point.
What You Need
- 1 plain felt or knitted Christmas stocking, minimum 35 cm long
- Iron-on letter set in a colour that contrasts with the stocking (gold on red, white on green)
- A household iron
- A thin cotton pressing cloth or a piece of clean cotton fabric
- A hard, heat-safe ironing surface
How to Make It
- Lay the stocking flat on the ironing surface, top cuff facing up. Arrange the iron-on letters spelling the baby’s name along the cuff, spacing them evenly. Step back and check the spacing from a distance before you commit, because once fused they are permanent.
- Heat the iron to the cotton setting with no steam. Lay the pressing cloth over the letters.
- Adult: press the iron firmly and evenly over each letter for the number of seconds specified on the iron-on letter pack (usually 10 to 15 seconds per letter). Do not slide the iron: lift and place for each letter.
- Lift the pressing cloth and check each letter is fully adhered at the edges. If any corner lifts, replace the cloth and press again for 5 more seconds.
- Leave the stocking completely flat to cool for 10 minutes before handling. The bond strengthens as it cools.

🛍 Shopping guide
Edible Paint Smear Framed as Abstract Art
This is the one for parents who are not ready to put anything near the baby’s skin.
Mix a small amount of natural food colouring into plain Greek yoghurt or pureed sweet potato, spread it on a sheet of good white card, and let the baby smear it with their fists, palms, or forearms. The result looks like a proper abstract print.
Let it dry completely, and what remains is a muted, textured piece that frames beautifully. The food base dries flat and does not smell once dry.
What You Need
- 1 sheet heavyweight white watercolour card, A3, minimum 300 gsm
- 2 tablespoons plain full-fat Greek yoghurt, or 2 tablespoons smooth pureed sweet potato
- Natural food colouring paste in red and green (gel type gives stronger colour)
- A silicone mat or clean high chair tray as work surface
- An A3 frame (or trim the finished piece to A4 and frame that)
How to Make It
- Mix a small amount of red food colouring paste into one tablespoon of yoghurt and green into another, stirring until the colour is even. The mixture should be thick but spreadable, not runny.
- Drop spoonfuls of coloured yoghurt across the card in a loose, scattered pattern. No need to cover the whole surface: the white card showing through becomes part of the composition.
- Place the card on the silicone mat or high chair tray, within safe reach of the baby. Let the baby press, swipe, and pat the yoghurt across the surface. Guide their hands gently if they are very young. This step takes two minutes or twenty, depending entirely on the baby.
- Once the baby is done, lift the card carefully off the tray and place it flat on a clean, dry surface. Leave it undisturbed overnight, at least 8 hours. The yoghurt will dry into a thin, matte layer that does not flake.
- When fully dry, the card should feel flat and papery, not tacky. Trim any rough edges with scissors, then frame and hang.

🛍 Shopping guide
Scrap Fabric Sensory Ribbon Tag Ornament
The baby contributes nothing to this one except the inspiration, and it is none the worse for it.
A small stuffed fabric circle with ribbon loops stitched around the perimeter is a sensory toy the baby can safely hold on the day and an ornament the tree holds every year after.
Use fabric scraps from a babygro the baby has outgrown, a blanket, or any soft cotton you have, and the ornament carries textile memory as well as visual one.
What You Need
- 2 circles of soft fabric, each 12 cm diameter (cut from a babygro or use cotton scraps)
- 6 to 8 lengths of ribbon or fabric strips, each 8 cm long and at least 1 cm wide, in varying textures
- Small amount of toy-grade polyester stuffing, approx 20 g
- Needle and thread or a sewing machine
- Scissors (adult only)
- 1 loop of ribbon 15 cm long for hanging
How to Make It
- Adult: cut two 12 cm circles from the fabric. Fold each of the 8 cm ribbon lengths in half to make loops, and pin them around the right side of one fabric circle at regular intervals, raw ends pointing inward toward the centre. Include the 15 cm hanging loop at the top in the same manner.
- Place the second fabric circle on top, right sides together, sandwiching all the ribbon loops between the layers. Pin securely all the way around.
- Adult: stitch around the circle 1 cm from the edge, leaving a 4 cm gap for turning. Remove pins as you go. The ribbon loops will be caught in the seam and extend outward once turned.
- Trim the seam allowance at curves to reduce bulk. Turn the circle right side out through the gap. The ribbon loops should all pop outward cleanly. Poke out any flattened edges with a blunt pencil.
- Stuff lightly with the polyester filling until the circle is plump but soft, not hard. Slipstitch the opening closed with neat hand stitches. Hang from the ribbon loop.

🛍 Shopping guide
Paint Rolled Inside a Clear Bauble
This is the most hands-off craft for the baby and the most visually striking for the tree. A clear fillable bauble, a few drops of paint squeezed inside, and a vigorous roll creates a marble effect in your chosen palette that looks deliberately designed.
Red and gold together set inside a clear bauble are particularly good: the colours stay separate and the result looks expensive. This one takes five minutes and dries overnight.
What You Need
- 1 clear fillable plastic bauble, 80 mm diameter
- Acrylic craft paint in two or three colours (red, gold, and white work well together)
- 30 cm ribbon for hanging
How to Make It
- Separate the bauble at the seam. Remove the metal hanging cap from the top half and set the cap aside.
- Squeeze 5 to 8 drops of each colour into the bottom half of the bauble. Do not mix them yet.
- Replace the metal cap on the top half and press the two halves firmly together. Tip and roll the bauble slowly in your hands, letting the paint flow around the interior surface. The colours will swirl and layer without fully merging. Roll for about 60 seconds.
- Remove the metal cap and leave the bauble open, paint side down if any excess pools at the bottom, on a piece of scrap paper overnight. The paint is dry when you can tip the bauble and no liquid moves inside, at least 8 hours.
- Replace the metal cap and hang with ribbon. The dried paint clings to the inside of the clear bauble and stays in place for years.

🛍 Shopping guide
Frequently Asked Questions
What Christmas crafts for babies are safe under one year?
Every project in this list is designed for babies under twelve months.
The safest options for the very youngest are the salt dough hand impression, the photo bauble, the ribbon length framed, the stocking with an iron-on name, and the paint-rolled bauble, since none of these require paint on skin or any baby participation beyond being held still.
For crafts that involve skin contact, use only water-based, non-toxic tempera or finger paint labeled baby-safe and age-appropriate, and keep a warm damp cloth ready for immediate cleanup.
Always check that no small parts, including ribbon loops, beads or decorative pieces, are within the baby’s reach.
What paint is safe for Christmas crafts for babies?
Use water-based, non-toxic tempera paint or finger paint that is specifically labeled baby-safe or skin-safe. This type of paint washes off skin with warm water and a damp cloth within seconds, and comes out of fabric in a cold rinse before it dries.
Avoid craft acrylic paint directly on skin: it is non-toxic once dry but harder to remove quickly and not formulated for skin contact.
For fabric projects, choose a fabric paint that is also labeled non-toxic and skin-safe, then heat-set it with an iron once fully dry to make it machine-washable. Never use glitter paint, paint containing metallic particles, or any paint not explicitly labeled non-toxic near a baby.
How do you get a clean handprint from a baby?
Preparation matters more than technique. Get everything ready before the paint comes out: card or fabric flat on the surface, a damp cloth within arm’s reach, and a second adult or helper if possible.
Apply paint to the baby’s hand with a foam brush or sponge rather than dipping the hand directly into paint, because a controlled, thin coat gives a sharper print than a flooded one.
Press your palm over the baby’s hand to apply even pressure across the whole surface, hold for two to three seconds, then lift cleanly and straight up rather than peeling sideways. Wipe the hand immediately.
If the first print smears, blot it gently and try again on a fresh surface. The window of cooperation is short, so move quickly and do not attempt this when the baby is hungry or tired.
How do I preserve Christmas crafts for babies as a keepsake?
The method depends on the medium. Salt dough and air dry clay pieces last indefinitely if kept dry: store them in an acid-free box or hang them where they will not be knocked.
Seal them with a coat of clear water-based varnish if you want a glossy, more durable finish. Paint-on-card pieces should be stored flat in an acid-free portfolio sleeve or framed behind UV-protective glass to prevent fading.
Fabric pieces, including the tea towel handprint and the sensory ornament, can be washed gently once the paint is heat-set. For all paper and card keepsakes, avoid storing in attics or basements where humidity fluctuates, as this causes warping and mould over time.
A simple acid-free memory box kept in a wardrobe is the most practical long-term solution for the whole collection.

19 work Christmas party themes with decor, food and one activity each, from a zero-cost pajama night

24 Christmas door decorations for the slab, the glass, the handle and beyond, grouped so you can pic
31 christmas table decorations that work down the length of a too-long table, hide every seam, and u
Leave a Reply