

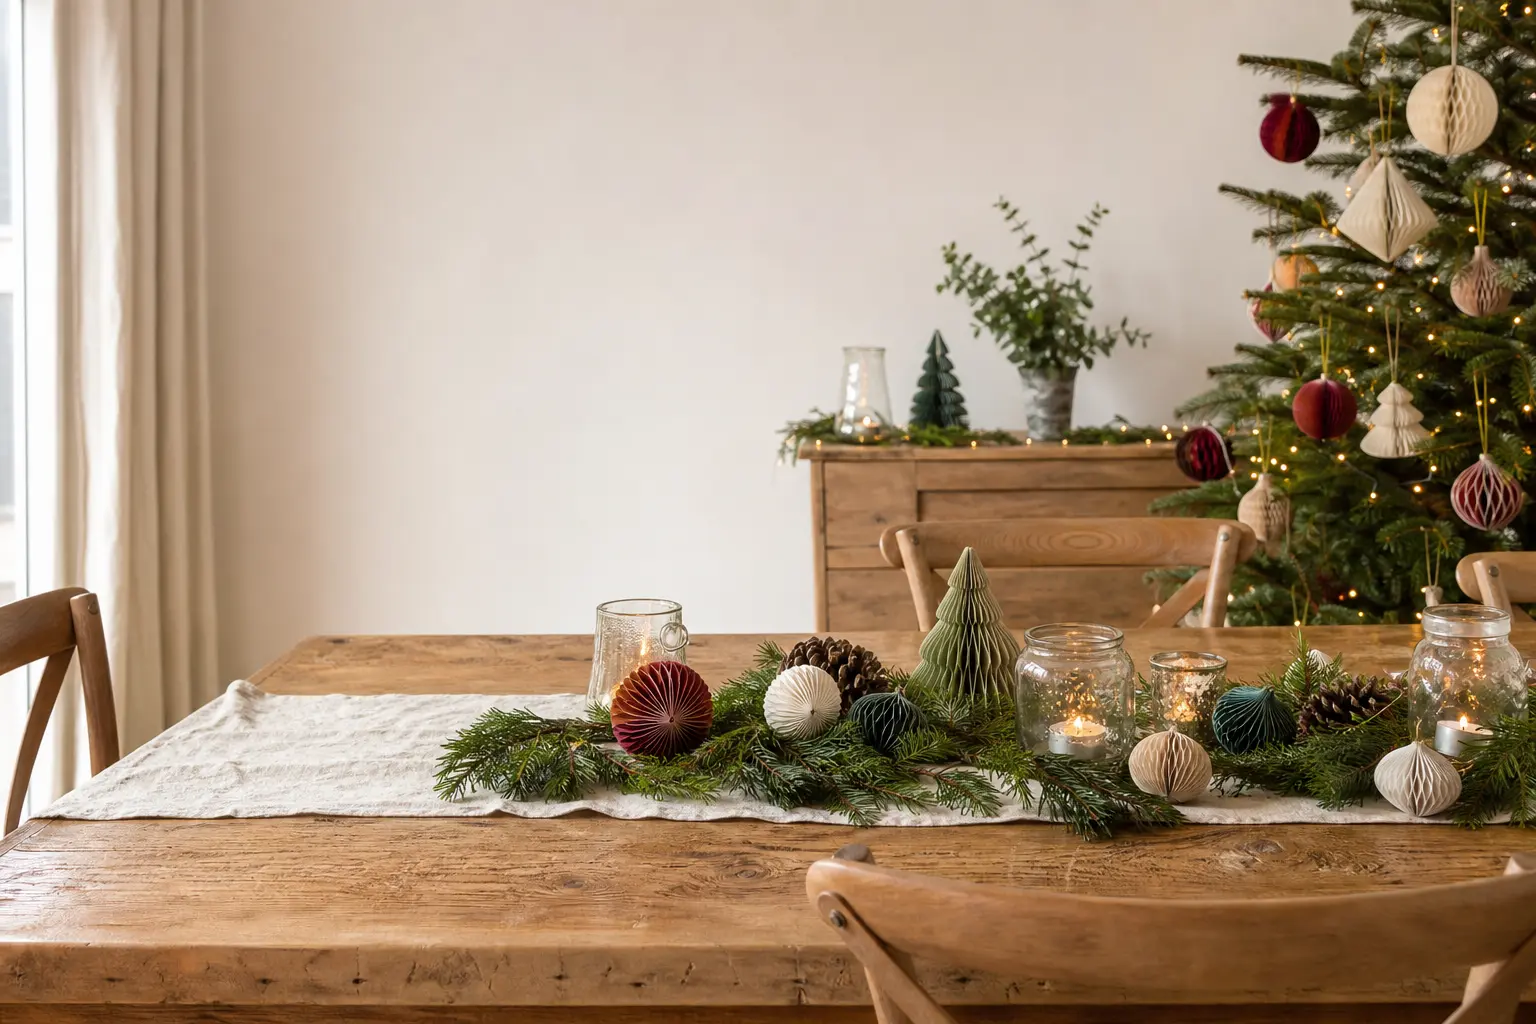
The best christmas crafts for adults have one thing in common: a single finishing move that erases the evidence of the kitchen table. Not more materials, not more time. One deliberate detail that makes a guest pick it up and squint.
That is the thread running through every project here, from a five-minute wax seal to a slow afternoon of indigo dyeing.
The list covers 22 crafts across completely different techniques: paint on water, cast plaster, wood burning, needle felting, lino cutting, macrame, and more. Most need nothing from a specialist shop.
All of them belong on a mantel, a table, or wrapped as a gift, and none of them look like a school project. For broader inspiration, browse the full christmas crafts hub before you start.
If you want to turn any of these into stock, the christmas crafts to sell guide covers pricing and packaging. And if ornaments are your focus, diy christmas ornaments goes deep on the subject.
This post contains affiliate links. If you buy through them, I may earn a small commission at no extra cost to you.
- Marbled Baubles Dipped Through Spray Paint on Water
- Amaryllis Bulb Sealed in Coloured Wax
- Hand Dipped Tapers in Three Graded Lengths
- Plaster Bell Cast Inside a Balloon
- Wood Burned Monogram Discs on Pale Birch
- Alcohol Ink Snowflakes on a Glass Bauble
- Dried Flower Hoop Wreath Left Deliberately Half Empty
- Wax Sealed Envelopes Lifted with a Cold Spoon
- Gilded Walnut Shells Scattered in a Shallow Bowl
- Lino Cut Stamp Printed Across Plain Brown Paper
- Indigo Dipped Linen Napkins Oxidised Between Dips
- Papier Mache House with One Lit Window
- Needle Felted Spheres in Five Greys
- Hammered Brass Discs Hung on Thread
- Candle Poured into a Thrifted Teacup, Wick Held by a Peg
- Hand Lettered Place Cards Drawn in Pencil First
- Macrame Star of Four Repeated Knots
- Pressed Fern Set Under Glass in a Plain Frame
- Leather Tags Saddle Stitched with Two Needles
- Beeswax Slab Poured Flat and Cut into Tiles
- Paper Honeycomb Balls in Three Sizes Hung as a Cluster
- Quilted Bauble Cut from a Worn-Out Quilt
- Frequently Asked Questions
Marbled Baubles Dipped Through Spray Paint on Water
This is the five-minute craft on the list, and it consistently fools people.
The technique borrows from hydro-dipping: spray paint floated on still water forms a skin almost instantly, and dragging a clear glass bauble through it picks up a swirl that looks nothing like something done at a kitchen sink.
The finishing move is a second quick dip into a different colour, which adds depth without muddying the first layer.
Choose two colours maximum. Three colours collapse into brown. Cream and gold read expensive; white and pale sage read Scandi. Hang finished baubles in a doorway or cluster seven of them in a wide glass bowl for a centrepiece that takes under an hour to assemble.
What You Need
- 6 clear glass baubles, 80 mm
- 2 cans spray paint in satin finish, colours of your choice
- 1 large plastic storage tub, at least 30 cm wide and 15 cm deep
- Water to fill the tub to 10 cm depth
- Kitchen paper and a drop cloth
- Fine wire or a straightened coat hanger for dipping
How to Make It
- Fill the tub with cold water to a depth of about 10 cm. Set it on a drop cloth outdoors or in a well-ventilated space, because the overspray goes wide.
- Remove the bauble cap and thread a length of fine wire through the hanging loop so you have something to hold that keeps your hand out of the paint.
- Hold the first spray can 20 cm above the water surface and spray two short bursts. The paint fans out into an iridescent film. If it sinks, the paint is too heavy or the water is too cold: warm the can briefly in your hands and try again.
- Lower the bauble through the film in one smooth motion, keeping it moving so the paint wraps rather than pools at the bottom. Lift it out and let the excess drip back into the tub for ten seconds.
- Set the bauble on a sheet of kitchen paper, wire uppermost, and do not touch it for at least 40 minutes. The surface feels tacky long after it looks dry.
- Repeat with remaining baubles, spraying a fresh film for each one. Replace the cap once the bauble is fully dry.

🛍 Shopping guide
Amaryllis Bulb Sealed in Coloured Wax
An amaryllis bulb needs nothing: no pot, no soil, no watering schedule.
Coat the roots and lower third of the bulb in a thick shell of coloured wax and it will sit on a windowsill and bloom on its own reserves for four to six weeks.
The wax protects the roots from drying out and holds the bulb upright.
The finishing move is a final pour of clear wax over the whole surface while it is still on its stand, which gives the cured shell a glassy sheen that reads like lacquered ceramic.
Use pillar candle wax or paraffin wax, not soy, because soy wax stays matte and powdery at room temperature. Red or forest green are the obvious choices; an off-white bulb in sage wax is quietly elegant. Store spent bulbs unwaxed in a cool dry spot after flowering: they will rebloom the following year.
What You Need
- 1 large amaryllis bulb, unplanted
- 300 g pillar candle wax or paraffin wax pellets
- Candle dye in your chosen colour, 1 disc or 5 g
- 1 old saucepan and a heatproof jug for a double boiler
- A wooden skewer or pencil to hold the bulb during dipping
- Baking paper
How to Make It
- Trim any dry or damaged outer scales from the bulb with scissors, but leave the papery skin intact. The roots should be alive and cream-coloured, not black. Let the bulb sit at room temperature for a day if it has come from cold storage.
- Melt the wax in the heatproof jug set inside the saucepan of simmering water. An adult must handle all steps involving the heat source. Add the dye and stir until the colour is even. Remove from the heat and allow to cool to about 70 degrees C: the wax should look opaque around the edges of the jug.
- Push the wooden skewer gently into the base of the bulb between the roots so you have a handle. Hold the bulb by the skewer and dip the lower two-thirds into the wax, roots first. Hold it there for four seconds, then lift it straight up in one smooth movement.
- Hold the bulb in the air for thirty seconds while the wax firms to a matte shell, then set it on baking paper, skewer upright, for ten minutes.
- Reheat the remaining wax until it is just liquid and clear again. Pour a thin stream over the entire waxed surface while the bulb sits on the baking paper. This final clear coat gives the glassy finish. Leave undisturbed for at least one hour.
- Remove the skewer and stand the bulb on its wax base in a bright spot. Watering is unnecessary: the wax holds enough moisture for the full blooming cycle.

🛍 Shopping guide
Hand Dipped Tapers in Three Graded Lengths
Dipped tapers are slow and deeply satisfying. The technique is simple repetition: you dip a length of wick into hot wax, let it harden for a minute, and dip again. Twenty dips builds a taper thin enough to use.
The finishing move is the final dip into a slightly cooler batch of wax, which gives the surface a smooth, almost satin finish instead of the bumpy layered look that gives away the process.
Make three together in graduating heights (25 cm, 20 cm and 15 cm) and they read as a set.
What You Need
- 200 g paraffin wax pellets
- Candle dye in one colour, 1 disc or 5 g
- Braided candle wick, 1.5 m cut into three lengths: 55 cm, 45 cm, 35 cm
- A tall narrow jug or a purpose-made dipping can, at least 30 cm deep
- A saucepan for the double boiler
- Candle thermometer
- A length of dowel or a ruler to hang the wicks from while they cool
How to Make It
- Melt the wax in the tall jug set over simmering water. Add dye and stir until even. Bring the wax to 82 degrees C: this is hot enough to bond each layer properly without melting the previous one. An adult must operate the heat source throughout.
- Tie each wick to the dowel at one end, spacing them so they hang without touching. Lower the longest wick into the wax until only 3 cm sticks out above the jug, hold for five seconds, then lift smoothly. A thin white film clings to the wick: that is your first layer.
- Hang the wick from the dowel and leave it for 60 seconds. The wax goes from shiny to matte as it cools. Then dip again. Continue for 20 dips total, working all three wicks in rotation so each gets a full minute between dips.
- After 20 dips the tapers should be 8-10 mm in diameter at the base, tapering naturally to the tip. If one side is thicker, straighten it gently while still warm by rolling it briefly on a smooth surface.
- For the finishing dip, reduce the wax temperature to 74 degrees C. This cooler wax grabs the surface in a single thin coat that fills any lines. Dip each taper once, lift slowly and hang for ten minutes without touching.
- Cut the bottom of each taper straight and flat with a warm knife. The flat base helps them sit in a standard holder. Leave overnight before burning.

Plaster Bell Cast Inside a Balloon
The drama here is entirely in the reveal: you inflate a round balloon, coat it in plaster, and once it cures you crack the balloon away.
The plaster shell inside has the exact shape of the balloon’s interior, including the slight irregularities that make it look hand-thrown.
The finishing move is a wash of raw umber acrylic thinned to near-transparency, rubbed into the surface and wiped back with a cloth, which settles into the plaster’s texture and reads like aged stone or ceramic.
Hang the finished bell with a length of linen twine knotted through a small hole drilled at the crown. Three bells in graduating sizes, unpainted in different finishes, look architectural on a mantel.
What You Need
- Plaster of Paris, 500 g
- 3 round balloons, 25 cm diameter when inflated
- A large mixing bowl
- 250 ml cold water
- A craft knife (adult use only)
- Raw umber acrylic paint, 1 small tube
- A lint-free cloth
- A small hand drill or skewer for the hanging hole
How to Make It
- Inflate a balloon to 20 cm diameter (slightly under-inflated gives a rounder, less pointed bell shape) and knot it. Mix the plaster by sprinkling it into the cold water until it mounds above the surface before sinking: this gives you a workable consistency, not too thin. Stir slowly for two minutes.
- Dip both hands into the plaster and coat the balloon in overlapping handfuls, building up a layer about 1 cm thick. Work quickly: plaster begins to set in eight minutes. Leave the knotted base of the balloon uncovered so you can grip it.
- Set the balloon knotted-end down in a small bowl so it sits stable. The plaster will feel warm as it sets: this is normal. Leave it undisturbed for at least six hours, then leave overnight to be certain.
- When fully cured (the bell feels hard and makes a hollow sound when tapped), use a craft knife (adult only) to pierce the balloon at the uncovered knot end. The balloon deflates and the plaster bell slides free. If small fragments stick to the interior, they will lift away with a fingernail.
- Mix a small amount of raw umber acrylic with water until it is almost transparent. Brush it over the entire outer surface and immediately wipe back with the cloth, leaving colour only in the surface texture. One coat is usually enough.
- Once dry, use a small hand drill or a sharp metal skewer to make a hanging hole at the crown. Thread linen twine through and knot inside.

🛍 Shopping guide
Wood Burned Monogram Discs on Pale Birch
A slice of pale birch holds a burned initial better than any gift tag available to buy. The wood’s grain adds texture the burn can work with rather than against, and the natural edge of the disc means no two look identical.
The finishing move is a single coat of clear beeswax rubbed in with a finger and buffed off: it deepens the burn to near-black while leaving the pale wood almost white, which is exactly the contrast you want.
Stack three discs of different diameters tied together with undyed linen string, or use them as gift tags with a hole drilled at the top. They keep indefinitely.
What You Need
- Birch wood discs, 8 cm diameter and 1 cm thick, quantity as needed
- A wood burning tool with a fine point tip
- A pencil for sketching the letter first
- Fine sandpaper, 220 grit, one sheet
- Clear beeswax polish, one small tin
- A lint-free cloth
How to Make It
- Sand the face of each disc lightly with the 220-grit sandpaper until the surface is smooth under your finger. Blow or wipe away all dust: dust in the grain causes the burner tip to skip.
- Sketch the initial lightly in pencil in the centre of the disc. Use a simple serif or block letter: fine script looks beautiful but punishes a shaky hand. The pencil line should be barely visible.
- Plug in the wood burning tool and allow it to reach working temperature (about two minutes). An adult must operate the tool throughout. Rest your hand on the disc’s edge to keep your stroke stable and trace the pencil line with a slow, even pace. Moving too fast gives a pale, scratchy line. Moving too slow scorches a wide blot.
- For any curves, rotate the disc rather than the tool: this keeps the pressure angle consistent. When the letter is complete, erase any remaining pencil marks with a soft eraser.
- Rub a small amount of clear beeswax into the whole face of the disc with a fingertip in circular motions. Leave for five minutes, then buff briskly with the lint-free cloth. The wax deepens the burn and seals the wood simultaneously.

🛍 Shopping guide
Alcohol Ink Snowflakes on a Glass Bauble
Alcohol inks move in ways that are impossible to fully control, which is precisely why they work on a bauble. Remove the cap, drop ink inside, swirl, and the ink blooms into branching shapes that actually resemble snowflakes under the curved glass.
The finishing move is a single drop of isopropyl alcohol added last, which pushes the pigment to the edges and opens a pale centre, making the pattern read as deliberate rather than accidental.
What You Need
- Clear glass baubles, 80 mm, quantity as needed
- Alcohol inks in white, pale blue and silver, 1 small bottle of each
- Isopropyl alcohol (91% or higher), 50 ml
- A pipette or eye dropper
- Kitchen paper
How to Make It
- Remove the bauble cap and set it aside. Work in a ventilated room: alcohol ink fumes are strong in a confined space.
- Drop three drops of white ink inside the bauble, followed by two of pale blue. Swirl the bauble slowly so the ink coats the interior walls in long arcs.
- Add one drop of silver ink and tilt the bauble so the silver threads through the blue and white without mixing into them completely.
- Draw a single drop of isopropyl alcohol into the pipette and drop it through the bauble opening. The alcohol pushes the pigment outward immediately, opening a clear centre and driving the colour to the edges in feathered points. One drop is usually enough: a second drop flattens the whole effect.
- Set the bauble opening-down on a folded piece of kitchen paper and leave to dry for 20 minutes. Replace the cap once completely dry.

🛍 Shopping guide
Dried Flower Hoop Wreath Left Deliberately Half Empty
A wreath that is half bare reads as curated. A wreath that is full reads as busy.
Bunch all the material to one side and lower quarter of a plain brass ring, and the empty arc at the top does the heavy lifting: it makes the whole thing look considered.
The finishing move is binding the stems with a single long piece of undyed linen tape rather than wire or multiple bits of string, which gives a clean, wrapped handle of a look where the stems meet the ring.
Dried flowers hold indefinitely in a dry room. Store the wreath flat in a paper bag between seasons.
What You Need
- A plain brass ring, 30 cm diameter
- Dried flowers and foliage: choose 3-4 varieties, around 15 stems total. Pampas, dried eucalyptus, dried ranunculus, and seedheads all work.
- Undyed linen tape or natural raffia, 1 m
- Fine florist’s wire, 30 cm
- Scissors
How to Make It
- Lay the ring flat on the table and decide where the cluster will sit: the lower left quadrant is the most natural choice. Set the ring so this point is toward you.
- Build the cluster off the ring before attaching it. Arrange three stems of your largest material (pampas or eucalyptus) into a loose fan shape, then tuck the smaller flowers in front of them so they sit at different heights. The tallest stem should be no taller than the ring’s diameter.
- Hold the cluster against the ring where the stems cross the metal and bind them tightly to the ring with a 10 cm length of florist’s wire, twisting the wire ends together at the back. This is the anchor: everything else is just tidying.
- Wrap the linen tape over the wire and around the stems and ring together in overlapping passes, working from the top of the cluster down to where the stems end. Tie it off with a knot at the back. The finished binding should look like a neat handle: no wire visible from the front.
- Hang the wreath and step back. The empty upper arc should feel like a choice. If any stem points outward awkwardly, bend it gently while still flexible or simply remove it: editing is faster than adding.

🛍 Shopping guide
Wax Sealed Envelopes Lifted with a Cold Spoon
A wax seal turns a plain envelope into the kind of thing someone photographs before opening. The problem most people have is that the pool of wax spreads unevenly or the seal sticks to the stamp.
The fix is two things: a cold spoon pressed against the pool while the wax is still molten to gather and level it, and a stamp chilled in the freezer for five minutes before pressing. The cold stamp releases cleanly every time.
What You Need
- Wax seal sticks in one or two colours, 4-6 sticks for 20 seals
- A wax seal stamp in a motif of your choice
- A glue gun or dedicated wax melting spoon
- A metal teaspoon
- Plain envelopes, quantity as needed
How to Make It
- Put the stamp in the freezer for five minutes before you start. While it chills, lay the envelopes flat in a row on a smooth surface.
- Heat the glue gun or wax melting spoon. An adult must handle all heated equipment. Melt the wax stick directly onto the envelope at the flap join, forming a pool roughly 3 cm wide. Work quickly: wax that sits in the gun too long becomes stringy.
- Immediately press the bowl of the cold metal teaspoon lightly onto the pool and lift straight up. This levels the surface without pressing a design into it. The pool is now flat, round and ready for the stamp.
- Remove the stamp from the freezer. Press it firmly and evenly into the centre of the wax pool. Hold it still for eight seconds, then peel it straight back without rocking it sideways.
- The design should release cleanly. If the wax tears, the pool was either too cool before pressing (wait less time next round) or the stamp was not cold enough (return it to the freezer between each seal).

🛍 Shopping guide
Gilded Walnut Shells Scattered in a Shallow Bowl
A shallow bowl of gilded walnut shells is the kind of thing that looks like it was sourced from an expensive interiors shop. It costs almost nothing and takes twenty minutes.
The finishing move is skipping gold spray in favour of gold leaf applied over a base of red-brown paint: the red shows through every crack in the leaf and that patchy undertone is what reads as real gilding rather than craft gold.
What You Need
- 12-15 walnut halves, shells emptied and cleaned
- Red-brown acrylic craft paint, 1 small pot
- Gold transfer leaf (imitation gold leaf), 1 book of 25 sheets
- Gilding size (quick-dry), 15 ml
- A small flat brush
- A shallow bowl for display
How to Make It
- Paint the outside of each walnut shell with two thin coats of red-brown acrylic, letting the first coat dry fully before applying the second (about 20 minutes per coat). The paint fills any remaining walnut debris and gives the gilding size something to grip.
- Apply a thin, even coat of quick-dry gilding size to the outer surface of each shell with the flat brush. The size looks milky when wet and goes clear and tacky as it becomes ready: this takes 15-25 minutes depending on the room temperature. It is ready when it feels like the surface of a Post-it note.
- Tear small pieces of gold leaf from the book (handle the sheets by the backing paper, not the leaf itself, which tears at a breath) and lay them over the tacky surface, pressing down with a dry brush or a fingertip. The leaf cracks and breaks over the curves of the shell: this is exactly right.
- Once all shells are covered, brush away loose flakes with a dry brush. The red paint shows through every crack. Leave for one hour before handling.
- Scatter the gilded shells in a shallow bowl. Fill any gaps with a few dried bay leaves or a sprig of preserved eucalyptus for contrast.

Lino Cut Stamp Printed Across Plain Brown Paper
Lino cutting looks hard and is mostly just slow. Once the stamp is cut, you can print a sheet of brown paper in under ten minutes, which makes it the most efficient wrapping paper project on this list.
The finishing move is printing in two passes: the first in warm white, let dry, then a second offset pass in pale gold.
The registration does not need to be perfect: the slight misalignment is what makes it look like a textile print rather than a computer job.
What You Need
- Soft-cut lino block, 10 cm x 10 cm
- Lino cutting tool set with V-gouge and U-gouge
- Water-based printing ink in warm white and pale gold, 1 tube each
- A rubber brayer (ink roller), 10 cm wide
- A sheet of glass or acrylic for inking, 20 cm x 20 cm
- Brown kraft paper, 1 roll or several sheets
- A pencil and carbon paper or tracing paper
How to Make It
- Draw a simple motif on paper in pencil: a sprig of berries, a single star, a small fir tree. Keep it under 7 cm so the stamp repeats neatly across the paper. Transfer it to the lino face by tracing and going over the reverse with a soft pencil, then pressing it face-down onto the lino.
- Cut away all the areas you want to stay as paper (unprinted). An adult must use lino cutting tools throughout. The V-gouge makes fine lines; the U-gouge removes larger areas quickly. Always cut away from your steadying hand. The raised areas will print.
- Squeeze a small amount of warm white ink onto the glass sheet. Roll the brayer through it until it covers the brayer evenly with no thick patches. Roll the inked brayer firmly over the face of the lino stamp.
- Press the stamp firmly onto the brown paper, rocking slightly to ensure full contact. Lift straight up. Repeat across the paper in a loose grid, reinking for every two to three impressions. Let the white ink dry for 30 minutes.
- Re-ink the stamp in pale gold and print a second pass, shifting each impression 2-3 cm from the white print. The slight offset creates the layered textile effect. Leave the paper flat to dry for one hour before rolling or folding.

🛍 Shopping guide
Indigo Dipped Linen Napkins Oxidised Between Dips
Indigo dyeing involves real chemistry and that is what makes it interesting. The vat has no colour when the fabric is inside it: the indigo only turns blue when the fibre is lifted out and exposed to air.
Dipping the hem of a plain linen napkin and letting it oxidise fully between each of three dips produces a gradient that goes from near-white at the top to deep navy at the hem.
The finishing move is a cold rinse in water with a tablespoon of white vinegar added, which locks the indigo and brightens the blue noticeably.
What You Need
- Plain undyed linen napkins, pre-washed, quantity as needed
- Pre-reduced indigo dye kit (includes fructose and soda ash), enough for a 5-litre vat
- A 10-litre plastic bucket
- 5 litres of warm water (not hot)
- Rubber gloves
- White vinegar, 30 ml
- Drying line and clips
How to Make It
- Prepare the indigo vat according to the kit instructions: the fructose and soda ash reduce the indigo and make it water-soluble. The surface of a ready vat has a distinctive iridescent bronze sheen and the liquid below looks yellow-green, not blue. Give it 30 minutes after mixing before dipping.
- Wet the napkins thoroughly in plain water and wring them out: wet fabric dyes more evenly than dry.
- Wearing rubber gloves throughout, lower the hem of one napkin into the vat to a depth of 8 cm. Hold it still for three minutes, then lift it slowly. The fabric will look greenish as it comes out.
- Hold the napkin in the open air for five minutes, turning it occasionally. Watch it shift from green to blue as the indigo oxidises. This is the step most people rush: full oxidation takes the whole five minutes.
- Dip the same hem section again for three minutes, lift, and oxidise for another five. Repeat for a third dip. By the third dip the hem should be a deep, true navy.
- Rinse the napkin in cold water until the water runs clear, then in a fresh rinse with the white vinegar added. Machine wash separately in cold water on the first wash. Hang to dry away from direct sunlight.

Papier Mache House with One Lit Window
A single glowing window does more than a whole string of lights. Build a simple rectangular papier mache house, cut one window opening while the pulp is still pliable, and slip a battery tea light inside once cured.
The glow through that one opening makes the house look inhabited. The finishing move is painting the exterior in white chalk paint and sanding back the corners while still damp, which gives a slightly worn plaster finish that reads nothing like papier mache.
What You Need
- Papier mache pulp or air-dry clay, 500 g
- A small cardboard box, approximately 10 cm x 8 cm x 12 cm tall
- A craft knife (adult use only)
- White chalk paint, 1 small pot
- Fine sandpaper, 180 grit
- 1 battery-operated tea light
- PVA glue, 50 ml
How to Make It
- Cover the exterior of the cardboard box in three layers of torn newspaper strips dipped in diluted PVA (one part PVA to two parts water), letting each layer dry completely before adding the next. This takes at least four hours per layer. The finished shell should feel hard and make a hollow knock when tapped.
- While the final layer is still slightly tacky, use a craft knife (adult only) to cut a window opening on one face: a rectangle approximately 3 cm x 4 cm, positioned in the centre upper third of the wall. Remove the cardboard cutout from inside the box.
- Mix a simple peaked roof by folding a piece of stiff card into a triangle and papier mache-ing over it separately. Glue it to the top of the box with undiluted PVA once both pieces are fully dry.
- Paint the entire exterior in white chalk paint, working it into all the surface texture. While still damp (about ten minutes in), rub the corners and edges with fine sandpaper. The chalk paint lifts away at the high points to reveal the grey newsprint underneath, giving the worn plaster effect.
- Place a battery tea light inside the box through the window opening (or through the base if you have left it open). The glow through the window is the whole point: position the tea light so the light falls toward the window.

🛍 Shopping guide
Needle Felted Spheres in Five Greys
Needle felting is meditative and requires no wet materials, no drying time and no equipment beyond a barbed needle and some loose wool. The technique is simple stabbing: a barbed felting needle tangles wool fibres together under pressure until they form a solid, dense ball.
Make five spheres in shades that move from off-white to charcoal and cluster them on a wooden board or a cake stand.
The finishing move is a final round of stabbing with a very fine needle, which closes the surface pores to a smooth, almost suede-like finish.
What You Need
- Merino wool roving in 5 grey shades from off-white to charcoal, 200 g total
- A felting needle, 38 gauge and one finer 40 gauge
- A thick foam block or felting mat, at least 5 cm deep
- Scissors
How to Make It
- Pull off a length of roving about 40 cm long for the first (smallest) sphere. Roll it tightly into a rough ball shape and hold it compressed between your palms. The tighter you start, the less stabbing you need later.
- Place the ball on the foam mat and begin stabbing with the 38-gauge needle, rotating the ball a quarter turn every ten to fifteen stabs so it compresses evenly. The needle goes straight in and straight out: at an angle it will snap. Keep your non-stabbing fingers clear of the work area.
- As the ball firms up, pull thin wisps of the next shade of roving and lay them over the surface, then stab them in to blend the colour at the edges. For a sphere that graduates subtly rather than showing hard colour rings, pull the transition wool thin and overlap it generously before stabbing.
- Continue until the sphere is firm all the way through (press it: no soft centre), then switch to the 40-gauge fine needle and work over the entire surface with short, shallow stabs. The surface closes and smooths noticeably within two minutes of switching needles.
- Make five spheres increasing in size from approximately 3 cm to 7 cm diameter, moving through the grey palette from lightest to darkest. Display clustered together so the scale difference reads.

Hammered Brass Discs Hung on Thread
A sheet of thin brass cut into circles and hammered with a ball-peen hammer acquires a faceted texture that catches light the way nothing flat can.
Cut five discs in graduating sizes, punch a hole near the edge of each, and hang them on a single length of fine linen thread knotted between each disc so they are spaced 5 cm apart.
The finishing move is buffing each disc with 0000 steel wool after hammering, which removes oxidation from the hammer strikes and gives a bright, even sheen that holds its colour for months.
What You Need
- Thin brass sheet, 0.5 mm thick, one A5 piece
- Tin snips or metal scissors
- A ball-peen hammer
- A steel block or a concrete surface for hammering
- A hole punch or a small nail and hammer for piercing
- 0000 grade steel wool, one pad
- Fine linen thread or jewellery thread, 60 cm
How to Make It
- Draw five circles on the brass sheet in sizes from 2 cm to 5 cm diameter, using a coin as a template for the larger ones. Cut them out with tin snips (adult only): work slowly around the curve and keep the cut just outside the pencil line. File or sand any sharp edges immediately.
- Lay each disc on the steel block. Using the ball-peen hammer, work across the surface in overlapping strikes, covering every part of the disc. The facets build up quickly: ten to fifteen strikes per square centimetre gives a rich texture without distorting the disc. Hammer more strikes at the centre to keep the edges from curling up.
- Punch a hole 3 mm from the edge of each disc with the hole punch or nail (adult handles the punch). A 2 mm hole is large enough for the thread without weakening the disc.
- Rub both sides of each disc with the steel wool in circular motions for about 30 seconds per side. The brass brightens from a hammered grey to a warm gold. Wipe away metal dust with a dry cloth.
- Thread the discs onto the linen thread from largest to smallest, tying a double knot below each disc to hold its position. Hang the finished piece in a window where light will catch each facet differently as it moves.

Candle Poured into a Thrifted Teacup, Wick Held by a Peg
The teacup is the craft: the candle is just what you put in it. A bone china cup with a delicate pattern reads as a considered gift in a way that any bought candle in a tin cannot.
The wick centring trick is a wooden peg laid across the cup rim, with the wick threaded through the spring mechanism: it holds the wick perfectly upright and releases cleanly once the wax sets.
The finishing move is trimming the wick to exactly 5 mm before gifting, which signals to anyone who has burned a good candle that someone knew what they were doing.
What You Need
- A teacup with saucer, thrifted or from your own cupboard
- Soy wax flakes, 150-200 g depending on cup size
- 1 pre-tabbed candle wick, 10 cm (tab diameter to match the cup base)
- Fragrance oil, up to 6% of wax weight (10 g for 170 g wax)
- A wooden clothes peg
- A heatproof jug and a saucepan for the double boiler
- A wick trimmer or scissors
How to Make It
- Stick the metal tab of the wick to the centre of the cup base using a small dot of superglue or a wick sticker. Press the tab firmly and let it set for a few minutes. Centre is critical: an off-centre wick burns unevenly and tunnels.
- Thread the top of the wick through the spring of the wooden clothes peg and lay the peg across the cup rim. The wick should hang taut and centred. Adjust the thread length so the wick tip clears the wax surface by 1 cm when you pour.
- Melt the soy wax flakes in the heatproof jug over simmering water. An adult must operate the heat source. Bring to 75 degrees C, then remove from heat and allow to cool to 60 degrees C before adding fragrance oil. Stir the fragrance in slowly for two full minutes.
- Pour the scented wax into the cup slowly down the inside wall, not directly onto the wick. Fill to 1 cm below the rim. Leave undisturbed on a level surface for at least four hours. Do not move the cup while the wax is setting: vibration causes sinkholes.
- Once fully set, remove the peg and trim the wick to exactly 5 mm with the wick trimmer. The surface of soy wax looks slightly uneven when set: this is normal and does not affect the burn.

Hand Lettered Place Cards Drawn in Pencil First
The pencil-first approach removes all the anxiety from hand lettering. Write the name lightly in pencil in whatever natural handwriting you have, then go over it in ink with a brush pen, and erase the pencil once the ink is dry.
No one can tell you used a guide. The finishing move is writing the name twice: once large in the centre and once smaller and paler in the lower right corner, slightly rotated, as if it were a shadow or a reflection.
That one extra detail is the difference between a place card and a piece of calligraphy.
What You Need
- Thick watercolour card, 300 gsm, cut to 10 cm x 7 cm per card
- A brush pen with a flexible tip (medium size)
- A soft pencil, HB or 2B
- A soft eraser
- A bone folder or ruler for scoring the fold
How to Make It
- Score each card across the centre with the bone folder and a ruler, then fold to make a tent card 5 cm x 7 cm when standing. The scored fold stands cleaner than a cold fold.
- On the front face, write the guest name lightly in pencil, centred, in your natural handwriting. Do not try to letter perfectly at this stage: the pencil is just a positioning guide.
- Go over the pencil with the brush pen. Press harder on downstrokes and lighter on upstrokes: this creates the natural variation in line weight that makes the writing look skilled. Let the ink dry for ten minutes before touching.
- In the lower right corner of the same face, write the name again at roughly 60% of the size and at a slight angle (about 15 degrees). Use the brush pen with consistent light pressure throughout, so this echo name stays pale against the main one.
- Erase the pencil guide carefully once the ink is completely dry. If the eraser smudges the ink, the pen tip was wet: leave the card another five minutes and try again.

🛍 Shopping guide
Macrame Star of Four Repeated Knots
A macrame star uses exactly four knots: two square knots and two diagonal clove hitches, repeated eight times around a central ring. The pattern sounds complex and is not.
Once the first arm of the star is done, every arm is identical, and the whole piece develops a visual rhythm within twenty minutes.
The finishing move is trimming the fringe ends with sharp scissors at a very slight angle (not straight across), which stops the ends from fraying and makes the tips read as deliberate rather than cut.
What You Need
- Natural cotton macrame cord, 3 mm single strand, 20 m
- A brass ring, 5 cm diameter
- Sharp scissors
- A macrame board or foam board with pins for holding work flat
How to Make It
- Cut 16 lengths of cord each 120 cm long. Fold each in half and attach to the brass ring using a lark’s head knot: push the folded loop through the ring from front to back, then pull both ends through the loop and pull snug. Attach all 16 cords (32 working ends) spaced evenly around the ring.
- Divide the cords into 8 groups of 4. Each group will form one arm of the star. Work one arm at a time: take the two central cords as carrying cords and the two outer cords as working cords. Tie a square knot (left over right, then right over left) close to the ring.
- Below the square knot, separate the four cords into pairs and tie a diagonal clove hitch on each pair, angling outward. Pull the knots firm but not tight: over-tight macrame distorts the geometry.
- Bring the four cords back together and tie a second square knot 2 cm below the first. This forms one complete arm. Repeat for all eight groups.
- When all eight arms are complete, trim the cord ends at a slight inward angle: about 5 degrees from perpendicular. The trimmed point at each tip finishes the star shape. Unpin from the board and hang by attaching a length of cord to the ring.

🛍 Shopping guide
Pressed Fern Set Under Glass in a Plain Frame
A pressed fern frond fills a frame the way nothing printed can: the variation is biological, and the colour range runs from deep olive to pale silver depending on when the fern was picked.
A plain black or thin brass frame does not compete with it.
The finishing move is mounting the fern against deep green or charcoal cartridge paper rather than cream or white, which makes the frond read as light against dark, the way botanical prints from the 1800s read.
That one choice is the difference between craft and art.
What You Need
- 1-3 fresh fern fronds, picked when fully open
- A flower press or two heavy books and blotting paper
- Deep green or charcoal cartridge paper, A4, 120 gsm
- A plain photo frame, A4 or 30 cm x 21 cm
- Acid-free mounting tape or a tiny spot of clear-drying craft glue
How to Make It
- Pick the fern frond in dry weather: a wet frond goes brown, not green, under pressure. Lay it flat on a sheet of blotting paper, arrange the leaflets so they fan naturally (no folding), and cover with a second sheet. Place inside the press or between the pages of two heavy books with additional weight on top.
- Leave for a minimum of two weeks, changing the blotting paper after the first three days. A frond that is still slightly flexible after two weeks needs another week. A pressed frond that is ready feels like paper and holds its shape when lifted by one end.
- Cut the cartridge paper to fit the inside of the frame. Lay the pressed frond on the paper and spend a few minutes adjusting its position: asymmetric placements (the fern slightly left of centre with tip pointing toward the upper right corner) read more deliberately than centred ones.
- Fix the frond to the paper with the smallest possible amount of mounting tape or glue at the stem base and two or three points along the main spine. Too much adhesive and you can see the fixing; too little and the frond shifts in the frame.
- Assemble the frame with the paper and frond inside, glass over the top. The glass holds the frond flat without any additional fixing. Hang away from direct sunlight, which fades pressed botanicals within months.

Leather Tags Saddle Stitched with Two Needles
Saddle stitching uses two needles and one long thread, one needle at each end, crossing inside each hole. The resulting stitch is the same on both sides, which is how you can tell a saddle-stitched piece from a machine-stitched one.
On a small gift tag of vegetable-tanned leather, a single row of even stitching around the perimeter is completely enough.
The finishing move is burnishing the cut edge with a wooden slicker or the back of a spoon, which rounds and polishes the raw edge to a smooth, rounded profile that feels finished even before the leather develops its patina.
What You Need
- Vegetable-tanned leather, 1.5-2 mm thick, cut into rectangles 8 cm x 5 cm
- A stitching chisel or pricking iron, 4 mm pitch, to mark holes
- Two blunt harness needles
- Waxed linen thread, 1 m per tag
- A rubber mallet
- A wooden edge slicker or a wooden spoon
- Water (a small dish)
How to Make It
- Mark a stitching line 4 mm in from the long edges of the leather tag with a wing divider or by scoring lightly with a ruler and awl. Place the stitching chisel along this line and strike it with the rubber mallet to punch the holes. Space them 4 mm apart. An adult must handle all cutting and punching tools.
- Cut a length of waxed linen thread four times the total stitch length. Thread one harness needle at each end of the thread so the needles meet in the middle.
- Push one needle through the first hole from front to back. Pull until the thread is equal length on both sides. Push the second needle through the same hole from back to front, crossing it under the first thread before it exits. Pull both threads snug together. This crossing is what makes the stitch lock.
- Continue through each hole in sequence, always crossing the second needle under the first thread before pulling through. Keep the tension consistent: even pulls make even stitches. The stitch should look the same on both sides of the leather.
- At the last hole, run both needles back through the previous hole in opposite directions and pull tight to lock the end. Trim threads close and press the end flat with the back of the needle.
- Wet the cut edge of the tag lightly with a finger dipped in water. Rub the wooden slicker back and forth along the edge with firm pressure: the friction compresses and polishes the fibres to a smooth curve within 30 seconds.

🛍 Shopping guide
Beeswax Slab Poured Flat and Cut into Tiles
Pure beeswax poured into a flat silicone tray and left to set produces a slab with the colour of old honey and a surface texture like skin.
Cut into small tiles and pressed with a simple botanical stamp while still warm, they become the kind of drawer sachet or mantel decoration that shops charge a lot for.
The finishing move is a brief pass with a heat gun over the stamped surface after it has set, which melts the very top layer back to liquid and re-levels it, giving a glassy surface over the impressed design below.
What You Need
- Pure beeswax pellets or blocks, 300 g
- A flat silicone baking tray or a shallow silicone mould
- A heatproof jug and saucepan for the double boiler
- A craft knife and a cutting mat (adult use)
- A metal or silicone botanical stamp
- A heat gun or hairdryer on high
How to Make It
- Melt the beeswax in the heatproof jug over simmering water. An adult must operate the heat source. Beeswax melts at around 65 degrees C and smells like honey as it liquefies: do not overheat it. Pour the liquid wax into the silicone tray to a depth of about 1 cm.
- Leave undisturbed on a level surface. The wax will take 90 minutes to two hours to set fully depending on room temperature. It is ready when the surface is opaque and firm to a light touch at the centre.
- Before the wax is completely cold (it should still be slightly warm and pliable, not brittle), press the botanical stamp firmly into the surface and hold for ten seconds, then lift straight up. Work quickly: a room-temperature slab will crack when stamped. If the slab has gone cold, warm it gently for 20 seconds with a hairdryer before stamping.
- Use the craft knife (adult only) and a ruler to score and cut the slab into rectangular tiles, approximately 6 cm x 4 cm. Press firmly and use multiple passes rather than trying to cut through in one go: beeswax cuts cleanly but requires patience.
- Pass the heat gun over each tile surface for about three seconds from a distance of 15 cm. The stamped impression remains while the surface re-levels to a glassy finish. Do not hold the heat gun in one place: movement prevents scorching.

Paper Honeycomb Balls in Three Sizes Hung as a Cluster
A single honeycomb ball looks festive. A cluster of three in graduating sizes hung at different heights looks like an installation.
The technique stacks layers of tissue paper with alternating lines of PVA, which, when the block is cut to shape and the pages are fanned open, forms the honeycomb cell structure.
The finishing move is hanging each ball from a thread tied to a short length of thin brass rod or a wooden dowel, so the three balls hang from one point at three different depths and drift independently in a draught.
What You Need
- Tissue paper in one colour, 30 sheets of 50 cm x 70 cm
- PVA glue, 100 ml
- A sharp craft knife and cutting mat (adult use)
- A pencil and compass for drawing circles
- A small paintbrush for applying glue
- Fine thread or fishing line, 1 m
- A 20 cm length of thin brass rod or dowel, 4 mm diameter
How to Make It
- Stack ten sheets of tissue paper in a neat pile. Using the small paintbrush, paint a thin line of PVA across the full width of the top sheet, 2 cm from the left edge. Skip to the fourth sheet and paint another line, this time 3 cm from the left edge. Continue alternating the position of every glue line (2 cm, then 3 cm) so that no two adjacent sheets have glue in the same position. Press all layers together and allow to dry flat under a heavy book for at least two hours.
- Once dry, draw a circle on the top sheet using the compass. The three balls should be 15 cm, 20 cm and 25 cm in diameter. Use the craft knife (adult only) to cut through all ten layers along the circle outline.
- Fan the layers open from the centre point: the cells emerge as you gently pull the top and bottom sheets apart. If any cells are stuck together where the PVA bled through, ease them apart with a fingernail rather than pulling hard.
- Tie a length of thread to a loop of thread pushed through the centre top of the ball with a needle, knotting it at the glue join so it cannot pull through. Repeat for all three balls.
- Tie the three threads to the brass rod at different points and heights, so the balls hang at 10 cm, 20 cm and 30 cm below the rod. Hang the rod from a central hook with a single loop of thread through its centre.

🛍 Shopping guide
Quilted Bauble Cut from a Worn-Out Quilt
A worn-out quilt has already done most of the work.
The patchwork pattern, the aged colour and the soft hand are already there: all you do is cut a circle from the best section, stuff it lightly and gather the edges over a polystyrene ball to form a sphere.
The finishing move is stitching a line of running stitch around the equator of the finished bauble in contrasting thread, which adds a seam that makes it read as a made thing in the best sense, not a ball covered in fabric but something that was designed as a sphere from the start.
What You Need
- A section of worn patchwork quilt or quilted fabric, at least 40 cm x 40 cm
- A polystyrene ball, 8 cm diameter
- A circle template, 30 cm diameter (draw around a dinner plate)
- Fabric scissors
- A hand sewing needle and strong thread, 1 m
- Contrasting embroidery thread, 1 skein
- An embroidery needle
- A long hat pin or a corsage pin for the hanger loop
- Ribbon or cord, 20 cm for the hanging loop
How to Make It
- Cut a 30 cm circle from the quilt fabric using the dinner plate as a guide. If the fabric has a directional pattern, centre the most interesting section within the circle before cutting.
- Thread the hand needle with a double length of strong thread and sew a running stitch 1 cm in from the edge of the entire circle, leaving long thread tails at the start and end. Do not knot the thread: you need it to gather freely.
- Place the polystyrene ball in the centre of the fabric circle, right side of fabric face-down. Pull both thread tails simultaneously to gather the fabric evenly up and over the ball. The fabric should wrap the ball like a round parcel, with the gathering pulled tight at the top.
- Tie the thread ends securely and tuck all the gathered fabric into a tidy knot at the top of the ball, pressing it flat with your fingers. The gathering sits at the top rather than dispersed around the ball, which is what creates the clean sphere shape.
- Thread the embroidery needle with a length of contrasting embroidery thread. Starting at the gathering knot, stitch a line of running stitch all the way around the equator of the ball, pulling the thread through both layers of fabric and into the polystyrene to anchor it. Keep the stitches even at about 8 mm each.
- Fold the ribbon into a loop and push both ends firmly into the gathering knot at the top using the hat pin. The pin holds the loop in place. Hang the bauble immediately to check the balance: if it tips, shift the gathering knot slightly toward the heavy side.

Frequently Asked Questions
What Christmas crafts for adults dry in one evening?
Several christmas crafts for adults on this list finish within a few hours. The marbled baubles are dry in under an hour. Wax sealed envelopes are ready in thirty minutes. The alcohol ink snowflake baubles dry in twenty minutes.
The gilded walnut shells need two hours for the size to set, and the hand lettered place cards are done in forty-five minutes. If your evening starts at seven, all five of these are finished before ten.
Are there Christmas crafts for adults that are not kid crafts?
Every project on this list was chosen specifically because it is not a child’s craft repackaged.
The techniques used here, saddle stitching leather, wood burning, indigo dyeing, lino cutting and needle felting, require adult judgment, tools children should not use, or a patience that develops only with time.
The results are correspondingly adult: things with texture, patina and considered finish that belong on a mantel rather than a school noticeboard.
What Christmas crafts for adults can I do without a craft room?
Most of these christmas crafts for adults need only a kitchen table and a drop cloth. The marbled baubles, wax sealed envelopes, hand lettered place cards, alcohol ink baubles and gilded walnut shells all work comfortably at a dining table.
The indigo dyeing needs outdoor or bathroom space for the vat, and the lino cutting needs a stable surface to press against. Everything else sets up and clears away in the same small space.
Which Christmas crafts for adults make good gifts?
The crafts that read as bought rather than made are the strongest gifts. The teacup candle works because the vessel is already beautiful. The leather gift tags work because the saddle stitching signals quality to anyone who handles them.
The beeswax tiles, the wax sealed envelopes and the gilded walnut shells in a shallow bowl all package well.
The amaryllis bulb in wax is genuinely unusual: most people have never seen one and immediately want to know where it came from, which is the ideal response to a handmade gift.

A full guide to christmas lights outside, from classy warm white rooflines to colored bulbs, trees,
13 christmas centerpieces you can build in under an hour from one container and three fillings. No f
20 baby Christmas crafts that turn a tiny handprint or footprint into a real keepsake: ornaments, ca
Leave a Reply