


Okay, real talk: the food is half the reason anyone agrees to game night. You could put the fanciest board game on the table, but if there’s nothing to munch on while someone takes forever deciding their Scrabble move, the whole vibe falls flat.
I’ve hosted enough family game nights to know that the snacks need one very specific quality — they have to be easy to eat with one hand. Because the other hand?
That one’s busy rolling dice, shuffling cards, or dramatically pointing at the board going, “That is not how you play that.”
So I’ve pulled together 15 of my absolute favorite family game night food ideas — from warm, bubbly dips you scoop with a chip to little bites you can pop in your mouth without so much as glancing away from your turn.
There’s a grazing board for the grazers, a proper dinner option for the nights the game runs long, and a sweet treat that will absolutely make people forgive you for winning.
I’ve also flagged anything that could get greasy (because greasy fingers and card games are a no), and every recipe here is all-ages and family-friendly.
One more thing before we get into it: Food Network’s test kitchen reminds us that the best party dips keep warm in a low oven or slow cooker so you’re never running back and forth to reheat — and that, my friend, is the whole game-night energy we’re going for. Let’s eat.
🍺 Responsible serving note: This article is 100% family-friendly and alcohol-free. All recipes are suitable for all ages.
This post contains affiliate links — if you buy through them, I may earn a small commission at no extra cost to you.
- Slow Cooker Buffalo Chicken Dip
- Baked Spinach Artichoke Dip
- Soft Pretzel Bites with Honey Mustard
- Game Night Snack & Grazing Board
- Mini Caprese Skewers
- Pepperoni Pizza Pinwheels
- Sheet Pan Nachos (The Easy Game-Night Dinner)
- Turkey and Cheese Sliders
- Crispy Baked Chicken Meatballs
- Veggie Cups with Ranch Dip
- Homemade Trail Mix Snack Bags
- Mini Quesadilla Wedges
- Savory Popcorn Bar
- Chocolate Chip Cookie Bars
- Five-Ingredient Guacamole with Chips
- Frequently Asked Questions
Slow Cooker Buffalo Chicken Dip
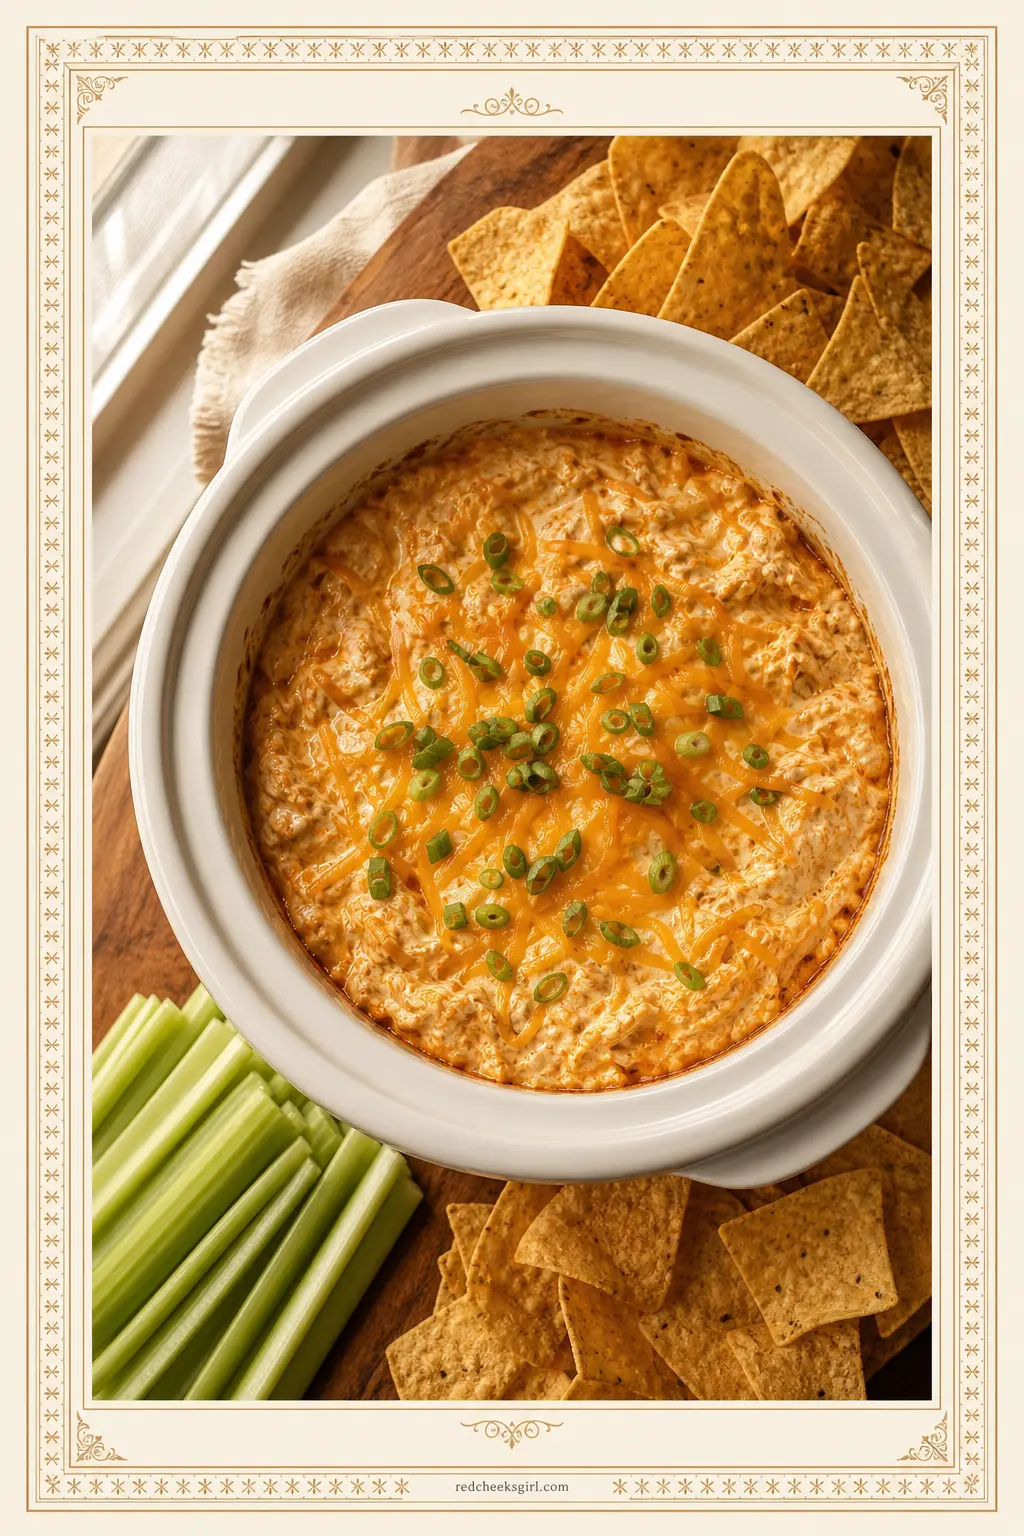
This is the dip that makes everyone stop mid-game and just stare at it lovingly. Creamy, tangy, a little spicy, and impossibly easy — you literally dump everything in the slow cooker and let it do its thing.
Food Network’s slow-cooker version is a crowd-pleaser that keeps warm all night long. Contains dairy. Make-ahead tip: shred a rotisserie chicken the night before to cut your prep to under 5 minutes.
Ingredients
- 2 cups (about 250 g) shredded cooked chicken (rotisserie works great)
- 8 oz (225 g) cream cheese, softened and cubed
- ½ cup (120 ml) buffalo wing sauce
- ½ cup (120 ml) ranch dressing
- 1½ cups (170 g) shredded sharp cheddar cheese, divided
- ¼ tsp garlic powder
- ¼ tsp onion powder
- Tortilla chips and celery sticks, to serve
Instructions
- Add the shredded chicken, cream cheese, buffalo sauce, ranch dressing, garlic powder, onion powder, and 1 cup of the shredded cheddar to the slow cooker. Stir everything together until roughly combined.
- Place the lid on and cook on HIGH for 1½–2 hours, pausing to stir once at the halfway mark, until the cream cheese has fully melted and the mixture is bubbling around the edges.
- Give it a final good stir until completely smooth, then scatter the remaining ½ cup cheddar over the top.
- Switch the slow cooker to WARM. Serve directly from the insert with tortilla chips and celery sticks for dipping.
🛍 Shopping guide
Baked Spinach Artichoke Dip
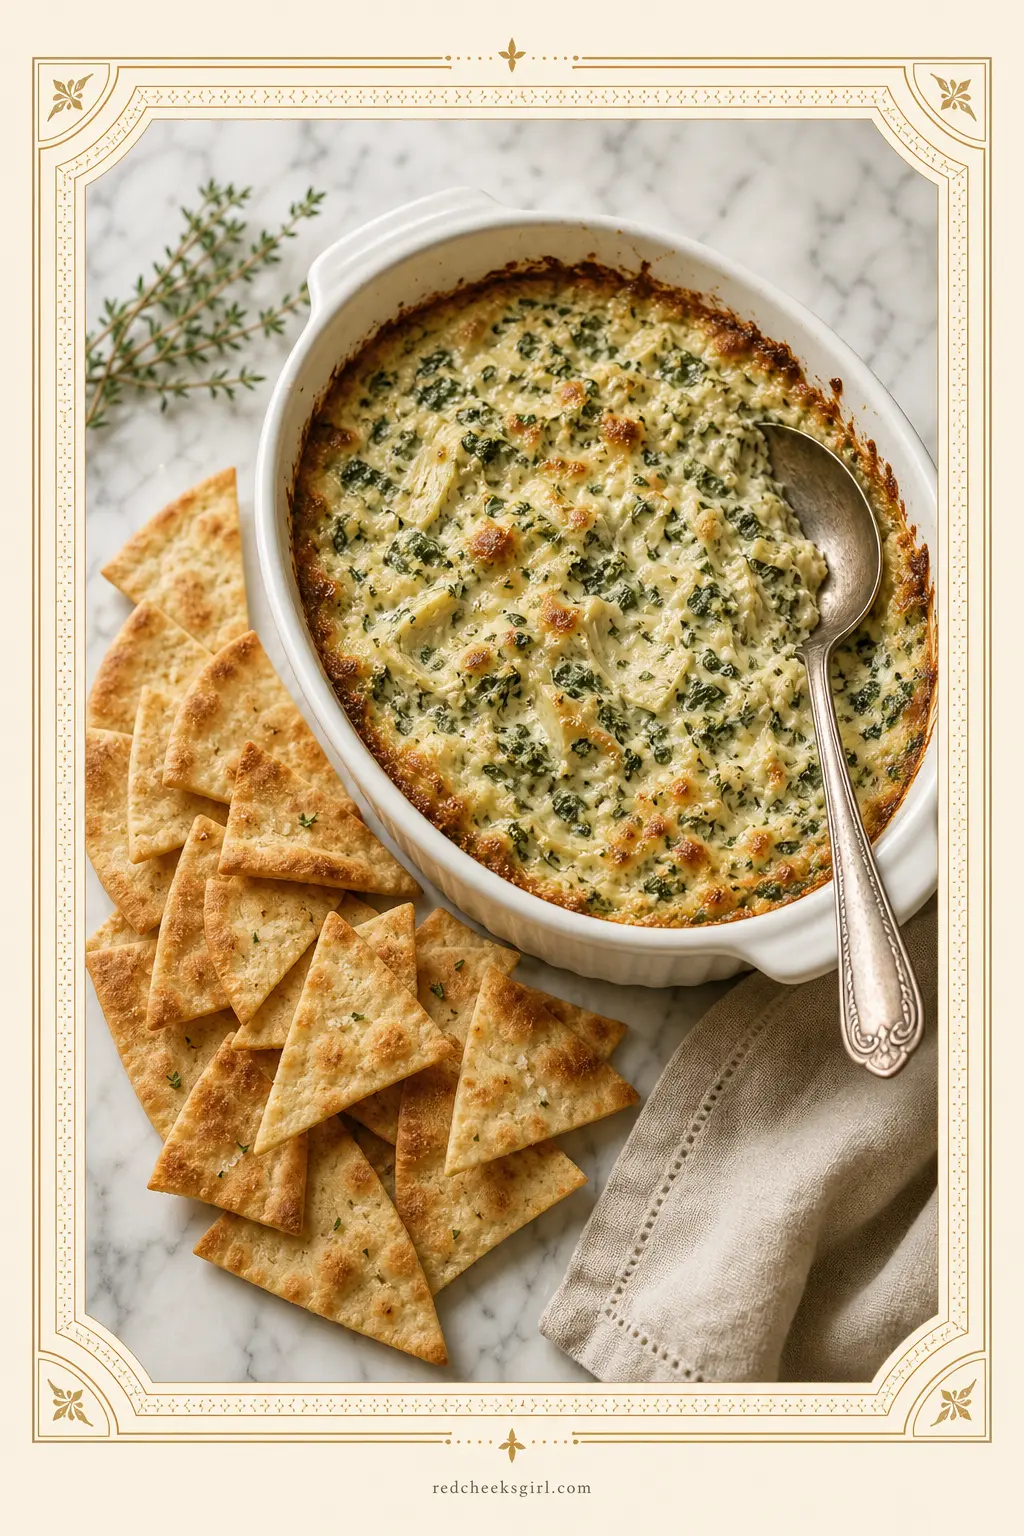
The warm dip hall of fame has exactly two members, and this one is the other.
Bubbling, golden, and unapologetically cheesy, Food Network’s test kitchen says the secret is room-temperature cream cheese — cold cream cheese makes a lumpy dip, and nobody wants that drama at game night. Contains dairy and eggs.
Make-ahead tip: assemble the unbaked dip up to 24 hours ahead and refrigerate; add 5–10 minutes to baking time.
Ingredients
- 10 oz (280 g) frozen chopped spinach, thawed and squeezed very dry
- 1 can (14 oz / 400 g) artichoke hearts in water, drained and roughly chopped
- 8 oz (225 g) cream cheese, at room temperature
- ½ cup (115 g) sour cream
- ½ cup (50 g) grated Parmesan cheese
- 1 cup (115 g) shredded mozzarella cheese, divided
- 2 cloves garlic, minced
- ½ tsp black pepper
- ¼ tsp salt
- Pita chips or tortilla chips, to serve
Instructions
- Preheat your oven to 375 °F (190 °C). Lightly grease a 1-quart baking dish.
- In a large mixing bowl, beat the room-temperature cream cheese with a spoon until smooth. Add the sour cream, Parmesan, minced garlic, salt, and pepper, stirring until well combined.
- Fold in the squeezed-dry spinach and chopped artichokes, then mix in ¾ cup of the mozzarella.
- Spread the mixture evenly into the prepared baking dish and scatter the remaining ¼ cup mozzarella over the top.
- Bake for 25–30 minutes until the edges are bubbling and the top is golden. For extra browning, slide under the broiler for 2 minutes.
- Serve hot from the oven with pita chips or tortilla chips.
Soft Pretzel Bites with Honey Mustard
These are genuinely one of the best things you can put on a game-night table — warm, chewy, salty, and you eat them one-handed with zero mess.
The baking-soda bath before they hit the oven is the non-negotiable step that gives them that signature chewy crust (and yes, it actually matters). Contains dairy and gluten; egg wash is optional.
Make-ahead tip: bake them unsalted, cool completely, freeze in a zip bag for up to 3 months. Reheat at 350 °F for 10 minutes, then salt and serve.
Ingredients
- 1½ cups (355 ml) warm water (about 110 °F / 43 °C)
- 1 tbsp granulated sugar
- 2¼ tsp (1 packet / 7 g) active dry yeast
- 2 tbsp (30 g) unsalted butter, melted
- 1 tsp fine sea salt
- 4½ cups (540 g) bread flour, plus more for dusting
- ⅓ cup (85 g) baking soda (for the water bath)
- 10 cups (2.4 liters) water (for the water bath)
- Coarse pretzel salt or flaky sea salt, for topping
- 3 tbsp unsalted butter, melted (for brushing after baking)
- Honey Mustard: ¼ cup (60 ml) yellow mustard + 2 tbsp (30 ml) honey, whisked together
Instructions
- Combine the warm water and sugar in a stand mixer bowl. Sprinkle the yeast over the top and let it sit for 5 minutes until foamy and active.
- Add the melted butter, sea salt, and flour. Mix on low with the dough hook until the dough comes together, then increase to medium and knead for 4–5 minutes until the dough is smooth and pulls cleanly away from the bowl sides.
- Form the dough into a ball, cover the bowl with a clean towel, and let it rest at room temperature for 20 minutes.
- Preheat your oven to 450 °F (230 °C). Line two baking sheets with parchment paper.
- Bring 10 cups of water to a rolling boil in a large pot. Carefully add the baking soda a little at a time (it will bubble up) and stir to dissolve.
- Divide the dough into 6 equal pieces. Roll each piece into a rope about ½ inch (1.3 cm) thick, then cut into 1-inch (2.5 cm) nuggets.
- Working in batches of 15–20, drop the nuggets into the baking soda bath and boil for exactly 30 seconds, swishing them around. Scoop out with a slotted spoon, shake off the excess water, and place on the prepared baking sheets an inch apart.
- Sprinkle immediately with coarse salt. Bake for 12–14 minutes until deep golden brown.
- As soon as they come out of the oven, brush with melted butter. Serve warm with the whisked honey mustard.

Game Night Snack & Grazing Board
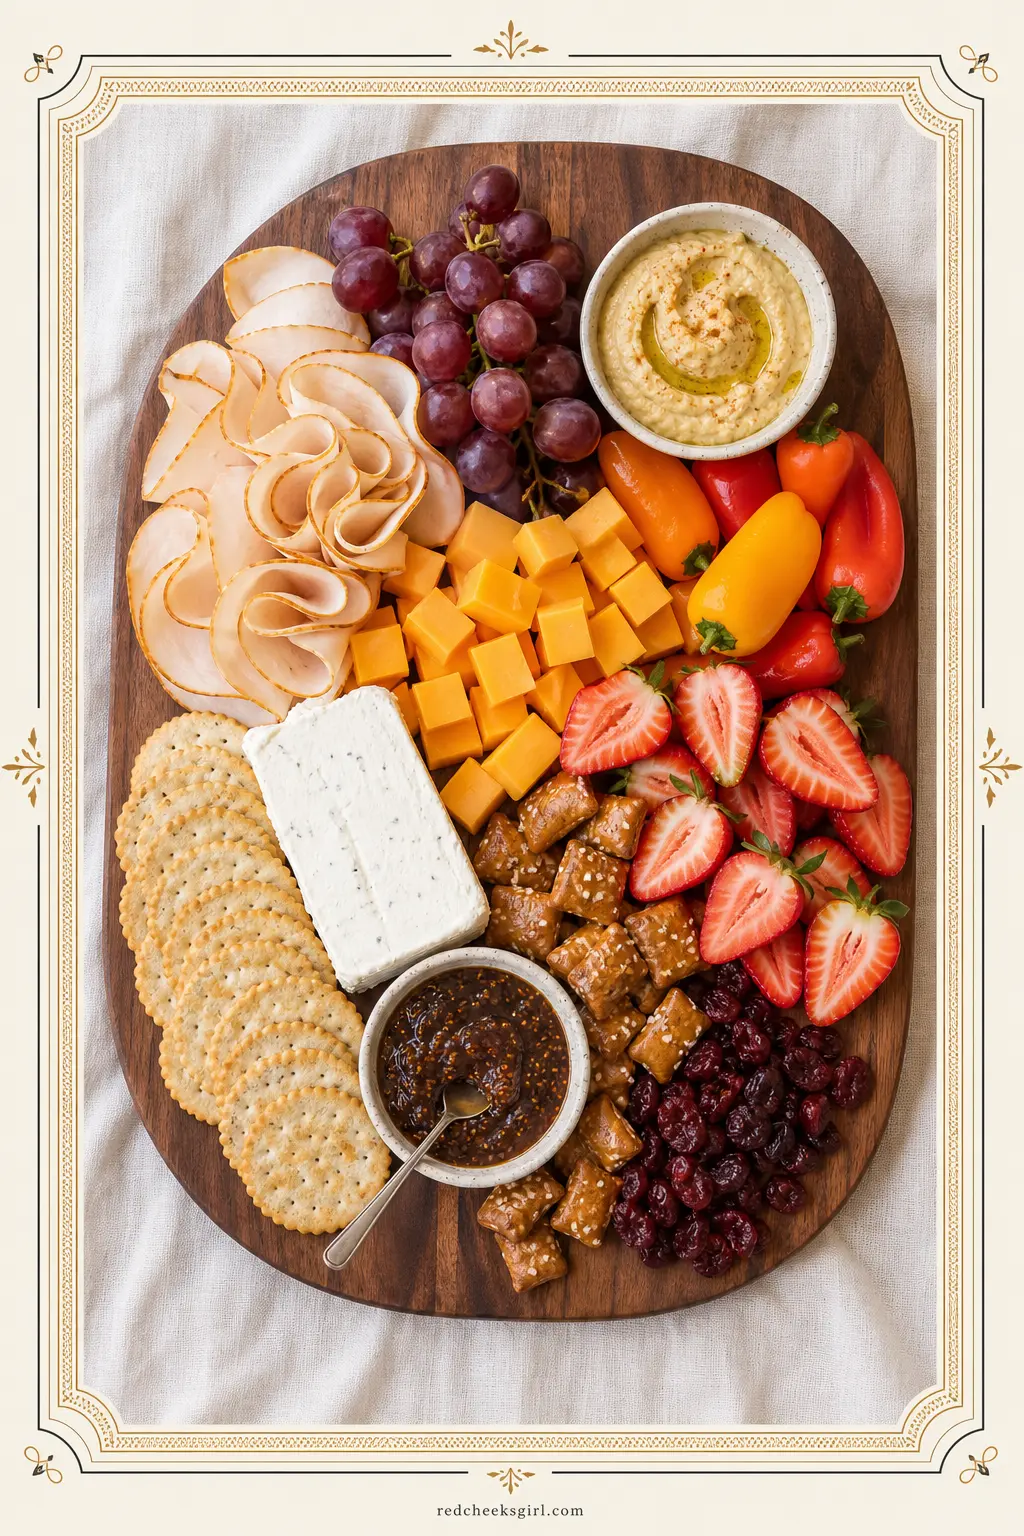
A grazing board is the ultimate game-night food because it requires exactly zero cooking and everyone can graze at their own pace between turns. Think of it as a buffet for your table — you pick and choose without committing to a plate.
The key is variety: salty, sweet, creamy, crunchy. Contains dairy and nuts (flag for allergies and offer a nut-free section). Make-ahead tip: assemble everything except the fresh fruit up to 2 hours ahead, cover loosely with plastic wrap, and refrigerate.
Ingredients
- 6 oz (170 g) sliced deli turkey or salami, folded into rosettes
- 6 oz (170 g) sliced mild cheddar cheese, cubed or fanned
- 4 oz (115 g) cream cheese block, at room temperature
- 1 cup (150 g) seedless grapes, washed and patted dry
- 1 cup (150 g) strawberries, washed and patted dry (halved if large)
- 1 cup (30 g) sturdy crackers (such as water crackers or multigrain)
- ½ cup (75 g) pretzel nuggets
- ½ cup (70 g) roasted almonds or mixed nuts (place in a separate bowl and label for allergy awareness)
- ¼ cup (40 g) dried cranberries
- ¼ cup (60 g) strawberry jam or fig jam, served in a small ramekin
- ½ cup (125 g) hummus, served in a small ramekin
- Mini sweet peppers, halved and seeded, for scooping
Instructions
- Start by placing your small ramekins — hummus, jam — on the board first, since they anchor the layout and everything else builds around them.
- Fan or fold the deli meat and layer it in clusters near one ramekin. Arrange the cheese cubes or slices nearby.
- Fill in the gaps with the crackers and pretzel nuggets, grouping them together so they’re easy to grab.
- Place the cream cheese block in a corner; guests can spread it on crackers with the jam alongside.
- Scatter the grapes and strawberries across open spaces — they add color and freshness and keep fingers from getting sticky. Place the nuts in their own clearly labeled bowl to one side.
- Tuck the dried cranberries and mini pepper halves into any remaining gaps. Serve immediately, or cover and refrigerate until ready.
🛍 Shopping guide
Mini Caprese Skewers
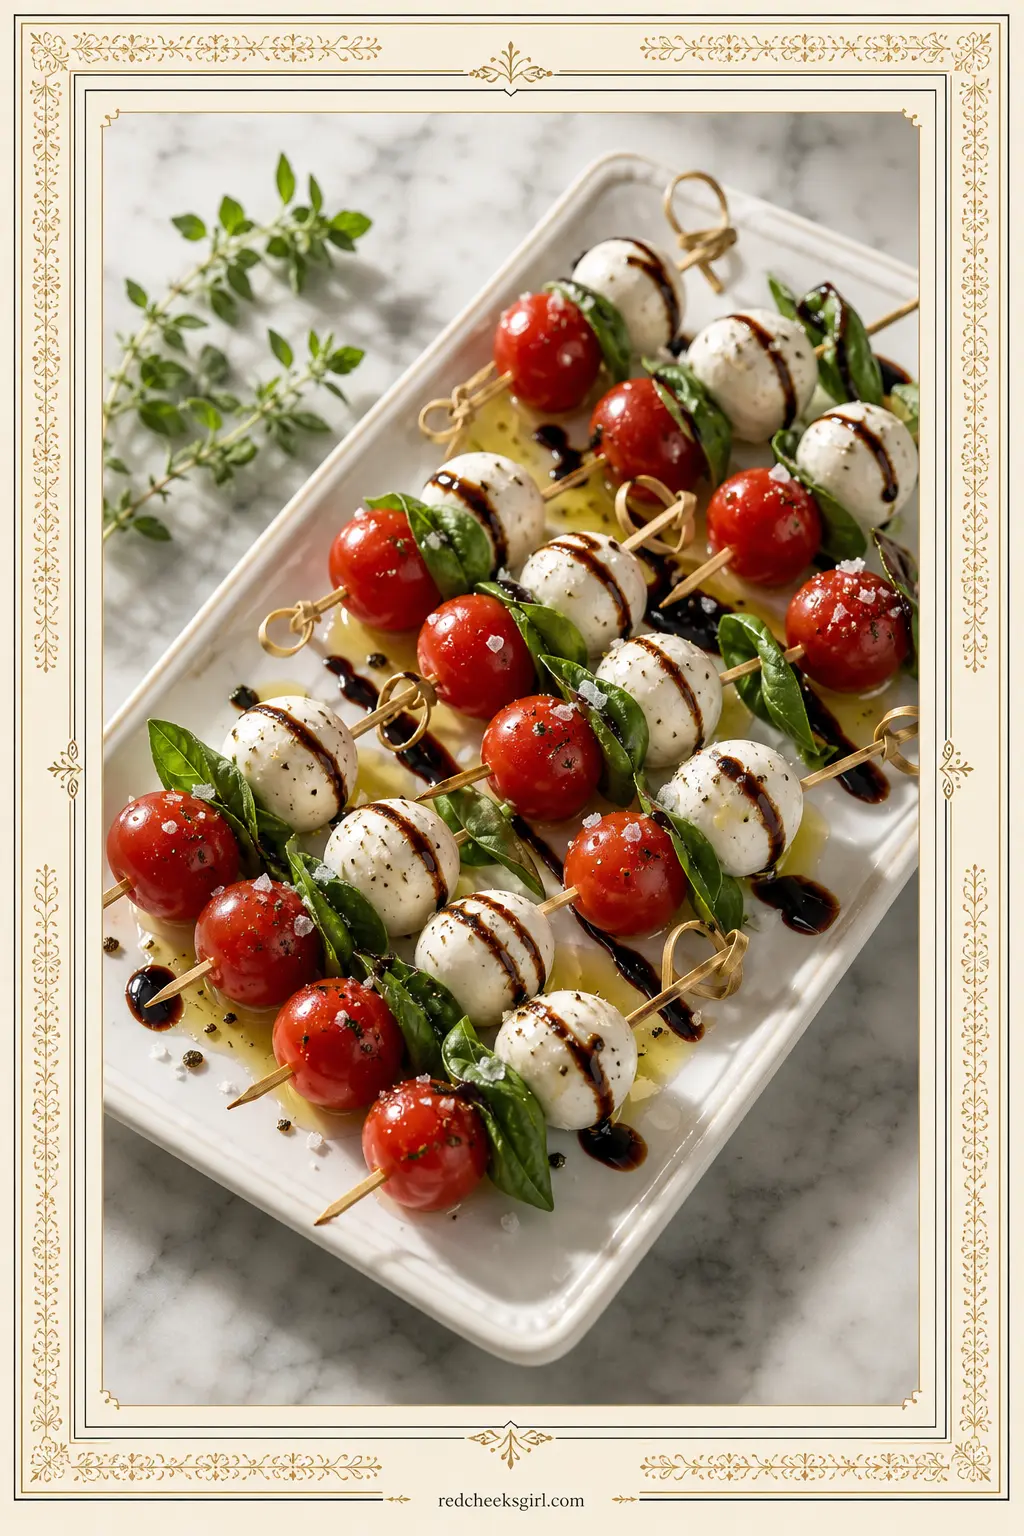
These are possibly the most elegant thing you can put on a game-night table that requires absolutely zero cooking. Pop them on a skewer, drizzle, done.
They are fresh, light, and clean — no grease, no mess, and they balance out all the cheesy, warm, indulgent stuff on the table perfectly. Contains dairy.
Make-ahead tip: thread the skewers up to 4 hours ahead and refrigerate; drizzle with balsamic and oil just before serving so the basil stays bright.
Ingredients
- 8 oz (225 g) fresh mozzarella balls (ciliegine — the small ones the size of a cherry)
- 1 pint (300 g) cherry tomatoes, washed and patted dry
- 24 fresh basil leaves
- 3 tbsp (45 ml) good-quality extra-virgin olive oil
- 2 tbsp (30 ml) balsamic glaze
- ¼ tsp flaky sea salt
- ¼ tsp freshly cracked black pepper
- 24 small appetizer skewers or toothpicks
Instructions
- Pat the mozzarella balls and cherry tomatoes completely dry with paper towels — any water will dilute your drizzle.
- Fold a basil leaf gently in half (shiny side out) so it cups slightly, then thread it onto a skewer, followed by a mozzarella ball, then a cherry tomato. Repeat until all 24 skewers are assembled.
- Arrange the skewers on a serving platter in a single layer.
- Drizzle the olive oil evenly over the skewers, then drizzle the balsamic glaze over the top in a zigzag.
- Finish with a pinch of flaky sea salt and cracked black pepper. Serve immediately.
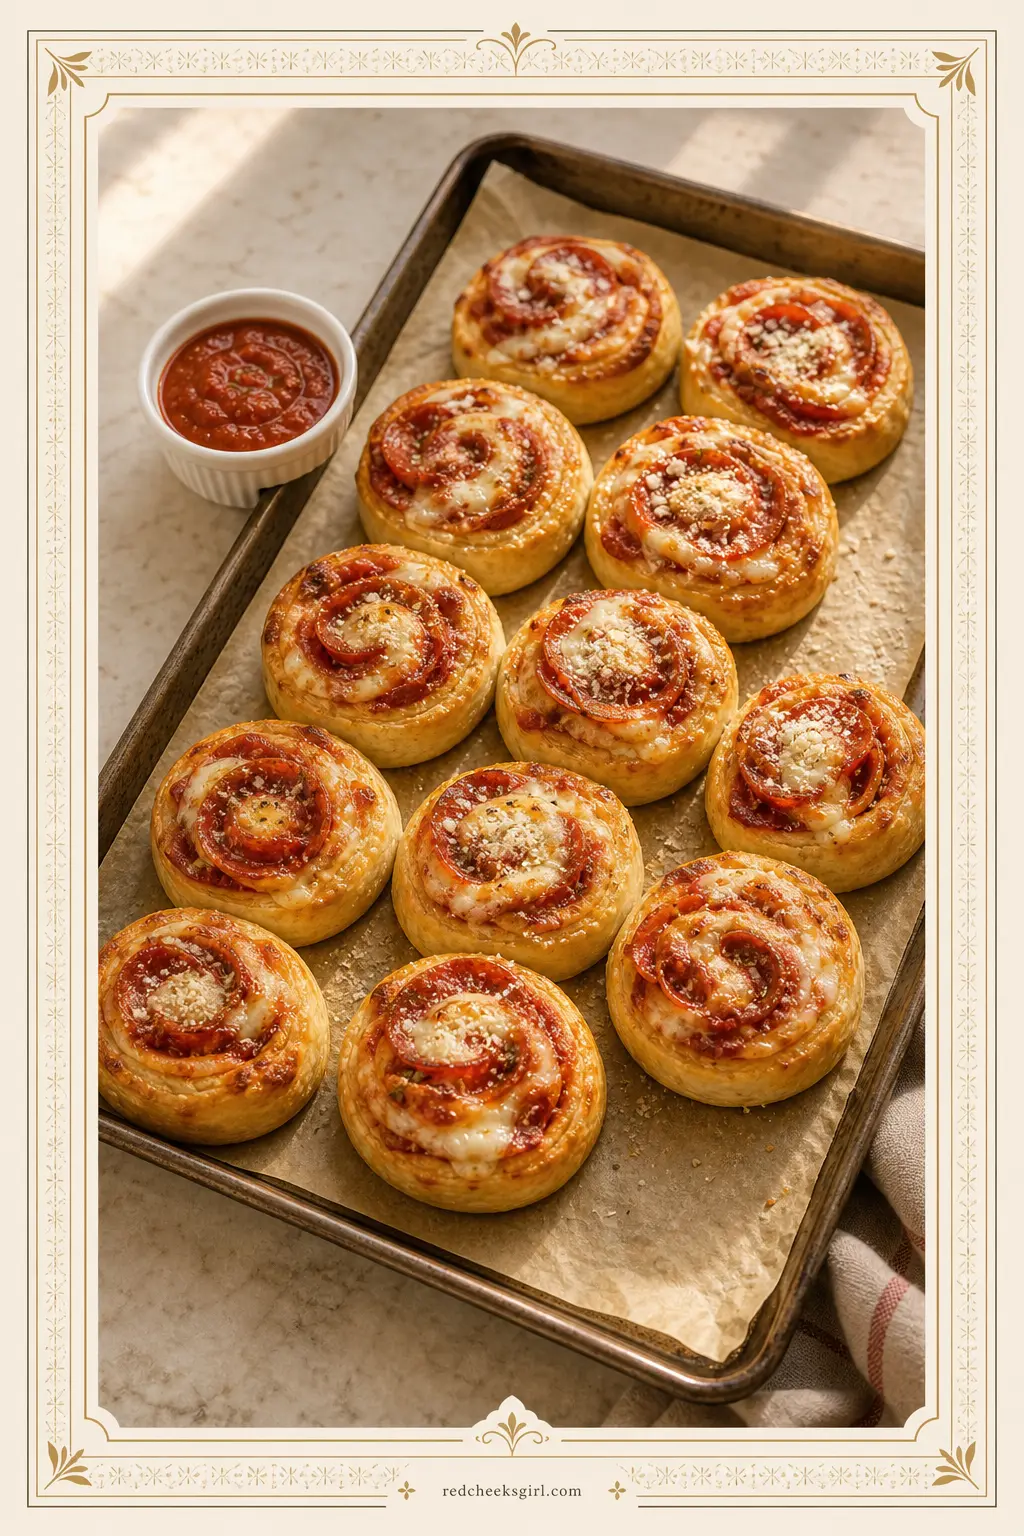
Pepperoni Pizza Pinwheels
These are what happens when you take everything great about pizza and make it portable, one-handed, and kid-approved. The rolled-and-sliced method means every single bite has melty cheese and pepperoni all the way through — none of that sad, topping-less edge situation.
Contains dairy and gluten. Make-ahead tip: roll and slice the pinwheels, then freeze unbaked on a sheet for up to 1 month. Bake straight from frozen at 400 °F for 18–20 minutes.
Ingredients
- 1 lb (450 g) store-bought pizza dough, at room temperature
- ½ cup (120 ml) pizza sauce or marinara, plus extra for dipping
- 1½ cups (170 g) shredded low-moisture mozzarella cheese
- 3 oz (85 g) mini pepperoni (or regular pepperoni, chopped)
- 1 tsp dried Italian seasoning
- ½ tsp garlic powder
- 2 tbsp (30 g) grated Parmesan cheese
- 1 tbsp (15 ml) olive oil
Instructions
- Preheat your oven to 400 °F (200 °C). Line a large baking sheet with parchment paper or grease a 12-cup muffin tin.
- On a lightly floured surface, stretch or roll the pizza dough out to roughly a 14-by-10-inch (35-by-25-cm) rectangle.
- Spread the pizza sauce evenly over the surface, leaving a ½-inch border along one of the long edges.
- Scatter the mozzarella evenly over the sauce, then distribute the pepperoni on top. Sprinkle with Italian seasoning and garlic powder.
- Starting from the long edge opposite the border, roll the dough into a tight log. Pinch the seam firmly to seal.
- Using a sharp or serrated knife, slice the log into 12 even rounds, each about 1 inch (2.5 cm) thick.
- Place the rounds cut-side up on the prepared baking sheet (or in the muffin tin), spacing them 1 inch apart. Brush the tops with olive oil and sprinkle with Parmesan.
- Bake for 13–16 minutes until golden and the cheese is bubbling. Let cool for 5 minutes before serving with extra marinara for dipping.
Sheet Pan Nachos (The Easy Game-Night Dinner)
When game night runs long and “snacks” aren’t going to cut it anymore, nachos are the answer.
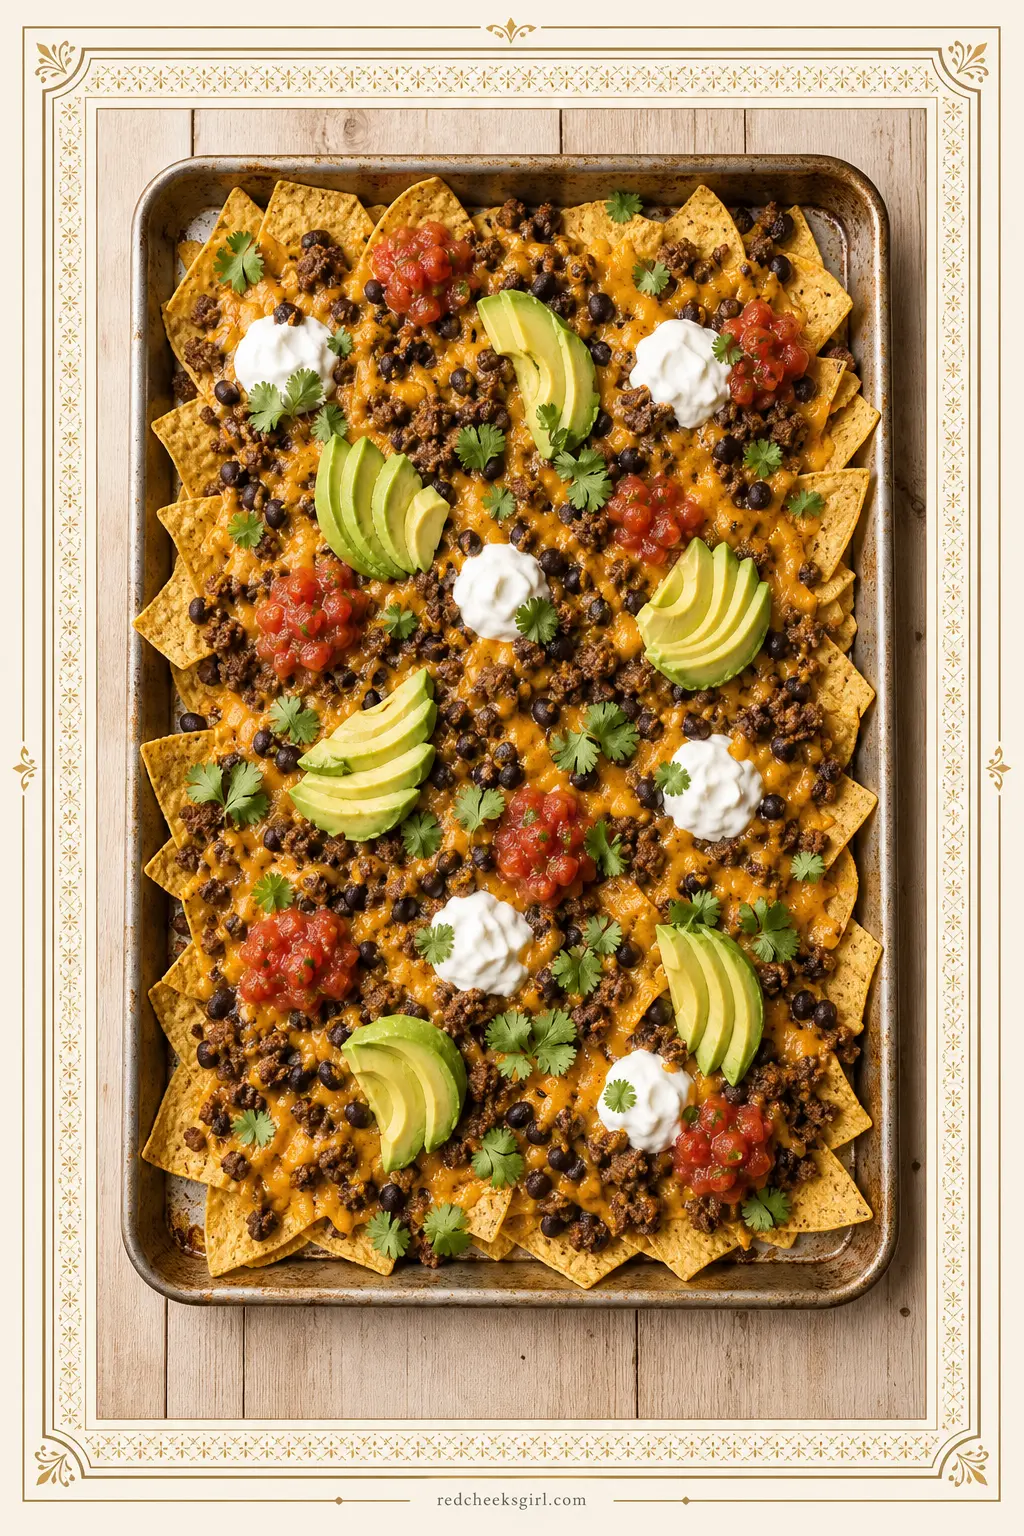
Sheet pan nachos are the game-night dinner that requires almost no actual cooking skill — you layer, you bake, you eat directly from the pan and call it cozy.
Ree Drummond’s Food Network sheet pan nachos popularized serving them straight from the tray, which is exactly the energy we need. Contains dairy. ⚠️ Mild grease note: pat the cooked beef well and use sturdy chips to keep drips minimal.
Make-ahead tip: brown and season the beef up to 2 days ahead; refrigerate and reheat before layering.
Ingredients
- 1 lb (450 g) lean ground beef (90/10)
- 1 tsp chili powder
- 1 tsp ground cumin
- ½ tsp garlic powder
- ½ tsp onion powder
- ½ tsp smoked paprika
- ½ tsp salt
- 1 large bag (about 12 oz / 340 g) sturdy corn tortilla chips
- 1 can (15 oz / 425 g) black beans, drained and rinsed
- 2 cups (230 g) shredded cheddar or Monterey Jack cheese
- ½ cup (75 g) jarred pickled jalapeño slices (optional, for heat)
- Toppings to serve: ½ cup sour cream, ½ cup salsa or pico de gallo, 1 ripe avocado (sliced), fresh cilantro (optional)
Instructions
- Preheat your oven to 400 °F (205 °C). Line a large rimmed baking sheet with foil.
- Cook the ground beef in a large skillet over medium-high heat, breaking it into small crumbles, until fully browned — about 7 minutes. Drain off excess fat thoroughly by pressing with a paper towel in the pan. Add chili powder, cumin, garlic powder, onion powder, paprika, and salt; stir to coat and cook 1 minute more.
- Spread half of the tortilla chips in an even layer across the entire baking sheet. Scatter half of the cheese over the chips, then add half the seasoned beef and half the black beans. Repeat with the remaining chips, cheese, beef, and beans (layering ensures every chip has toppings).
- Scatter jalapeño slices over the top if using.
- Bake for 8–10 minutes until the cheese is fully melted and beginning to bubble.
- Remove from the oven. Immediately dollop sour cream, add spoonfuls of salsa or pico, and fan the avocado slices over the top. Scatter cilantro if desired. Serve directly from the pan.
🛍 Shopping guide
Turkey and Cheese Sliders
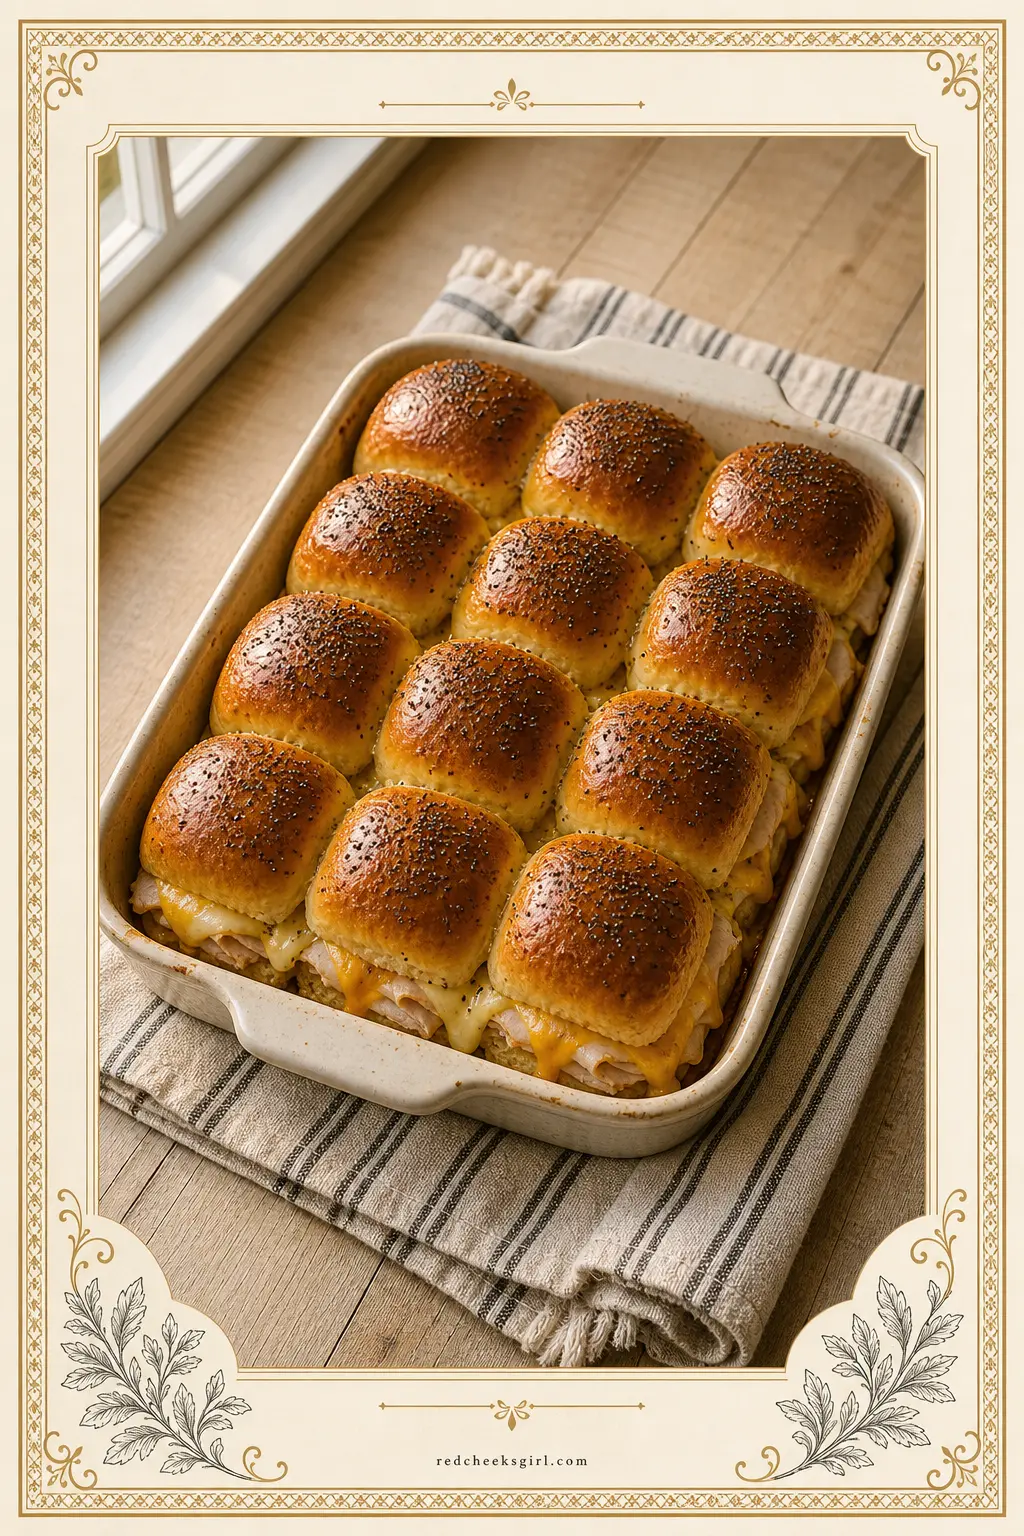
Sliders are the ultimate one-handed game-night food — they’re tidy, filling, and everyone loves a tiny sandwich. These bake right in the pan under a buttery, slightly sweet glaze that makes the tops caramel-golden and impossible to resist. Contains dairy and gluten.
Make-ahead tip: assemble the entire tray, cover tightly with foil, and refrigerate up to 8 hours. Bake covered for the first 10 minutes, then uncovered for the final 5 to crisp the tops.
Ingredients
- 12-count pack slider rolls or Hawaiian rolls
- 12 oz (340 g) deli-sliced turkey breast
- 6 slices (about 4 oz / 115 g) mild provolone or Swiss cheese
- 3 tbsp (45 g) unsalted butter, melted
- 1 tbsp (15 ml) Dijon mustard
- 1 tbsp (15 g) brown sugar or honey
- 1 tsp Worcestershire sauce
- ½ tsp garlic powder
- ½ tsp dried minced onion
- ½ tsp poppy seeds (optional)
Instructions
- Preheat your oven to 350 °F (175 °C). Grease a 9-by-13-inch (23-by-33-cm) baking dish.
- Without separating the rolls, use a serrated knife to slice the entire pack in half horizontally. Place the bottom half in the baking dish, cut side up.
- Layer the turkey slices evenly over the bottom buns, then lay the cheese slices on top of the turkey.
- Place the top half of the rolls over the cheese.
- In a small bowl, whisk together the melted butter, Dijon mustard, brown sugar, Worcestershire sauce, garlic powder, minced onion, and poppy seeds. Brush this glaze generously and evenly over all the tops of the rolls.
- Cover the dish with foil and bake for 15 minutes. Remove the foil and bake for another 5 minutes until the tops are golden and the cheese is fully melted.
- Cut between the rolls to separate the individual sliders. Serve warm.
Crispy Baked Chicken Meatballs
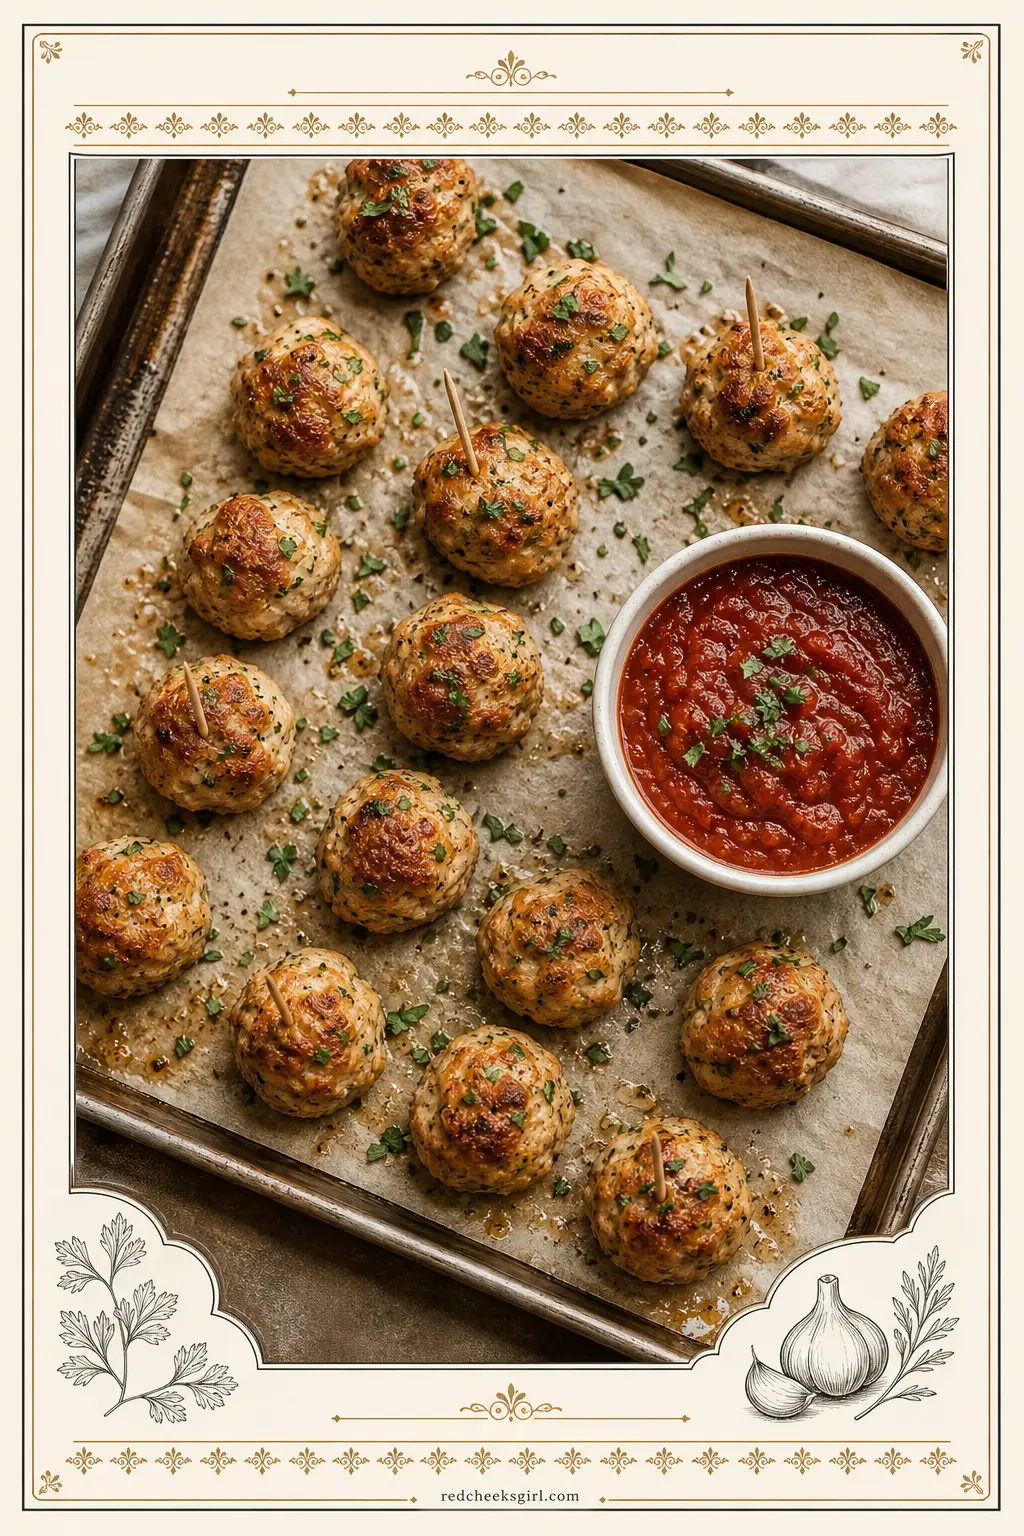
Meatballs are a game-night hall-of-famer for a reason — they’re perfectly portion-controlled, you eat them with a toothpick, and they’re hearty enough to keep everyone fueled through a three-hour board game session.
These bake in the oven instead of frying, so they’re not greasy (your cards will thank you). Serve with marinara on the side for dipping. Contains eggs and gluten (breadcrumbs). Make-ahead tip: freeze cooked meatballs in a single layer, then transfer to a bag.
Reheat in a 350 °F oven for 15 minutes.
Ingredients
- 1 lb (450 g) ground chicken
- ⅓ cup (35 g) plain breadcrumbs
- 1 large egg
- 2 cloves garlic, minced
- 2 tbsp (10 g) grated Parmesan cheese
- 2 tbsp (8 g) fresh parsley, finely chopped (or 1 tsp dried)
- 1 tsp Italian seasoning
- ½ tsp onion powder
- ½ tsp salt
- ¼ tsp black pepper
- 1 tbsp (15 ml) olive oil (for brushing)
- Marinara sauce, for dipping
Instructions
- Preheat your oven to 400 °F (205 °C). Line a large baking sheet with parchment paper.
- In a large bowl, combine the ground chicken, breadcrumbs, egg, garlic, Parmesan, parsley, Italian seasoning, onion powder, salt, and pepper. Mix gently with your hands until everything is just combined — don’t overwork it or the meatballs will be tough.
- Use a small cookie scoop or tablespoon to portion the mixture into balls about 1 inch (2.5 cm) in diameter (roughly 1 heaped tablespoon each). Place them on the parchment-lined sheet, leaving a little space between each.
- Lightly brush or drizzle the tops with olive oil.
- Bake for 18–20 minutes, until the meatballs are cooked through and golden on the outside. An instant-read thermometer should read 165 °F (74 °C) in the center.
- Serve immediately with warm marinara for dipping and toothpicks for easy grabbing.
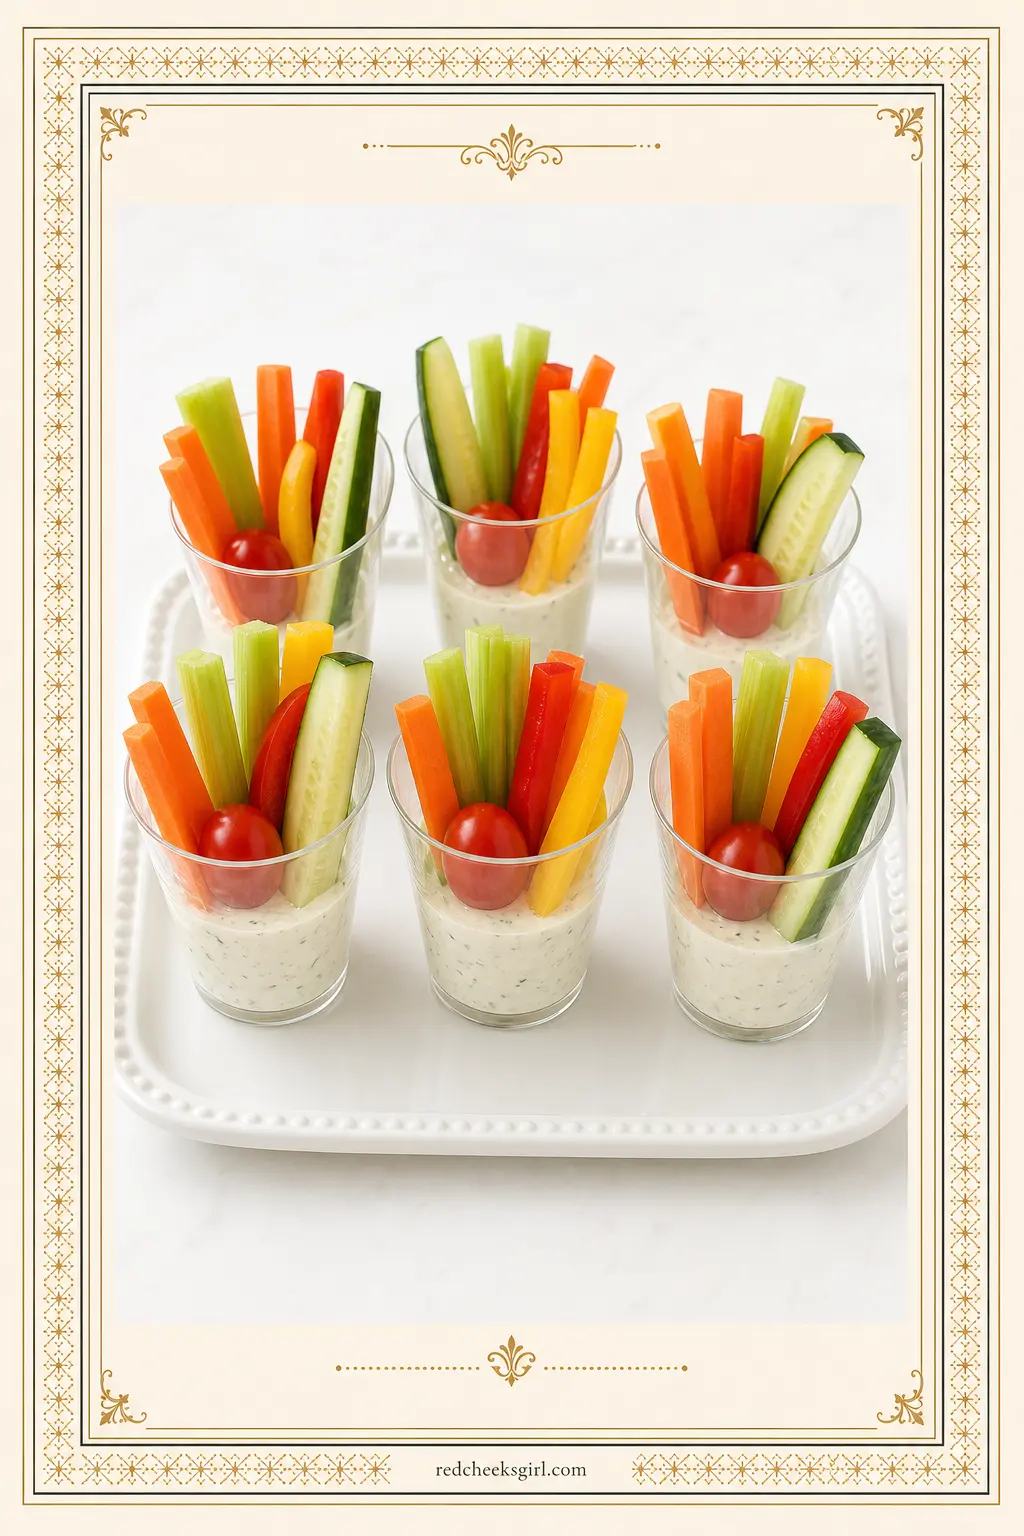
Veggie Cups with Ranch Dip
These are the hero of the game-night table that nobody gives enough credit for. Individual veggie cups are mess-free, pre-portioned, and mean no one is double-dipping — which, frankly, is the real game-night drama you want to avoid.
They’re also a great way to offer something fresh and crunchy alongside all the warm, cheesy options. Contains dairy. Make-ahead tip: fill the cups, cover with plastic wrap, and refrigerate up to 24 hours ahead.
The dip actually gets better overnight as the flavors come together.
Ingredients
- 2 medium carrots, peeled and cut into 3-inch sticks
- 3 celery stalks, cut into 3-inch sticks
- 1 medium English cucumber, cut into spears
- 1 cup (150 g) cherry tomatoes, washed and patted dry
- 1 red bell pepper, seeded and cut into strips
- 1 yellow bell pepper, seeded and cut into strips
- Ranch Dip: 1 cup (240 ml) sour cream + 1 tbsp dried ranch seasoning powder, stirred together
- 10 small disposable or reusable cups (about 8 oz / 240 ml size)
Instructions
- Make the ranch dip first: stir the sour cream and ranch seasoning together in a bowl until fully combined. Taste and add a pinch of salt if needed. Cover and refrigerate until ready to use.
- Spoon about 2 tablespoons of the ranch dip into the bottom of each cup.
- Stand a selection of carrot sticks, celery sticks, cucumber spears, and pepper strips upright in each cup, leaning them against each other so they stay put.
- Nestle 1–2 cherry tomatoes in among the sticks in each cup.
- Arrange the cups on a tray or directly on the table. Serve immediately or keep refrigerated for up to 24 hours.
Homemade Trail Mix Snack Bags
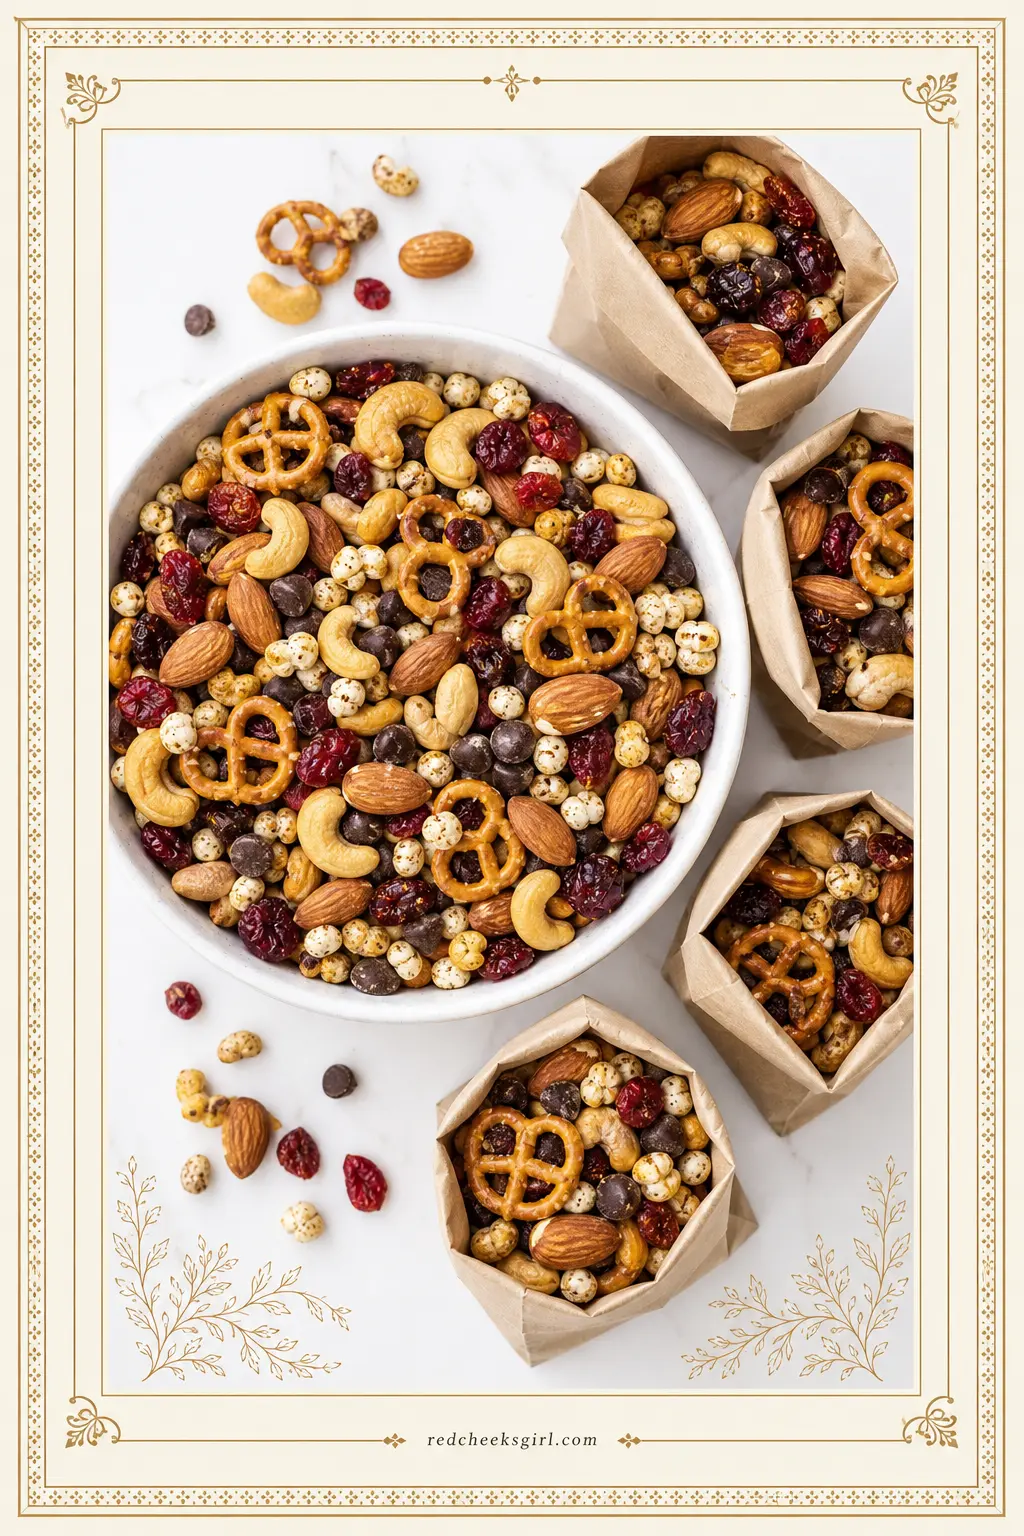
This is the snack that’s always on my game-night table, no matter what else I’m making — because it’s the one people graze on between courses, during the long strategy discussions, and while they’re waiting for everyone else to take their turn.
Make it your own by swapping in whatever your family loves. Contains nuts; make a nut-free version with sunflower seeds and pumpkin seeds for any guests with allergies.
Make-ahead tip: mix a big batch and store in an airtight container at room temperature for up to 2 weeks.
Ingredients
- 1 cup (115 g) roasted salted cashews
- 1 cup (115 g) roasted salted almonds
- 1 cup (30 g) lightly salted pretzels (small twists or sticks)
- ½ cup (75 g) raisins or dried cranberries
- ½ cup (90 g) semi-sweet chocolate chips or M&Ms
- ½ cup (15 g) puffed corn or popcorn (plain or lightly salted)
- ¼ cup (30 g) roasted sunflower seeds
Instructions
- Add all ingredients to a large bowl and toss gently to combine evenly.
- For individual serving bags: divide the mix equally into 8 small zip bags or paper bags (about ⅓ cup each). This keeps hands away from a communal bowl — great for game hygiene!
- Alternatively, pour the whole batch into a large wide bowl and place on the table with a small scooping spoon so no one has to plunge their hand in.
- Store any leftovers in an airtight container at room temperature for up to 2 weeks.
Mini Quesadilla Wedges
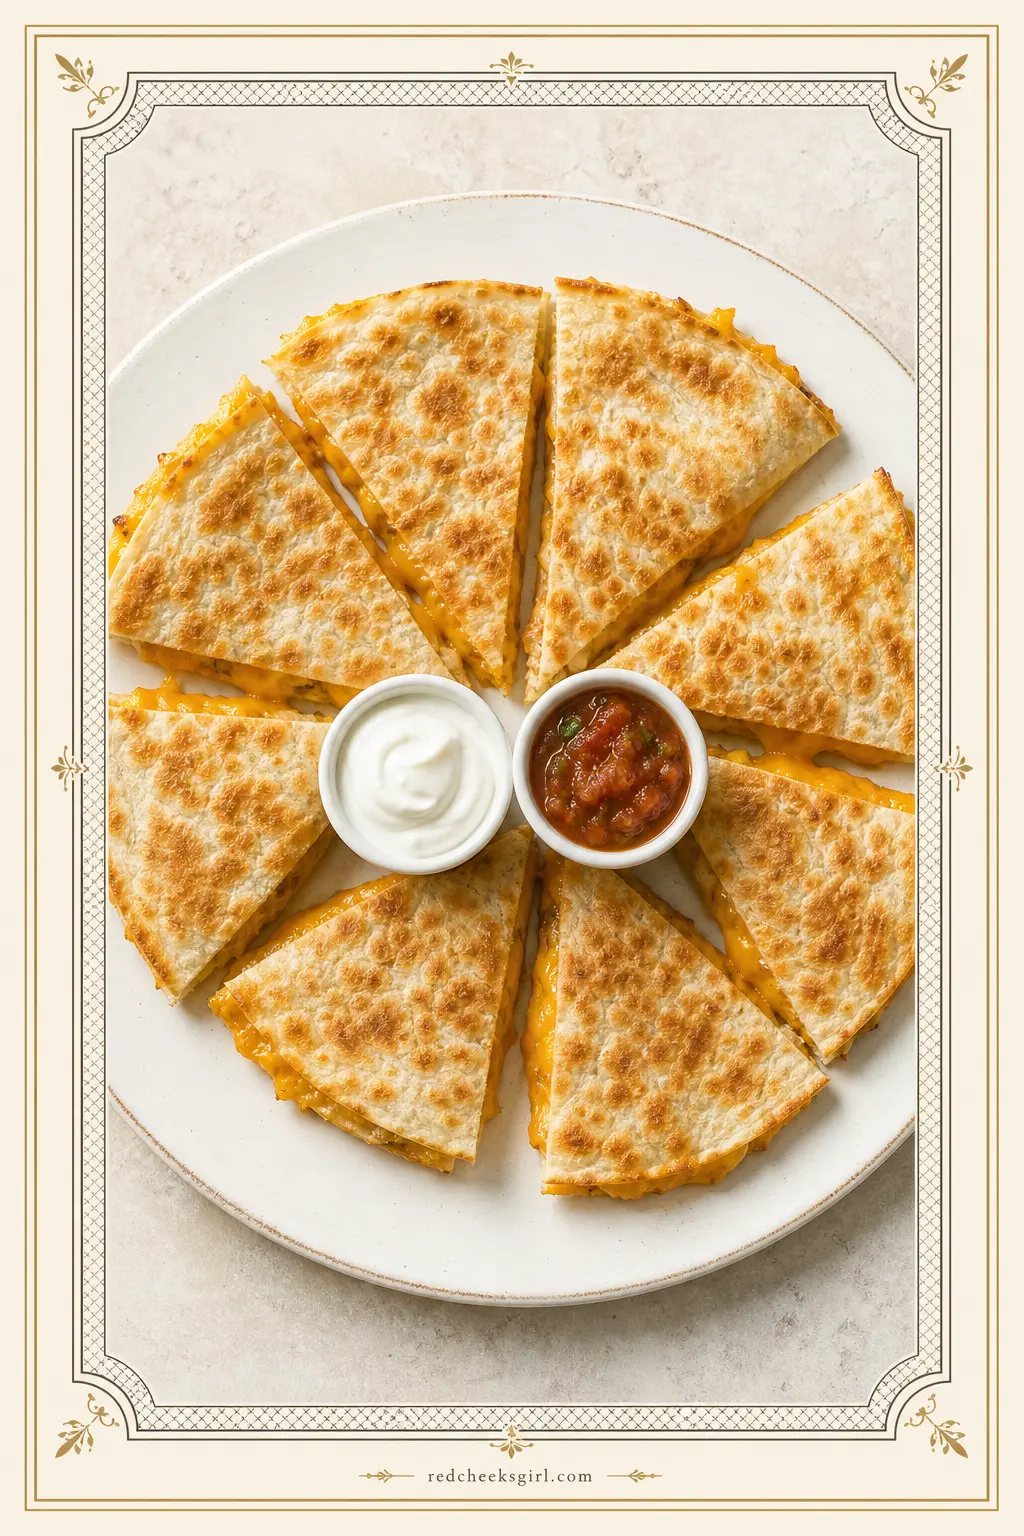
Quesadillas are one of those foods that sound like too much effort for game night but actually take about 8 minutes start to finish.
The secret is cooking them in a dry pan with no oil so the tortilla crisps without getting greasy — that way your fingers stay clean and your cards stay safe. Cut into small wedges so they’re one-handed and poppable. Contains dairy and gluten.
Make-ahead tip: cook the quesadillas up to 1 hour ahead, keep warm in a 200 °F oven on a wire rack (the rack prevents sogginess), then cut and serve.
Ingredients
- 4 large (10-inch / 25-cm) flour tortillas
- 2 cups (230 g) shredded Mexican blend or cheddar cheese
- 1 cup (175 g) drained canned black beans, roughly mashed
- ½ cup (75 g) jarred salsa or pico de gallo (thick style, not watery)
- ½ tsp cumin
- ½ tsp chili powder
- Sour cream and extra salsa, to serve
Instructions
- In a small bowl, stir the mashed black beans with the cumin and chili powder.
- Heat a large skillet or griddle over medium heat — no oil needed.
- Lay one tortilla flat in the pan. Scatter ½ cup of cheese evenly over the entire surface, then spread a thin layer of the seasoned bean mixture over one half only. Add a few spoonfuls of salsa on top of the beans.
- Fold the plain cheese half over the topped half to form a half-moon. Press down gently with a spatula.
- Cook for 2–3 minutes until the bottom is golden and crisp, then carefully flip and cook another 2 minutes on the other side.
- Slide onto a cutting board. Repeat with the remaining tortillas.
- Cut each quesadilla into 8 small wedges. Serve immediately with sour cream and salsa for dipping.
Savory Popcorn Bar
Plain popcorn? Fine. A popcorn bar? Now you’re talking. This sets out a big bowl of freshly popped corn alongside three or four seasoning blends in little dishes, and everyone customizes their own cup.
It’s interactive (game night appropriate), totally mess-free when done in cups, and kids absolutely love it. No common allergens in the base (dairy-free if you skip the butter seasoning).
Make-ahead tip: pop the corn up to 4 hours ahead and store in a large paper bag — it stays crispier than in a plastic container.
Ingredients
- Popcorn base: ½ cup (100 g) popcorn kernels, air-popped or stovetop-popped in 2 tbsp neutral oil (about 16 cups / 160 g popped)
- Cinnamon Sugar Mix: 2 tbsp (25 g) granulated sugar + ½ tsp ground cinnamon
- Ranch Mix: 1 tbsp dried ranch seasoning powder
- Parmesan Herb Mix: 2 tbsp (10 g) finely grated Parmesan + 1 tsp dried Italian seasoning + ¼ tsp garlic powder
- Taco Spice Mix: 1 tsp chili powder + ½ tsp cumin + ¼ tsp smoked paprika + ¼ tsp salt
- 2 tbsp (30 g) melted butter (optional, for helping seasonings stick)
- 8 paper cups or small bowls, for serving
Instructions
- Pop the corn: for stovetop, heat 2 tbsp oil in a large pot with a lid over medium-high heat. Add 3 test kernels; when they pop, add the remaining kernels, cover, and shake the pot every 30 seconds until popping slows to 2–3 seconds between pops. Remove from heat.
- Prepare each seasoning mix in its own small bowl or ramekin.
- Transfer the popped corn to a large serving bowl. Drizzle lightly with melted butter if desired, and toss to coat — this helps the dry seasonings stick when people add their own.
- Set out the seasoning bowls alongside the popcorn with a small spoon in each.
- Give each player a paper cup. Let them scoop popcorn into their cup and sprinkle on whichever seasoning they like — or mix a few!

Chocolate Chip Cookie Bars
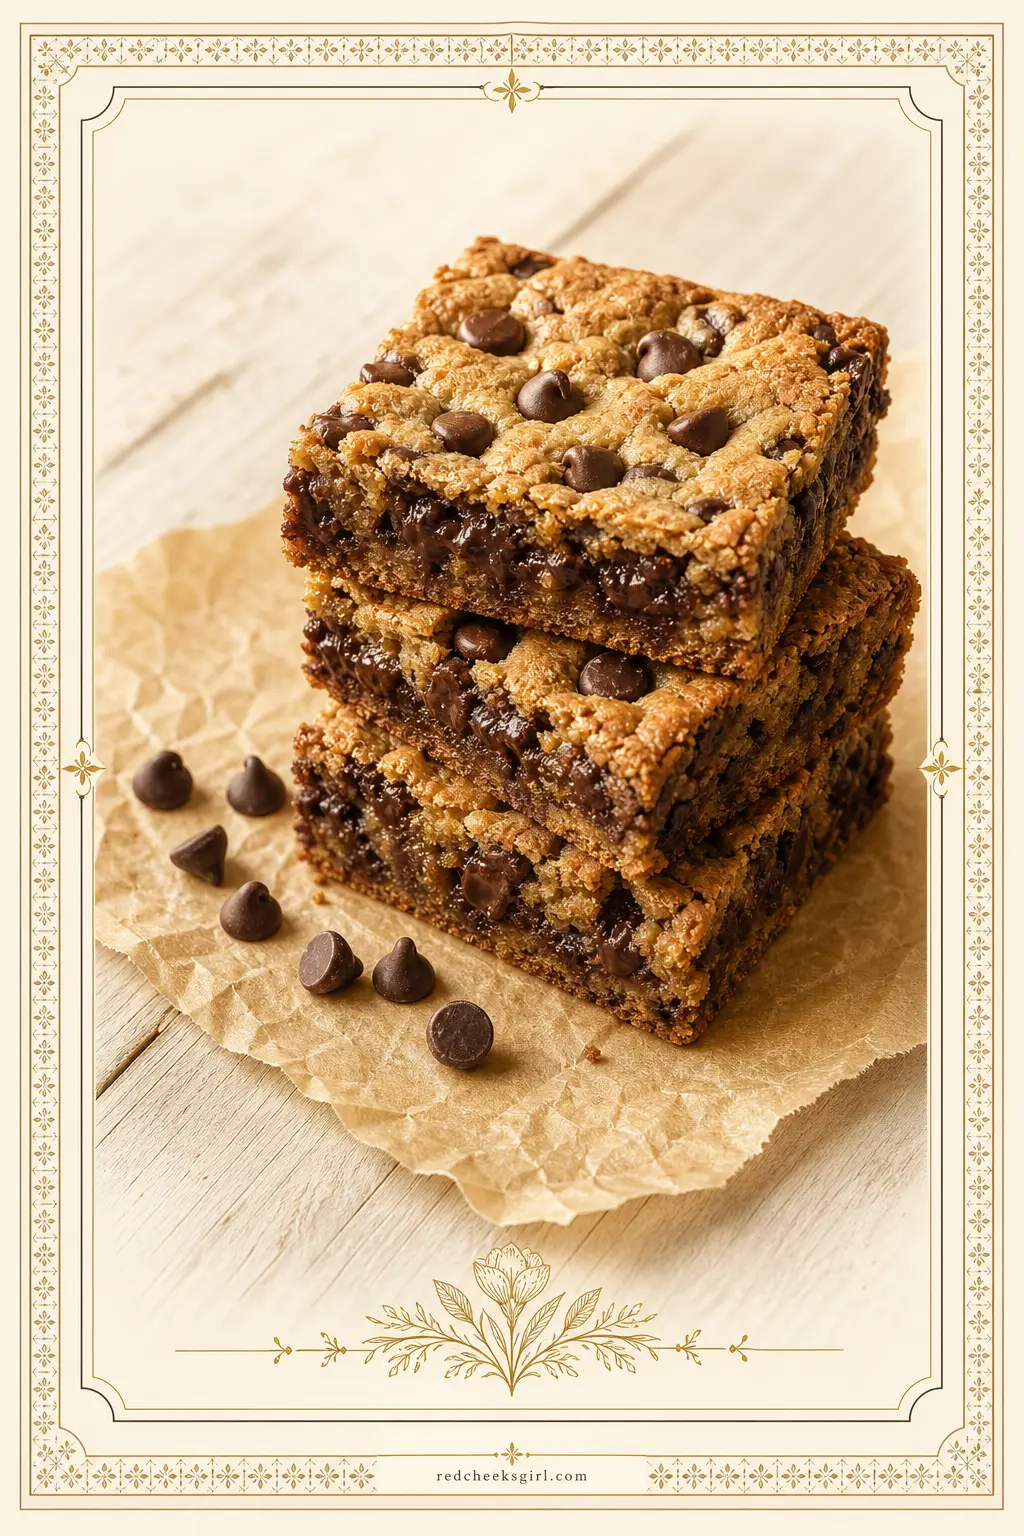
Every game night needs a sweet finish, and cookie bars are basically the perfect version of a chocolate chip cookie — because you get all the flavor without scooping two dozen individual portions.
You bake one big pan, cut into squares, and people grab them like they’re pulling cards. Epicurious’s cookie bar formula uses melted butter for extra-chewy centers and crisp edges — a combination that is genuinely dangerous at a table full of competitive people.
Contains dairy, eggs, and gluten. Make-ahead tip: bake up to 2 days ahead and store covered at room temperature; or freeze cut bars for up to 3 months.
Ingredients
- ¾ cup (170 g) unsalted butter, melted and cooled to room temperature
- 1 cup (200 g) packed dark brown sugar
- ½ cup (100 g) granulated sugar
- 2 large eggs, at room temperature
- 1 tbsp (15 ml) pure vanilla extract
- 2 cups (250 g) all-purpose flour
- 1 tsp baking soda
- ¾ tsp baking powder
- 1 tsp fine sea salt
- 1¾ cups (300 g) semi-sweet chocolate chips, divided
- Non-stick cooking spray, for the pan
Instructions
- Preheat your oven to 350 °F (175 °C). Spray a 9-by-13-inch (23-by-33-cm) baking pan with non-stick cooking spray, then line with parchment paper, leaving an overhang on the long sides to make lifting the bars out easier.
- In a large bowl, whisk the melted, cooled butter with both sugars until the mixture looks glossy and no lumps remain, about 1 minute.
- Add the eggs and vanilla extract; whisk again until smooth and slightly paler, about 30 seconds.
- Add the flour, baking soda, baking powder, and salt. Switch to a rubber spatula and fold until just combined — stop as soon as you see no more dry streaks. Do not overmix.
- Fold in 1¼ cups of the chocolate chips. Scrape the thick batter into the prepared pan and spread it to an even layer with the spatula. Scatter the remaining ½ cup of chocolate chips over the top, pressing them in very lightly.
- Bake for 22–27 minutes until the edges are set and golden, and the center looks slightly underdone (it will firm up as it cools). Do not overbake.
- Let the pan cool completely on a wire rack before lifting out and slicing into 24 bars. Cut into squares by slicing 4 columns and 6 rows.
Five-Ingredient Guacamole with Chips
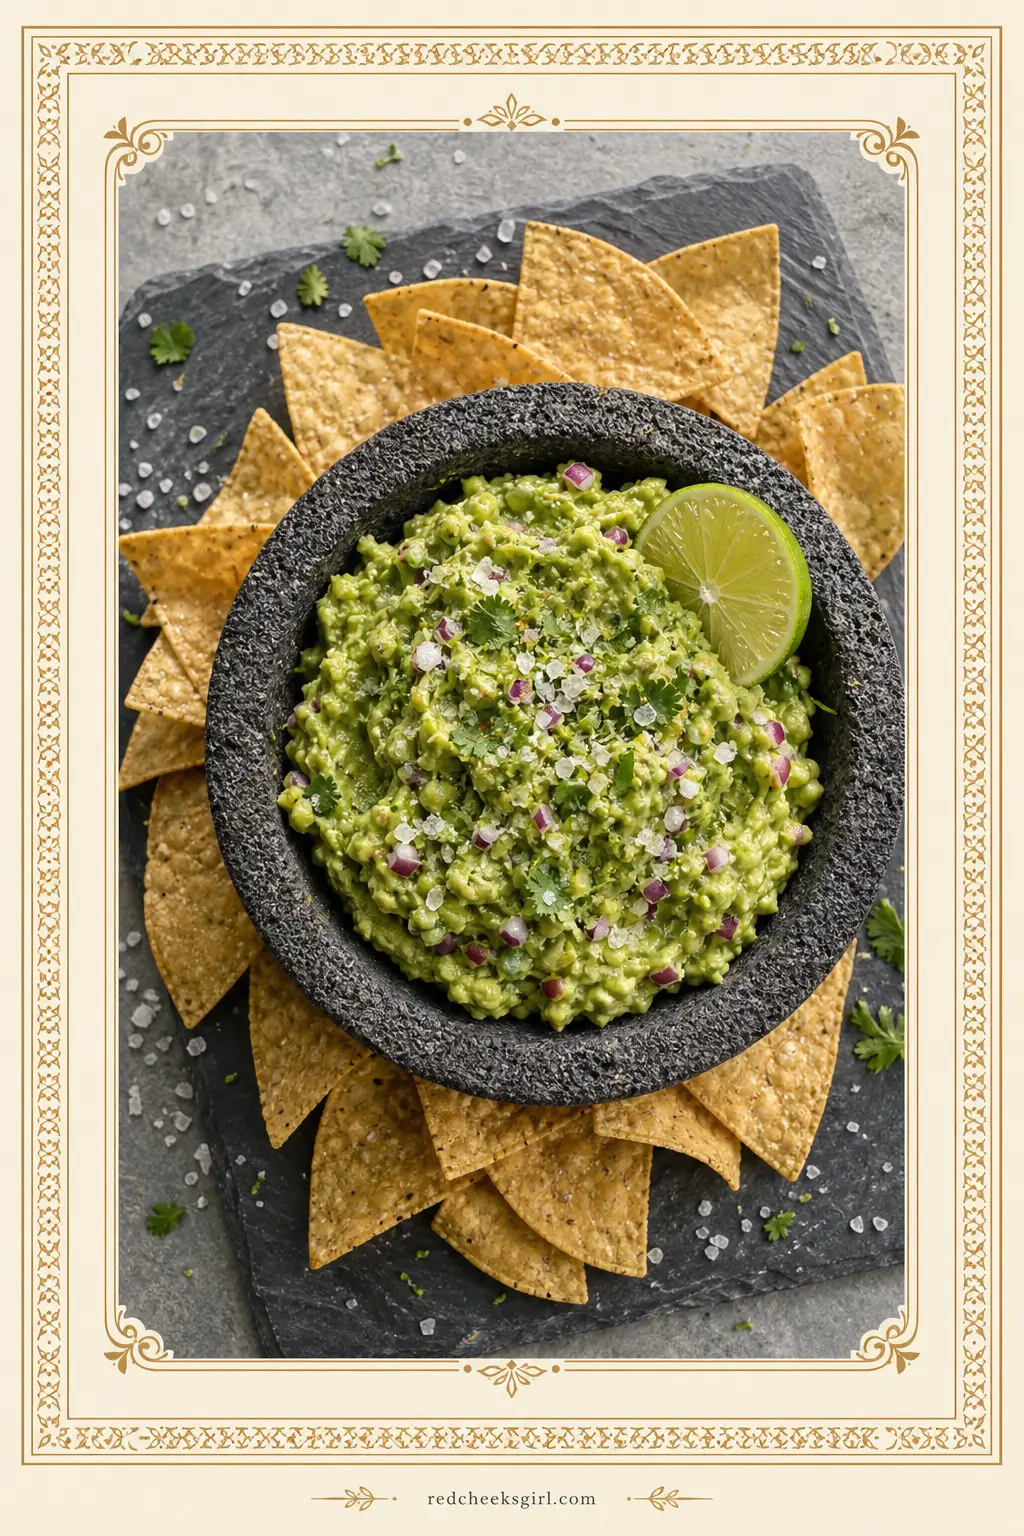
Guacamole is one of those foods that people act like is complicated, and I genuinely don’t know why. Five ingredients, one bowl, ten minutes. It’s creamy, bright, and naturally dairy-free and gluten-free — making it the most inclusive dip on this whole list.
The trick is ripe avocados (they should yield to gentle pressure) and enough lime juice to keep it from turning brown. No common allergens.
Make-ahead tip: press plastic wrap directly against the surface of the guacamole (touching it, not just covering the bowl) and refrigerate up to 4 hours — this slows browning significantly.
Ingredients
- 3 large ripe avocados
- Juice of 2 limes (about 3–4 tbsp / 45–60 ml)
- ½ tsp fine salt, plus more to taste
- 2 tbsp (20 g) red onion, very finely minced
- 2 tbsp (8 g) fresh cilantro leaves, finely chopped (omit if your crowd doesn’t do cilantro)
- 1 small jalapeño, seeded and very finely minced (optional)
- Sturdy corn tortilla chips, to serve
Instructions
- Halve each avocado, remove the pits, and use a large spoon to scoop the flesh into a medium bowl.
- Add the lime juice and salt. Use a fork to mash the avocados to your preferred consistency — I like mine with some texture, so I leave it a bit chunky rather than going fully smooth.
- Add the minced red onion, cilantro, and jalapeño (if using). Fold together gently.
- Taste and adjust with more salt or lime juice as needed.
- Transfer to a serving bowl. Press plastic wrap directly against the surface if not serving immediately. Serve with tortilla chips.
🛍 Shopping guide
Frequently Asked Questions
What are the best family game night foods that won’t make your hands greasy?
The golden rule for game night food is: no grease on the cards. Your best bets are baked rather than fried options — baked meatballs, pretzel bites, quesadilla wedges cooked in a dry pan, and pizza pinwheels are all great.
Veggie cups with ranch, caprese skewers, trail mix, and cookie bars are also completely grease-free. Avoid fried wings, mozzarella sticks, or anything cooked in a lot of oil.
If you’re serving dips, give everyone their own portion cup or a small plate to dip onto — that way they’re not dragging chip residue back to the table.
How much food should I make for a game night with 6–8 people?
A good rule of thumb is to serve 3–5 different snacks for grazing and plan for about 6–8 pieces of finger food per person per hour of game play, plus one more filling option (like sliders or nachos) if the night is going long.
For a 3-hour session, that’s roughly 18–24 pieces per person across all the snacks. This sounds like a lot but people tend to graze slowly over time rather than all at once, so it evens out.
Scale each recipe in this list by 1.5× if you have a particularly hungry crowd.
Can I make all of these game night snacks ahead of time?
Almost everything here has a make-ahead option. The slow cooker buffalo dip, spinach artichoke dip, and sliders can all be prepped a day in advance. Pretzel bites, pizza pinwheels, and meatballs can be frozen for up to 3 months and reheated.
The grazing board goes together 2 hours ahead (minus fresh fruit, which you add last minute). Guacamole holds up to 4 hours with plastic wrap pressed directly on the surface.
The only real same-day recipe is the popcorn bar, and even that takes under 15 minutes.
What are good game night foods for picky kids?
Kid-friendly classics that appear in this list: pizza pinwheels, pretzel bites with honey mustard, turkey and cheese sliders, mini quesadilla wedges (mild, no jalapeños), popcorn bar, trail mix, and chocolate chip cookie bars.
For younger kids, the veggie cups with ranch are a fun, interactive option since they get their own personal cup. The caprese skewers are a great way to introduce kids to fresh mozzarella and tomatoes in a fun format.
Stick to milder seasonings and put spicy toppings like jalapeños on the side so everyone can customize.
What should I avoid serving at game night?
Anything that requires two hands to eat, leaves sticky or powdery residue on fingers, or drips.
Specific things to avoid: soup or stew (learned that one the hard way), wings with sauce, powdery cheese snacks like Cheetos or Doritos (the orange fingers are real), honey-glazed anything that makes fingers sticky, s’mores or anything with marshmallow, and overly saucy foods.
Also keep an eye on your plates — if you use small plates for each person rather than everyone reaching into communal bowls, you significantly reduce the risk of anything landing on the game.
How do I keep warm dips hot for the whole game night without burning them?
A slow cooker on the WARM setting is your best friend for this — it’ll keep your buffalo chicken dip or spinach artichoke dip at the perfect serving temperature for hours without scorching.
For oven-baked dips like the spinach artichoke, keep them covered in a low (200 °F / 95 °C) oven until you’re ready to serve, then bring them to the table. A small electric fondue pot or a mini warming tray also works well.
Give any warm dip a gentle stir every 30–45 minutes to keep the temperature even throughout.
📌 Save These for Later
Loved these? Pin your favorite image below so you can find this list again when you’re planning.




Discover 20 fun and memorable games for family gatherings that connect grandparents, parents, and ki

72 would you rather questions for kids aged 8-12, sorted into six silly rounds with free printable c

Twenty tried-and-tested indoor games for family rainy days, from printable scavenger hunts to sock b
Leave a Reply