

18 Galentines Party Food Ideas Your Friends Will Photograph Before Eating

Galentine’s night doesn’t need a hot fryer running the whole time, and it definitely doesn’t need you stuck in the kitchen while everyone else is already on the sofa. Every bite here leans into pink and red without tipping into cliche, and nothing requires a vat of oil or a thermometer.
Mix a board, a few skewers, one hot thing from the oven and a tray of something sweet, and the spread looks considered rather than catered. If the night runs long once the plates are empty, hand the room over to the 18 Galentine’s Party Games for a Night With Your Best Friends.
A note before you start: several of these use eggs, dairy, gluten or nuts, so check labels if anyone in the group has an allergy. The rosey spritz further down is for the adults in the room only, so pour something non-alcoholic alongside it for anyone driving home or sitting this one out.
This post contains affiliate links. If you buy through them, I may earn a small commission at no extra cost to you.
Table of Contents
- Heart-Shaped Pizza
- Strawberry Caprese Skewers
- Beet Pink Deviled Eggs
- Raspberry Brie Bites
- Butter Board with Berries
- Conversation Heart Sugar Cookies
- Pink Beet Hummus with Warm Pita
- Watermelon Feta Mint Bites
- Strawberry Goat Cheese Crostini
- Prosciutto Rose Crostini
- Pomegranate Goat Cheese Endive Spears
- Smoked Salmon Pink Pinwheels
- Pink Velvet Cupcakes
- Chocolate-Dipped Strawberries
- Raspberry Rose Spritz
- Pink Lemonade Berry Punch
- Mini Pavlova Berry Nests
- Raspberry Cheesecake Bites
- Frequently Asked Questions
Heart-Shaped Pizza
Say heart-shaped pizza and someone always pictures a sad frozen crust hacked into a lopsided lump. Pinch the dough properly and it reads as a real heart from across the room, with a crust that snaps at the edge and pulls soft and stringy through the middle.
Buy the dough from a pizzeria down the street if kneading your own on a Tuesday night feels like one job too many, nobody checks where the base came from once the cheese is bubbling. Leftover slices reheat well in a dry skillet the next morning, which almost never happens with pizza.
Ingredients
- 450 g pizza dough (1 ball), at room temperature
- 2 tablespoons olive oil, plus extra for brushing
- 1 clove garlic, minced
- 120 g crushed tomatoes (about 1/2 cup)
- 1/4 teaspoon fine salt
- pinch of sugar
- 150 g shredded low-moisture mozzarella
- 115 g fresh mozzarella, torn into small pieces
- 10 to 12 fresh basil leaves
- 1/4 teaspoon red pepper flakes (optional)
- 2 tablespoons grated parmesan
Instructions
- Take the dough out of the fridge 30 minutes before you shape it; cold dough snaps back instead of holding a point, so let it relax on the counter under a damp cloth.
- Heat the oven to 475°F (245°C) with a pizza stone or heavy baking sheet on the middle rack for at least 20 minutes, long enough for the stone to get properly hot.
- On a floured sheet of parchment, press and stretch the dough into a rough circle about 12 inches across, keeping the center thinner than the edge.
- Pinch the top of the circle inward to form the dip of the heart, then pull and tuck the bottom into a point, patching thin spots until the outline holds.
- Stir the garlic, crushed tomatoes, salt and sugar together in a small bowl; the sauce should taste bright and slightly sweet, not tinny.
- Spread the sauce over the dough leaving a half-inch border, then scatter the shredded mozzarella evenly, followed by the torn fresh mozzarella.
- Slide the pizza, still on its parchment, onto the hot stone and bake for 10 to 13 minutes, until the crust is deep gold at the edges and the cheese bubbles with a few brown spots.
- Pull the pizza out and scatter basil leaves and red pepper flakes over the top while it’s still hot enough to wilt the basil slightly.
- Drizzle with a little olive oil and the parmesan, then rest 3 minutes before slicing so the cheese sets and doesn’t slide off each piece.
- Cut into strips that follow the heart’s curve rather than straight lines, so every piece keeps a bit of the point or the top lobes.

🛍 Shopping guide
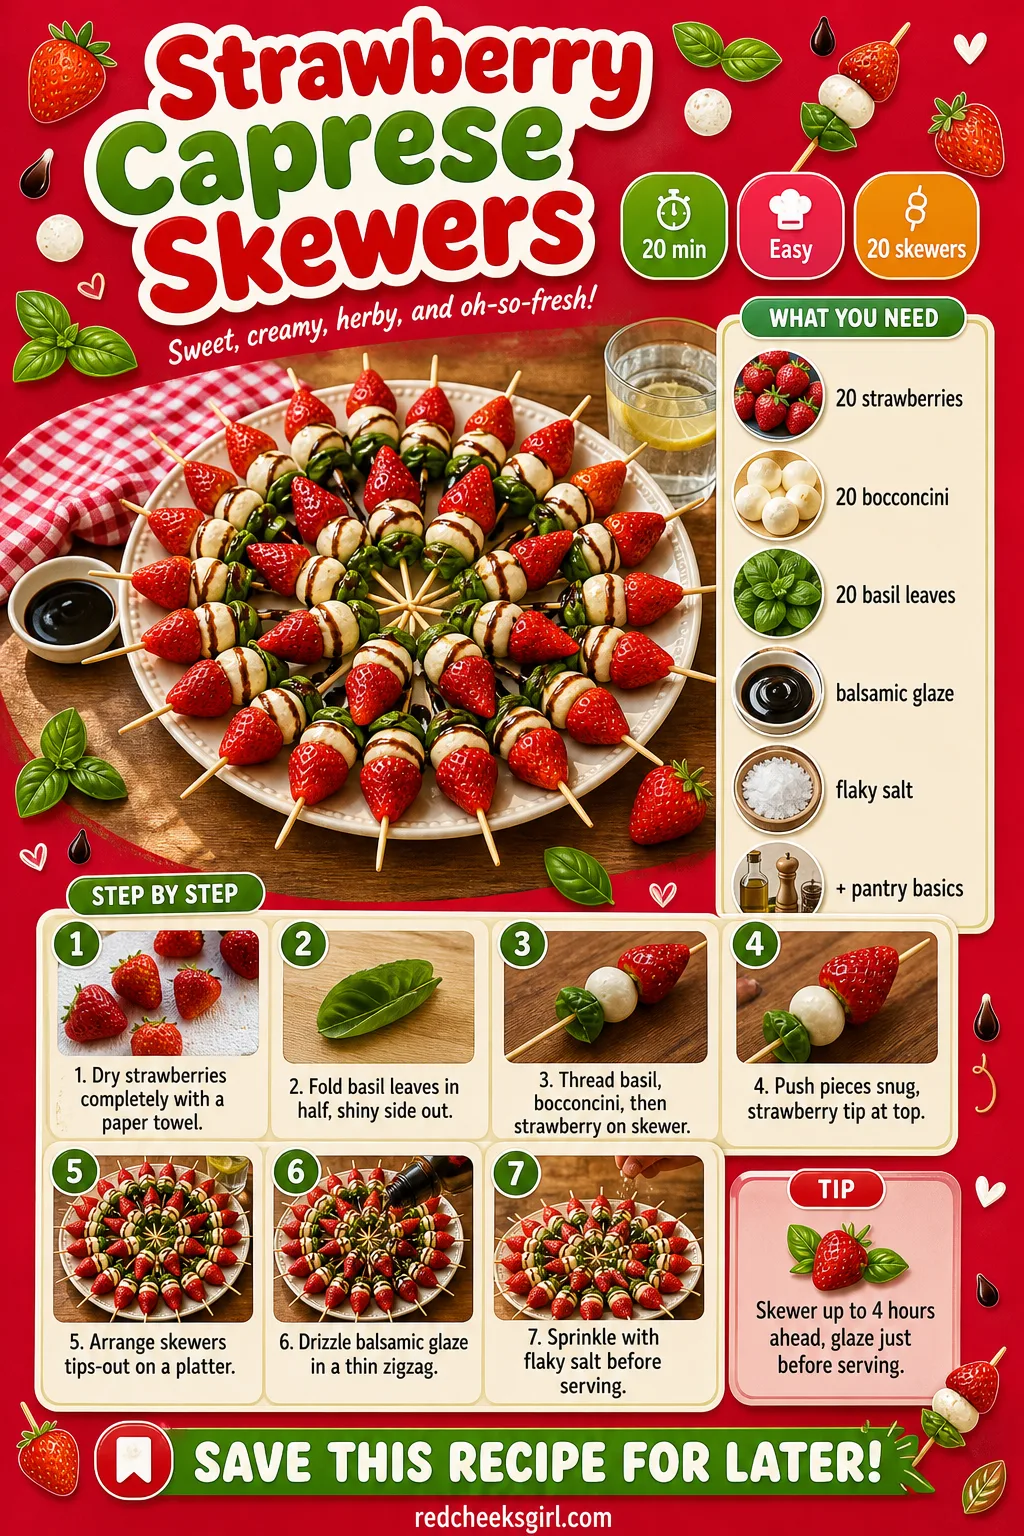
Strawberry Caprese Skewers
Caprese usually means a knife and a board and someone standing over it while the party starts without her. Thread it onto a skewer instead and the same three ingredients turn into something a guest can pick up between sentences, no plate required.
The basil has to be fresh, dried won’t fold the same way and tastes flat against the sweetness of the strawberry. Build the skewers a few hours ahead and hold the balsamic drizzle back until serving, so the platter still looks glossy and not soggy when the doorbell rings.
Ingredients
- 20 small wooden skewers (4-inch)
- 20 fresh strawberries, hulled
- 20 bocconcini (small mozzarella balls), drained
- 20 fresh basil leaves
- 3 tablespoons balsamic glaze
- pinch of flaky sea salt
Instructions
- Pat the strawberries completely dry with a paper towel; any trapped water will make the skewers weep onto the platter.
- Fold each basil leaf in half with the shiny side out, so it sits like a small tent and shows its deep green color against the pink.
- Thread one folded basil leaf, then one bocconcini ball, then the pointed end of a strawberry onto each skewer, pushing gently so the strawberry sits at the tip, like a torch.
- Space the three pieces close together along the skewer; a loose arrangement looks sparse and lets bits spin during serving.
- Repeat until all 20 skewers are built, laying each one flat on a lipped tray as you go so the fruit juice doesn’t run.
- Arrange the skewers in a sunburst or straight rows on a flat platter, strawberry tips facing outward.
- Drizzle balsamic glaze back and forth across the tips in a thin zigzag, not a puddle, right before serving.
- Finish with a small pinch of flaky salt over the top; this is what keeps the bite from tasting only sweet.
🛍 Shopping guide
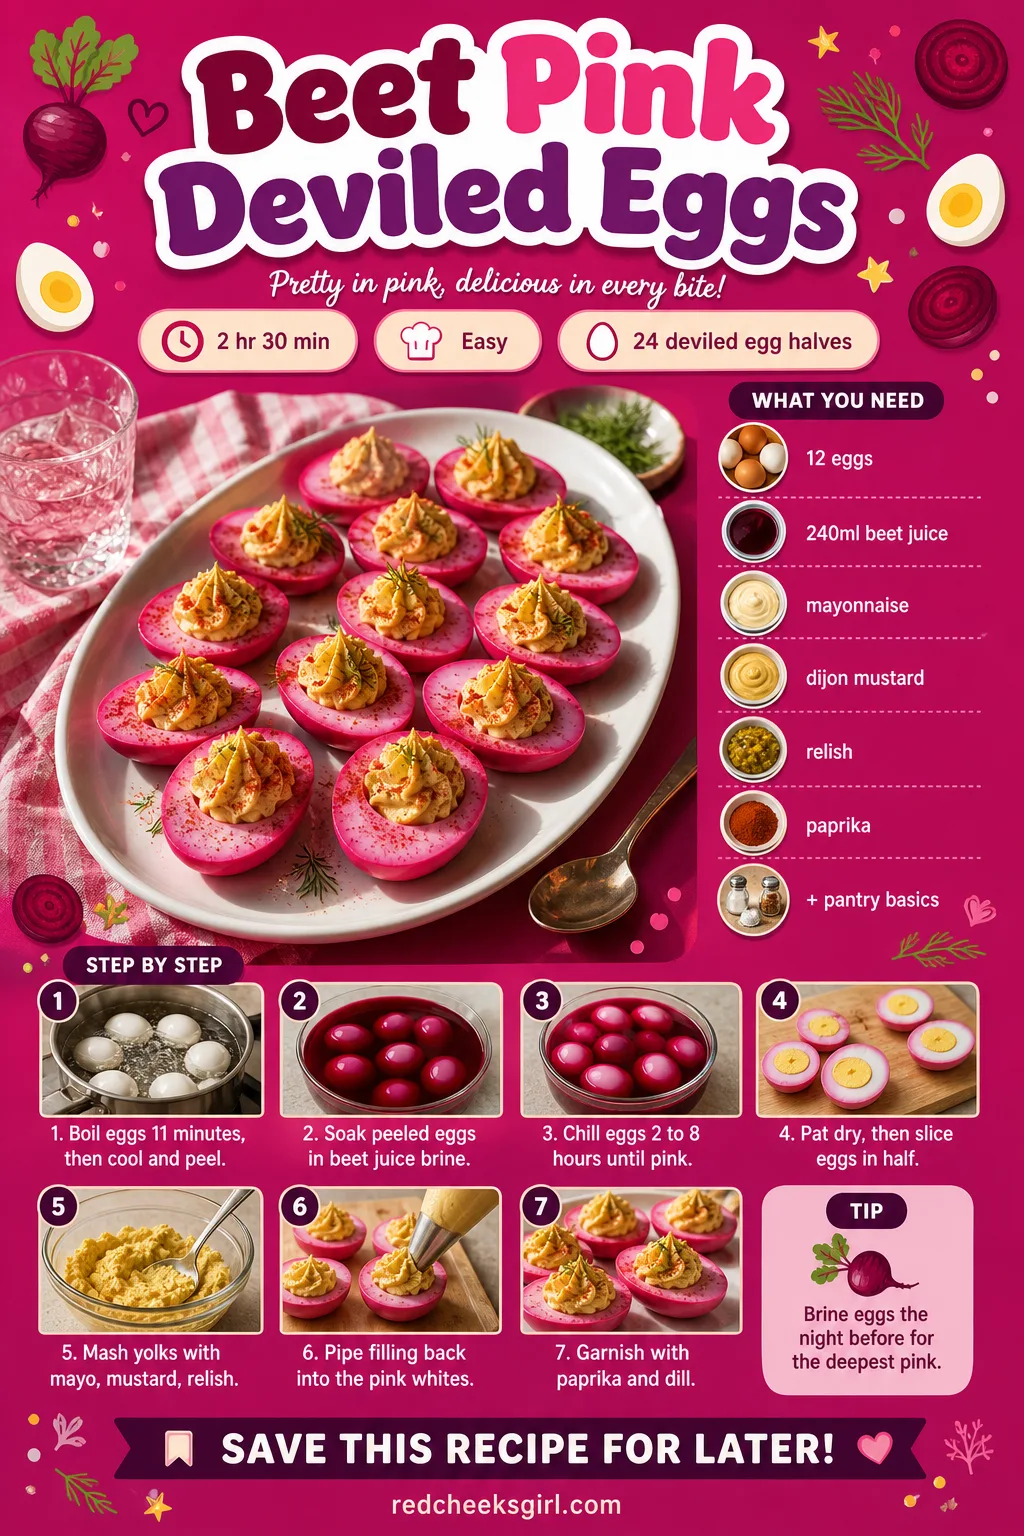
Beet Pink Deviled Eggs
Deviled eggs show up at every potluck going, which is exactly why the beet version feels like a trick. The filling tastes like the deviled eggs you already know, tangy and rich, but the white underneath turns a deep, natural rose that no food coloring quite matches.
Start the eggs the night before if boiling, peeling and brining on party day sounds like too much, the color only gets better the longer they sit. Anyone with an egg allergy will need to sit this one out, but it’s naturally gluten free for everyone else.
Ingredients
- 12 large eggs
- 1 cup (240 ml) reserved liquid from a can of beets, or juice from steamed beets
- 1 tablespoon white vinegar
- 1/3 cup (75 g) mayonnaise
- 1 tablespoon Dijon mustard
- 1 teaspoon pickle relish (optional)
- 1/4 teaspoon salt, plus more to taste
- black pepper, a few turns
- paprika, for garnish
- fresh dill, for garnish
Instructions
- Place the eggs in a single layer in a saucepan, cover with an inch of cold water, bring to a boil, then cover, remove from heat and let sit 11 minutes so the yolks cook through without grey edges.
- Drain and run the eggs under cold water for a full minute, then peel under a thin stream of water; the shells should slip off in large pieces.
- Combine the beet liquid and vinegar in a container big enough to hold all the eggs, and taste it, it should be tangy and deeply magenta.
- Submerge the peeled whole eggs in the beet brine, cover, and refrigerate at least 2 hours and up to 8; check at 2 hours for a soft blush and at 6 for a deep rose.
- Lift the eggs from the brine and pat dry; the color stops developing once they’re out of the liquid, so pull them when the shade pleases you.
- Slice each egg in half lengthwise with a clean, sharp knife, wiping the blade between cuts so the pink skin doesn’t smear onto the white.
- Scoop the yolks into a bowl and mash with a fork until no lumps remain, then mix in the mayonnaise, mustard, relish, salt and pepper.
- Taste the filling, it should hold a soft peak on the fork and taste rounder than plain mayonnaise; loosen with an extra half teaspoon of mayonnaise if it feels stiff.
- Spoon or pipe the filling back into the pink-rimmed whites, mounding it slightly above the edge.
- Dust each egg with paprika and a few small fronds of dill, then chill until ready to serve; they hold well covered for up to a day.
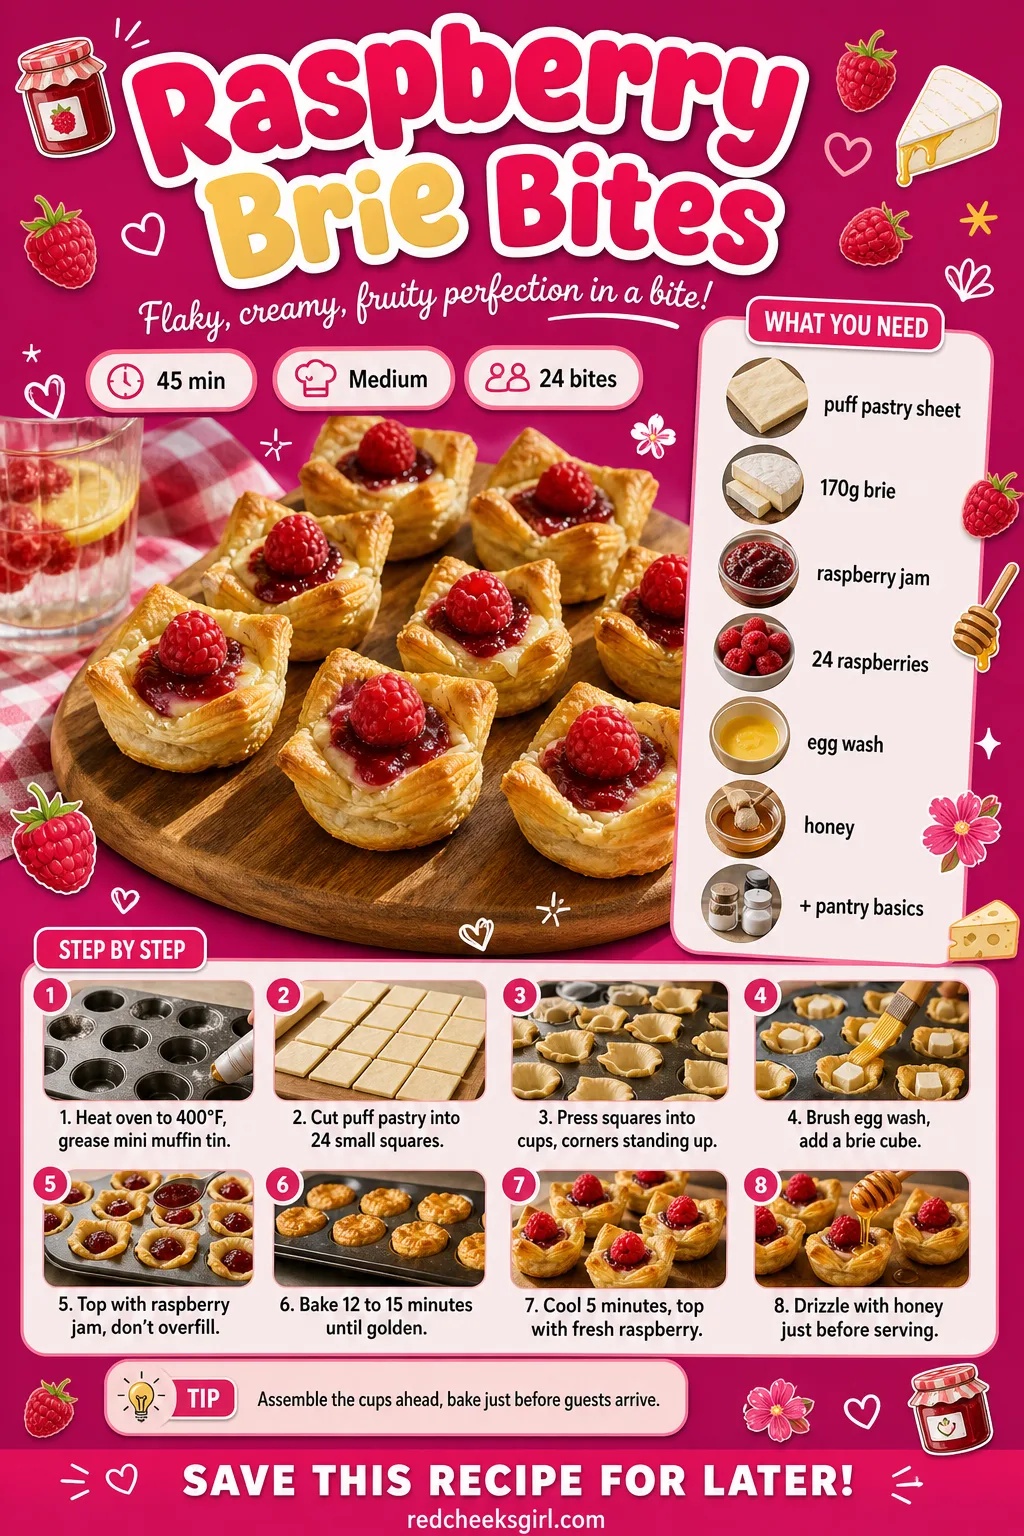
Raspberry Brie Bites
Baked brie alone asks for a knife, a board and someone hovering nearby to stop it collapsing. Tuck the same melt into a pastry cup instead and it becomes a one-bite, no-plate-needed version that holds its shape walking across a room.
Assemble the cups up to a day ahead and keep them in the fridge unbaked, then slide the tray in twenty minutes before anyone arrives. The jam turns almost jewel-like against the white pastry, which photographs better than it has any right to for something this easy.
Ingredients
- 1 sheet (about 245 g) puff pastry, thawed
- 170 g wheel of brie, cut into 24 small cubes
- 1/3 cup (100 g) raspberry jam
- 24 fresh raspberries
- 1 egg, beaten (for egg wash)
- fresh thyme leaves or mint, for garnish
- 1 tablespoon honey, for drizzling
Instructions
- Heat the oven to 400°F (200°C) and lightly grease a 24-cup mini muffin tin.
- Unroll the puff pastry on a floured surface and roll it very slightly thinner with a rolling pin, just enough to even out the folds.
- Cut the sheet into 24 small squares, about 1.5 inches per side, using a knife or pizza cutter.
- Press one square into each muffin cup, pushing it down into the bottom and up the sides so the corners stand up like little flags; a square that isn’t pressed fully in will slump sideways as it bakes.
- Brush the inside edges lightly with beaten egg, then drop a cube of brie into each cup.
- Spoon about half a teaspoon of raspberry jam on top of the brie in each cup; don’t overfill, it will bubble up and over a full cup.
- Bake 12 to 15 minutes, until the pastry corners are deep golden and the cheese has melted into a soft pool around the jam.
- Let the bites cool in the tin for 5 minutes; the pastry is too fragile to lift straight from the oven and will tear.
- Run a small knife around the edges and lift each bite out onto a serving board.
- Top each warm bite with a fresh raspberry pressed lightly into the melted cheese, then a few thyme leaves.
- Finish with a light drizzle of honey over the whole tray just before serving, which keeps the pastry from going soft if drizzled too early.
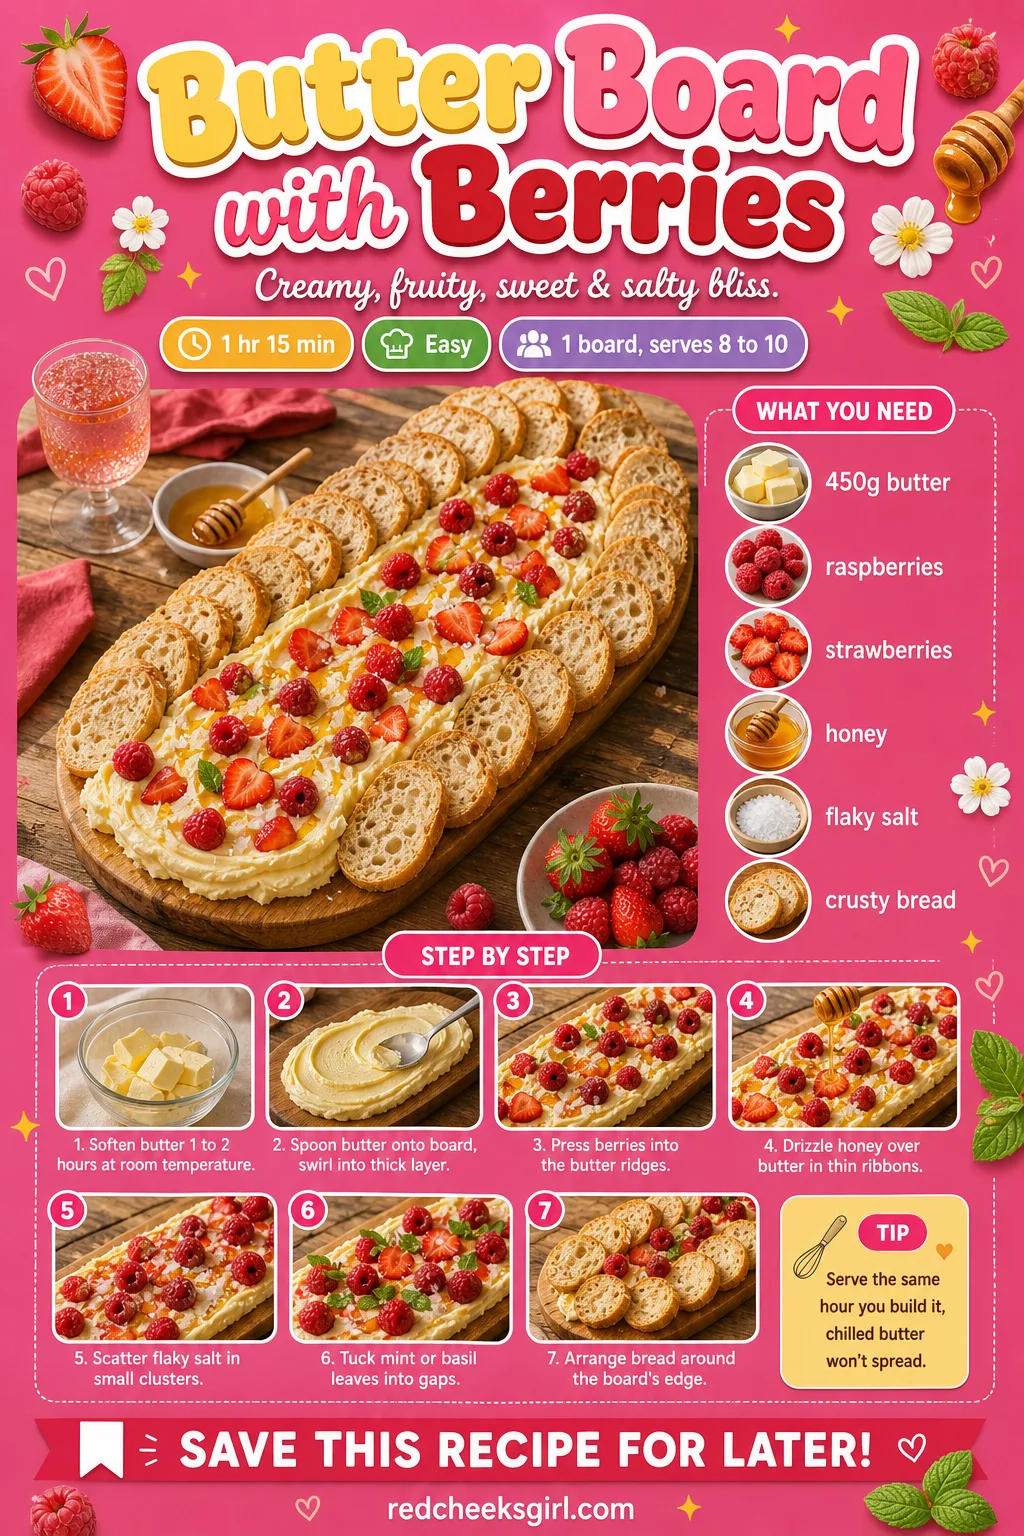
Butter Board with Berries
A butter board sounds strange until it sits in front of someone with warm bread in her hand. The cold, slightly salty butter melts against the bread the second it touches it, and the berries pressed into the swirls add a sharp, sweet hit that plain butter never gives.
This is the cheapest thing on the whole table by a wide margin, a block of butter and a punnet of berries, dressed up with a drizzle of honey. Build it no more than an hour before guests arrive, chilled butter refuses to spread and the whole point is lost.
Ingredients
- 450 g (2 cups) unsalted butter, very soft
- 1 cup (150 g) mixed raspberries and sliced strawberries
- 2 tablespoons honey
- 1 teaspoon flaky sea salt
- small handful fresh mint or basil leaves
- 1 baguette, sliced, for serving
Instructions
- Let the butter sit at room temperature for 1 to 2 hours before you start, until a finger pressed into it leaves a dent without resistance; cold butter tears instead of spreading.
- Choose a wooden board or large flat platter at least 12 inches long, the base every other layer sits on.
- Spoon the soft butter onto the center of the board in large dollops.
- Using the back of a spoon, swipe and swirl the butter outward into one thick, uneven layer across the middle two-thirds of the board, leaving raised ridges, not a flat sheet; the texture is what catches the toppings.
- Press the raspberries and sliced strawberries into the ridges of butter at intervals, pushing just enough that they sit half-sunk and won’t roll off.
- Drizzle the honey over the whole surface in thin ribbons, following the swirls rather than pooling in one spot.
- Scatter the flaky salt over the berries and butter; it should land in small clusters, not an even dusting, so some bites are saltier than others.
- Tuck whole mint or basil leaves into gaps between the berries, laying them flat so they read from above.
- Arrange the sliced bread around the outer third of the board, overlapping it like shingles and leaning a few pieces into the butter’s edge.
- Serve within the hour at room temperature; butter that goes back in the fridge seizes and won’t spread off a knife.
🛍 Shopping guide
Conversation Heart Sugar Cookies
Conversation hearts from a bag taste like chalk and say things nobody actually means. A real sugar cookie in the same shape, iced and lettered by hand, tastes the way the candy always promised to and lets you write something that’s actually true, like “CALL ME” or “MY TREAT!”
Chill the dough properly or the hearts spread into soft blobs with no point left.
Ice and letter them two days ahead if the party falls on a weeknight, they keep well in a single layer, and set the plate out next to the 72 Truth or Dare Questions for a Group of Friends if the conversation needs a nudge once everyone’s eaten their words.
Ingredients
- 2 3/4 cups (345 g) all-purpose flour
- 1/2 teaspoon baking powder
- 1/4 teaspoon salt
- 1 cup (225 g) unsalted butter, softened
- 1 1/2 cups (300 g) granulated sugar
- 1 large egg
- 1 teaspoon vanilla extract
- a few drops pink and red gel food coloring (optional)
- 2 cups (240 g) powdered sugar, for icing
- 2 to 3 tablespoons milk, for icing
- edible food pens, for lettering
Instructions
- Whisk the flour, baking powder and salt together in a bowl and set aside.
- Beat the butter and sugar together on medium speed for 2 to 3 minutes, until visibly pale and fluffy, not just combined.
- Beat in the egg and vanilla until smooth, then add the flour mixture in two additions, mixing just until the dough comes together and pulls cleanly from the side of the bowl.
- Divide the dough in half; if you want pastel colors, knead a few drops of gel coloring into each half until even, with no streaks.
- Flatten each half into a disc, wrap in plastic, and chill at least 1 hour and up to 2 days; this is the step that keeps the hearts from spreading into blobs in the oven.
- Heat the oven to 350°F (175°C) and line two baking sheets with parchment.
- Roll the chilled dough on a floured surface to a quarter-inch thickness and cut out hearts with a 2-inch cutter, re-rolling scraps once.
- Space the hearts 1 inch apart and bake 9 to 11 minutes, until the edges are just barely golden and the centers look set but pale; overbaking turns these hard instead of tender.
- Cool the cookies on the sheet 5 minutes, then move to a wire rack to cool completely before icing; warm cookies melt the icing into a puddle.
- Whisk the powdered sugar with the milk, a teaspoon at a time, until the icing is thick but pourable, like heavy cream, and ribbons back into itself slowly when you lift the whisk.
- Spread a thin layer of icing over each cooled cookie and let it set until matte, about 20 minutes.
- Once the base coat is dry, write short phrases across each heart with a food pen, then let the lettering set another 15 minutes before stacking.

🛍 Shopping guide
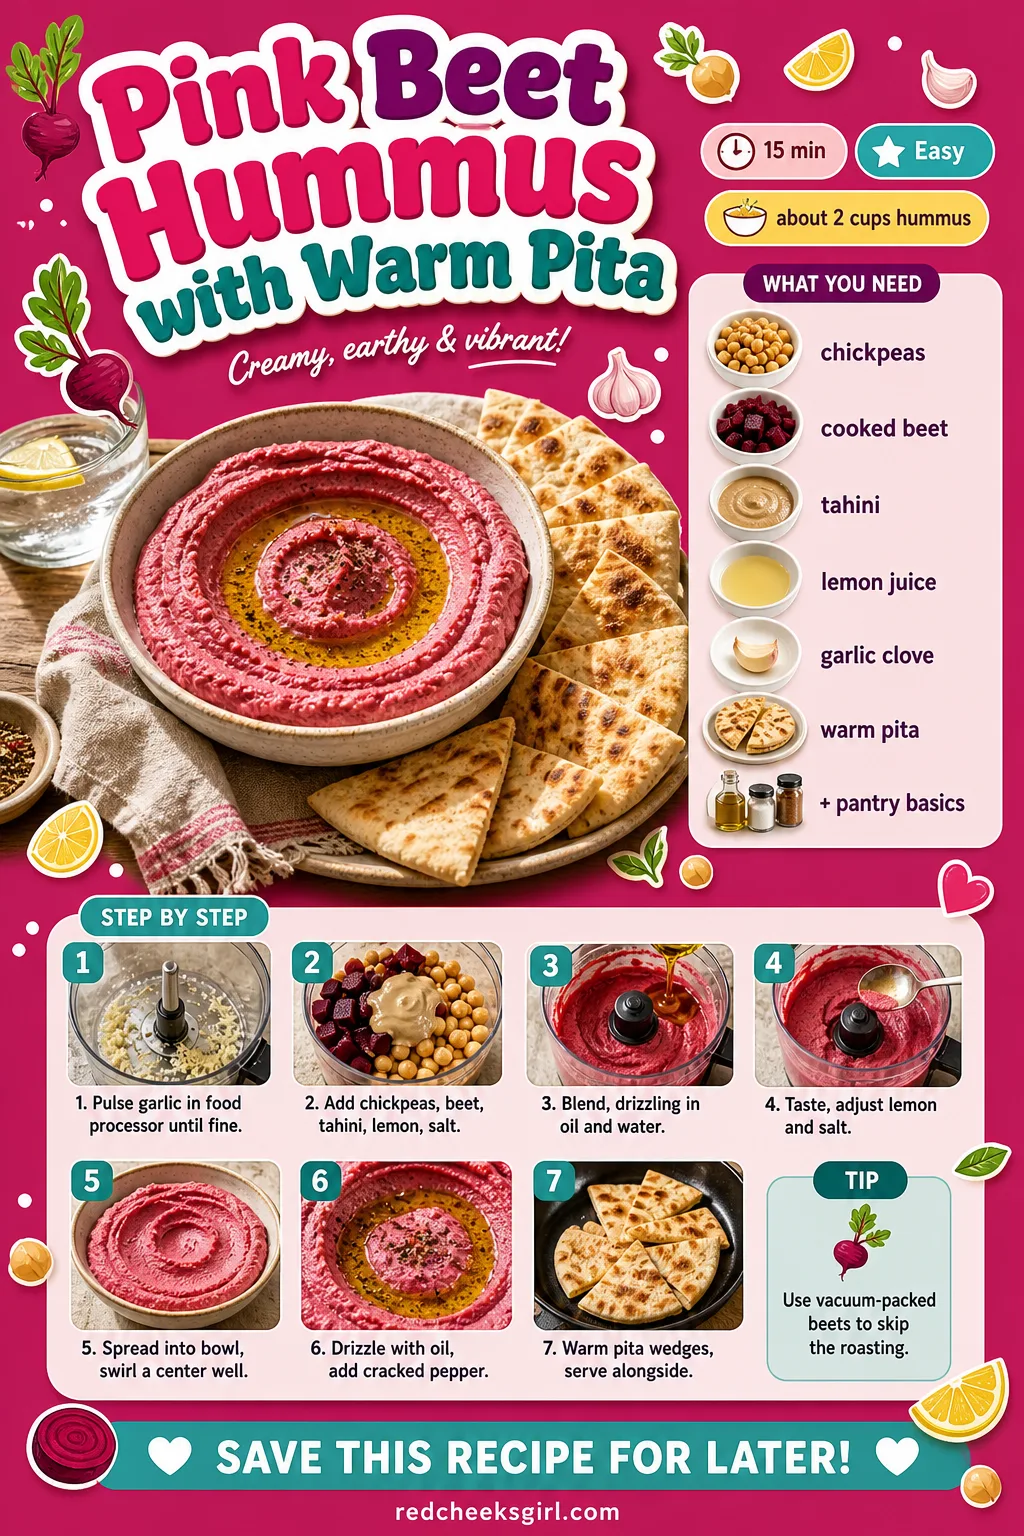
Pink Beet Hummus with Warm Pita
Hummus is the dip everyone brings and nobody remembers, until it turns up a deep, startling rose with no artificial color in sight. The beet barely changes the flavor, it just makes the same garlicky, nutty dip impossible to ignore on a buffet table.
Use a vacuum-packed beet from the produce aisle if roasting your own feels like one step too many, the color comes out the same. It keeps covered in the fridge for three days, so make it whenever the week allows and warm the pita only right before serving.
Ingredients
- 1 can (400 g) chickpeas, drained and rinsed
- 1 small cooked beet (about 100 g), peeled and quartered
- 1/4 cup (60 g) tahini
- 2 tablespoons lemon juice
- 1 clove garlic
- 2 tablespoons olive oil, plus more for drizzling
- 1/2 teaspoon salt
- warm pita, cut into wedges, for serving
Instructions
- Drop the garlic clove into a food processor first and pulse a few times on its own, so it minces fine instead of leaving big bits through the dip.
- Add the chickpeas, beet, tahini, lemon juice and salt, and blend for a full minute, scraping down the sides halfway.
- With the motor running, drizzle in the olive oil and 2 to 3 tablespoons of water, a little at a time, until the hummus turns light and whips into soft peaks rather than sitting in a stiff ball.
- Taste and adjust, more lemon for brightness, more salt if the pink still tastes flat; the color should be a solid rose, not streaky, by now.
- Spread the hummus into a shallow bowl with the back of a spoon, swirling a well into the center.
- Drizzle olive oil into the well and finish with a crack of pepper.
- Warm the pita wedges in a dry skillet or a 350°F oven for 3 to 4 minutes, until they puff slightly and turn spotty, then serve alongside while still warm.
Watermelon Feta Mint Bites
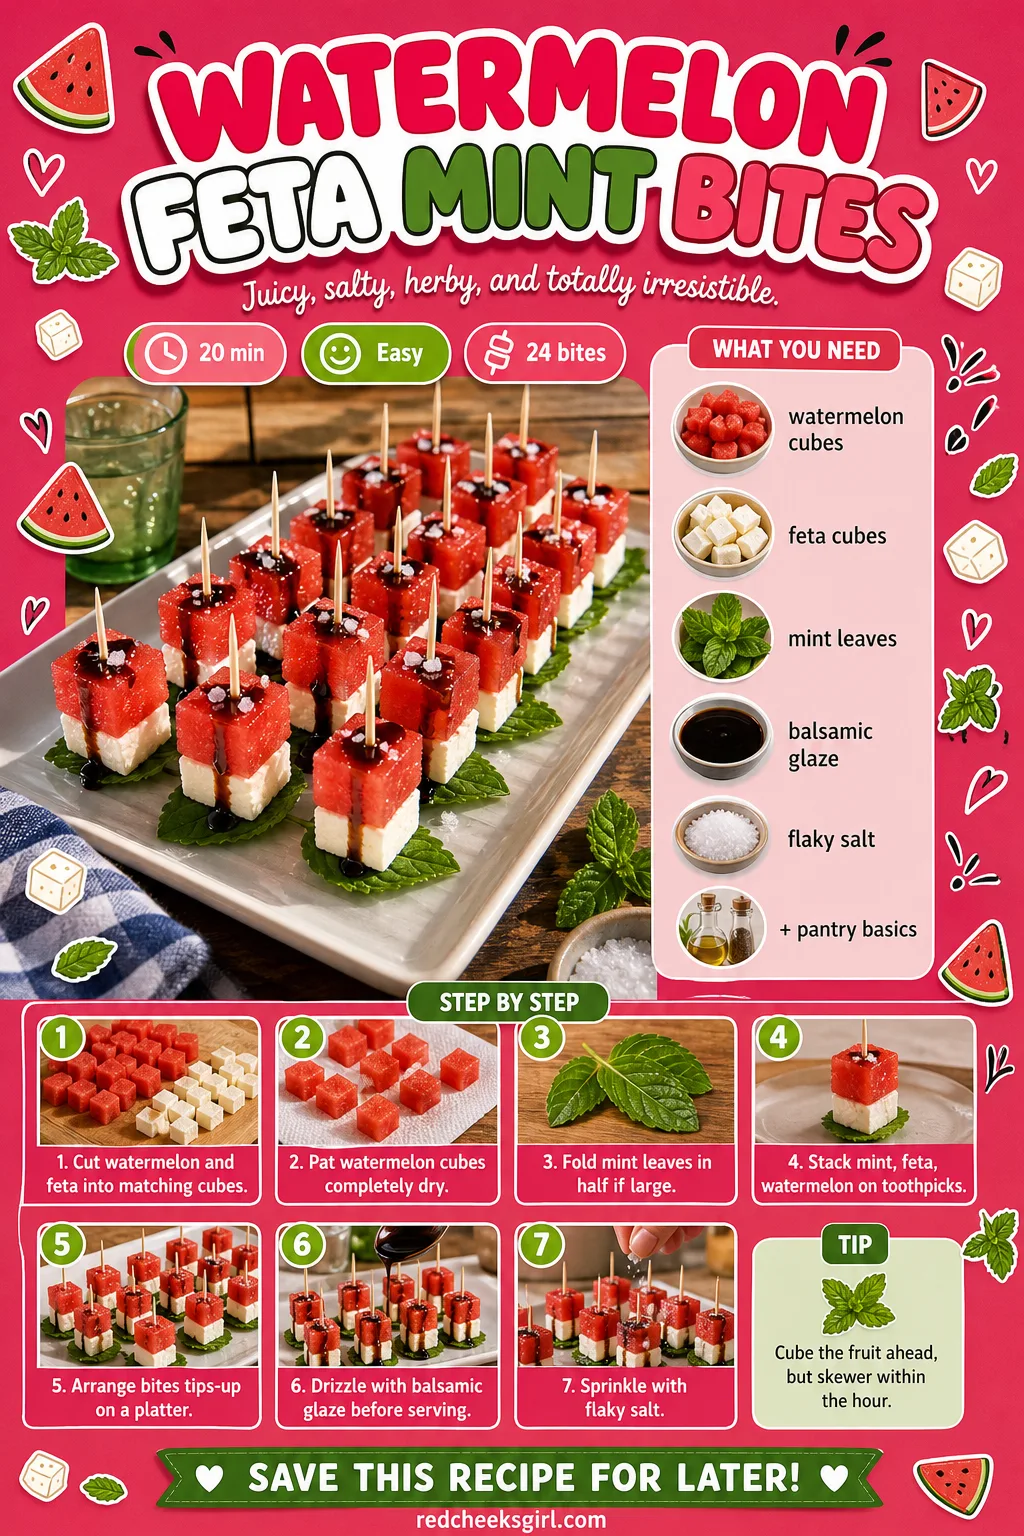
Watermelon and feta sounds like a summer combination that has no business at a February party, until you remember most supermarkets stock decent watermelon year round. The cold, juicy fruit against salty cheese is the one bite on the table that actually cools the mouth down between the richer things.
Cube the fruit and cheese the morning of if you like, but don’t skewer until closer to serving, watermelon weeps once it’s pierced. If mint isn’t to hand, a small basil leaf does the same job.
Ingredients
- 450 g watermelon, cut into 24 small cubes
- 115 g feta, cut into 24 small cubes
- 24 small mint leaves
- 2 tablespoons balsamic glaze
- pinch of flaky salt
- 24 toothpicks
Instructions
- Cut the watermelon flesh into cubes slightly larger than the feta, about three-quarters of an inch, trimming away any seeds as you go.
- Cut the feta into similarly sized cubes, keeping them a touch smaller so they don’t overwhelm the watermelon.
- Pat the watermelon cubes dry with a paper towel; wet fruit slides right off a toothpick and leaves pink puddles on the tray.
- Fold each mint leaf in half if it’s large, so it sits neatly rather than draping off the pick.
- Stack one mint leaf, then a feta cube, then a watermelon cube onto each toothpick, pushing through the center so the stack sits straight and doesn’t tip sideways.
- Arrange the finished bites on a platter in tight rows, watermelon tips facing up, so the pink reads as one solid block of color.
- Drizzle balsamic glaze over the top in thin lines right before serving; drizzled too early, it pools and turns the watermelon soggy.
- Finish with a small pinch of flaky salt scattered over the whole platter.
Strawberry Goat Cheese Crostini
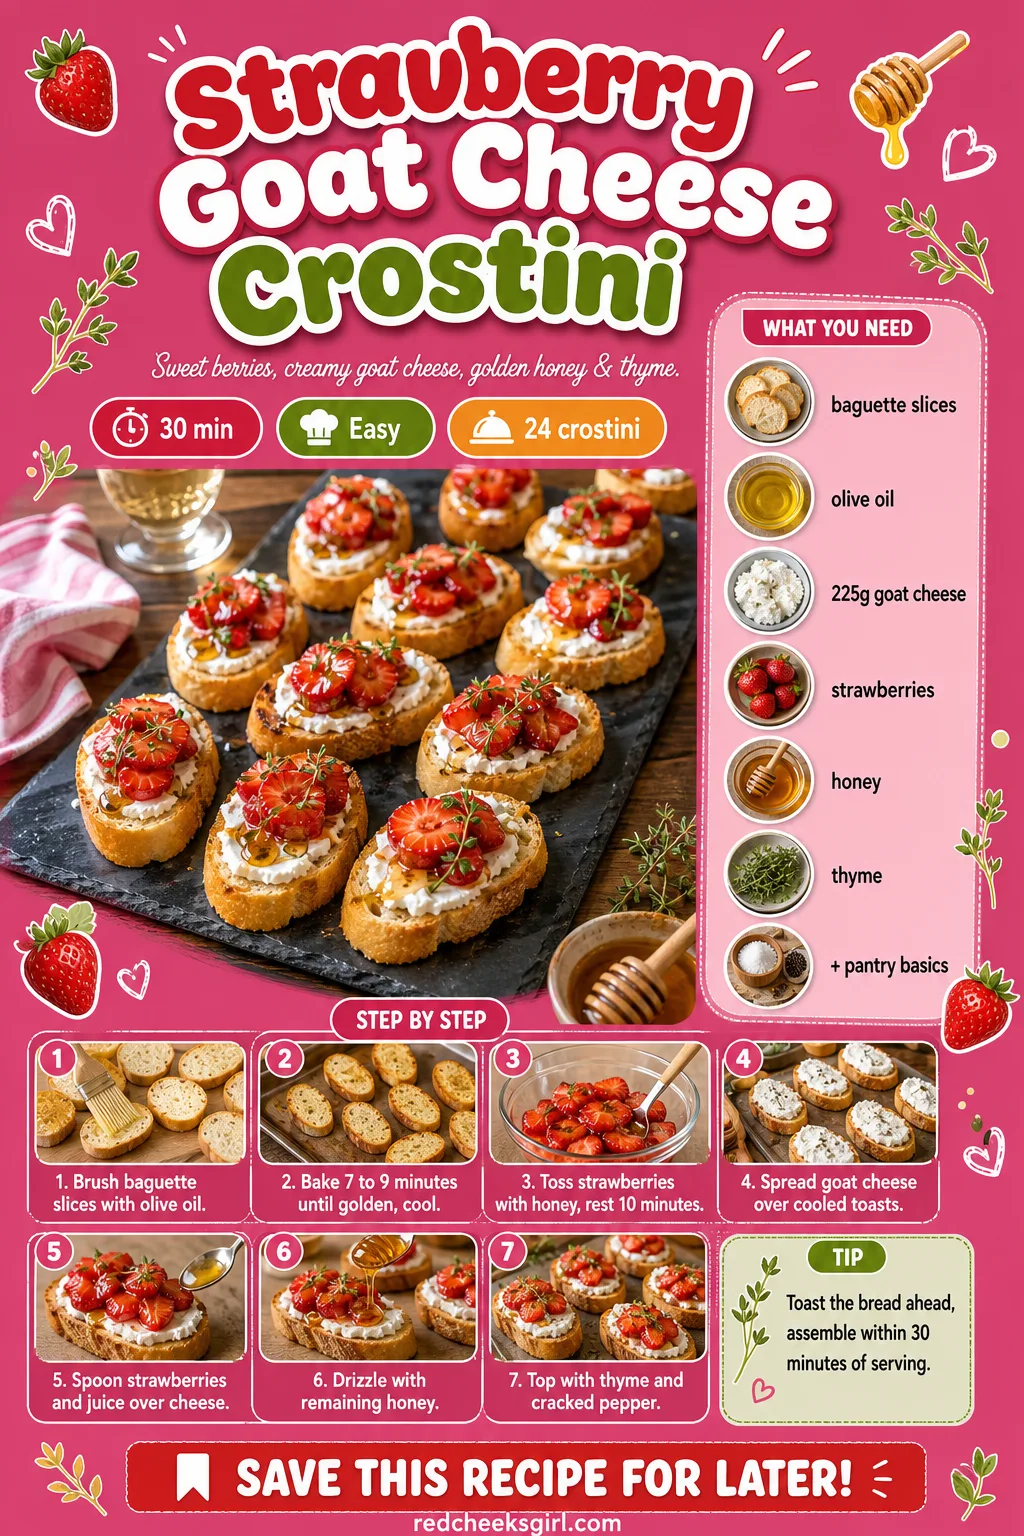
Crostini gets written off as a dinner party cliche, fair enough, until the goat cheese underneath turns tangy against berries that have had ten minutes to macerate into their own syrup. The bread stays crisp enough to hold the weight without collapsing into crumbs down someone’s front.
Toast the bread the morning of and store it uncovered at room temperature, then build the toppings no more than half an hour before anyone eats. Swap the strawberries for sliced figs if they’re out of season where you are and the bite still works.
Ingredients
- 1 baguette, sliced into 24 rounds
- 2 tablespoons olive oil
- 225 g soft goat cheese, room temperature
- 2 cups (300 g) strawberries, hulled and diced small
- 3 tablespoons honey
- fresh thyme or basil, for garnish
- black pepper
Instructions
- Heat the oven to 375°F (190°C) and arrange the baguette slices on a baking sheet in a single layer.
- Brush both sides of each slice lightly with olive oil.
- Bake 7 to 9 minutes, flipping once halfway, until both sides are golden and the centers feel crisp rather than soft when pressed.
- Let the toasts cool 5 minutes on the sheet; warm bread melts the goat cheese into a puddle instead of holding a swipe.
- While the toasts cool, stir the diced strawberries with 1 tablespoon of the honey in a small bowl, and let sit 10 minutes so they release juice and turn glossy.
- Spread a thick swipe of goat cheese across each cooled toast, right to the edges.
- Spoon the strawberries and their juice over the goat cheese, a small mound per toast rather than a flat layer.
- Drizzle the remaining honey over the top in a thin zigzag.
- Finish with a few thyme leaves or torn basil and a light crack of black pepper.
- Serve within 30 minutes of assembling; the bread stays crisp only so long once topped.
Prosciutto Rose Crostini
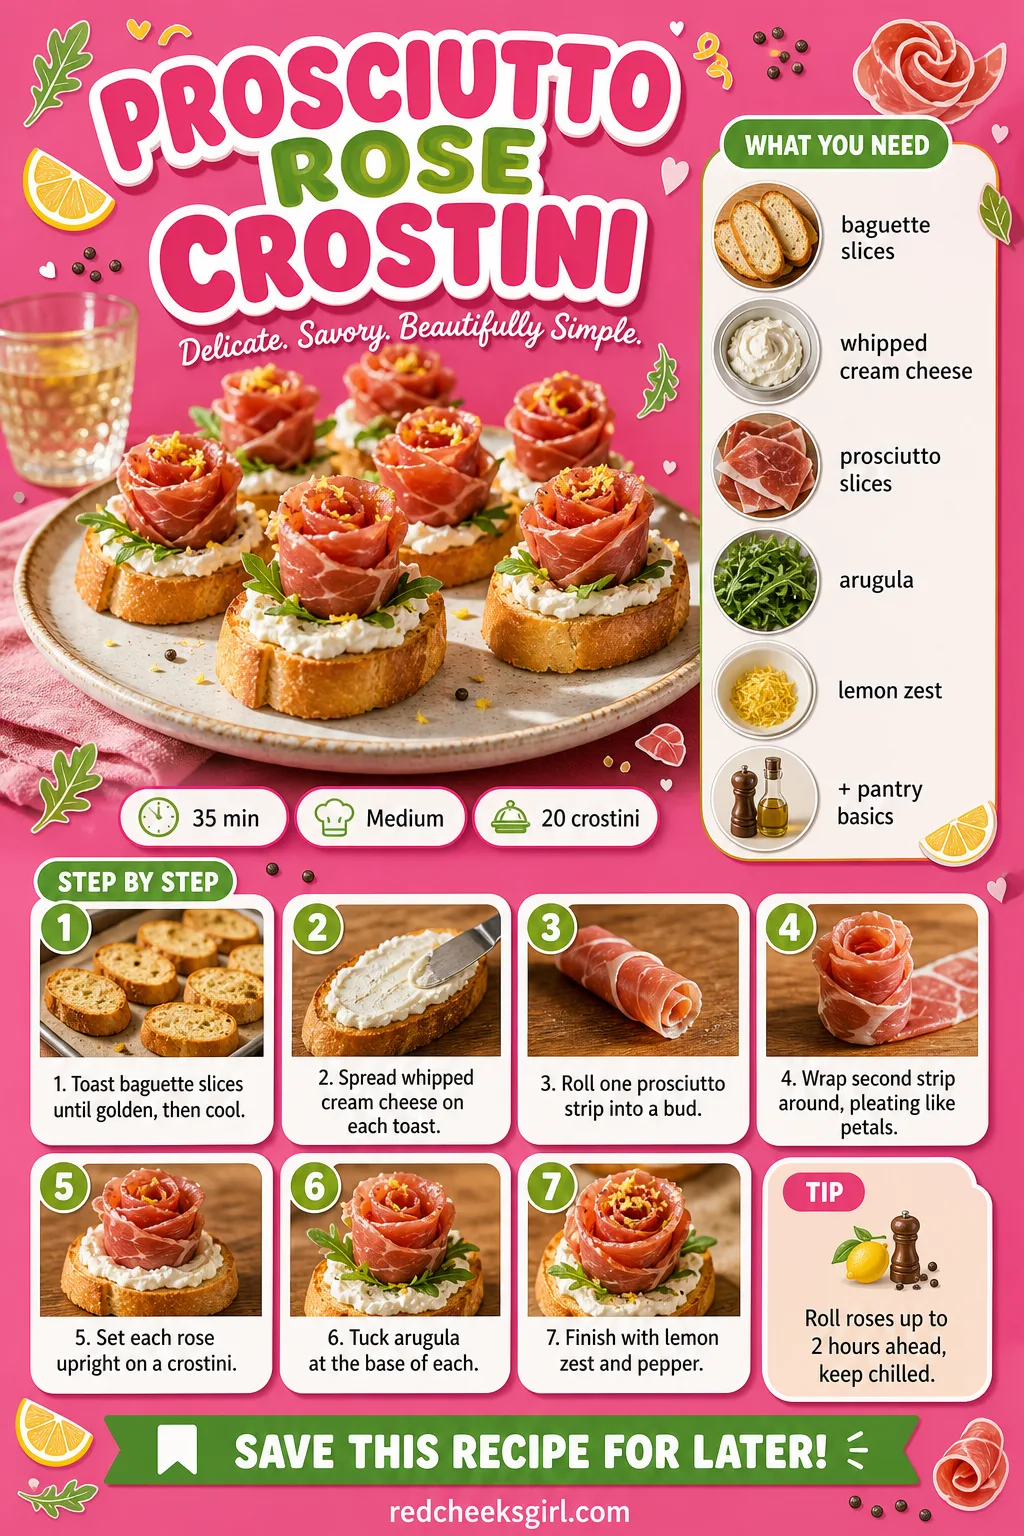
A rose folded out of prosciutto looks like it needed a course at culinary school, it didn’t. Two thin strips, rolled and pleated, stand up on their own and catch the light the way a real flower does, while the meat stays salty and slightly sweet against the whipped cheese underneath.
Roll the roses up to two hours ahead and keep them covered and cold, any longer and the edges dry out and curl the wrong way. If prosciutto isn’t in the budget this month, thin salami folds into a similar shape for less.
Ingredients
- 1 baguette, sliced into 20 rounds
- 2 tablespoons olive oil
- 170 g whipped cream cheese or mascarpone
- 10 thin slices prosciutto, halved lengthwise
- small handful arugula or microgreens
- black pepper
- zest of 1/2 lemon
Instructions
- Heat the oven to 375°F (190°C), arrange baguette slices on a sheet, brush with olive oil, and bake 7 to 9 minutes until golden and crisp at the edges.
- Let the toasts cool completely; warm bread will make the roses wilt and flatten.
- Spread a thin layer of whipped cream cheese on each toast.
- Lay one prosciutto strip flat and roll it tightly from one short end to the other, like rolling a tiny rug, to form the center bud of the rose.
- Take a second strip and wrap it loosely around the first roll, pleating the top edge outward with your fingers so it ruffles like petals, then pinch the base to hold the shape.
- Set each prosciutto rose upright on a crostini, pressing gently into the cream cheese so it stands without tipping.
- Tuck a small piece of arugula or a few microgreens at the base of each rose, like a leaf.
- Finish with a light grating of lemon zest and a crack of black pepper over the platter, then serve within an hour so the prosciutto doesn’t dry out and curl.
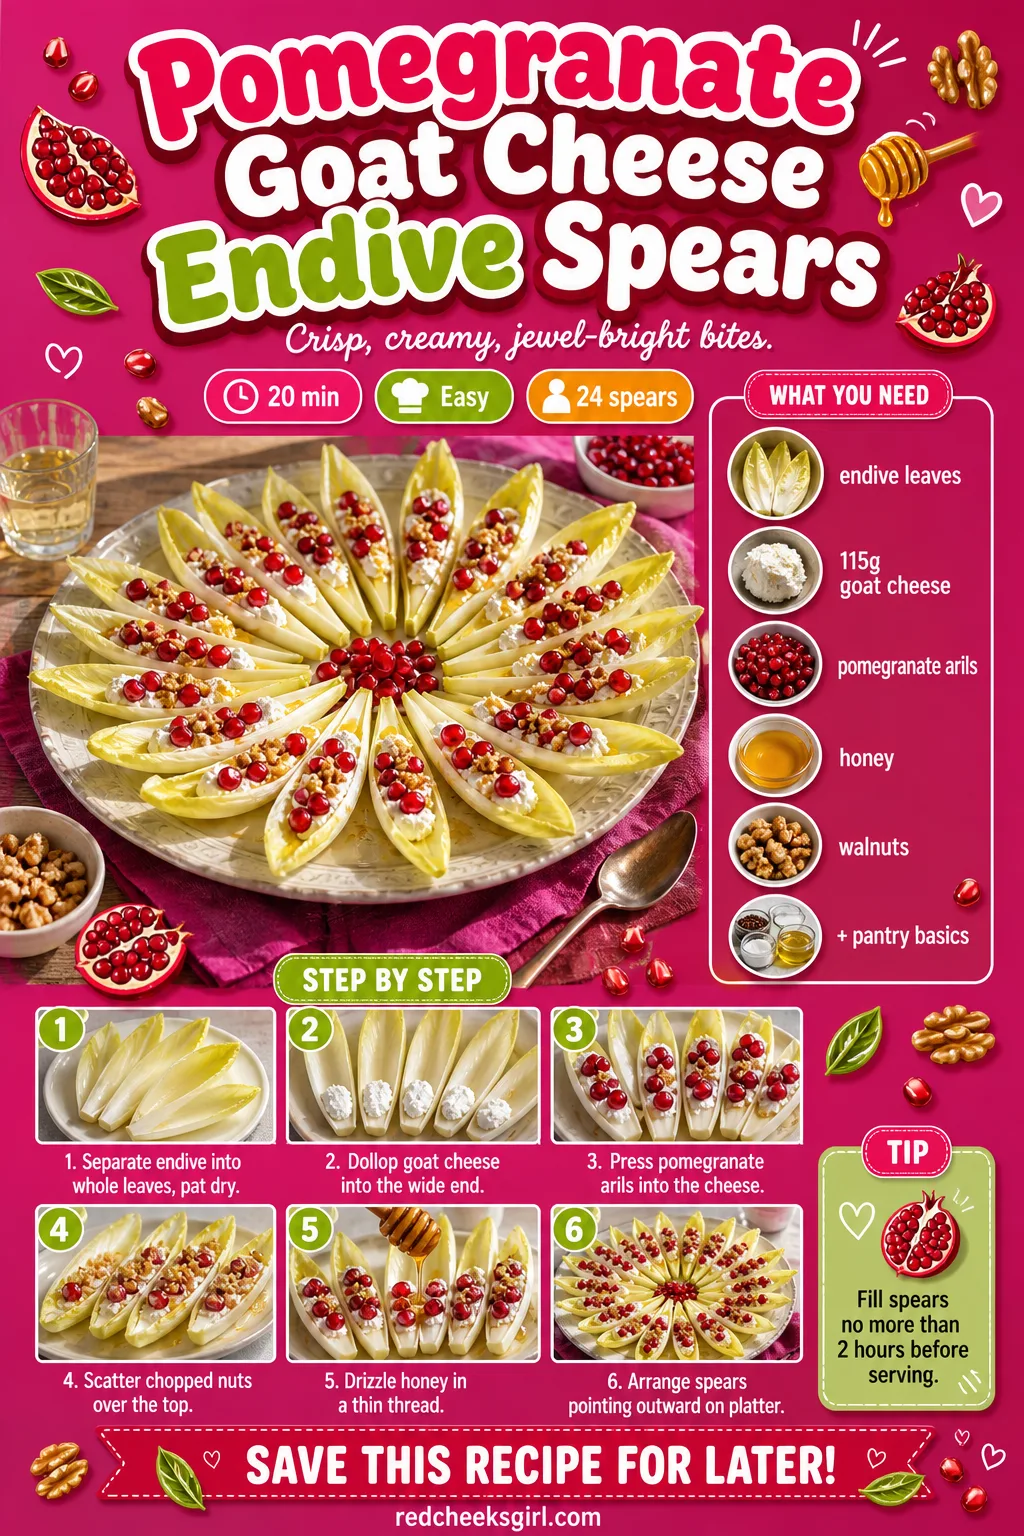
Pomegranate Goat Cheese Endive Spears
Endive looks fussy sitting there in its pale little boats, but it needs nothing more than a spoon and a handful of pomegranate to look like it came from somewhere expensive. Each leaf gives a clean, bitter snap that cuts through the sweet, creamy filling instead of fighting it.
Pull the arils from a whole pomegranate the night before and keep them in the fridge, they’re the only slow part of this one. Fill the spears within two hours of the party starting, limp endive is the one thing that gives away how long something sat out.
Ingredients
- 3 heads Belgian endive, leaves separated (about 24 leaves)
- 115 g soft goat cheese
- 1/2 cup (90 g) pomegranate arils
- 2 tablespoons honey
- 2 tablespoons chopped walnuts or pistachios
- small handful fresh thyme leaves
Instructions
- Trim the base of each endive head just enough to separate the leaves without cutting all the way through, so each spear keeps its natural curved boat shape.
- Rinse the leaves gently and pat them completely dry; water pooling in the curve will dilute the toppings.
- Spoon a small dollop of goat cheese into the wide end of each leaf, pressing gently so it stays in the curve rather than sliding to the point.
- Press a few pomegranate arils into the cheese on each leaf.
- Scatter the chopped nuts over the top, a few pieces per spear, then drizzle honey over the filled leaves in a thin thread.
- Finish with a few thyme leaves and arrange the spears pointing outward on a round platter, like spokes on a wheel.
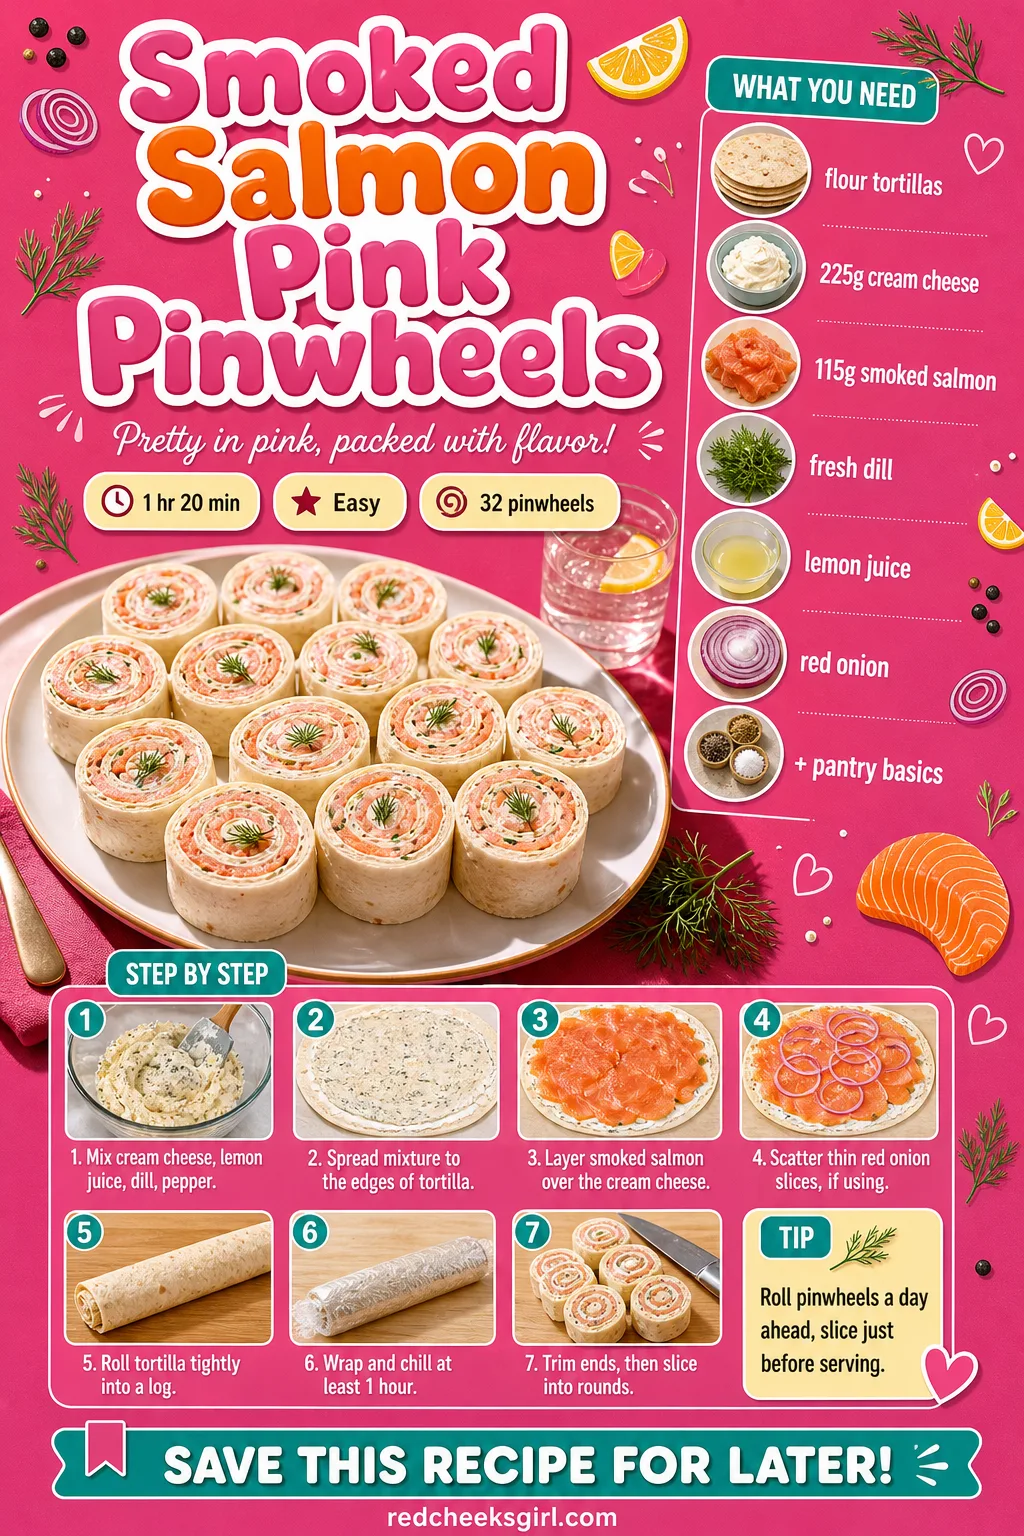
Smoked Salmon Pink Pinwheels
Pinwheels can look like something from a 1990s buffet table if the filling is too thick or the roll too loose. Done properly, the spiral of pale pink salmon against cream cheese looks deliberate, and the texture goes soft and cold against a slightly chewy wrap.
Roll the logs the day before and keep them wrapped tight in the fridge, slicing cold is the only way to get a clean spiral instead of a smear. Swap in smoked trout if salmon is pricier than the rest of the spread this month.
Ingredients
- 4 large flour tortillas (10-inch)
- 225 g cream cheese, softened
- 115 g smoked salmon, thinly sliced
- 2 tablespoons fresh dill, chopped, plus sprigs for garnish
- 1 tablespoon lemon juice
- 1/4 small red onion, very thinly sliced (optional)
- 1/4 teaspoon black pepper
Instructions
- Beat the cream cheese, lemon juice, dill and pepper together until smooth and spreadable, with no cold lumps left.
- Lay a tortilla flat and spread an even, thin layer of the cream cheese mixture all the way to the edges; a thick center with bare edges makes the outer pinwheels fall apart.
- Lay the smoked salmon slices over the cream cheese in a single overlapping layer, covering the whole tortilla.
- Scatter the thin red onion slices over the salmon, if using, keeping them sparse so they don’t tear the wrap when you roll it.
- Starting from the edge closest to you, roll the tortilla into a tight log, rolling slowly and evening out any air pockets; a loose roll unravels when sliced.
- Wrap each rolled log tightly in plastic wrap, twisting the ends like a candy wrapper, and chill at least 1 hour and up to a day; this is what keeps the pinwheels from falling open under the knife.
- Unwrap and trim the ragged ends off each log with a sharp knife.
- Slice the log crosswise into half-inch rounds, wiping the blade clean between cuts so the filling doesn’t smear across the pink spiral.
- Arrange the pinwheels cut-side up on a platter and tuck a small dill sprig into the center of a few for garnish.
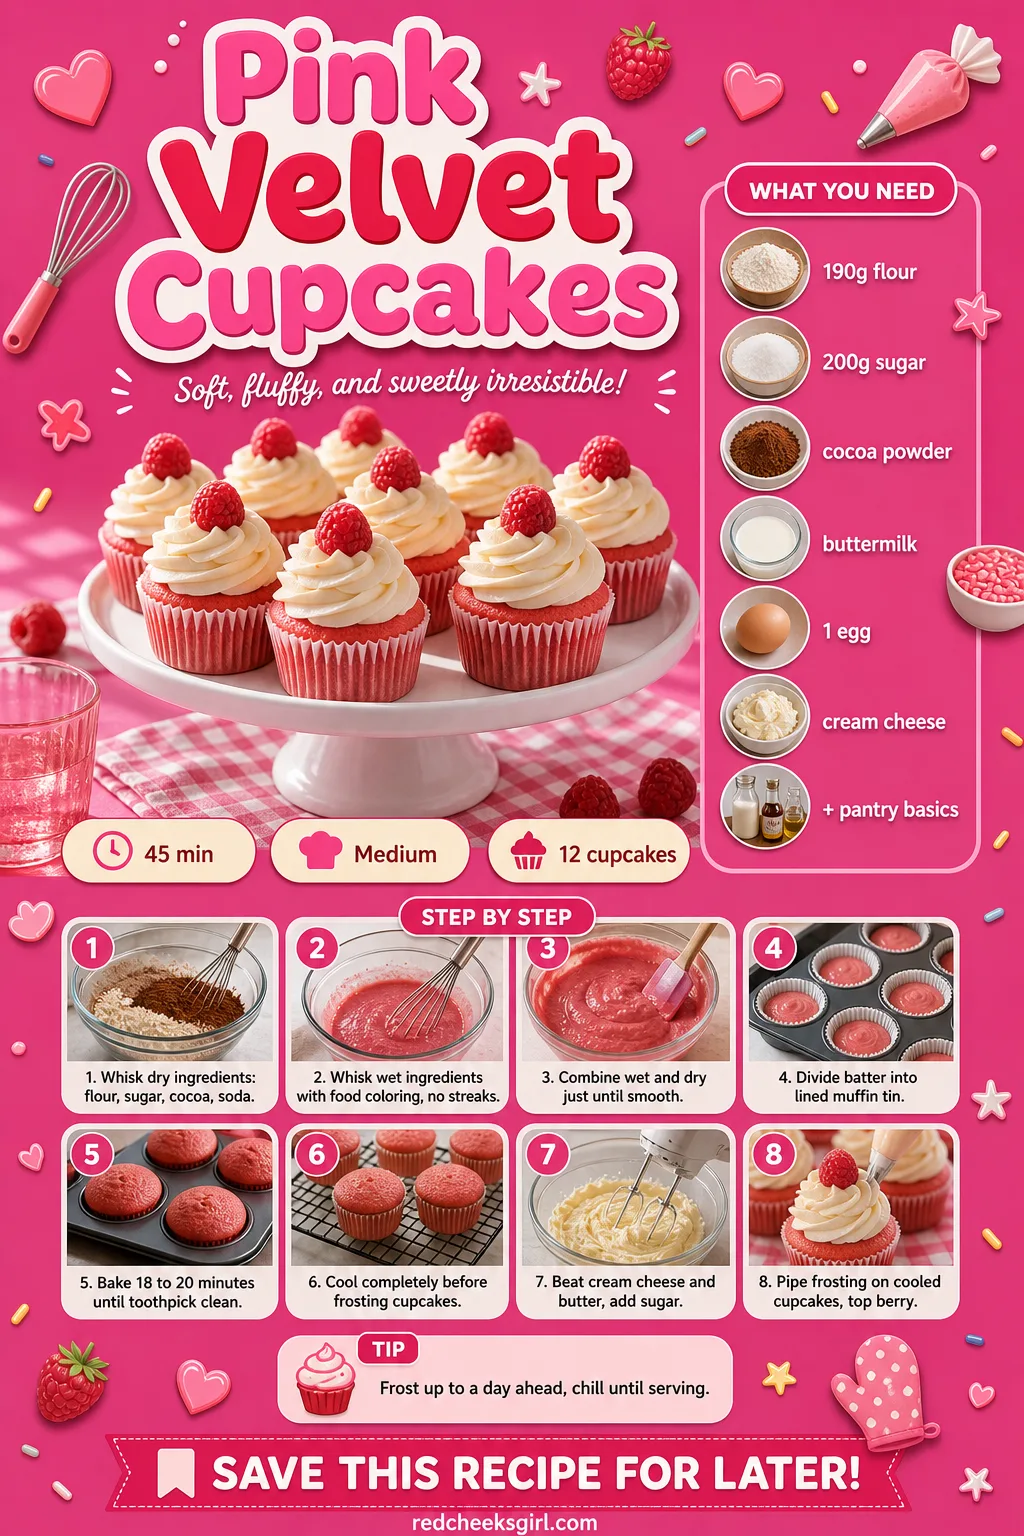
Pink Velvet Cupcakes
Red velvet gets all the attention, but turn the same base a shade lighter and it feels built for this specific night rather than borrowed from Christmas. The crumb stays soft and faintly chocolatey under a layer of cream cheese frosting that tastes sharper than plain buttercream.
Frost them the morning of the party and keep the tray in the fridge, they soften back to room temperature in under an hour on the counter. Gel food coloring gives the cleanest pink, liquid coloring waters the batter down and dulls the shade.
Ingredients
- 1 1/2 cups (190 g) all-purpose flour
- 1 cup (200 g) granulated sugar
- 1/2 teaspoon baking soda
- 1/2 teaspoon salt
- 1 tablespoon unsweetened cocoa powder
- 1/2 cup (120 ml) vegetable oil
- 1/2 cup (120 ml) buttermilk
- 1 large egg
- 1 teaspoon vanilla extract
- 1 teaspoon white vinegar
- 1 to 2 teaspoons pink or red gel food coloring
- 225 g cream cheese, for frosting
- 115 g butter, for frosting
- 3 cups (360 g) powdered sugar, for frosting
Instructions
- Heat the oven to 350°F (175°C) and line a 12-cup muffin tin with paper liners.
- Whisk the flour, sugar, baking soda, salt and cocoa powder together in a large bowl.
- In a separate bowl, whisk the oil, buttermilk, egg, vanilla, vinegar and food coloring together until the color is even, with no streaks of white.
- Pour the wet mixture into the dry and whisk just until combined and smooth; the batter should fall off the whisk in a thick ribbon, and overmixing makes the cupcakes tough.
- Divide the batter evenly between the liners, filling each about two-thirds full.
- Bake 18 to 20 minutes, until a toothpick inserted in the center comes out clean and the tops spring back lightly when pressed.
- Cool the cupcakes in the tin 5 minutes, then move to a wire rack to cool completely; frosting warm cupcakes melts the frosting into a slide.
- Beat the cream cheese and butter together until smooth, 1 to 2 minutes, then add the powdered sugar in two additions, beating until light and fluffy and holding soft peaks.
- Once the cupcakes are fully cool, pipe or swirl the frosting on top in a tall peak.
- Finish with a sprinkle of pink sugar or a fresh raspberry pressed into the top of each one.
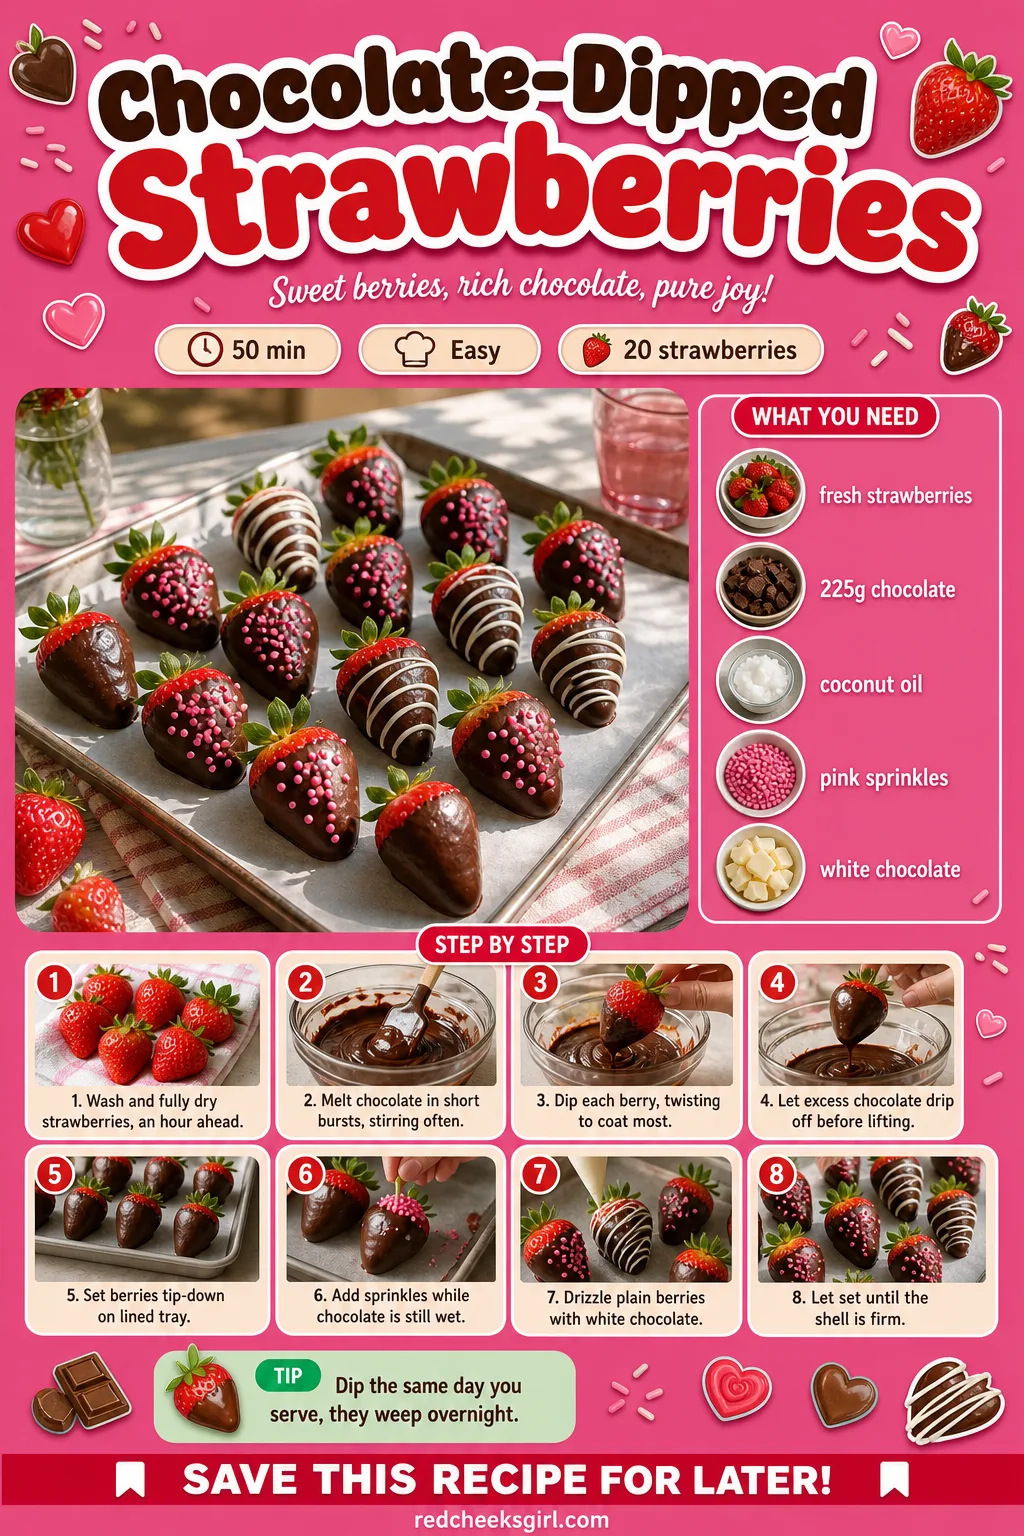
Chocolate-Dipped Strawberries
Nobody needs convincing on chocolate-dipped strawberries, they’re the one thing on this list every guest has made before. The only real risk is soggy chocolate sliding off a wet berry, which a few minutes with a towel solves completely.
Dip them the same day you plan to serve them, strawberries kept overnight in the fridge start to weep under the shell by morning. Let everyone dip their own as an activity if the group likes getting their hands into things, it’s cheap, it’s fast, and it keeps people in the kitchen talking.
Ingredients
- 450 g fresh strawberries (about 20), with stems, washed and completely dried
- 225 g good melting chocolate, chopped, or candy melts
- 1 teaspoon coconut oil or shortening (optional, for shine)
- pink sprinkles, for decorating
- 60 g white chocolate, melted, for drizzle (optional)
Instructions
- Wash the strawberries and lay them on a towel-lined tray at least an hour before dipping; any surface moisture will make the chocolate seize and slide right off.
- Line a baking sheet with parchment or wax paper and set it near your melting bowl.
- Melt the chocolate in short 20-second bursts in the microwave, stirring between each, until smooth and glossy; stir in the coconut oil now if using, it keeps the shell from cracking later.
- Hold each strawberry by the stem and dip it into the chocolate, twisting gently to coat about three-quarters of the berry and leave a little red showing near the stem.
- Let the excess chocolate drip back into the bowl for a few seconds before lifting the berry clear.
- Set each dipped strawberry on the lined tray, tip down, so the chocolate pools evenly instead of sliding to one side.
- While the first coat is still wet, scatter pink sprinkles over some of the berries; leave the rest plain for the drizzle in the next step.
- Melt the white chocolate separately and drizzle it over the plain berries with a spoon, working in thin back-and-forth lines.
- Let the berries set at room temperature 20 to 30 minutes, or in the fridge for 10, until the shell is hard enough to tap without leaving a fingerprint.
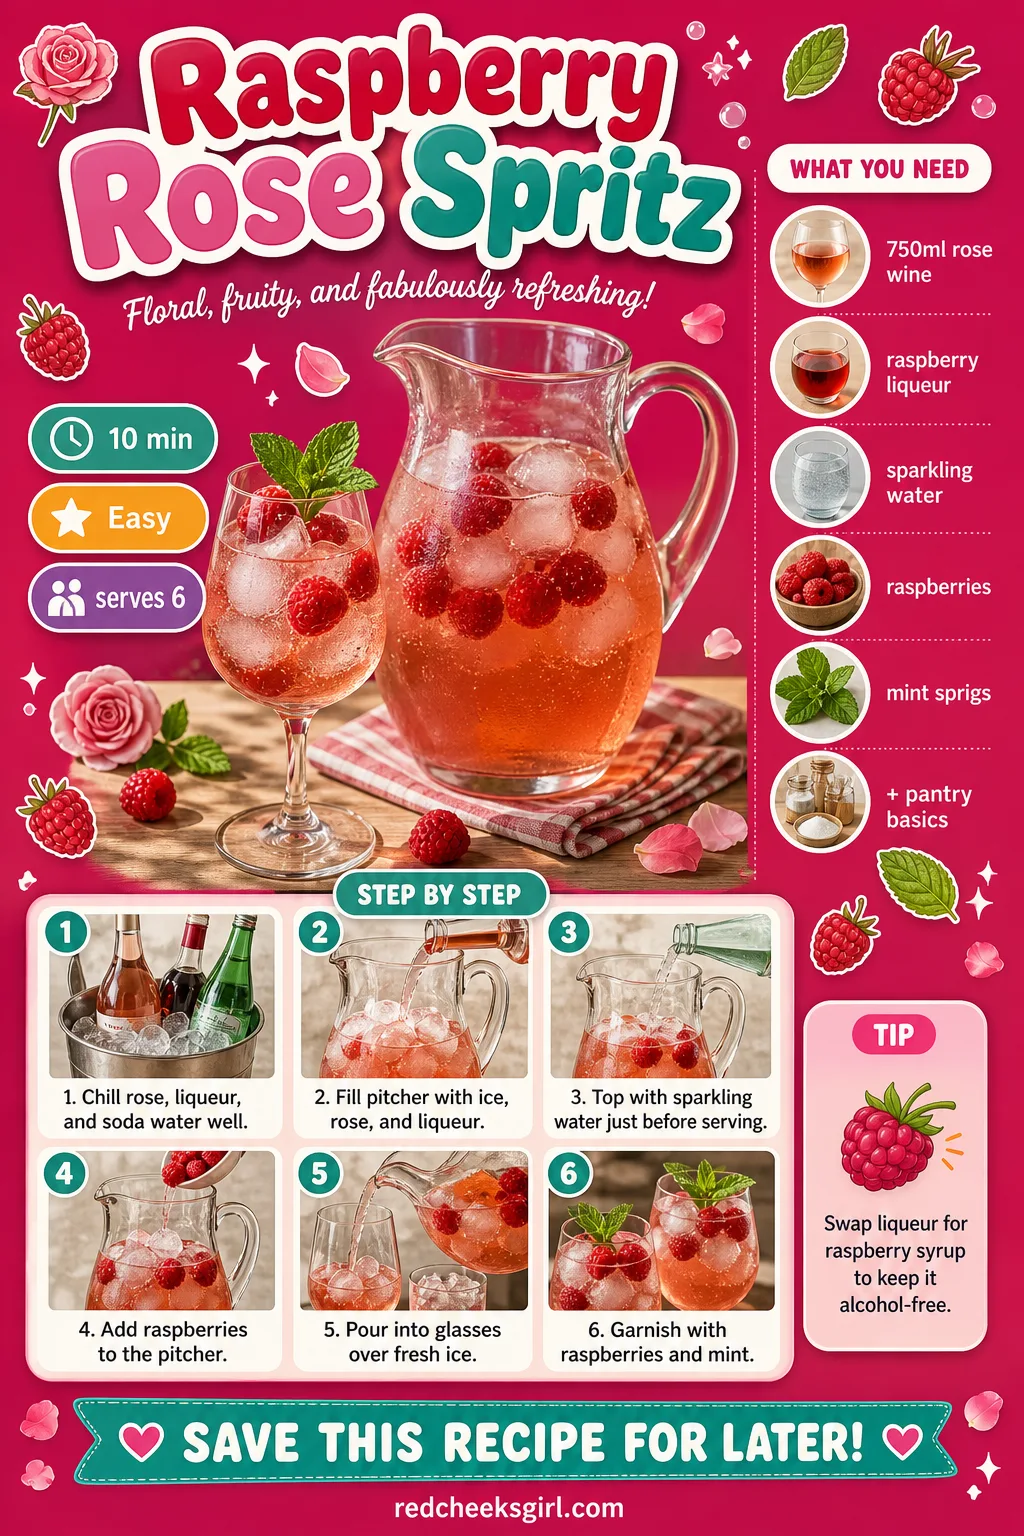
Raspberry Rose Spritz
A pitcher drink saves you from standing behind a bar cart mixing one glass at a time while everyone else is already seated. Rose wine and raspberry liqueur settle into something closer to a grown-up cordial than a sweet cocktail, with the soda keeping it light rather than syrupy.
Make this one for adults only, and keep a non-alcoholic version going alongside for anyone skipping wine tonight, swap the liqueur for raspberry syrup and it tastes nearly as good. Chill every bottle before mixing, warm liquid poured over ice waters a drink down before the first sip.
Ingredients
- 1 bottle (750 ml) chilled dry rose wine
- 1/2 cup (120 ml) raspberry liqueur (such as Chambord)
- 2 cups (480 ml) chilled sparkling water or soda water
- 1 cup (125 g) fresh raspberries
- 6 sprigs fresh mint
- ice
Instructions
- Chill the rose, liqueur and soda water in the fridge at least 2 hours before mixing; a cocktail built from warm bottles dilutes fast over ice.
- Fill a large pitcher halfway with ice, then pour in the rose and raspberry liqueur, stirring once or twice with a long spoon.
- Top with the sparkling water right before serving, pouring slowly down the side of the pitcher so it keeps its fizz instead of going flat.
- Drop half the raspberries into the pitcher so they float and bleed a little color into the drink.
- Pour into wine glasses or coupes filled with fresh ice, then finish each glass with a raspberry or two and a mint sprig for garnish.
🛍 Shopping guide
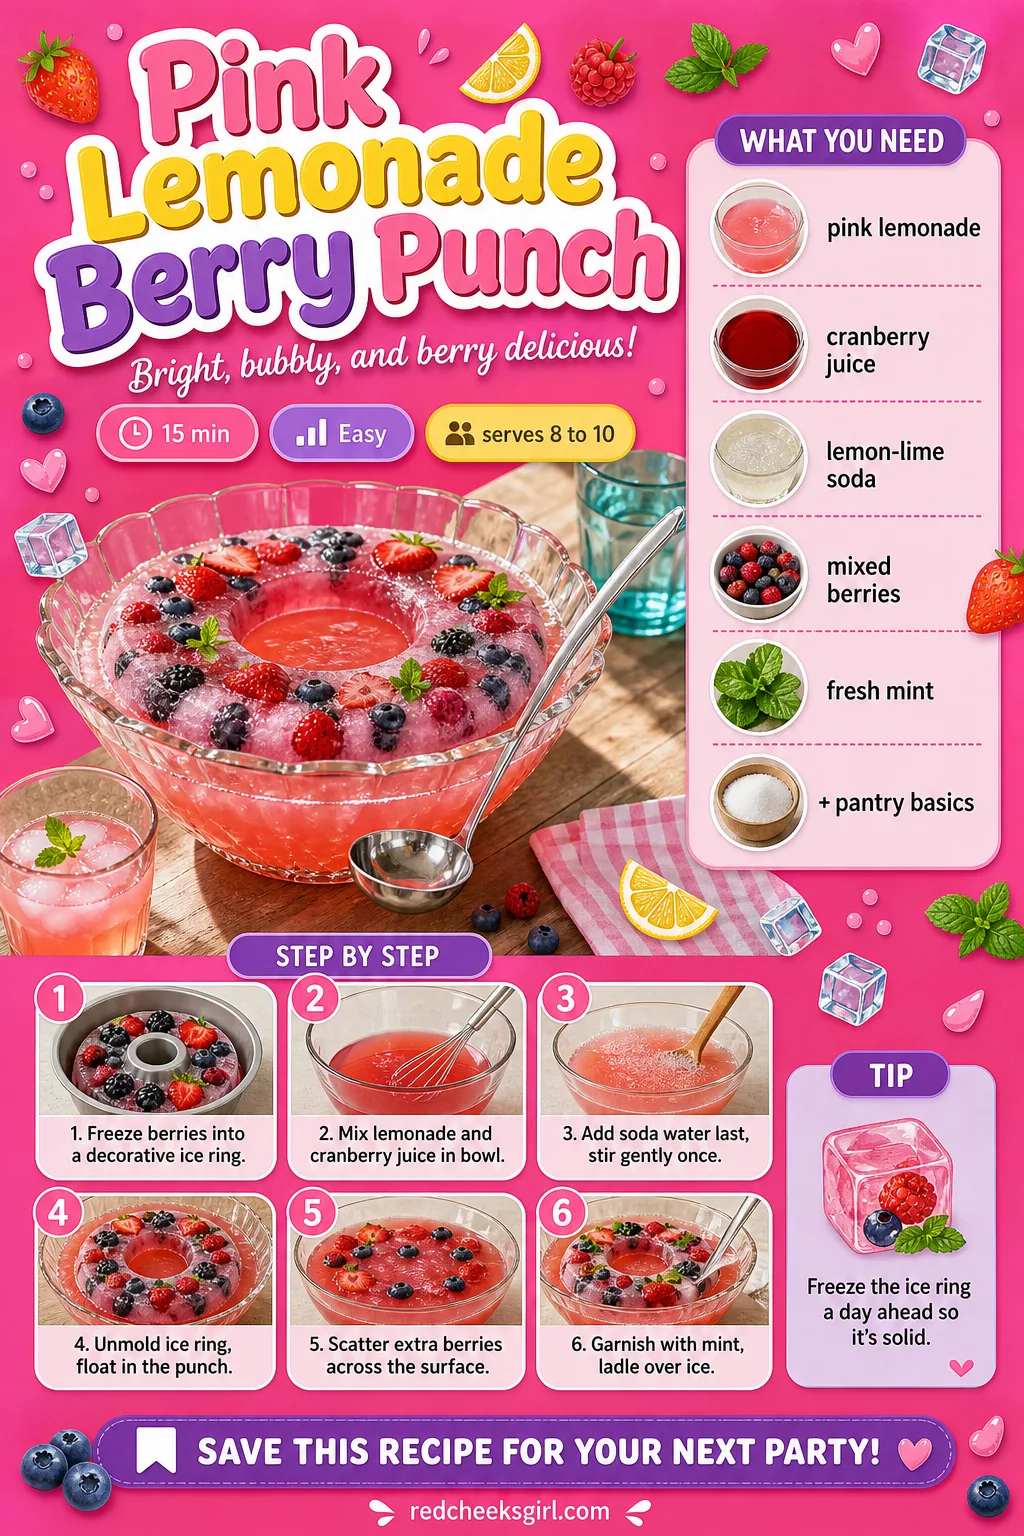
Pink Lemonade Berry Punch
A punch bowl in the middle of the table does half the hosting for you, nobody needs a drink made one glass at a time, they ladle their own and come back for more, maybe between rounds of the 72 Would You Rather Questions for a Group of Friends.
The berries frozen into the ice ring keep the punch cold without watering it down the way loose cubes do.
This is a safe pour for the whole party, no alcohol involved, so it works as the only drink on the table or sits next to the rose spritz for anyone who’d rather skip the wine. Build the ice ring the night before, it’s the only part of this that can’t be rushed.
Ingredients
- 4 cups (1 L) pink lemonade, chilled
- 2 cups (480 ml) white cranberry juice, chilled
- 2 cups (480 ml) chilled lemon-lime soda or sparkling water
- 1 cup (125 g) mixed raspberries and sliced strawberries, plus extra for garnish
- ice ring or ice cubes
- fresh mint, for garnish
Instructions
- Make an ice ring the day before by arranging a layer of raspberries and strawberry slices in a round cake pan or bundt pan, covering with water, and freezing solid overnight; a few plain ice cubes melt too fast and water the punch down.
- Just before serving, combine the pink lemonade and cranberry juice in a large punch bowl, stirring to blend the colors into one even pink.
- Pour in the soda or sparkling water last and stir gently once, just enough to combine without knocking the fizz out.
- Unmold the ice ring by dipping the pan briefly in warm water, then slide it fruit-side up into the punch bowl.
- Scatter the extra raspberries and strawberry slices across the surface so they float rather than sink.
- Tuck a few mint sprigs between the floating fruit and ladle into glasses filled with ice.
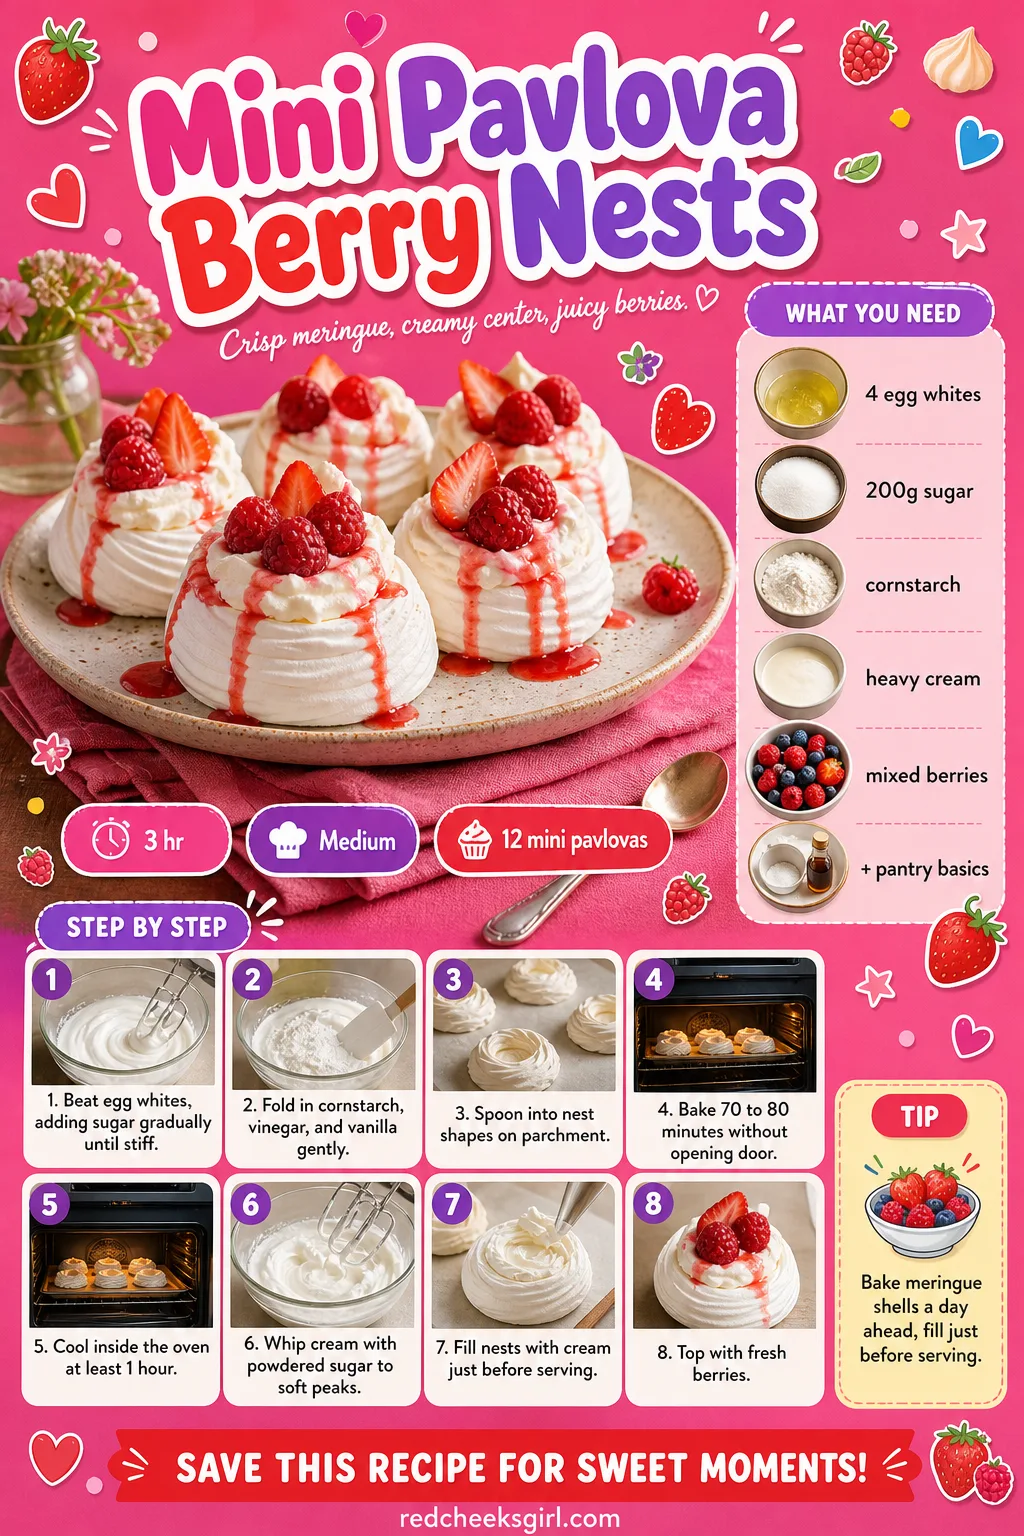
Mini Pavlova Berry Nests
Pavlova has a reputation for collapsing the second it meets humidity or an impatient oven door. Baked low and slow and left to cool inside a closed oven, the shell turns out properly crisp outside with a soft, marshmallowy center that gives under the spoon.
Bake the shells up to two days ahead and store them in an airtight container at room temperature, only fill them with cream and berries right before serving. If the kitchen runs humid, a dry day genuinely makes a better pavlova than a damp one, there’s no fixing that with more baking time.
Ingredients
- 4 large egg whites, room temperature
- 1 cup (200 g) granulated sugar
- 1 teaspoon cornstarch
- 1 teaspoon white vinegar
- 1/2 teaspoon vanilla extract
- 1 cup (240 ml) heavy cream, chilled
- 2 tablespoons powdered sugar
- 1 1/2 cups (200 g) mixed raspberries and sliced strawberries
Instructions
- Heat the oven to 225°F (110°C) and line a baking sheet with parchment, drawing twelve 3-inch circles on the back as a guide.
- Beat the egg whites on medium speed until foamy, then increase to high and add the sugar one tablespoon at a time, beating well after each addition.
- Keep beating 6 to 8 minutes total, until the meringue is thick, glossy and holds a stiff peak that stands straight up without flopping when you lift the beater.
- Sprinkle the cornstarch, vinegar and vanilla over the meringue and fold in gently by hand, just until combined; overmixing here deflates all the air you just beat in.
- Spoon the meringue onto the circles, using the back of a spoon to build up the sides slightly higher than the center, forming a shallow nest shape in each.
- Bake 70 to 80 minutes without opening the oven door, which would let the meringues collapse or crack from the sudden temperature drop.
- Turn off the oven and let the meringues cool inside with the door closed at least 1 hour, or overnight; the outside should be dry and crisp to the touch, with a marshmallowy center.
- Once fully cool, whip the cream with the powdered sugar to soft, billowy peaks that just hold their shape.
- Spoon the whipped cream into the center well of each meringue nest right before serving; filled too early, the cream weeps and the shell goes soggy within an hour.
- Top each nest with a small pile of raspberries and strawberry slices, letting a little juice run down into the cream.
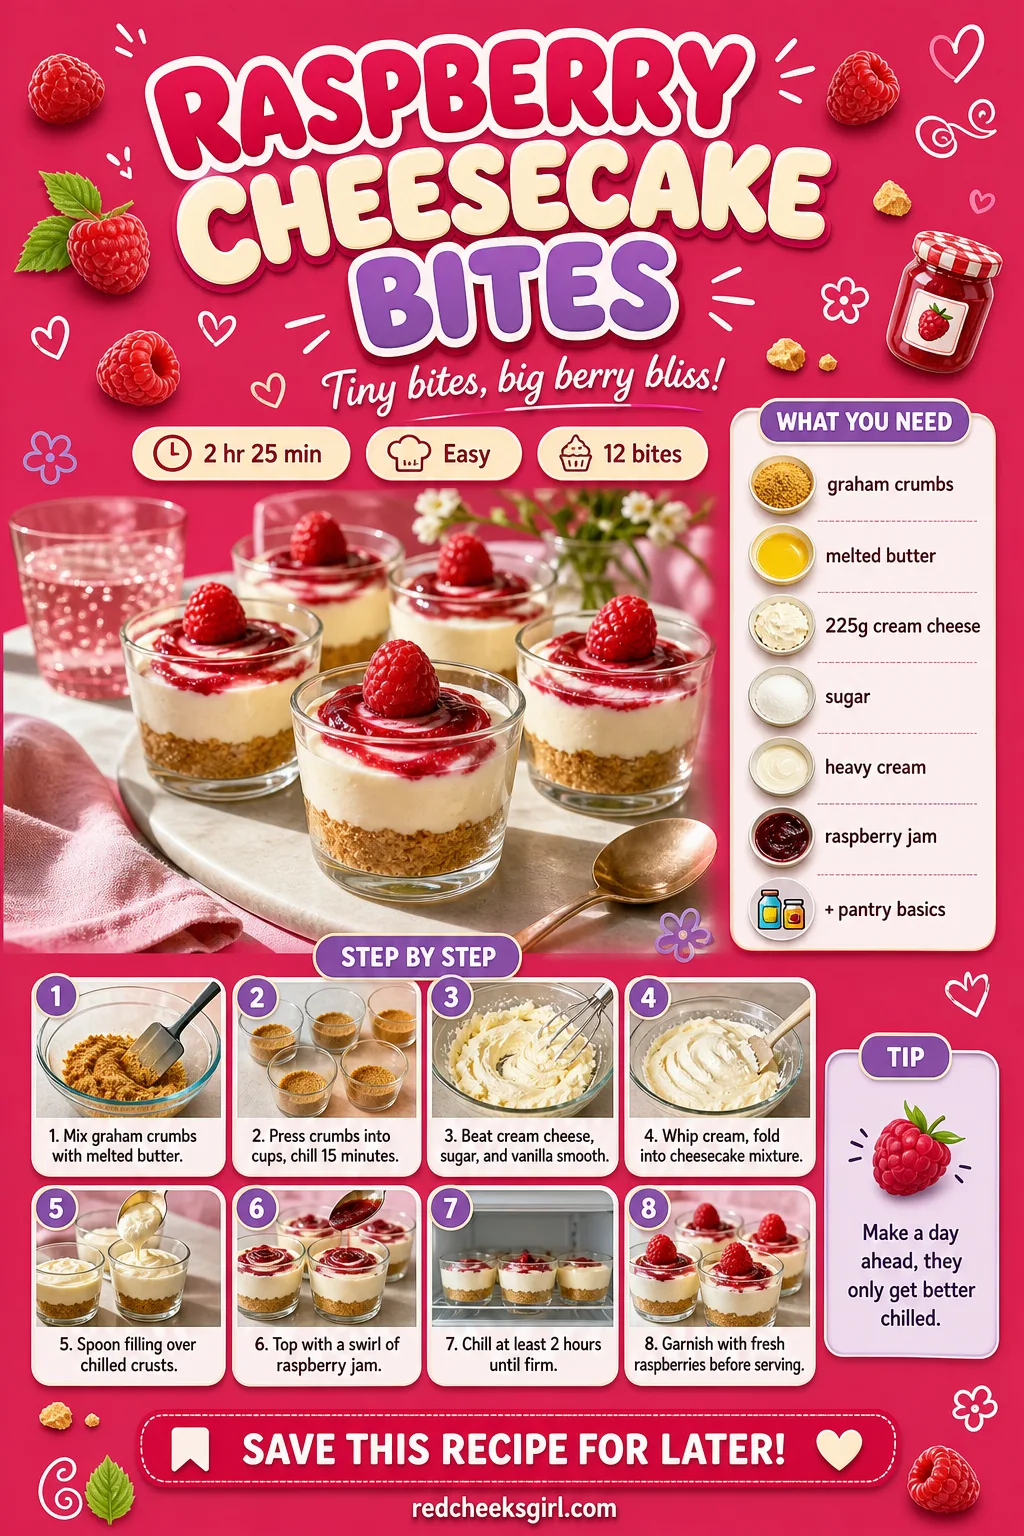
Raspberry Cheesecake Bites
No-bake cheesecake solves the one problem every other dessert on this list has, it needs no oven time at all and no watching through a glass door. Each cup holds a crisp graham base, a filling that tastes properly rich without being heavy, and a swirl of raspberry that cuts through the sweetness.
Make these a full day ahead, they’re better cold and set than fresh, which makes them the easiest thing to prep before the party rather than during it. Swap the raspberry jam for a sharper fruit curd if the rest of the dessert table leans sweet already.
Ingredients
- 1 cup (100 g) graham cracker crumbs
- 3 tablespoons melted butter
- 225 g cream cheese, softened
- 1/3 cup (65 g) granulated sugar
- 1/2 teaspoon vanilla extract
- 1/2 cup (120 ml) heavy cream, chilled
- 1/3 cup (100 g) raspberry jam or raspberry sauce
- fresh raspberries, for topping
Instructions
- Stir the graham cracker crumbs and melted butter together in a bowl until the mixture looks like wet sand and holds together when pressed between two fingers.
- Spoon about a tablespoon of the crumb mixture into the bottom of each of 12 small cups or a lined muffin tin, pressing down firmly with the back of a spoon to form a solid base.
- Chill the crusts 15 minutes while you make the filling, so they set enough not to crumble when you add the next layer.
- Beat the cream cheese, sugar and vanilla together until completely smooth, with no lumps, scraping the bowl once partway through.
- Whip the chilled cream separately in another bowl until it holds soft peaks, then fold it gently into the cream cheese mixture in two additions, keeping the mixture light and airy rather than stirring it flat.
- Spoon or pipe the cheesecake filling over the chilled crusts, filling each cup about two-thirds full and smoothing the top.
- Spoon a small layer of raspberry jam over the cheesecake filling in each cup, swirling it slightly into the top with a toothpick if you like a marbled look.
- Chill the finished cups at least 2 hours, or until the filling feels firm rather than loose when you tap the side of the cup.
- Top each bite with a fresh raspberry just before serving.
Frequently Asked Questions
What food do you serve at a Galentine’s party?
Galentine’s spreads lean on easy, shareable bites in pink and red: a butter board, deviled eggs, caprese skewers, mini pizza and a sweet table of cookies or cupcakes, nothing that needs deep frying or a sit-down course.
How do you make deviled eggs pink naturally?
Soak peeled, hard-boiled eggs whole in beet juice or beet brine for 2 to 8 hours before slicing and filling them. The vinegar in the brine sets the color without changing the taste of the filling.
Can you make Galentine’s party food ahead of time?
Most of it, yes: deviled eggs, cookies, pinwheels and cheesecake bites all taste better after a day in the fridge. Save only the skewers, crostini and punch for assembly within a few hours of serving.
What drinks go with Galentine’s Day food?
A raspberry rose spritz covers the adults in the room, while a pink lemonade berry punch keeps a non-alcoholic option on the same table for anyone skipping wine.
What is Galentine’s Day?
Galentine’s Day falls on February 13th, the day before Valentine’s, set aside for celebrating friendship rather than romance. Galentine’s Day is a holiday created by Knope, celebrated on Feb. 13, introduced in Season two.
What’s a good non-alcoholic option for a Galentine’s party?
A pink lemonade berry punch with a fruit-filled ice ring works as the single drink on the table or sits next to the rose spritz for guests who are skipping alcohol.
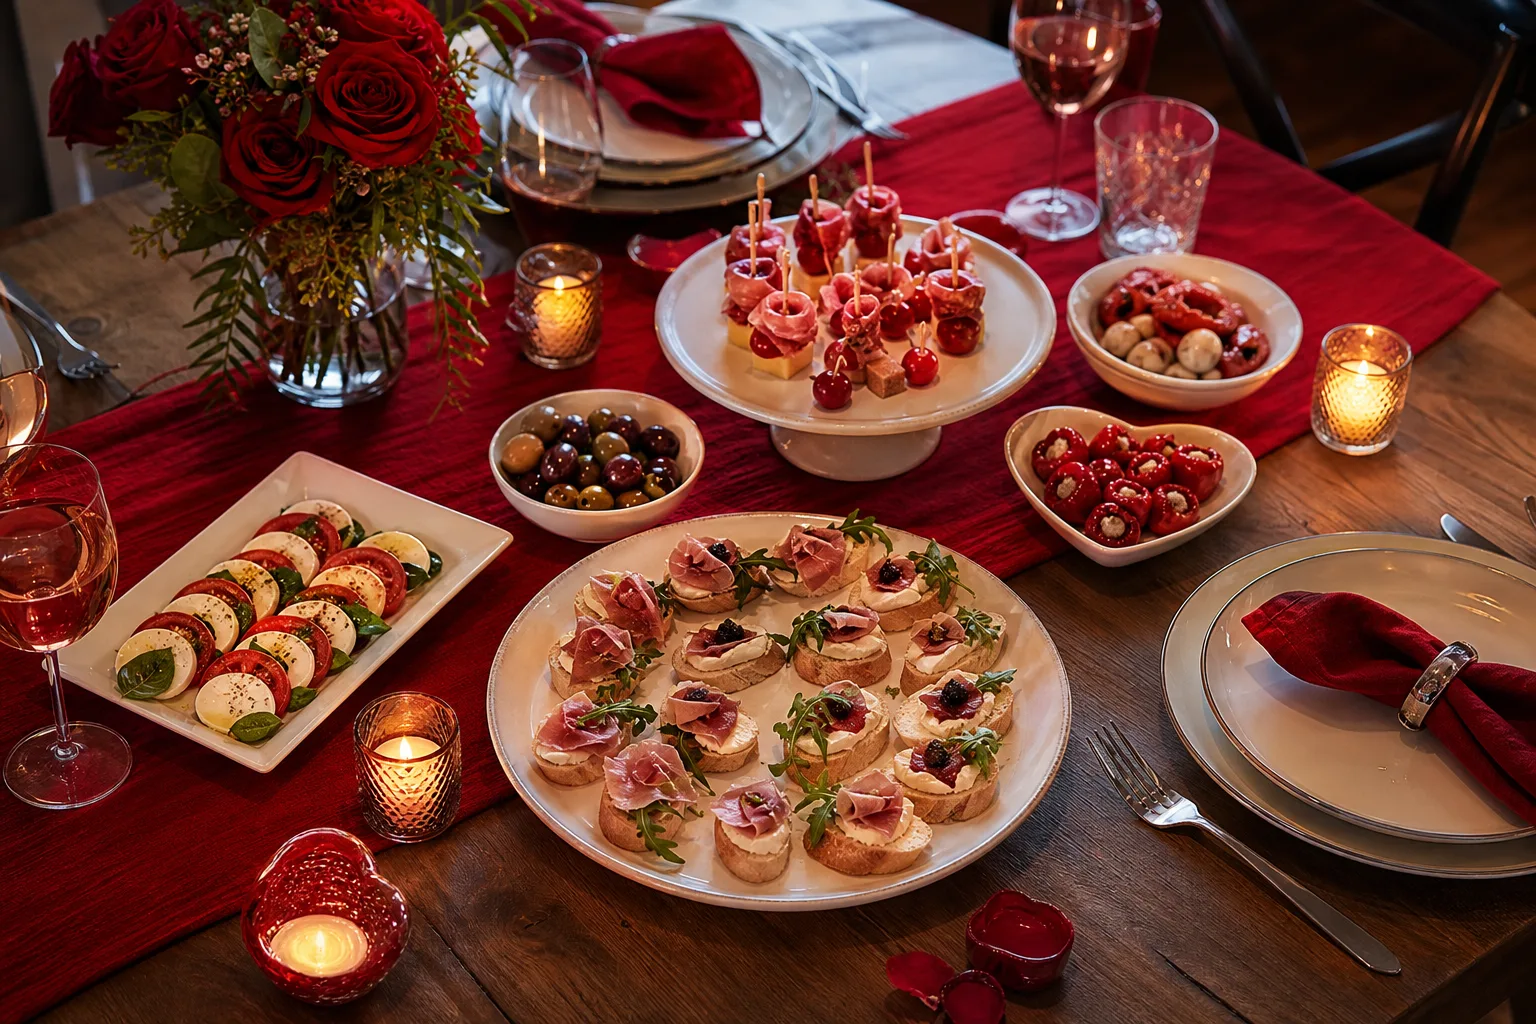
17 valentine appetizers for a romantic dinner at home: heart caprese, baked brie, beet hummus, shrim
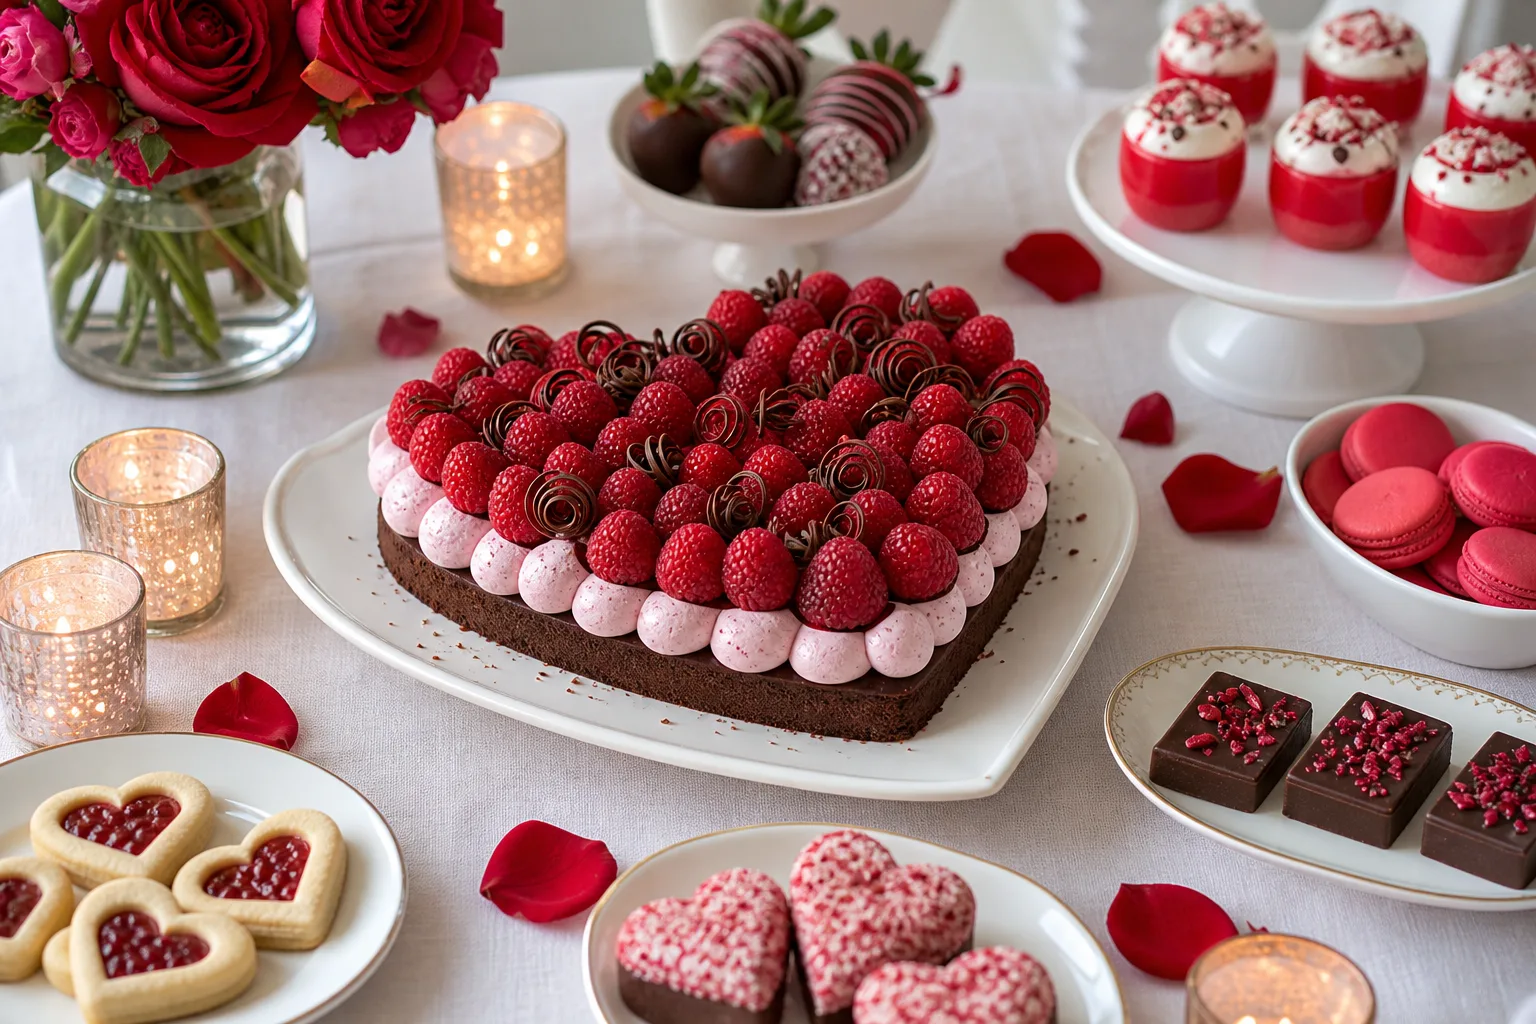
21 valentine desserts that look fancy but stay simple: a piped heart cake, lava cakes for two, panna

Free printable valentines day games for kids classroom parties: 9 print-and-play sheets plus 6 no-pr
Leave a Reply