

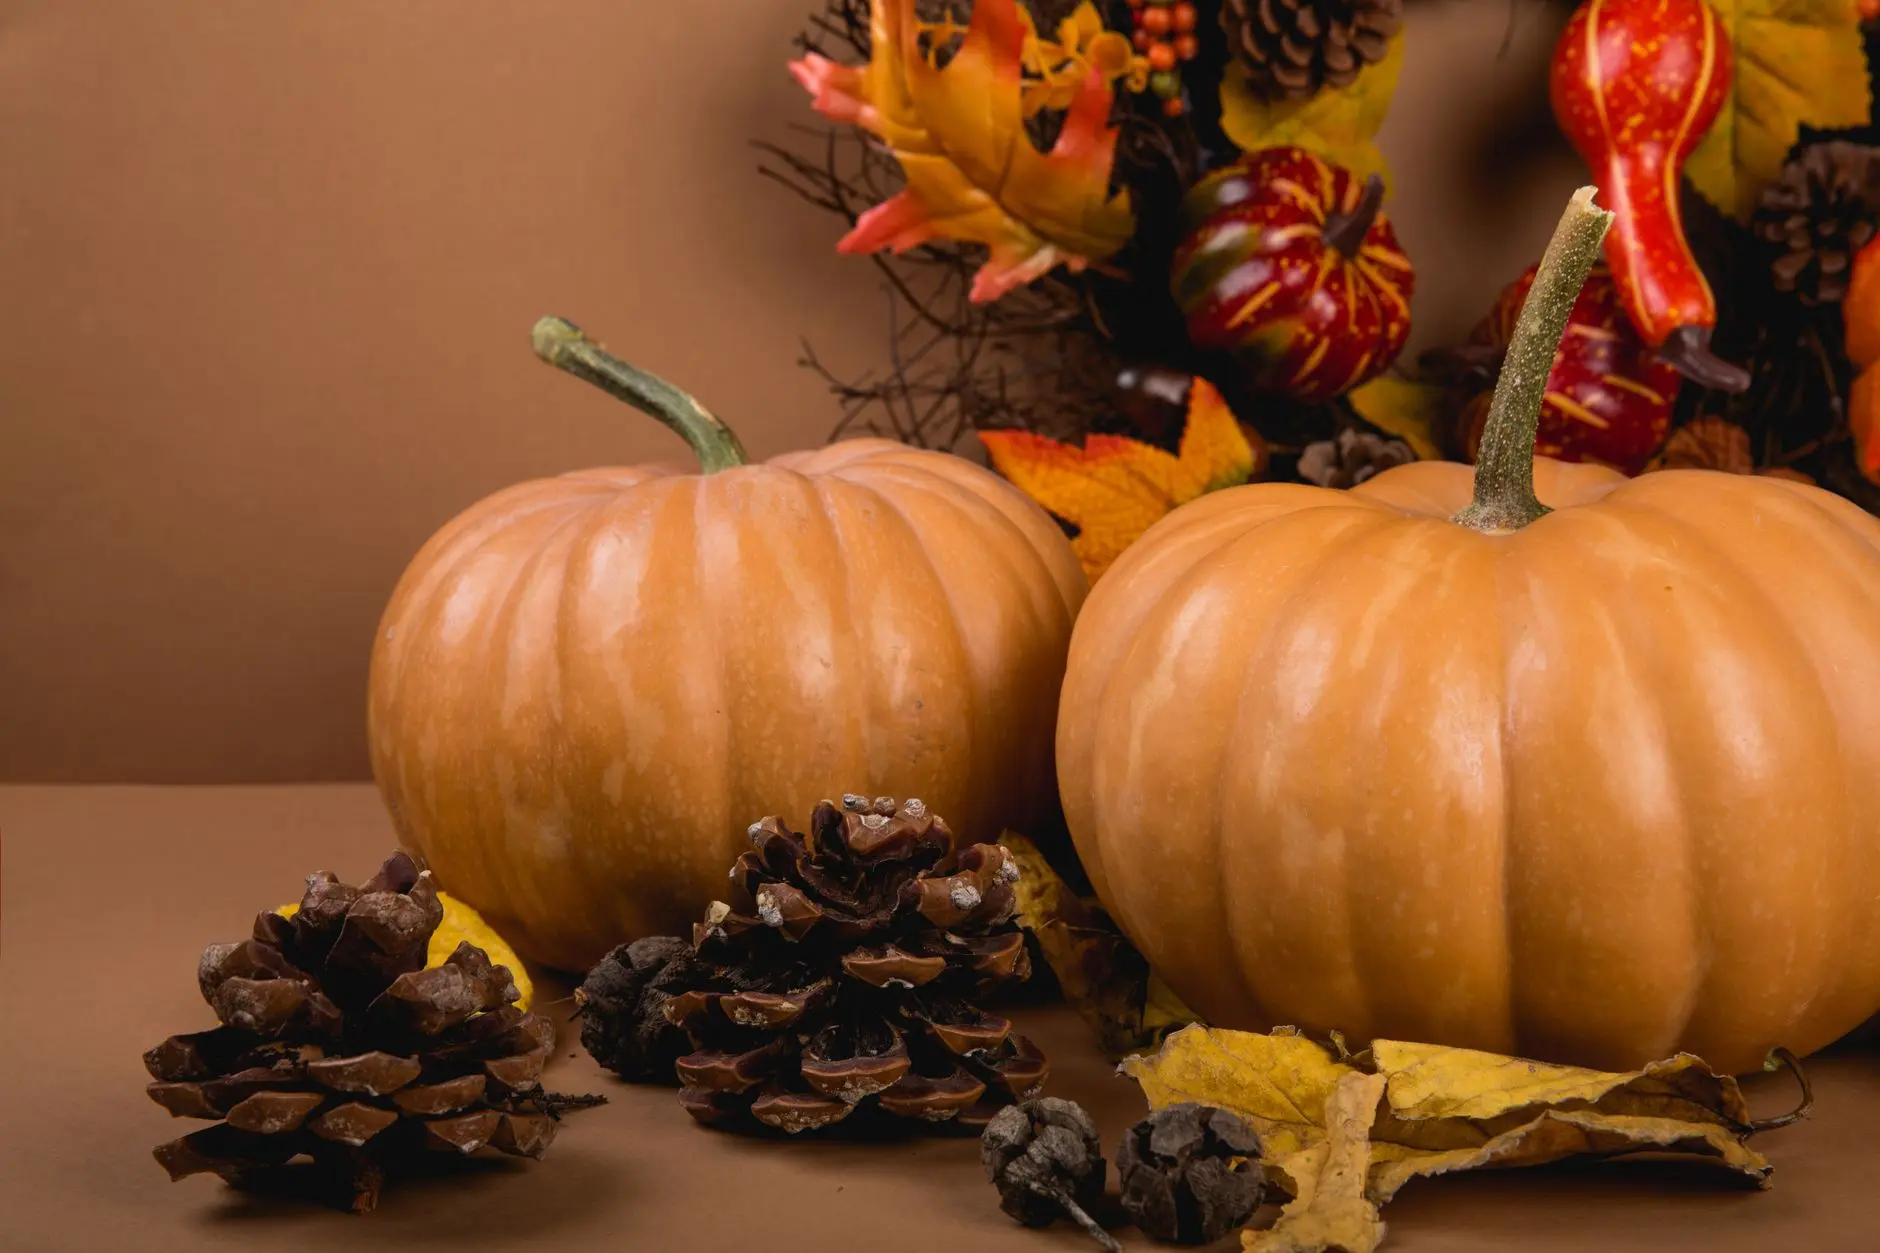
Every one of these projects starts the same way: put on shoes, walk outside, and look at the ground. Branches, seed pods, pinecones, bark, dried grasses, and the odd stubborn hydrangea head are all free, all beautiful, and all far more interesting than anything stacked on a seasonal shelf. Designers have been saying it for a while now, and the tables on Pinterest are finally catching up: real botanicals signal effort and taste in a way that a plastic garland simply cannot. The palette here is moss, bark, wheat, rust, and cream. It photographs beautifully and costs almost nothing.
Before you start, collect more than you think you need. Lay foraged materials on newspaper for a day or two if they feel damp. And if you want something to do with guests while dinner finishes, 15 Thanksgiving Table Games You Can Play Without Getting Up pairs well with every decorated table here.
This post contains affiliate links. If you buy through them, I may earn a small commission at no extra cost to you.
- Wheat Sheaf Tied With Twine
- Dried Orange Slice Garland
- Pressed Leaf Frames
- Acorn Place Markers
- Pinecone Fire Starters
- Twig Napkin Rings
- Branch Hung as a Mantel Garland
- Moss and Bark Tray
- Dried Hydrangea Bundle
- Candle Holder Wrapped in Bark
- Wreath From Foraged Twigs
- Nut Bowl With a Cracked Shell Mosaic Lid
- Herb Bundle Party Favours
- Beeswax Rolled Tapers
- Stamped Clay Leaf Dish
- Dried Grasses in a Bottle
- Conker Garland on String
- Bark-Wrapped Jar Lantern
- Leaf Print Tea Towel
- Seed Pod Mobile
- Pumpkin Hollowed as a Vase
- Twine-Wrapped Bottle Vases
- Dried Flower Place Cards
- Frequently Asked Questions
Wheat Sheaf Tied With Twine
A gathered wheat sheaf on a door, a sideboard, or propped against a wall reads as genuinely considered rather than seasonal-aisle. Buy a small bundle of dried wheat from a florist or farm shop, gather it to a point at the bottom, and bind it tightly. The finished sheaf should hold its cone shape without a hand supporting it.
What You Need
- 1 bundle dried wheat stems (approximately 40 stems)
- Natural jute twine, 2 m
- Sharp scissors (adult step)
How to Make It
- Hold the wheat stems in one hand, fanning them so the heads sit at slightly different heights. Grip about 15 cm from the bottom to create a natural flare at the top.
- Wrap twine firmly around the bundle four or five times at the grip point, pull it snug after each pass so the stems cannot rotate, then tie a double knot. Trim the tails to about 8 cm and tuck them under the wrapping so they hide.
- Stand the sheaf upright and press the stem ends flat on a table so it stands without tipping. Trim any uneven stems with scissors, cutting straight across. The sheaf is ready when it holds its shape freestanding for a count of ten.

🛍 Shopping guide
Dried Orange Slice Garland
Citrus slices dried in an oven smell faintly of winter spice and look like stained glass when strung near a window. Thread them with dried bay leaves and cinnamon sticks for a garland that is genuinely scented and lasts for weeks.
What You Need
- 4 large oranges
- 20 dried bay leaves
- 6 cinnamon sticks
- 2 m natural jute twine
- Large darning needle
- Sharp knife and chopping board (adult step)
How to Make It
- An adult slices the oranges into 5 mm rounds with a sharp knife, discarding the end pieces. Lay slices on a wire rack over a baking tray. Dry in an oven at 90 C (no-fan) for 4 to 5 hours, turning once halfway through. The slices are done when they feel leathery and dry to the touch, not sticky. Leave them to cool completely on the rack.
- Thread the darning needle with twine. Pierce each orange slice through its rind at the top, about 5 mm from the edge, pushing slowly so the slice does not crack. Alternate: two bay leaves, one orange slice, one cinnamon stick (loop the twine around the middle of the stick twice before continuing).
- Continue until all slices are used, leaving 30 cm of twine at each end for hanging. Hang near a window or above a mantel; the garland tolerates gentle heat but keep it away from candle flames.

Pressed Leaf Frames
A pressed maple or oak leaf behind glass is the fastest gallery wall upgrade in autumn’s toolkit. Pick leaves that are just beginning to turn, press them flat for a week, and slip them straight into clip frames. Five frames in a row, staggered heights, makes a proper display.
What You Need
- 5 to 10 large autumn leaves (maple, oak, or sweetgum)
- Heavy books or a flower press
- Blotting paper or newspaper, 10 sheets
- 5 clip frames, A5 or A4 size
How to Make It
- Place each leaf between two sheets of blotting paper. Stack them in a heavy book, adding a fresh sheet of blotting paper between every two leaves so they do not stick. Weight the book with two or three more heavy books on top. Leave for at least 5 days; a full week is better. The leaf is properly pressed when it feels papery and does not spring back when you lift it.
- Open the clip frames and remove the backing card. Lay the pressed leaf face-up on the glass, positioning it so the stem points toward one corner for a natural look rather than sitting dead centre. Replace the backing and clip the frame shut.
- Hang or prop the frames. Leaves pressed this way keep their colour for about four weeks before fading to a softer antique tone, which is also attractive.

🛍 Shopping guide
Acorn Place Markers
A single acorn with a small paper tag attached to its cap makes a place marker that guests actually pocket as a keepsake. The trick is attaching the tag with floral wire rather than glue so it sits neatly upright. Collect acorns with caps still on, since the cap is the anchor for everything.
What You Need
- 1 acorn per guest, cap intact
- Kraft card tags, 4 x 7 cm, 1 per guest
- Fine floral wire, 28 gauge, 30 cm per acorn
- Thin felt-tip pen for writing names
- Wire cutters or strong scissors (adult step)
How to Make It
- Write each guest’s name on a tag in your clearest handwriting. Fold the top 1 cm of the tag down over the wire before you thread it, so the wire has something to grip.
- An adult cuts a 10 cm length of floral wire per acorn. Thread one end through the tag’s existing hole or pierce a new hole near the top of the tag. Twist the wire ends together twice to lock the tag, then wind the remaining tail twice around the acorn’s cap stalk and twist tight. The tag should stand nearly upright from the cap.
- Place one acorn at each setting. Lay it on the folded napkin or tuck it against the wine glass so it does not roll.

🛍 Shopping guide
Pinecone Fire Starters
These are the party favour that nobody expects and everyone takes home: pinecones dipped in wax and rolled in dried herbs that light a fire faster and smell better than newspaper. Collect medium cones, fully open. Make a batch in one afternoon and the whole house smells like a forest.
What You Need
- 12 medium open pinecones
- 200 g plain paraffin wax pellets or old candle stubs
- Dried rosemary and thyme, 2 tablespoons combined
- Natural jute twine, 12 x 20 cm lengths
- Old saucepan and heatproof bowl for a double boiler
- Baking paper to line the work surface
How to Make It
- Tie a 20 cm length of twine around the base of each cone, leaving a 5 cm tail as the fire-lighting wick. Melt the wax in a heatproof bowl set over a saucepan of simmering water. An adult must do all wax-melting steps: wax is flammable and must never be left unattended over heat. Stir in the dried herbs once the wax is fully liquid.
- Holding each cone by its twine tail, lower it into the wax and submerge it for five seconds. Lift it straight out, let the excess drip back into the bowl for a count of three, then set it on baking paper. Work quickly, as the wax skins over in about 30 seconds.
- Leave cones on baking paper at room temperature for at least one hour until the wax is completely opaque and hard to the touch. Wrap individually in a square of brown paper tied with twine for gifting, or arrange in a bowl near the fireplace.

🛍 Shopping guide
Twig Napkin Rings
Cut from thin, flexible willow or dogwood stems gathered on a walk, these napkin rings take fifteen minutes to make and look like something from a boutique hotel table. The key is choosing stems thin enough to bend without snapping, roughly pencil-thickness or less.
What You Need
- 6 flexible green willow or dogwood stems, each at least 30 cm long and pencil-thin
- Natural jute twine, 1 m
- Secateurs or sharp scissors (adult step)
How to Make It
- An adult cuts each stem to 25 cm. Soak stiff stems in warm water for 10 minutes if they resist bending. Loop one stem into a circle about 6 cm in diameter and hold the overlap point between two fingers. The overlap should be about 4 cm.
- Wrap the twine tightly around the overlap point six times, then knot it firmly. Trim the twine tails short. The ring holds its shape when you can release your fingers and it does not spring open.
- Slide a rolled napkin through each ring and place on the plate. Twig rings store flat: simply unloop the stem and re-soak to reshape if they dry out before the party.

🛍 Shopping guide
Branch Hung as a Mantel Garland
A single straight branch, about the width of the mantel, hung or rested above the fireplace and dressed with foraged stems, dried seed heads, and a ribbon or two is the chicest thing in this list. It takes under half an hour and changes the entire room. Choose a branch that has already dropped most of its leaves so the structure of the wood shows.
What You Need
- 1 straight branch, 120 to 150 cm long, 3 to 5 cm diameter
- Assorted dried stems: eucalyptus, dried grasses, seed heads (a small bunch of each)
- Natural jute twine, 2 m
- Floral wire, 28 gauge, 1 m
- 2 small picture hooks or adhesive wall strips rated to 2 kg (adult step for fixing)
How to Make It
- Fix two small hooks into the wall above the mantel at each end of where the branch will sit, or use adhesive strips rated to the branch weight. An adult must do all wall-fixing. Hang the branch from the hooks using looped twine tied around the branch at each end.
- Gather dried stems into small clusters of three to five stems each. Bind each cluster at its base with a short piece of floral wire, then use the wire tail to attach it to the branch, twisting it around the wood twice and tucking the sharp end away from view. Space clusters evenly, allowing the branch bark to show between them.
- Tie a loose knot of twine at the centre of the branch as a finishing detail. The finished garland should look slightly asymmetric, heavier with botanicals toward one end, which reads as designed rather than decorated.

🛍 Shopping guide
Moss and Bark Tray
A wooden tray lined with fresh or dried moss and scattered with bark pieces, a candle, and two or three pinecones is a centrepiece that costs nothing if you already own a tray. It works on a coffee table, a dining table, or a console. The moss stays fresh for about five days indoors before it dries to a pleasant pale green.
What You Need
- 1 wooden tray, any size
- A double handful of fresh or dried moss
- 3 to 5 pieces of loose bark, palm-sized
- 2 to 3 pinecones
- 1 pillar candle in cream or beeswax colour
How to Make It
- Press a layer of moss into the base of the tray, covering the bottom fully but keeping it to about 2 cm deep. Tuck the edges against the tray sides so nothing hangs over.
- Arrange the bark pieces on the moss at different angles, as they would fall naturally. Set the pinecones in the gaps. Place the pillar candle in the centre, pressing it gently into the moss so it sits level. Never leave a burning candle unattended or place it directly on dry moss without a candle holder beneath it: use a small ceramic saucer under the candle as a base.
- Fill any remaining gaps with a few extra pinecones or acorns. The tray should look gathered rather than arranged, so resist the urge to symmetrise it.

🛍 Shopping guide
Dried Hydrangea Bundle
Hydrangeas dry magnificently on the stem: the heads turn from pink or blue to a muted antique parchment that belongs on this palette. Gather stems in late summer before the heads turn brown, hang them upside down in a cool dry room for two weeks, and by Thanksgiving they are done. If the season has passed, florists often sell dried heads individually.
What You Need
- 5 to 7 dried hydrangea stems
- 1 ceramic jug or wide-mouthed vase, 20 cm+ tall
- Natural jute twine, 50 cm
How to Make It
- If drying fresh stems, tie them in a loose bunch with twine and hang them upside down in a dry, airy room for 10 to 14 days. The heads are ready when they feel papery and completely rigid, not soft at all.
- Trim stems to different lengths: the tallest at about 50 cm, the shortest at 30 cm. Place the tallest stem first, then add the others around it, rotating the jug a quarter turn after each addition so the arrangement stays full on all sides.
- Set the jug where it can be seen from multiple angles. Dried hydrangeas shed a little, so place them away from foot traffic. They keep indefinitely in a dry room.

🛍 Shopping guide
Candle Holder Wrapped in Bark
A plain glass tumbler becomes a genuinely textural candle holder when wrapped in a single panel of thin bark. Birch bark peels in flexible sheets and is easiest to work with; cedar bark works too. Collect bark that has already fallen from the tree rather than peeling a living one.
What You Need
- 1 glass tumbler, 8 to 10 cm tall
- 1 panel of fallen birch or cedar bark, large enough to wrap the tumbler
- Natural jute twine, 60 cm
- Strong PVA glue or a glue gun (adult step for hot glue)
- Craft knife and cutting mat (adult step)
- 1 tea light candle
How to Make It
- An adult trims the bark panel with a craft knife so its height matches the tumbler and its length wraps around with about a 1 cm overlap. Bark splits unevenly, so cut slowly on a mat and aim for a straight lower edge; the top can be pleasantly ragged.
- Apply a line of PVA or hot glue (adult handles the glue gun) down the overlap seam on the inside of the bark. Press the bark firmly around the glass, holding the seam for 60 seconds. The bark should sit flush at the base with no gap.
- Tie twine around the middle of the wrapped tumbler twice and knot it at the seam side to disguise the join. Drop a tea light inside. The glass means the flame never touches the bark directly, but still do not leave it burning unattended.

🛍 Shopping guide
Wreath From Foraged Twigs
A wreath built from bare twigs looks architectural and contemporary rather than festive-by-numbers. It suits a front door, an interior wall, or laid flat as a table centrepiece with a candle in the middle. The building technique here requires no wire frame, just patience and twine.
What You Need
- A large armful of flexible thin twigs, 30 to 40 cm each (willow or dogwood works best)
- Natural jute twine, 3 m
- Secateurs (adult step)
How to Make It
- Soak the twigs in a bathtub of warm water for 20 minutes if they feel brittle. An adult uses secateurs to trim all twigs to 35 cm. Take five twigs and arrange them in a loose bundle, then bend the bundle into a circle about 30 cm in diameter, overlapping the ends by about 8 cm. Tie the overlap at both sides with twine, wrapping at least four times and knotting firmly. This is the base ring.
- Add twigs to the ring in groups of three or four, weaving them through the existing structure and binding each group with twine where it crosses the ring. Work around the circle evenly so the wreath builds up to a consistent thickness of about 5 cm all the way round.
- Tie a loop of twine at the top for hanging, or lay it flat as a centrepiece. Tuck in small sprigs of dried rosemary or a few acorns for detail if you like, or leave it plain: bare twig wreaths are best when they are not over-dressed.

🛍 Shopping guide
Nut Bowl With a Cracked Shell Mosaic Lid
A round wooden bowl filled with mixed nuts and topped with a mosaic disc of cracked walnut shells is one of those objects that makes people stop and look. The mosaic lid lifts off so the nuts are accessible. It takes the most patience of anything in this list, but the technique is genuinely simple: it is just gluing broken shells to a card disc.
What You Need
- 1 round wooden bowl, 20 to 25 cm diameter
- Mixed whole nuts for filling
- 8 to 10 walnuts, cracked and shells reserved
- 1 circle of stiff card or thin plywood, cut to the same diameter as the bowl opening
- Strong PVA glue or craft adhesive
- Craft knife and cutting mat for trimming card (adult step)
How to Make It
- Crack the walnuts carefully with a nutcracker, aiming for large pieces rather than dust. An adult trims the card circle to fit the bowl opening exactly using a craft knife. Lay the card flat on a protected surface and apply a thin, even layer of PVA glue across the whole top surface.
- Press the shell pieces onto the glued card, curved side up, fitting them together like a rough mosaic. Leave small gaps; that is part of the texture. Cover the card entirely with shell pieces. Press each piece firmly and leave the disc flat to dry for at least 2 hours, undisturbed.
- Once dry, fill the bowl with whole nuts and lay the mosaic disc on top as a lid. The weight of the disc holds it in place. Lift it to access the nuts during the meal.

🛍 Shopping guide
Herb Bundle Party Favours
A small bundle of fresh rosemary, dried lavender, and a bay sprig tied with twine and tucked into a small paper bag is a party favour that doubles as a kitchen gift. It costs almost nothing if you grow any of these, and smells beautiful on the table before it goes home with a guest.
What You Need
- Fresh rosemary sprigs, 3 per bundle
- Dried lavender stems, 3 to 5 per bundle
- Fresh or dried bay leaves, 2 per bundle
- Natural jute twine, 30 cm per bundle
- Small kraft paper bags, 1 per guest
- Kraft card tags for writing a note (optional)
How to Make It
- Lay the rosemary sprigs together, then tuck the lavender stems alongside and the bay leaves flat against the front. The bundle should be no wider than a finger-length across and about 15 cm tall.
- Wrap the twine around the stems at the lower third, pulling firmly four times, and tie a neat bow rather than a knot so it looks finished. Trim the stem ends straight across with scissors.
- Slip each bundle into a kraft bag, fold the top of the bag over twice, punch a hole in the fold, and thread a card tag with the guest’s name. Set one at each place setting or arrange all the bags in a small basket by the door.

🛍 Shopping guide
Beeswax Rolled Tapers
Beeswax sheets roll into tapers in about five minutes each, they smell of honey without any added fragrance, and they burn cleanly. They are the most satisfying thing to make in the whole list. The sheets come in cream, ivory, and natural brown, all of which suit this palette exactly.
What You Need
- 2 natural beeswax sheets (20 x 40 cm each)
- 2 lengths of wicking, each 23 cm
- Sharp scissors (adult step for cutting wicking)
- A warm room or a hair dryer set to low
How to Make It
- Warm the beeswax sheet for 30 seconds with a hair dryer on low or rest it near a radiator until it feels pliable. A cold sheet cracks when you roll it. Lay one sheet portrait-way on a flat surface. Lay a wick along the short edge, leaving 1 cm extending beyond the top.
- Roll the sheet tightly around the wick, pressing the wax against itself firmly with your thumbs as you go. Keep the bottom edge flat on the table so the taper stands straight. Roll right to the end, then press the final edge firmly against the taper so it sticks without any gap showing.
- Trim the wick to 1 cm at the top. The finished taper should feel solid, with no soft spots when you squeeze it gently. Repeat with the second sheet. These tapers fit standard candlestick holders.

🛍 Shopping guide
Stamped Clay Leaf Dish
A small air-dry clay dish with a real leaf pressed into its surface before it sets is part trinket tray, part seasonal art. Press in a deeply veined leaf (maple is ideal) and the impression left behind looks almost botanical-illustrated. Make two or three and use them to hold place cards, a ring, or a single tealight.
What You Need
- 200 g air-dry clay (no baking required)
- 1 large fresh maple or oak leaf per dish
- Rolling pin
- Small round bowl or plate, 12 cm diameter, as a mould
- Craft knife or old blunt knife for trimming (adult step)
How to Make It
- Roll a ball of clay to about 1 cm thick on a non-stick surface. Press the leaf onto the clay surface, vein-side down, and roll gently one more time with the rolling pin so the veins imprint clearly. An adult trims the clay into a rough circle about 14 cm across, cutting slowly so the leaf does not shift.
- Drape the clay, leaf-side up, over the upturned small bowl. Gently press the edges down around the sides of the bowl so the clay takes a shallow dish shape. Peel the leaf away carefully after 10 minutes to reveal the impression; it should look like a detailed etching.
- Leave the clay to dry on the mould for 24 hours, then remove the bowl and leave the dish upside down for another 24 hours so the base dries flat. Once fully dry, the dish is hard and will not flex. Leave it natural or seal with a thin coat of PVA to give a light sheen.

🛍 Shopping guide
Dried Grasses in a Bottle
A narrow glass bottle holding a few stems of dried pampas, feather grass, or foxtail barley is the lowest-effort piece here and one of the prettiest. The bottle needs no water, the grasses need no cutting, and the whole thing can sit on a windowsill for months. Collect grasses before the first frost while the heads are still full and feathery.
What You Need
- 3 to 5 dried grass stems (pampas, feather grass, or foxtail barley)
- 1 narrow glass bottle, 20 to 30 cm tall (an old wine or olive oil bottle works)
How to Make It
- If the grasses are freshly picked, hang them upside down in a dry room for one week before using them. Dried grasses crumble if handled roughly, so carry them by the stem, not the head.
- Drop stems into the bottle one at a time, letting each find its own angle. Three stems often look better than five: resist overfilling. The heads should fan out above the bottle neck, not sit crammed together inside it.
- Place the bottle where it catches light. Clean the bottle by tipping the stems out, rinsing, and refilling: the grasses last until they are physically damaged.

🛍 Shopping guide
Conker Garland on String
A garland of conkers (horse chestnuts) on strong string is the autumn equivalent of a string of beads: tactile, earthy, and the kind of thing that makes a mantel or a staircase bannister look genuinely seasonal. An adult does all the piercing; the threading is satisfying work for any age after that.
What You Need
- 20 to 25 fresh conkers, shells removed
- Strong waxed string or linen thread, 2 m
- A sharp bradawl or skewer (adult step)
- Large darning needle
How to Make It
- An adult uses a bradawl or metal skewer to pierce a hole straight through the centre of each conker, pushing slowly with controlled pressure. The conker must be gripped firmly on a stable surface, not held in the hand. A hole just wide enough for the needle to pass is sufficient.
- Thread the darning needle with waxed string, knotting one end. Thread conkers one by one, pulling each snug against the last. Leave a 20 cm tail of string at each end for tying the garland in place.
- Drape the garland along a mantel, tie it to a bannister, or hang it in a window. Fresh conkers harden and lighten in colour over two to three weeks as they dry, which is part of their appeal.

🛍 Shopping guide
Bark-Wrapped Jar Lantern
A kilner jar or plain glass jar wrapped in a panel of bark and filled with sand and a tea light is the outdoor lantern equivalent of the indoor bark candle holder, and it works beautifully on steps, along a path, or on a table edge. The sand anchors the tea light and prevents any heat from reaching the glass base.
What You Need
- 1 large glass jar, at least 500 ml capacity
- 1 panel of fallen birch or cedar bark to wrap the jar
- Natural jute twine, 80 cm
- 3 tablespoons fine sand or grit
- 1 tea light candle
- Glue gun (adult step)
How to Make It
- An adult applies a line of hot glue down the length of the bark panel on the inside face. Wrap it around the jar and press the seam firmly for 60 seconds. The bark should cover about three-quarters of the jar height, leaving the rim clear.
- Wind the twine twice around the jar at the midpoint of the bark panel and tie a double knot. Pour sand into the jar to a depth of 2 cm and press a tea light into the sand so it sits level.
- Light the tea light and set the jar in place. The open top means the flame has air; the sand base means there is no risk of heat cracking the glass floor. These jars store by removing the bark panel and rolling it flat.

Leaf Print Tea Towel
A plain linen tea towel printed with autumn leaves in rust and ochre fabric paint is a lasting piece of seasonal homeware. It dries the dishes after the party, comes out every autumn, and looks completely intentional. This is also an excellent activity for children while adults cook, as long as an adult handles the iron at the end.
What You Need
- 1 plain linen or cotton tea towel, pre-washed
- Fabric paint in rust, ochre, and cream (small pots)
- 5 to 8 fresh leaves of different shapes and sizes
- A foam roller or wide paintbrush
- Scrap paper to protect the work surface
- An iron (adult step)
How to Make It
- Lay the tea towel flat on scrap paper. Place a leaf vein-side up on a separate piece of scrap paper and use the foam roller or brush to apply fabric paint evenly across its surface in one colour. Do not over-load the paint, or it will bleed under the leaf edges when you print.
- Flip the painted leaf paint-side down onto the tea towel and press firmly across the entire surface with your palm, paying particular attention to the edges. Lift the leaf straight up without sliding it. The print should show every vein clearly. Repeat with different leaves and colours, overlapping some prints for depth.
- Leave the tea towel flat to dry for at least 2 hours. An adult then heat-sets the paint by pressing each printed area with a dry iron on the cotton setting for 30 seconds per section. Once heat-set, the tea towel is washable.

Seed Pod Mobile
A floating mobile made from dried seed pods, a length of driftwood or a straight twig, and fine linen thread catches the light and moves with the warmth of a room. Hang it above a table or in a window. Honesty pods (Lunaria), iris pods, and poppy heads all work beautifully; each has a different silhouette.
What You Need
- 1 straight twig or piece of driftwood, 40 cm long
- 15 to 20 dried seed pods of 2 to 3 varieties
- Fine linen or cotton thread, 2 m total
- Large darning needle
- Natural jute twine, 50 cm for hanging
How to Make It
- Cut seven to nine lengths of thread between 15 and 30 cm. Thread the darning needle and pierce each seed pod through its stem end, pulling the thread through and knotting it twice below the pod. Vary the lengths so the pods hang at different heights. This step is fiddly: dried stems can be fragile, so work slowly and support the pod while you push the needle through.
- Tie each thread to the twig at irregular intervals, working from the outside in toward the centre and spacing the pods so they do not overlap when hanging. Tie a final length of twine around the twig at its balance point and check that the twig hangs level before you secure it.
- Hang the mobile from a ceiling hook or a curtain rail using the jute twine. The mobile is fragile, so hang it away from doorways where it will be knocked.

Pumpkin Hollowed as a Vase
A hollowed-out pumpkin holding a glass jar of water with a few stems of dried grasses and dried hydrangea inside it is a centrepiece that costs one pumpkin and takes twenty minutes. The jar inside does the work of keeping anything fresh alive, and the pumpkin itself lasts about a week before it needs replacing. Use a flat-bottomed variety so it does not rock.
What You Need
- 1 medium pumpkin, flat-bottomed
- 1 glass jar to fit inside the pumpkin neck (a standard jam jar works)
- Sharp serrated knife (adult step)
- A large spoon for scooping
- Assorted dried or fresh stems: grasses, hydrangea, rosehips
How to Make It
- An adult cuts a circle from the top of the pumpkin with a sharp serrated knife, angling the blade inward so the lid does not fall through when replaced. Remove the lid and set it aside. Scoop out all seeds and stringy flesh with the large spoon until the interior is clean.
- Lower the glass jar into the pumpkin. It should fit snugly in the cavity with its rim sitting just below or level with the pumpkin’s cut edge. Fill the jar with water.
- Arrange stems in the jar as you would any vase, letting them fan out above the pumpkin’s rim. Replace the lid at an angle against the arrangement for a casually finished look. Change the water every two days to extend the life of the fresh stems.

🛍 Shopping guide
Twine-Wrapped Bottle Vases
Three wine or spirits bottles wrapped entirely in jute twine, clustered together at different heights, make a table arrangement that looks like it belongs in a high-end flower shop. The twine hides the label and the glass colour so every bottle ends up the same warm neutral. Fill them with single stems of dried grass, a rosehip branch, or a bare twig.
What You Need
- 3 glass bottles of different heights (wine, olive oil, or spirits bottles)
- Natural jute twine, 10 m total
- Strong PVA glue or a glue gun (adult step for hot glue)
- Assorted single dried stems for filling
How to Make It
- Apply a line of PVA glue around the base of the bottle. Press the twine end into the glue and wrap the first row firmly around the bottle base, keeping the twine taut so there are no gaps. Add another thin line of glue every five rows or so to keep the wrapping anchored.
- Continue wrapping upward in tight, touching rows until you reach the shoulder of the bottle. Trim the twine and press the end against a fresh dab of glue, holding it for 30 seconds. The finished bottle should have no glass showing below the shoulder.
- Cluster the three bottles together at different heights on a table or mantel and tuck one or two stems into each. The bottles are reusable and the twine can be unrolled and re-used or composted.

🛍 Shopping guide
Dried Flower Place Cards
A small piece of card with a guest’s name and a dried flower or leaf pressed flat against it and taped in place with a strip of washi tape is a place card that doubles as a keepsake. Keep the card plain white or kraft; the botanical does the decorating. For a round-up of what to do at the table once everyone is seated, 15 Thanksgiving Dinner Games to Play Around the Table has plenty of ideas.
What You Need
- 1 place card per guest: plain white card cut to 9 x 6 cm, 250 gsm
- Pre-pressed small leaves or single dried flower heads, 1 per card
- Thin clear washi tape or floral washi tape, 1 roll
- A fine liner pen for writing names
How to Make It
- Score and fold each piece of card lengthways so it stands as a tent. Write the guest’s name on the front lower half in your clearest hand, leaving the upper third of the card free for the botanical.
- Lay a pressed leaf or dried flower head in the upper third of the card. Cut a 3 cm strip of washi tape and press it across the botanical, taping both the plant material and the card in one strip. The tape holds the botanical flat and reads as a design choice rather than a fix.
- Stand each card at the place setting. If a botanical falls loose before the party, simply re-tape it. These cards store flat between sheets of tissue paper in a box and can be used again if names are written in pencil and erased.

Frequently Asked Questions
What are the easiest DIY Thanksgiving decorations to make with foraged materials?
The easiest places to start are the dried grasses in a bottle (five minutes, no tools needed), the pressed leaf frames (fifteen minutes of active work, though the pressing takes a week), and the wheat sheaf tied with twine (ten minutes from start to finish). All three require nothing beyond what you collect on a walk.
How far in advance can I make DIY Thanksgiving decorations?
Anything that air-dries or requires pressing can be started two to three weeks before Thanksgiving. Pressed leaf frames, dried hydrangea bundles, conker garlands, and beeswax tapers all keep without any special storage. The pumpkin vase and the fresh herb bundles need to be made the day before, or the morning of the party.
Are these DIY Thanksgiving decorations suitable for children to make?
Several of them suit children aged five and up with supervision: the pressed leaf frames, the dried grasses in a bottle, the herb bundle favours, and the leaf print tea towel are all child-friendly for the hands-on steps. Adults must handle anything involving a hot glue gun, a craft knife, an oven, secateurs, or a bradawl. Those steps are clearly marked in each project.
Where can I forage materials for Thanksgiving decorations without damaging the environment?
Collect only what has already fallen: cones, bark, leaves, and seed heads from the ground. Take branches from material that has already dropped or been pruned. Never strip bark from a living tree, never pull seed heads from a park that asks you not to, and never take more than you will use. A single walk usually yields enough for several projects.
How do I store DIY Thanksgiving decorations after the holiday?
Dried arrangements last indefinitely in a dry room away from sunlight. Store them loosely in a cardboard box with a layer of tissue paper between fragile pieces; avoid airtight plastic containers, which trap moisture. The twig wreath, conker garland, and seed pod mobile all store flat or coiled. The pumpkin vase and fresh herb bundles do not store and should be composted after the party.
14 Thanksgiving sangria recipes built around fruit that shows through the glass. Apple cider, cranbe
Find thanksgiving decorations for every room, table and Friendsgiving party in this guide to 11 coll
Sixteen distinct Thanksgiving aesthetics, each with its own colour story and hero object, so every p
Leave a Reply