

19 Christmas Keepsake Crafts for Kids That Grandparents Will Keep for Decades
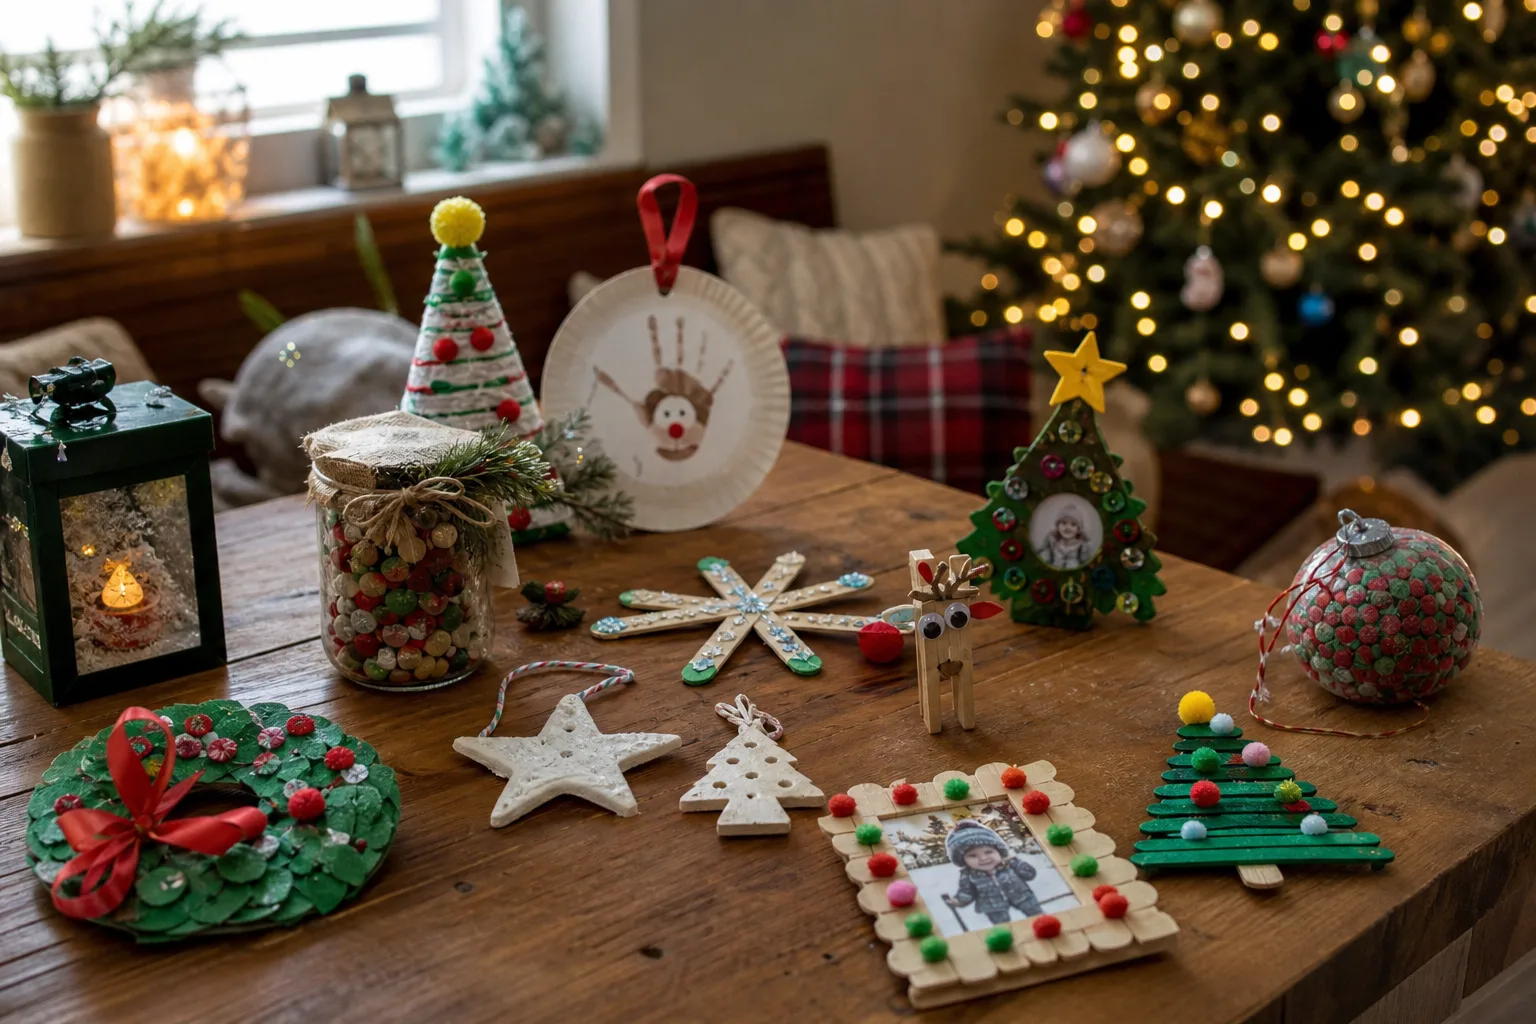
A keepsake does not have to be beautiful. It has to be unrepeatable: a hand that will never again be this small, a signature with the letters still a little backwards. Grandparents do not want a prettier ornament, they want proof.
Everything below comes together from things most houses already have, flour, buttons, a spare jar, nothing that needs a special trip. If the rest of the room still needs dressing, the Christmas crafts for kids list covers the tree and the windows, and the classroom Christmas decorations round-up solves the school party version of the same problem.
Some of these take twenty minutes start to finish. Others need a day of drying before anyone touches them again, so keep the Christmas party games for kids list open on another tab for the waiting part.
This post contains affiliate links. If you buy through them, I may earn a small commission at no extra cost to you.
- Salt Dough Handprint Ornament
- Plaster of Paris Handprint Keepsake
- Button Christmas Tree Photo Frame
- Thumbprint Reindeer Christmas Cards
- Photo Bauble Keepsake Ornament
- Air-Dry Clay Pinch Pot Trinket Dish
- Yarn-Wrapped Star Ornament
- Painted Wood Slice Ornament
- Fingerprint Family Christmas Tree Canvas
- Pom-Pom Reindeer Peg Ornament
- Mason Jar Keepsake Snow Globe
- Embroidery Hoop Photo Ornament
- Pony Bead Name Ornament
- Felt Christmas Stocking Keepsake
- Growth-Measuring Christmas Ribbon
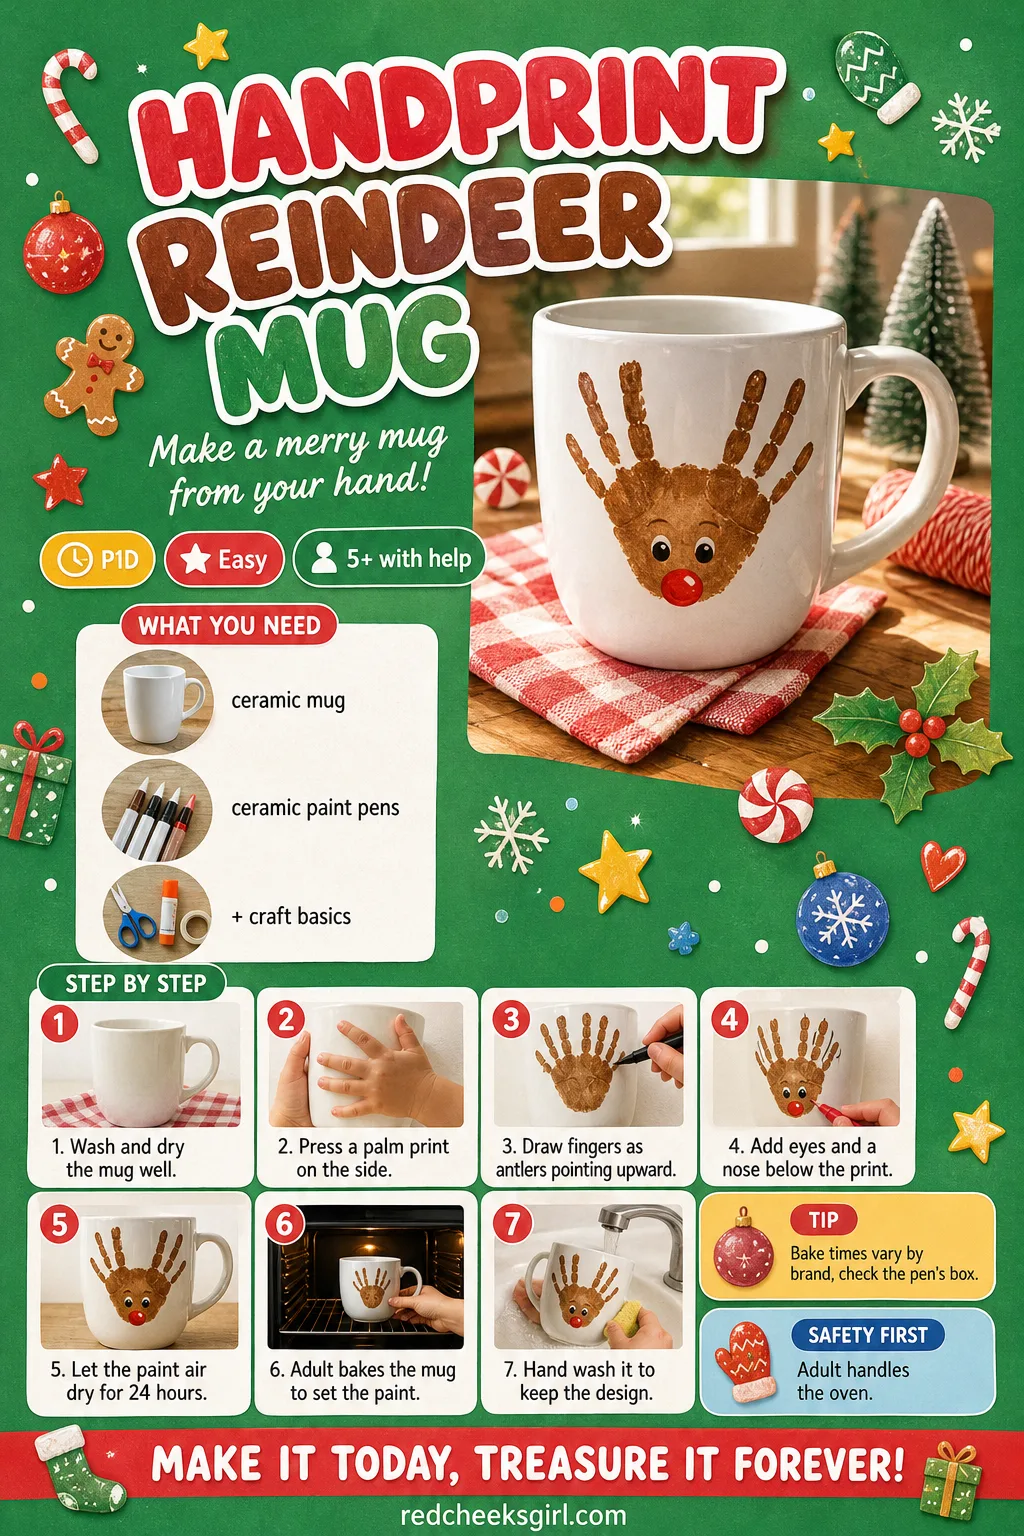
- Handprint Reindeer Mug
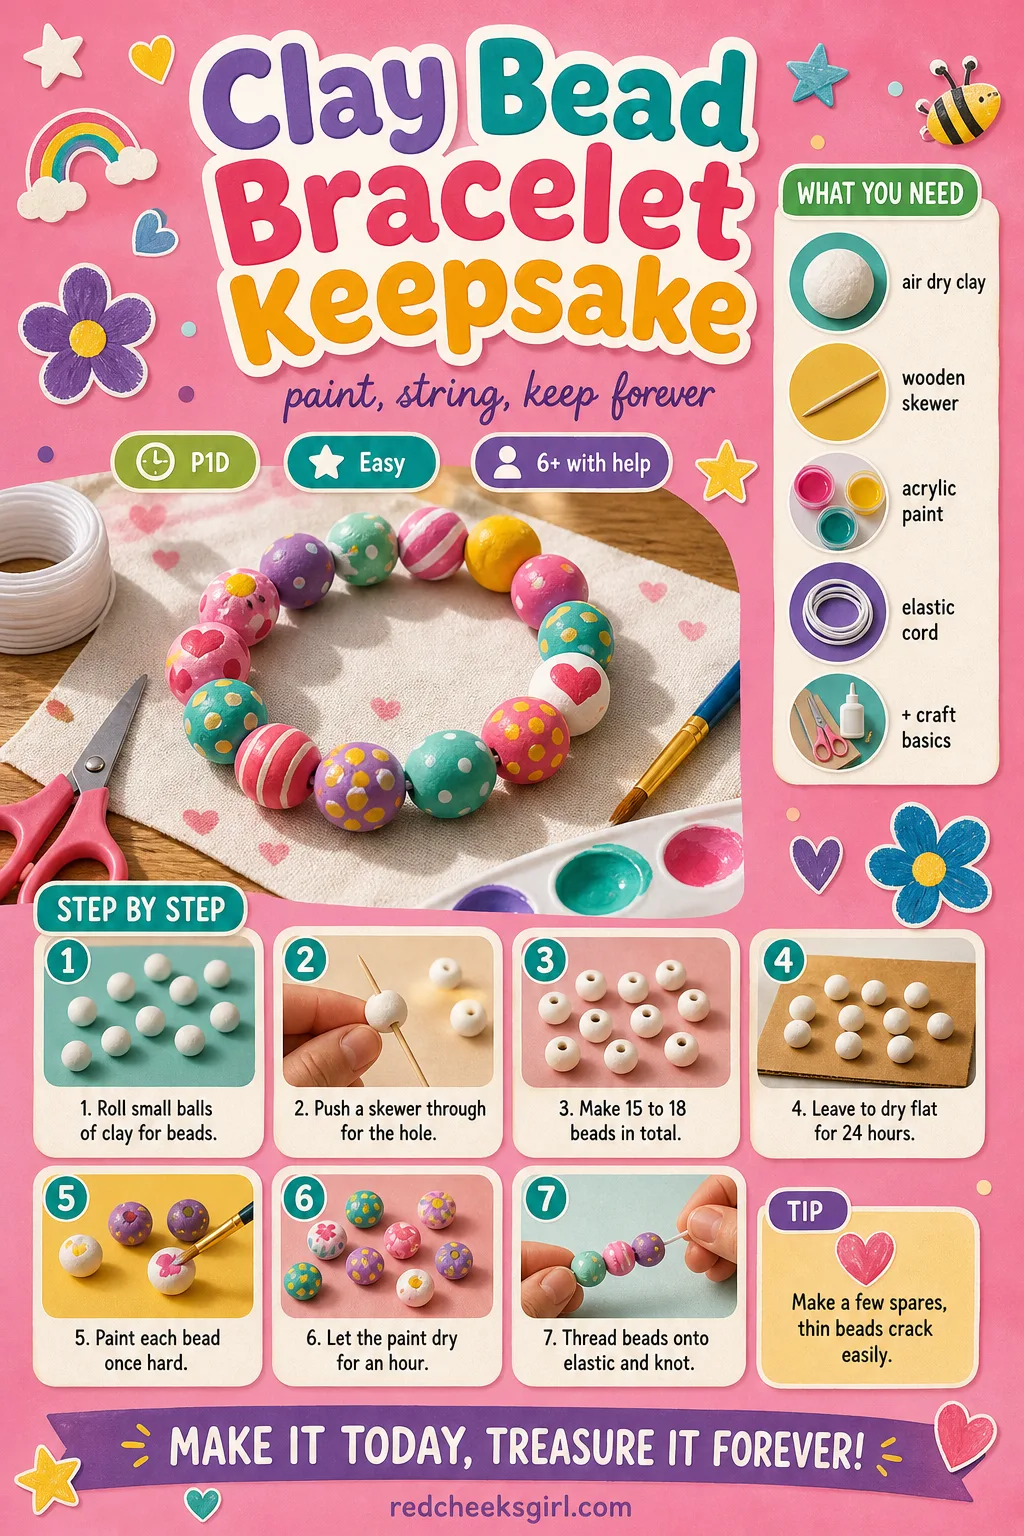
- Clay Bead Bracelet Keepsake
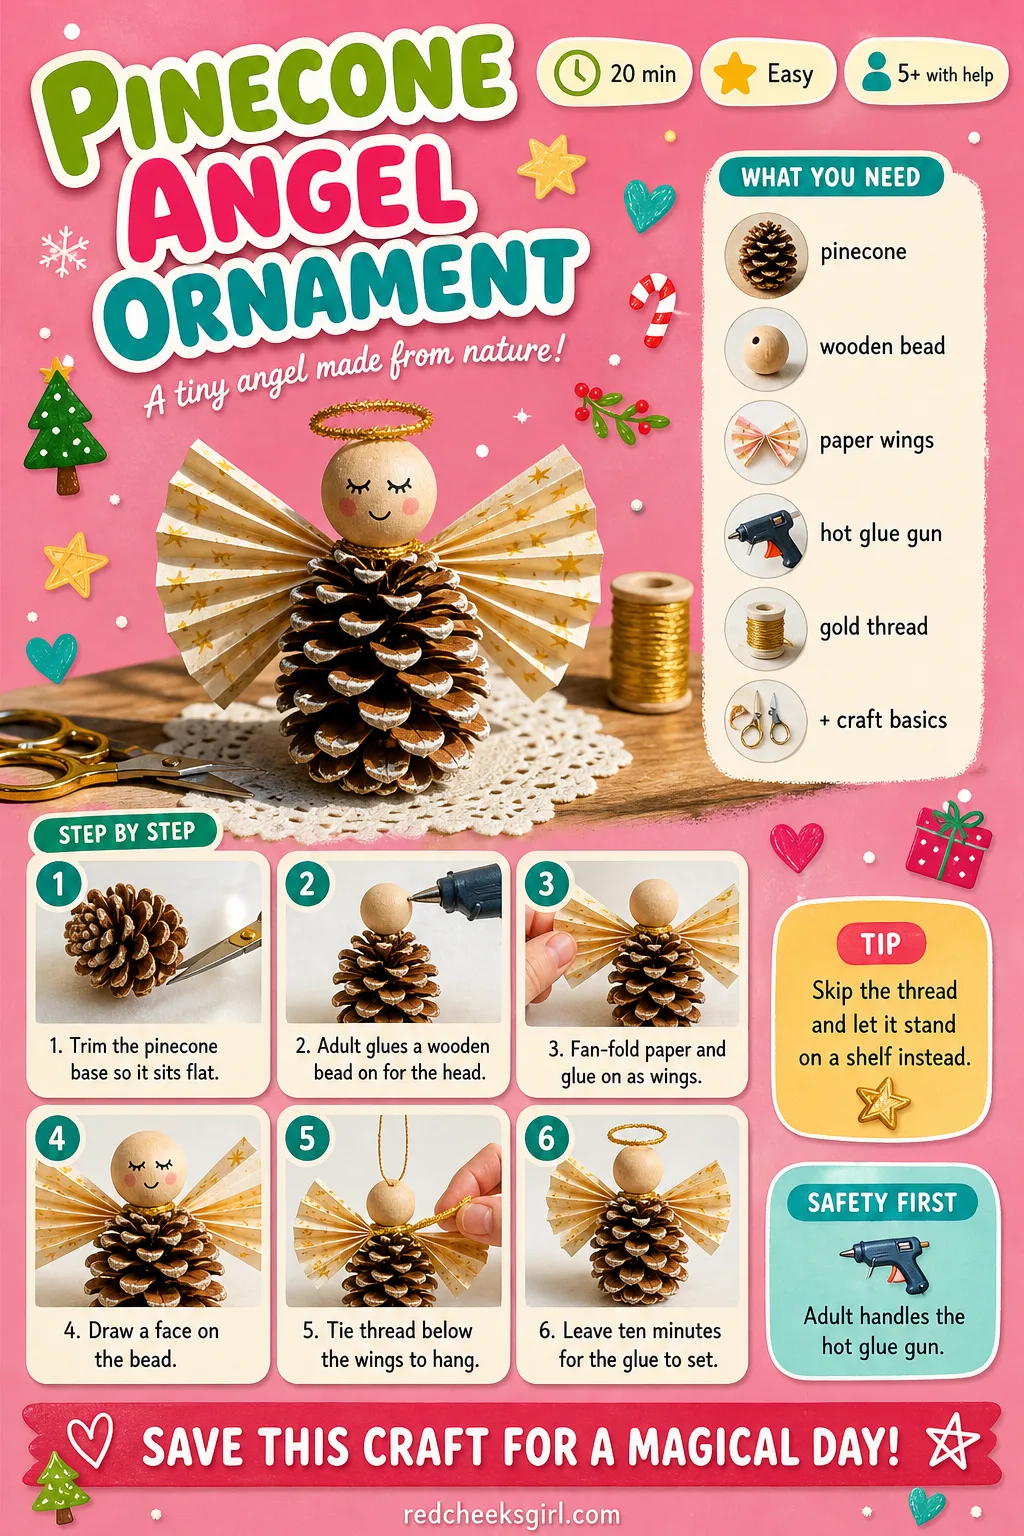
- Pinecone Angel Ornament
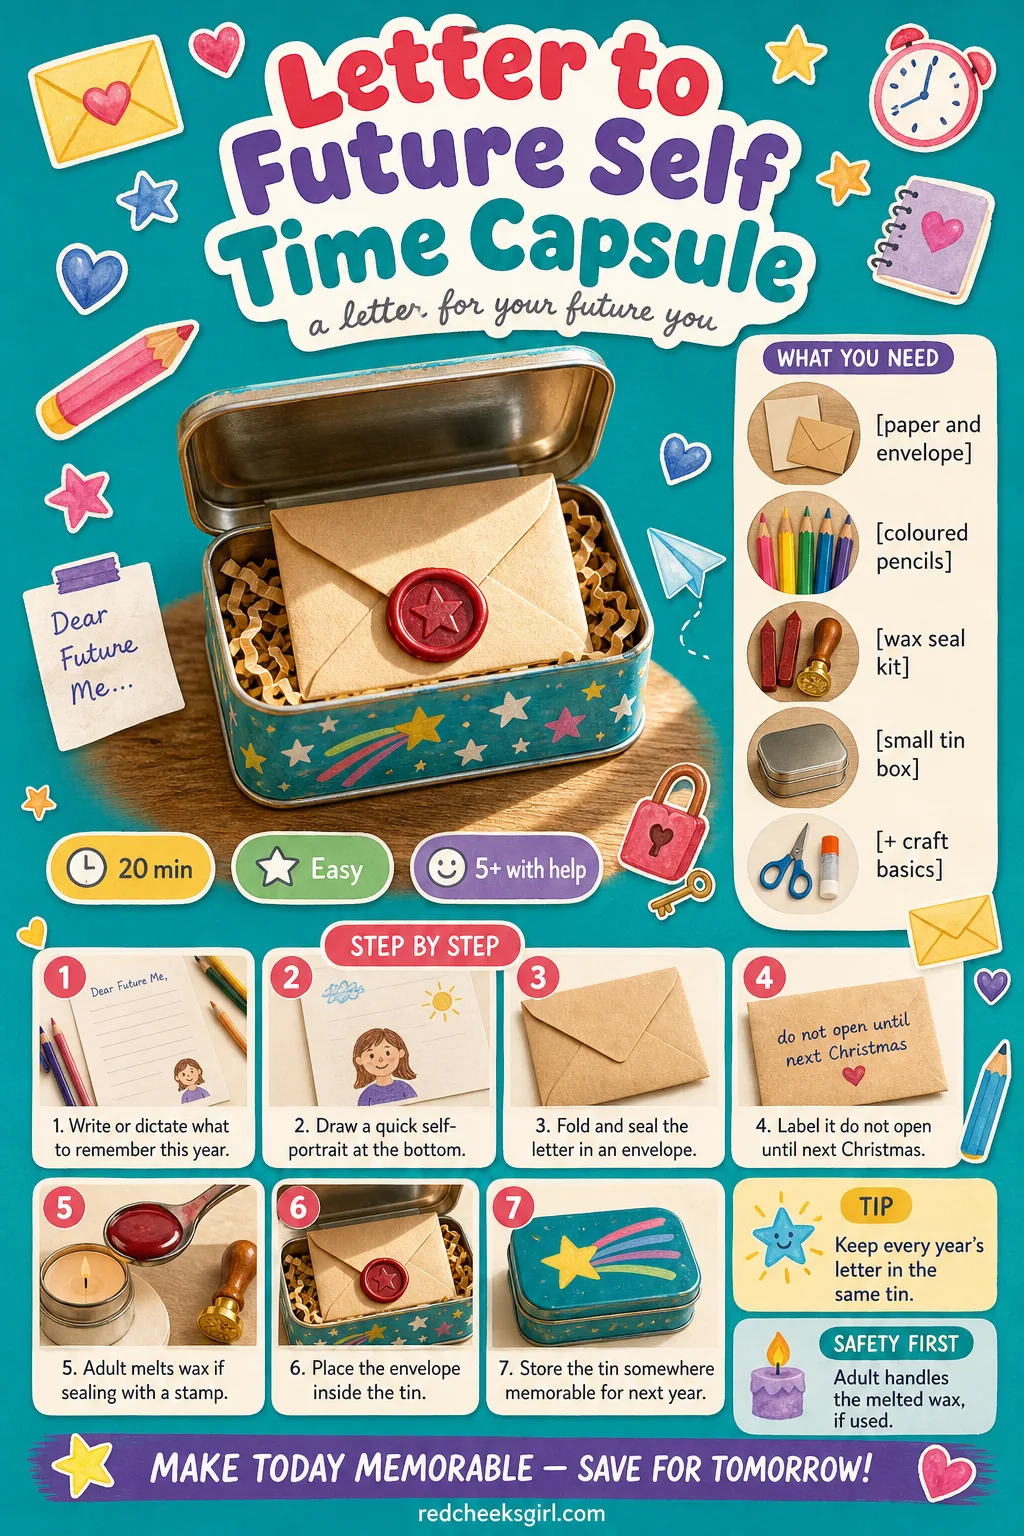
- Letter to Future Self Time Capsule
- Frequently Asked Questions
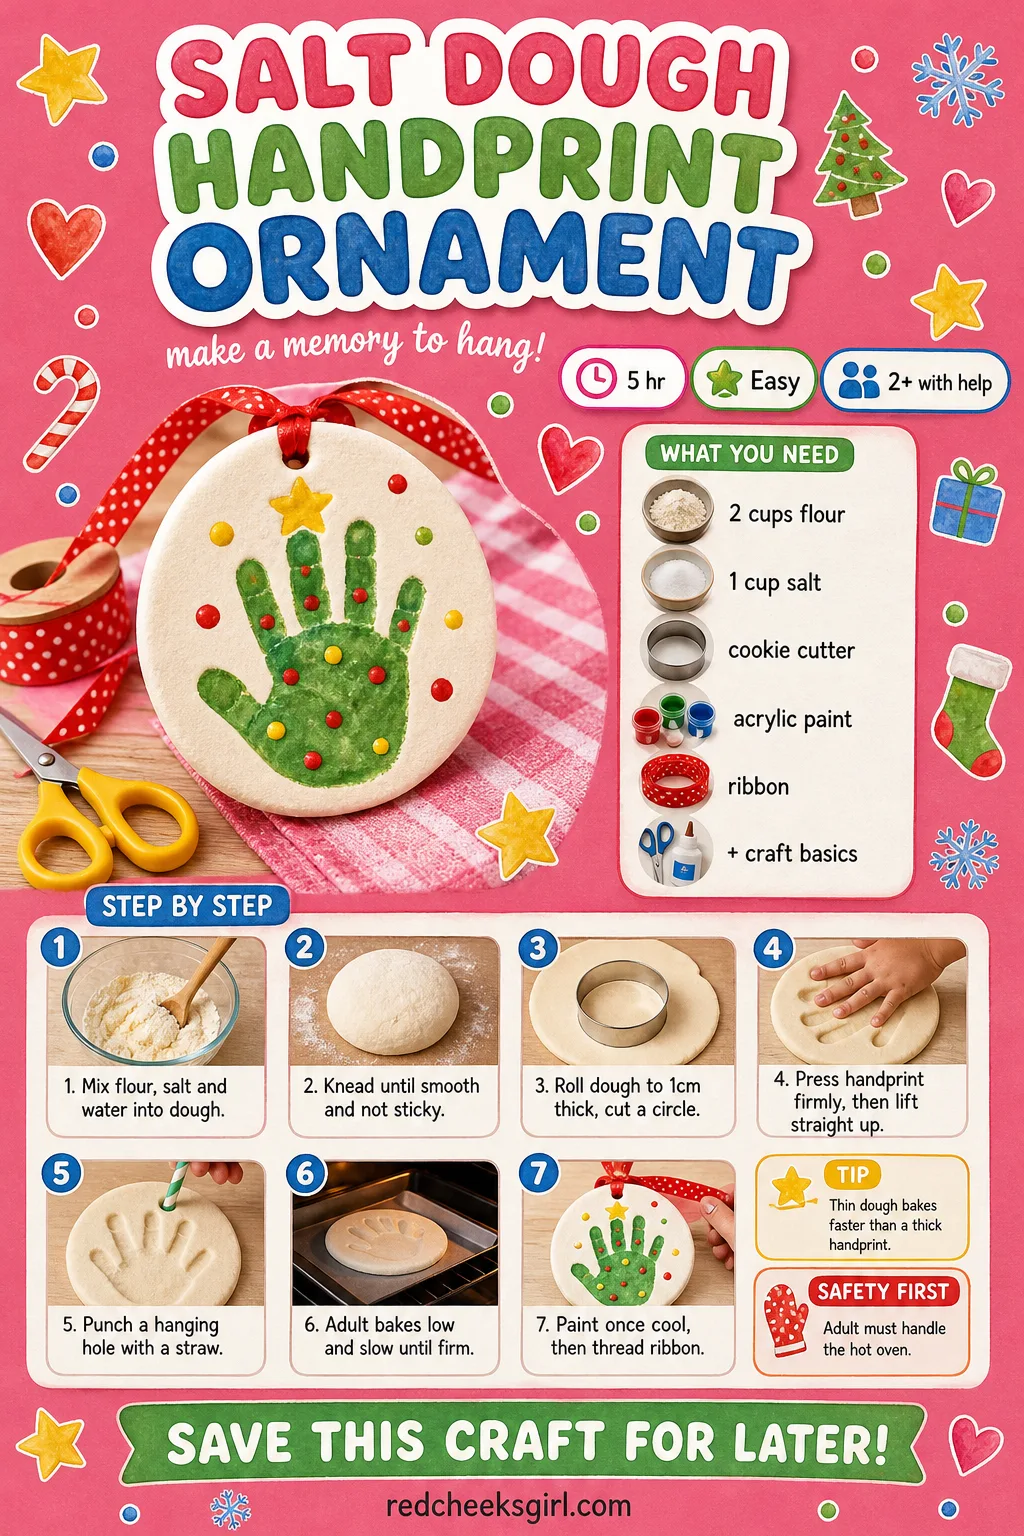
Salt Dough Handprint Ornament
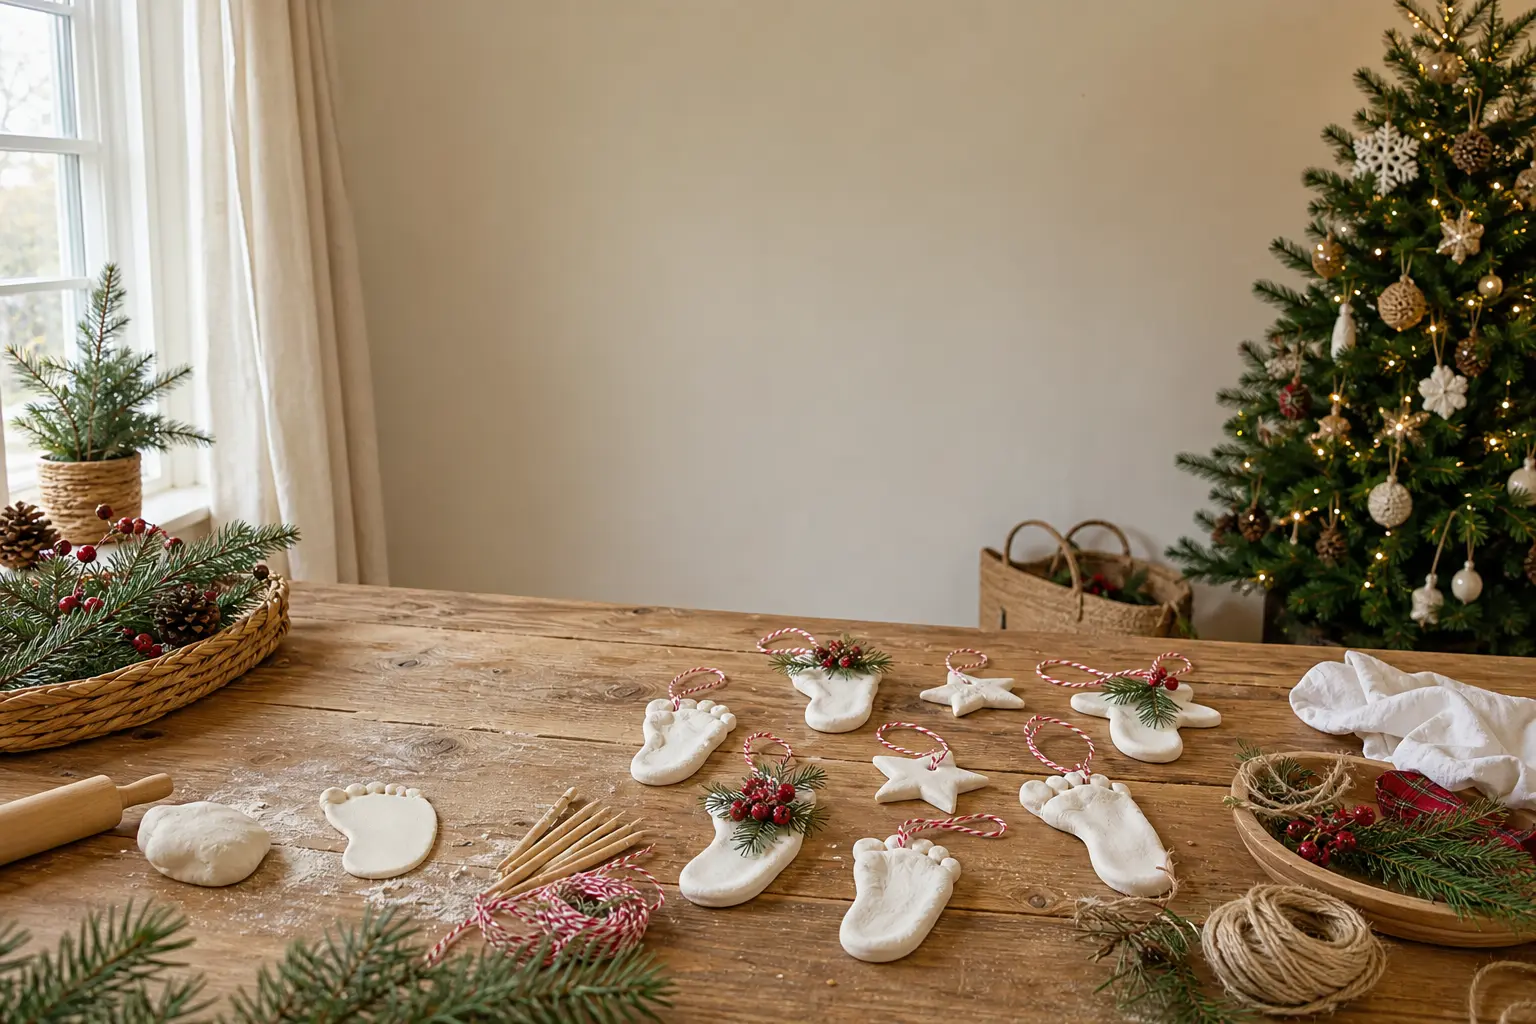
This is the one that gets pulled out of the box first every single year, because nothing marks how small a hand used to be quite like dough pressed flat by it. It hangs on the tree now and, honestly, sits on a shelf the rest of the year once the child is too big to believe it is their hand.
What You Need
- 2 cups plain flour
- 1 cup table salt
- 1 cup warm water
- a rolling pin
- 1 round cookie cutter, 10cm wide
- a drinking straw
- acrylic paint, assorted colours
- a fine paintbrush
- 30cm ribbon or twine
How to Make It
- Mix the flour and salt in a bowl, then stir in the water until a firm dough forms.
- Knead the dough on a floured surface for five minutes until it feels smooth, not sticky.
- Roll the dough out to about 1cm thick and cut a circle with the cookie cutter.
- Press your child’s hand firmly into the dough for a few seconds, then lift it straight up.
- Use the straw to punch a hole near the top edge for hanging.
- Ask an adult to bake it on a lined tray at 150C (300F) for 2 to 3 hours until firm, then leave to cool completely.
- Paint the handprint once it is fully cool, leave to dry for an hour, then thread the ribbon through the hole.
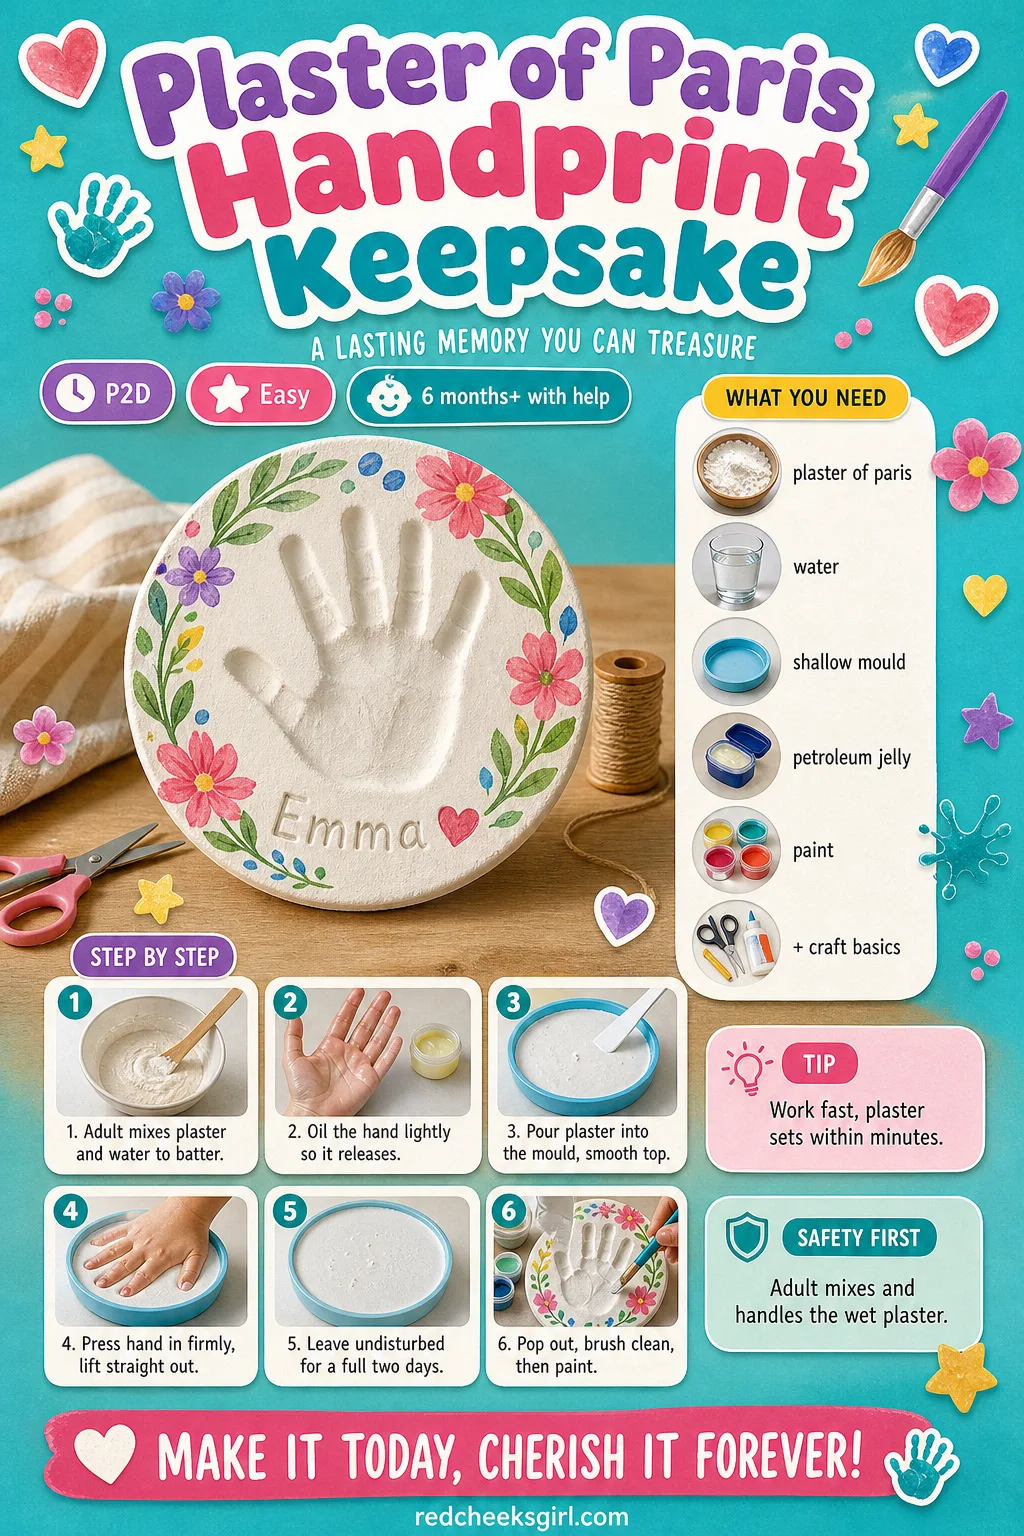
Plaster of Paris Handprint Keepsake
No oven, no overnight wait for baking, just a quick mix and a press, which feels like a small miracle on a busy day! It suits the smallest hands best, the ones too young to sit still for a salt dough recipe, and it dries pale and smooth rather than crumbly.
What You Need
- 2 cups plaster of paris powder
- 1.5 cups cold water
- a disposable mixing bowl
- a shallow mould or paper plate, 15cm wide
- petroleum jelly
- acrylic paint and a paintbrush
- a wooden spoon for mixing
How to Make It
- An adult should mix the plaster powder and water together until it looks like thick pancake batter.
- Rub a little petroleum jelly over the hand or foot that is going to make the print, to stop it sticking.
- Pour the plaster into the mould and smooth the top gently with the spoon.
- Press the hand or foot into the plaster firmly for about ten seconds, then lift straight out without wiggling.
- Leave the mould completely undisturbed for 24 to 48 hours until the plaster feels cold and hard right through.
- Pop it carefully out of the mould, brush off any loose powder, and paint the background once it is fully dry.
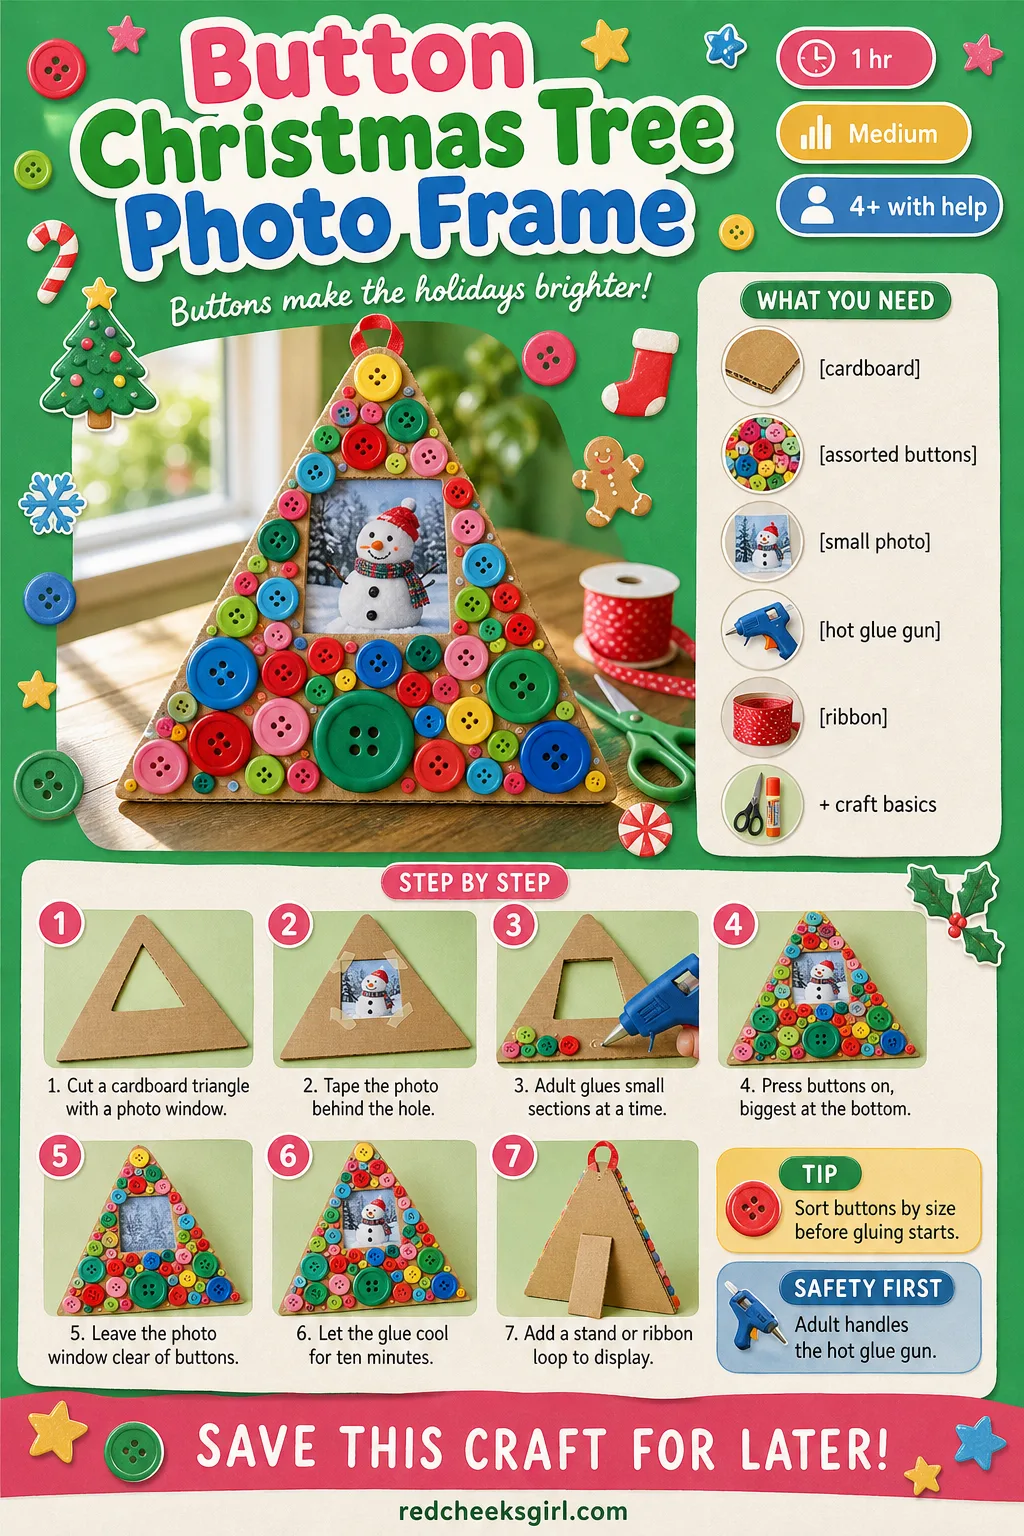
Button Christmas Tree Photo Frame
A cardboard triangle disappears completely under rows of mismatched buttons, with a small square left clear for a photo near the top. It stands on its own on the mantelpiece rather than hanging, which means it survives being handled and admired all season.
What You Need
- a piece of cardboard, 20cm x 20cm
- a pencil and ruler
- about 60 assorted buttons
- a small photo, 4cm wide
- a hot glue gun
- a cardboard stand or ribbon loop for hanging
How to Make It
- Draw a triangle on the cardboard for the tree shape, then cut a small square hole near the base for the photo window.
- Lay the photo behind the hole and tape it in place from the back.
- An adult should run a line of hot glue across one small section at a time, so it does not cool before the buttons go on.
- Press buttons on in rows, biggest at the bottom and smallest near the top, leaving the photo window clear.
- Once every gap is filled, let the glue cool fully, about ten minutes, before picking it up.
- Fold a strip of card into a triangle stand on the back, or glue a ribbon loop for hanging instead.
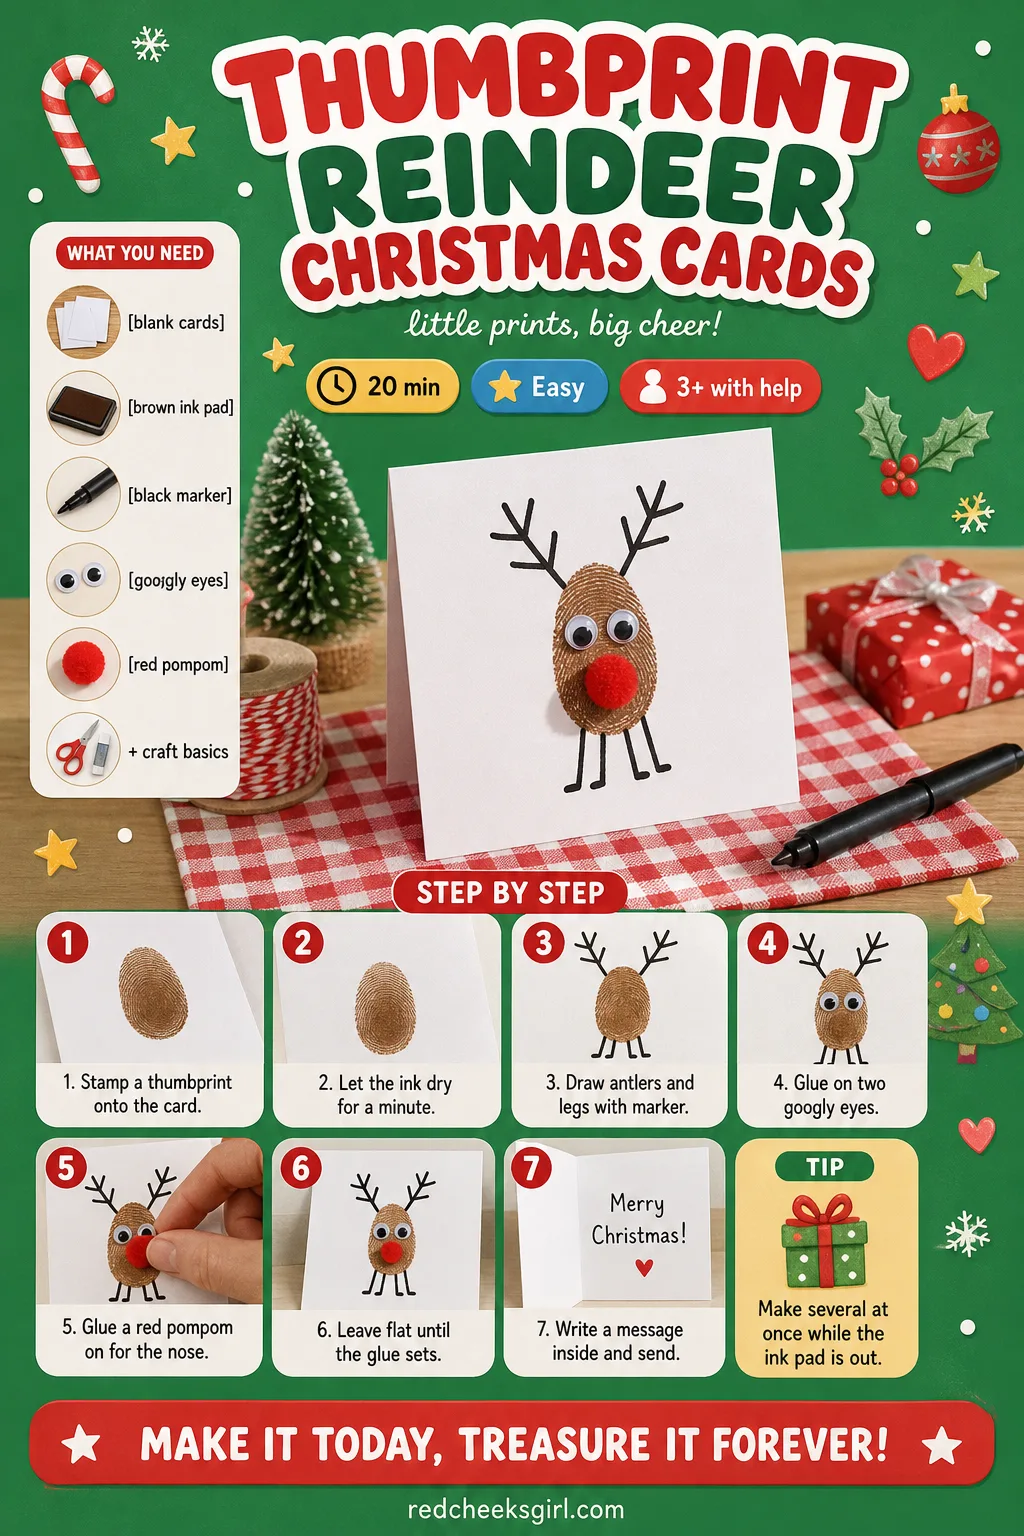
Thumbprint Reindeer Christmas Cards
A whole batch of these takes less time than wrapping one present, and every card arrives with a thumbprint nobody else on earth can copy. Send them to grandparents who live too far for the glue and glitter version of Christmas.
What You Need
- blank cards and envelopes, 10cm x 15cm
- a brown ink pad
- a fine black marker
- 2 small googly eyes per card
- a tiny red pompom, 1cm wide
- craft glue
How to Make It
- Press a thumb onto the brown ink pad, then stamp it firmly onto the front of the card, thumb pointing down.
- Let the ink dry for a minute so it does not smudge.
- Draw two thin antler lines up from the top of the print and four thin legs underneath with the marker.
- Glue on two googly eyes near the top of the print.
- Dab a little glue on the tip of the thumbprint and press the red pompom on for the nose.
- Leave flat for five minutes until the glue grabs, then write a message inside.
🛍 Shopping guide
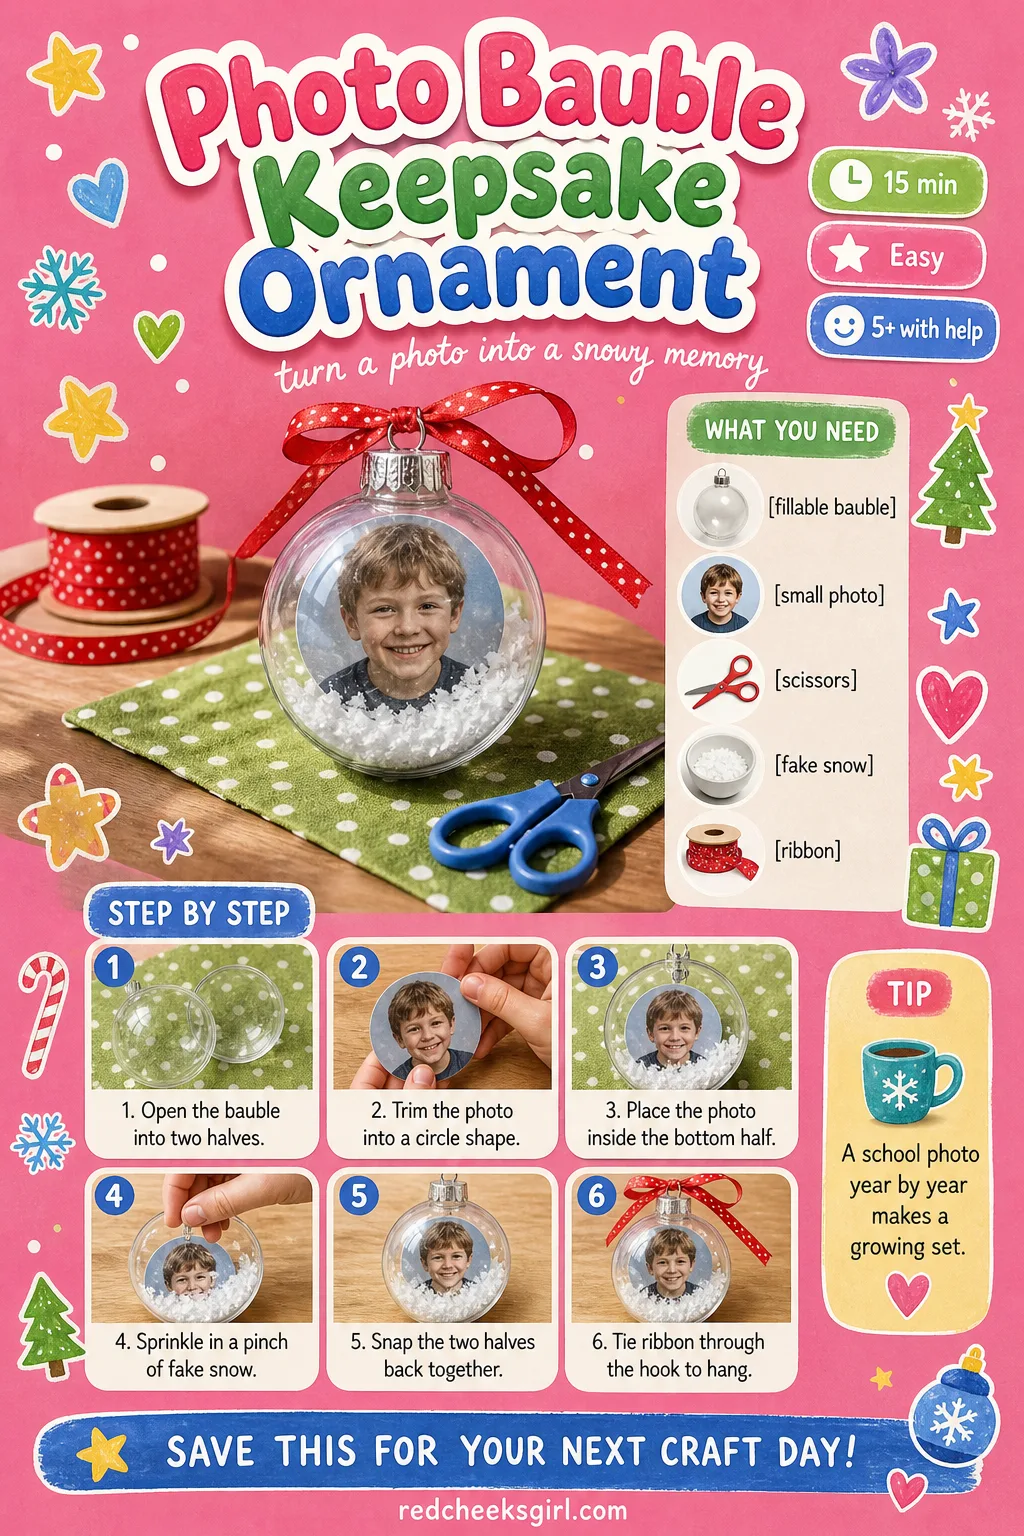
Photo Bauble Keepsake Ornament
A clear bauble filled with nothing more than this year’s school photo and a pinch of fake snow becomes the one grandparents hang front and centre, every time. Keep the empty box it came in and the whole thing stores itself for next December.
What You Need
- a clear fillable plastic bauble, 8cm wide
- a small photo, trimmed to a circle
- scissors
- a pinch of fake snow or fine glitter
- 30cm narrow ribbon
How to Make It
- Open the bauble into its two halves and trace one half onto the back of the photo.
- Cut the photo to that circle so it fits neatly inside one half.
- Drop the photo face up into the bottom half of the bauble.
- Sprinkle in the fake snow, not too much or it will hide the photo.
- Snap the two halves firmly back together.
- Loop the ribbon through the top hook and tie a bow for hanging.
Air-Dry Clay Pinch Pot Trinket Dish
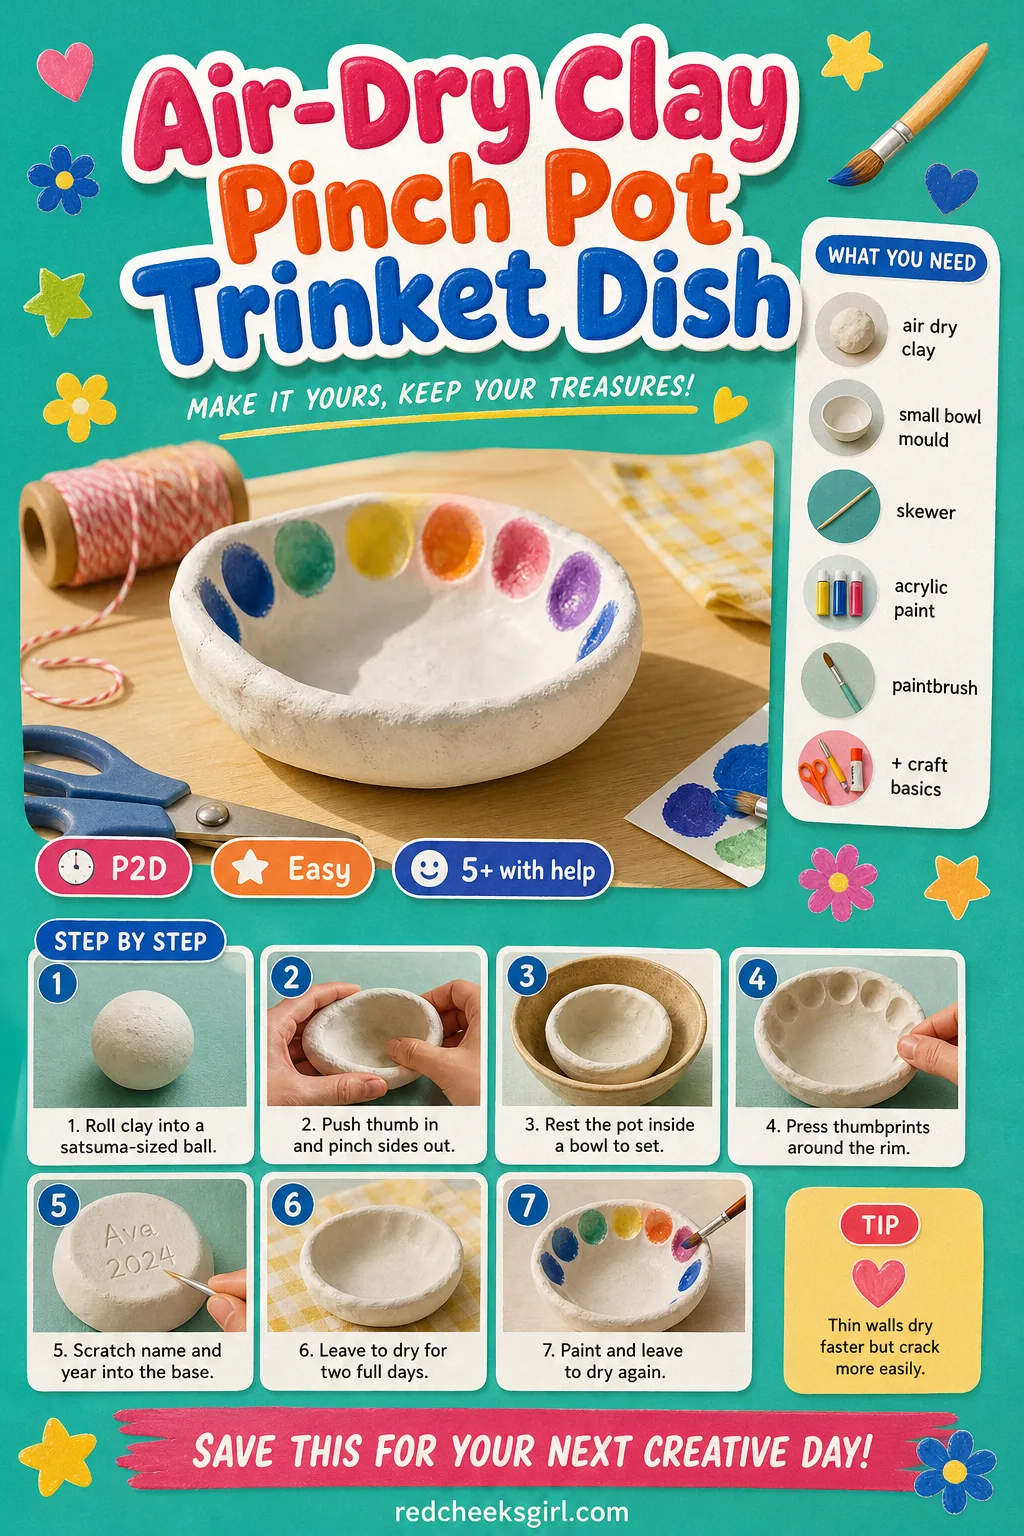
A small bowl for rings, loose teeth or the stray Lego piece, pinched into shape and ringed with thumbprints around the rim. It earns its keep on a dresser long after the tree has come down, which is more than most ornaments can say.
What You Need
- 200g white air-dry clay
- a small bowl, 8cm wide, to shape over
- a wooden skewer or toothpick
- acrylic paint
- a fine paintbrush
- clear varnish, optional
How to Make It
- Warm the clay in your hands and roll it into a ball the size of a satsuma.
- Push your thumb into the centre and pinch the sides out evenly, turning the ball as you go, until you have a small bowl shape.
- Rest the pot inside the small bowl so it keeps its shape while it firms up.
- Press a line of thumbprints around the rim, or use the skewer to scratch a name and the year into the base.
- Leave it to air dry for 24 to 48 hours until it feels hard and cold, not cool and soft.
- Paint the inside and the rim, then leave to dry for another hour before use.
🛍 Shopping guide
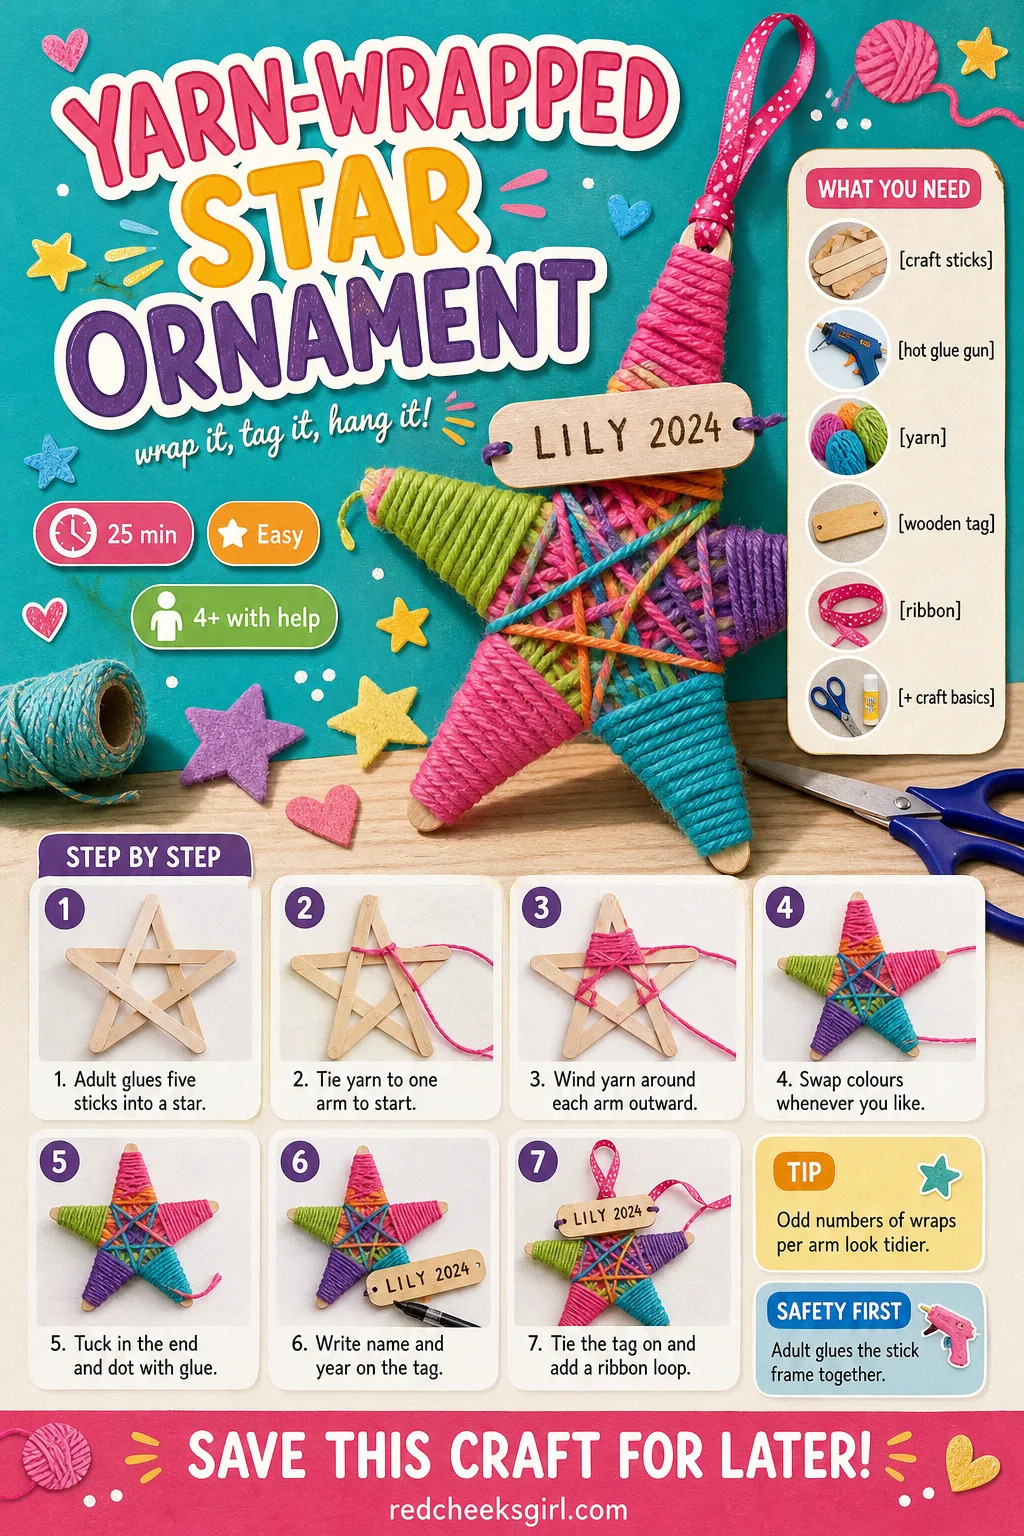
Yarn-Wrapped Star Ornament
Five sticks, glued into a star and wound round and round in whatever yarn is sitting in the basket, finished with a small wooden tag bearing a name and a year. There is no cutting once the frame is glued, which makes it a good one for the littlest crafters at the table.
What You Need
- 5 wooden craft sticks, 15cm long
- a hot glue gun
- yarn in 2 or 3 colours, about 10 metres total
- a small wooden tag
- a fine marker
- 20cm ribbon or cord
How to Make It
- An adult glues the five sticks into a star shape, crossing and overlapping the ends, and lets it set for a minute.
- Tie the end of the yarn tightly around one arm of the star, near a crossing point.
- Wind the yarn round and round each arm, working outward from the centre, and swap colours whenever you fancy.
- Tuck the loose end under the last few wraps and dot a little glue on it to hold.
- Write the child’s name and the year on the wooden tag and tie it to one point of the star.
- Loop ribbon through the top point for hanging.
🛍 Shopping guide
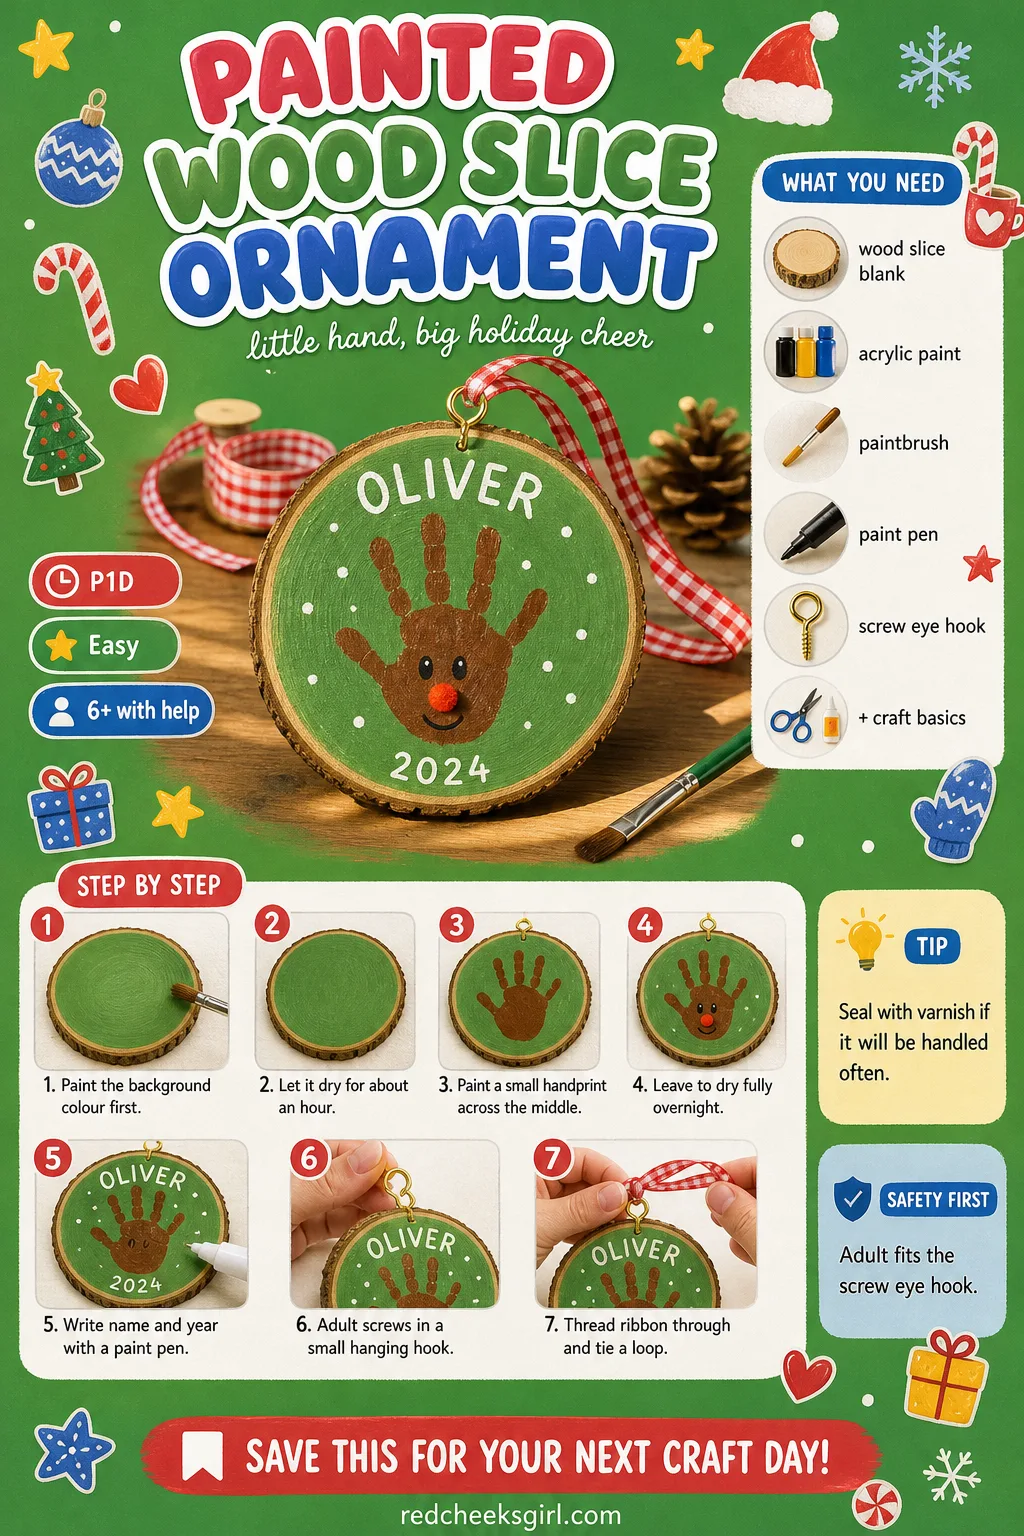
Painted Wood Slice Ornament
A real slice of branch, painted and labelled with a name and a year, looks like it came from a shop even though a seven year old made it. It brings a different texture to a tree otherwise full of glass and glitter, and it survives being handled far better than either.
What You Need
- a wood slice ornament blank, 8cm wide
- acrylic paint in 2 colours
- a paintbrush
- a fine paint pen, gold or white
- a small screw eye hook
- 20cm ribbon
How to Make It
- Paint the front of the wood slice in a plain background colour and leave it to dry for about an hour.
- Once dry, paint a small handprint across the middle using the child’s little finger or thumb for a reindeer or robin shape.
- Leave the paint to dry fully overnight before adding detail, otherwise colours will smear together.
- Use the paint pen to write the child’s name and the year along the bottom edge.
- An adult twists the small screw eye hook into the top edge of the wood.
- Thread ribbon through the hook and tie a loop for hanging.
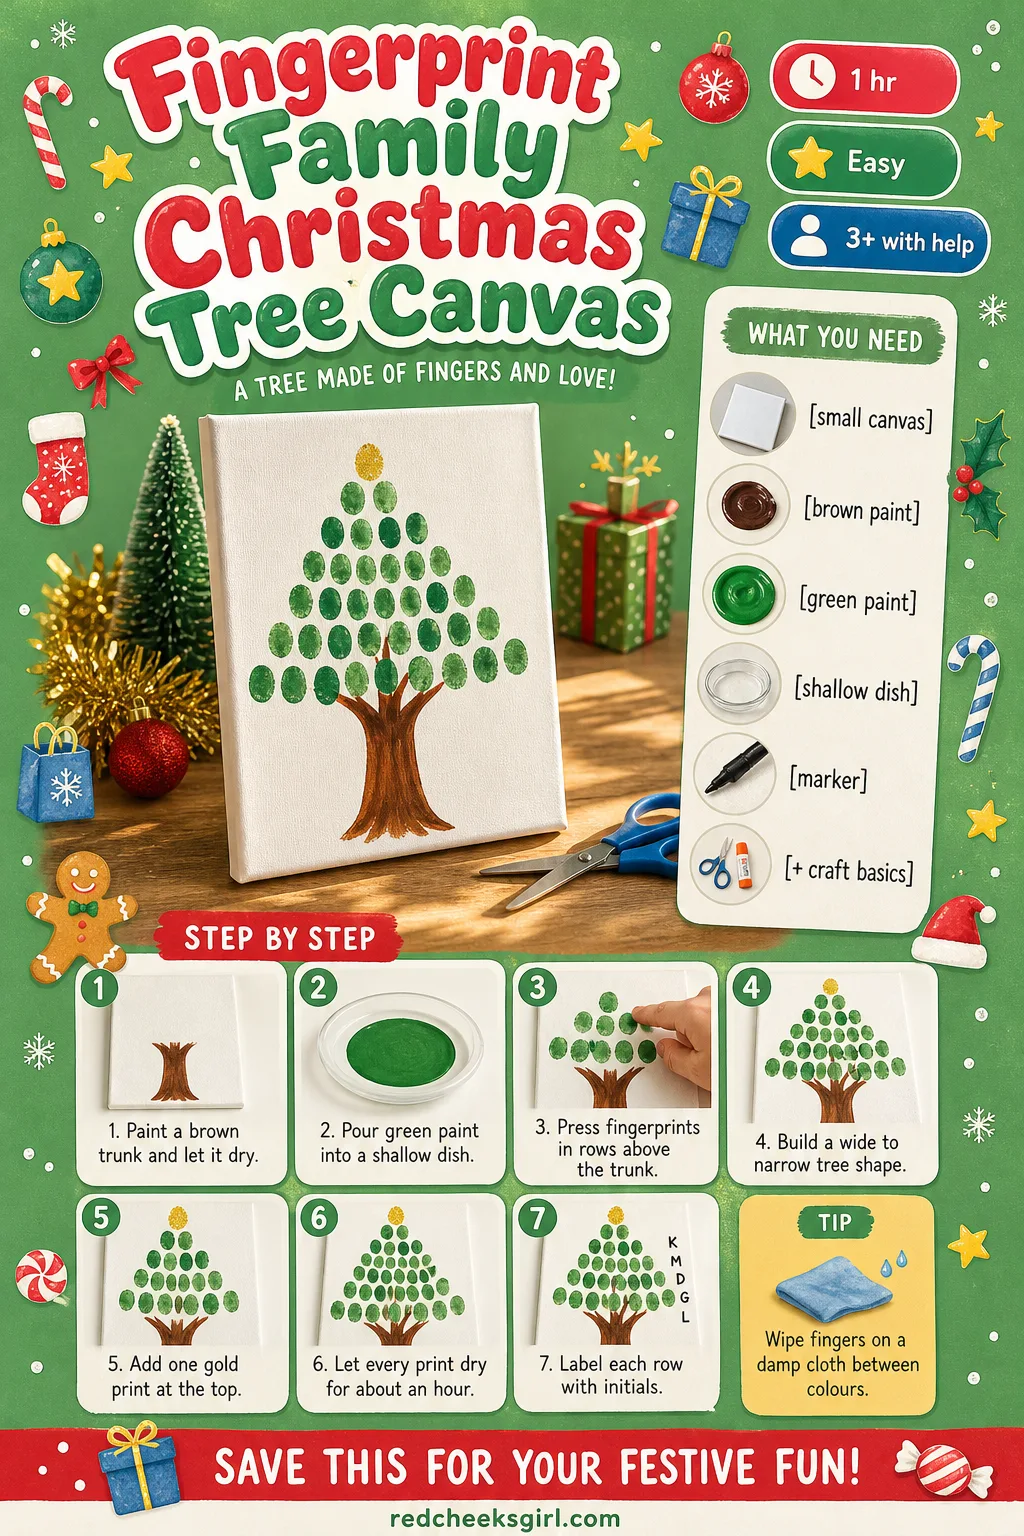
Fingerprint Family Christmas Tree Canvas
Every person in the house presses a finger onto a painted branch until the whole family becomes one small tree, star fingerprint and all. Hang it somewhere other than the actual tree, a hallway or a bedroom, so it does not vanish into a box every January.
What You Need
- a small canvas board, 20cm x 25cm
- brown acrylic paint for the trunk
- green acrylic paint for the branches
- a fine paintbrush
- a shallow dish for the paint
- a fine black marker
How to Make It
- Paint a simple brown trunk up the bottom third of the canvas and let it dry for about 20 minutes.
- Pour a little green paint into the shallow dish.
- Each family member dips a finger and presses prints in rows above the trunk, widest row at the bottom, narrowing toward the top, to build a triangle tree shape.
- Add one gold or yellow fingerprint right at the top for the star.
- Once every print is fully dry, about an hour, write each person’s initial underneath their row of prints with the marker.
- Hang it somewhere it can stay up well past December.
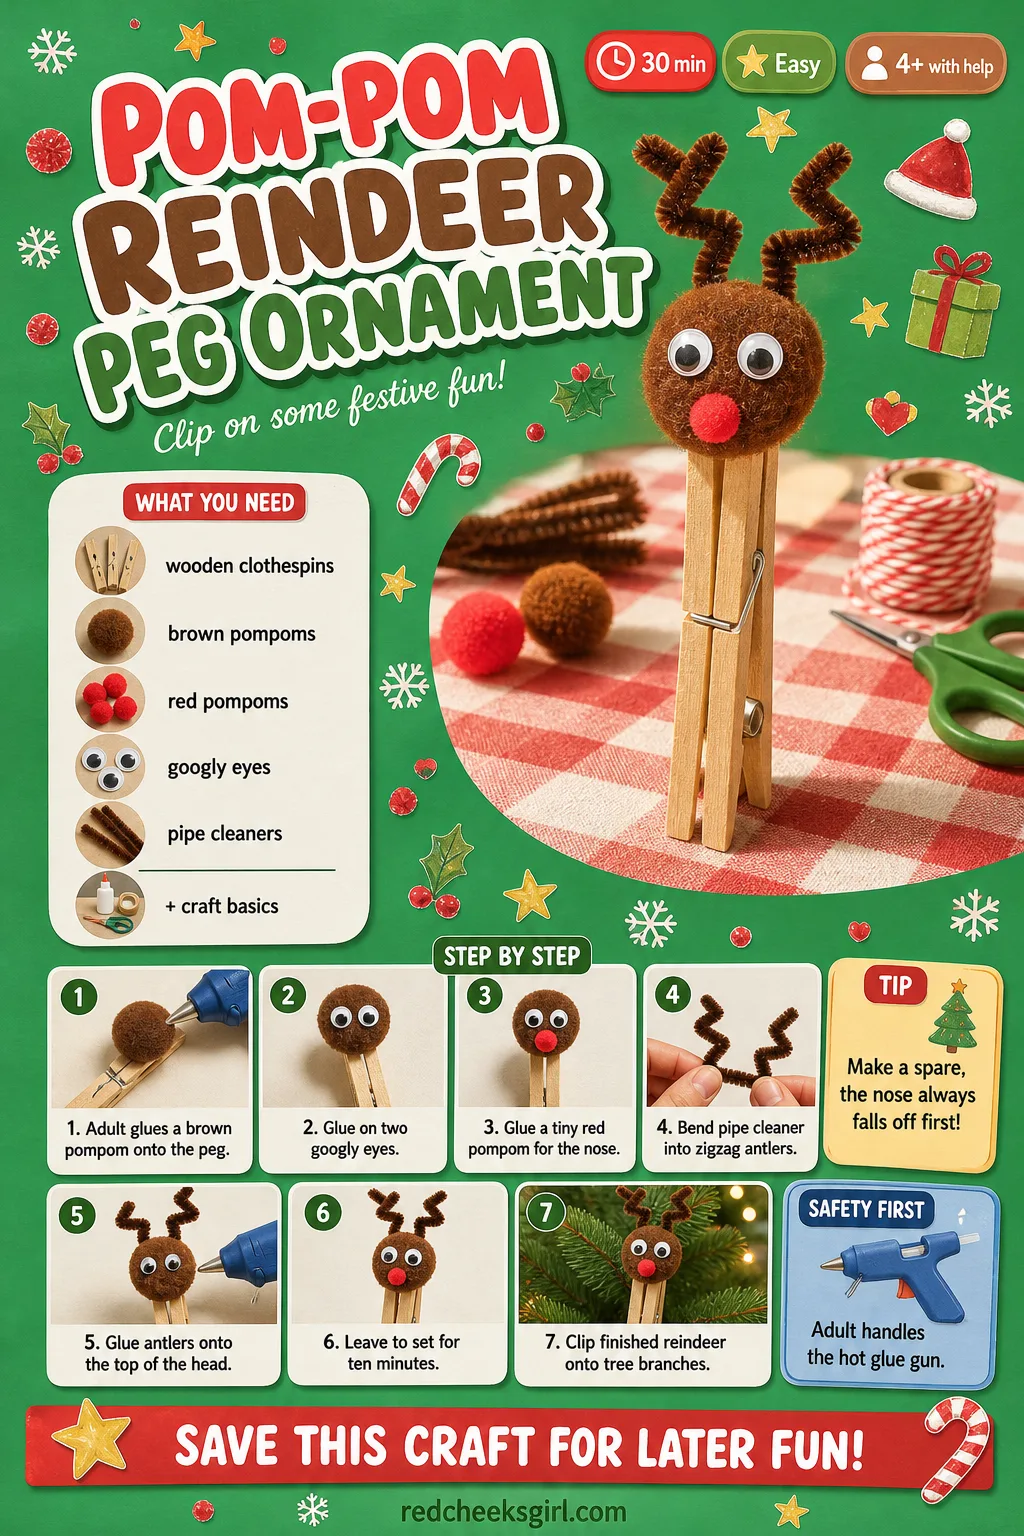
Pom-Pom Reindeer Peg Ornament
A tiny reindeer that clips straight onto a branch instead of needing to be looped on, which solves the actual problem of small hands and tree ornaments. Make a set of six and the whole family gets one with their name quietly written underneath.
What You Need
- 6 wooden clothespins
- 6 brown pompoms, 3cm wide
- 6 small red pompoms, 1cm wide
- 12 small googly eyes
- 2 brown pipe cleaners, cut into quarters
- a hot glue gun
How to Make It
- An adult dabs hot glue onto the rounded top of a clothespin and presses a brown pompom on firmly for the head.
- Glue two googly eyes onto the front of the pompom, close together near the top.
- Glue the tiny red pompom just below the eyes for the nose.
- Bend a quarter piece of pipe cleaner into a zigzag antler shape and glue two onto the top of the head, one each side.
- Repeat for the rest of the set, then leave them for ten minutes to set fully before clipping onto branches.
- Store flat in a small box between seasons so the antlers do not get bent.
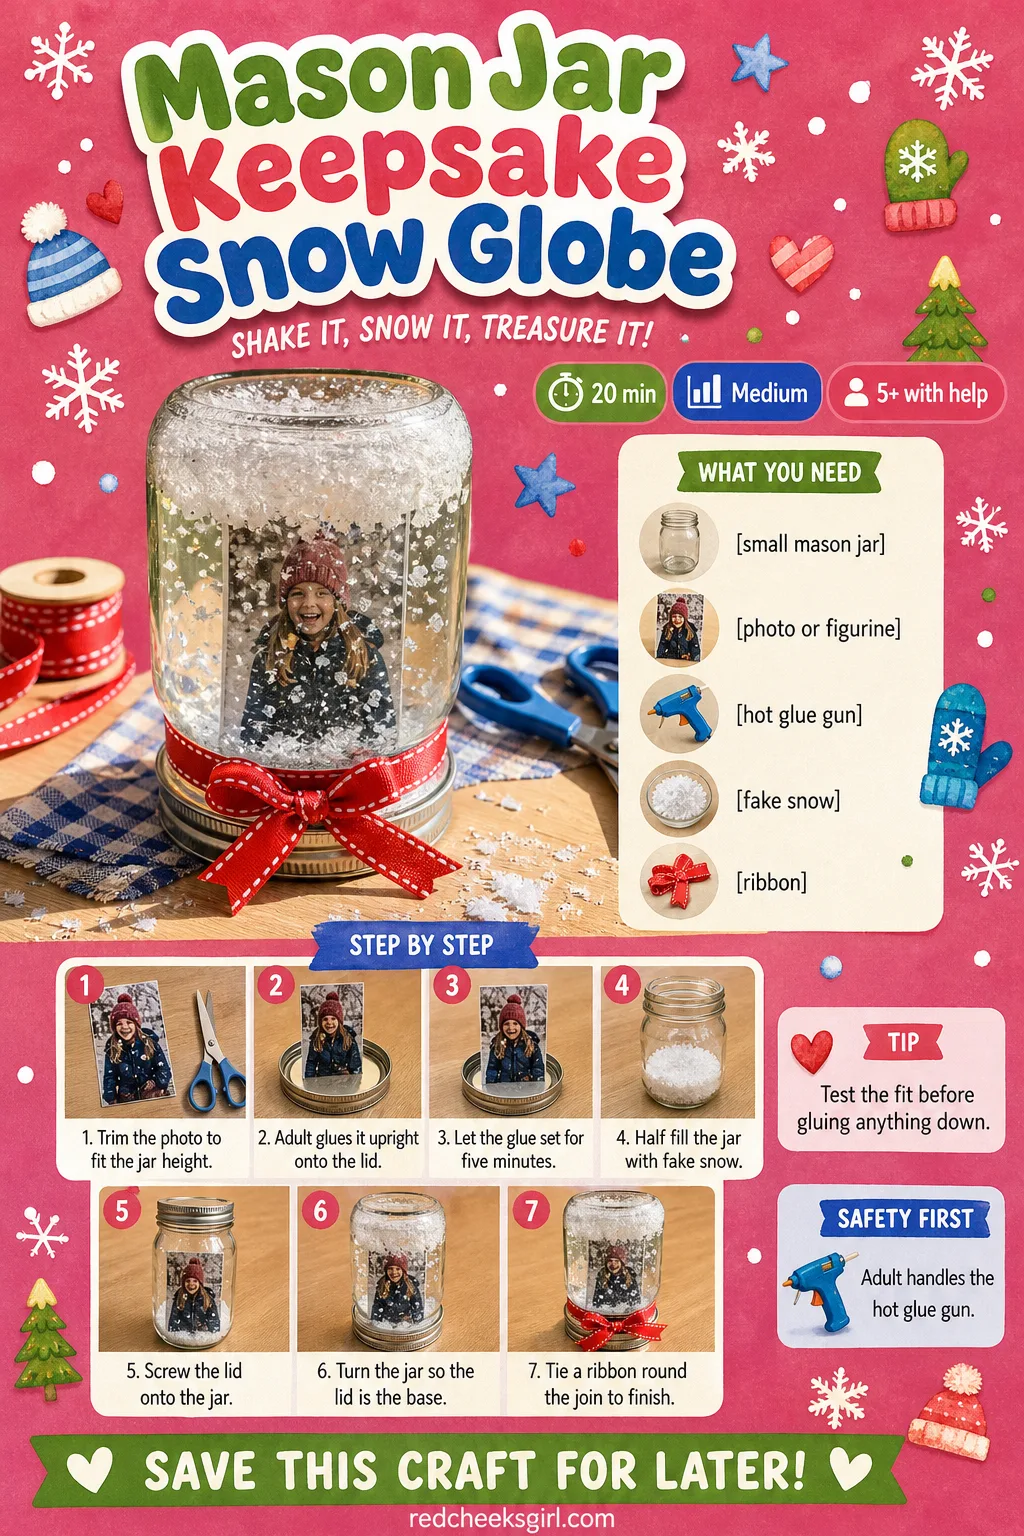
Mason Jar Keepsake Snow Globe
No water, no leaks, nothing to mop up if it tips over, just a photo or a tiny figure dusted with fake snow inside an upturned jar lid. Shake it gently and the snow settles exactly the way the real thing does, without any of the risk.
What You Need
- a small mason jar with a two-part lid, 240ml
- a small photo or tiny figurine
- a hot glue gun
- a pinch of fake snow
- 30cm ribbon
How to Make It
- Trim the photo so it stands slightly shorter than the inside height of the jar, or choose a figurine the same size.
- An adult glues the photo or figurine upright onto the flat top of the inner lid disc.
- Let the glue set hard for about five minutes.
- Half fill the jar with fake snow, then screw the lid, with the photo standing up inside, down onto the jar.
- Turn the jar upside down so the lid becomes the base and the photo stands inside the glass.
- Tie a ribbon bow around the rim where the lid meets the jar to hide the join.
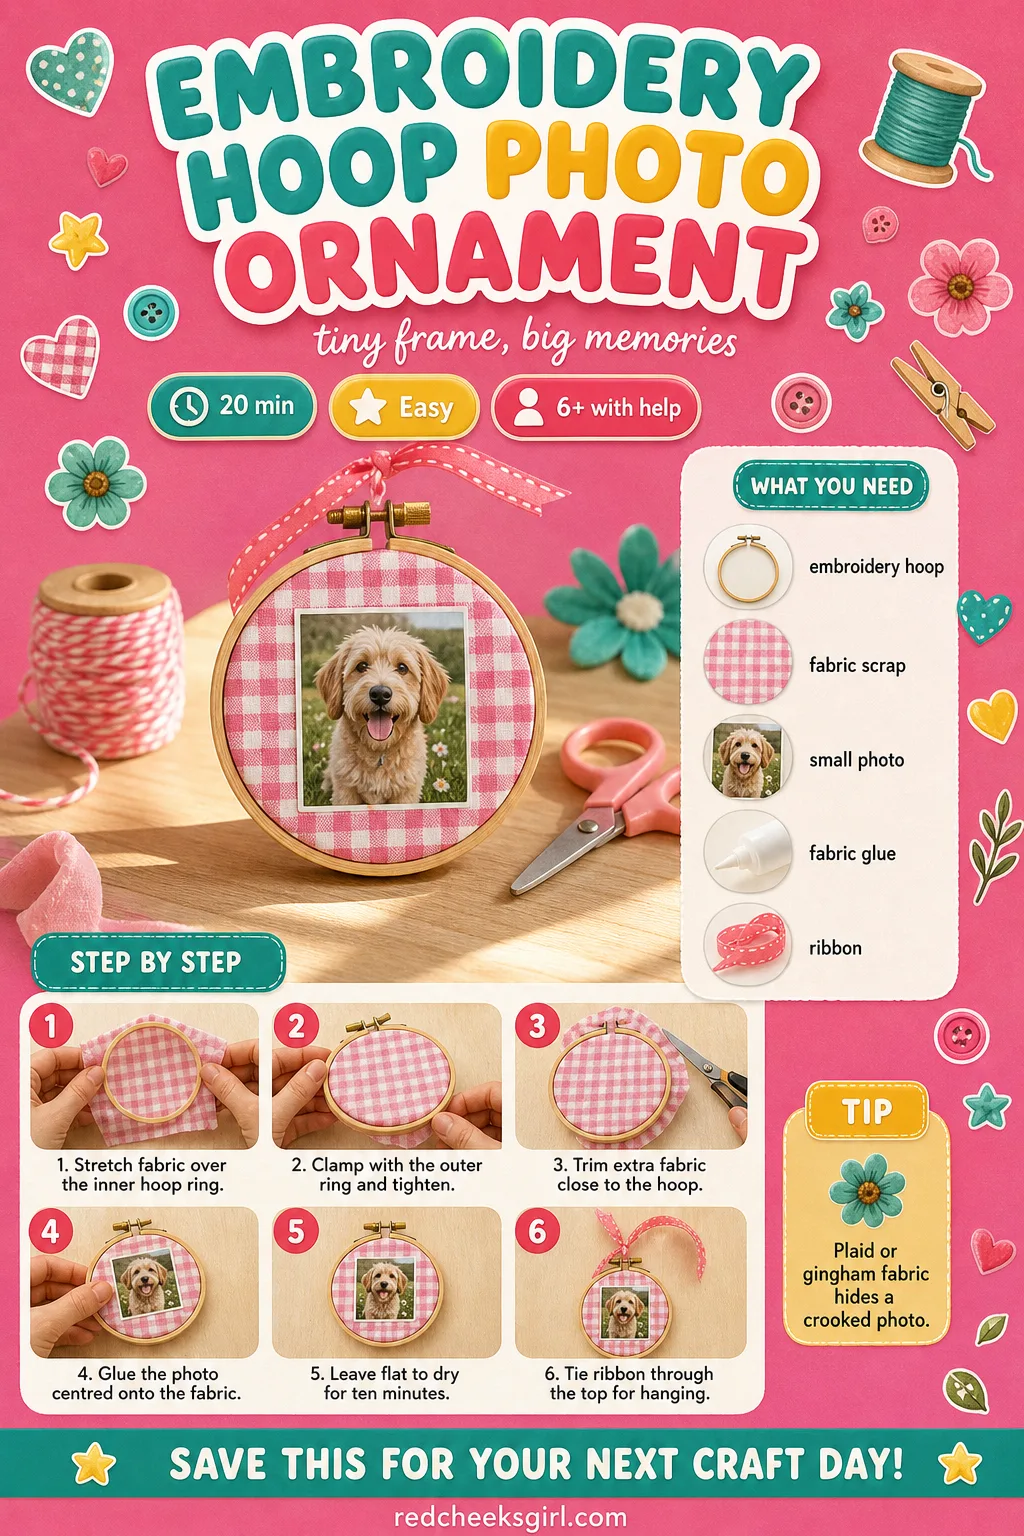
Embroidery Hoop Photo Ornament
A favourite photo stretched over a scrap of fabric inside a tiny wooden hoop, which does the job of a frame without any of the fuss of one. It looks handmade in the good way, the kind grandparents genuinely prop up on a shelf rather than tuck into a drawer.
What You Need
- a mini wooden embroidery hoop, 10cm
- a fabric scrap, 20cm square
- a photo, 7cm square
- fabric glue
- 30cm ribbon
How to Make It
- Separate the two rings of the hoop and lay the fabric over the inner ring.
- Press the outer ring down over the top to clamp the fabric, then pull it taut from the edges and tighten the screw.
- Trim the extra fabric away close to the hoop with scissors.
- Dab fabric glue onto the back of the photo and press it centred onto the stretched fabric.
- Leave flat to dry for about ten minutes.
- Tie a loop of ribbon through the screw fitting at the top for hanging.
🛍 Shopping guide
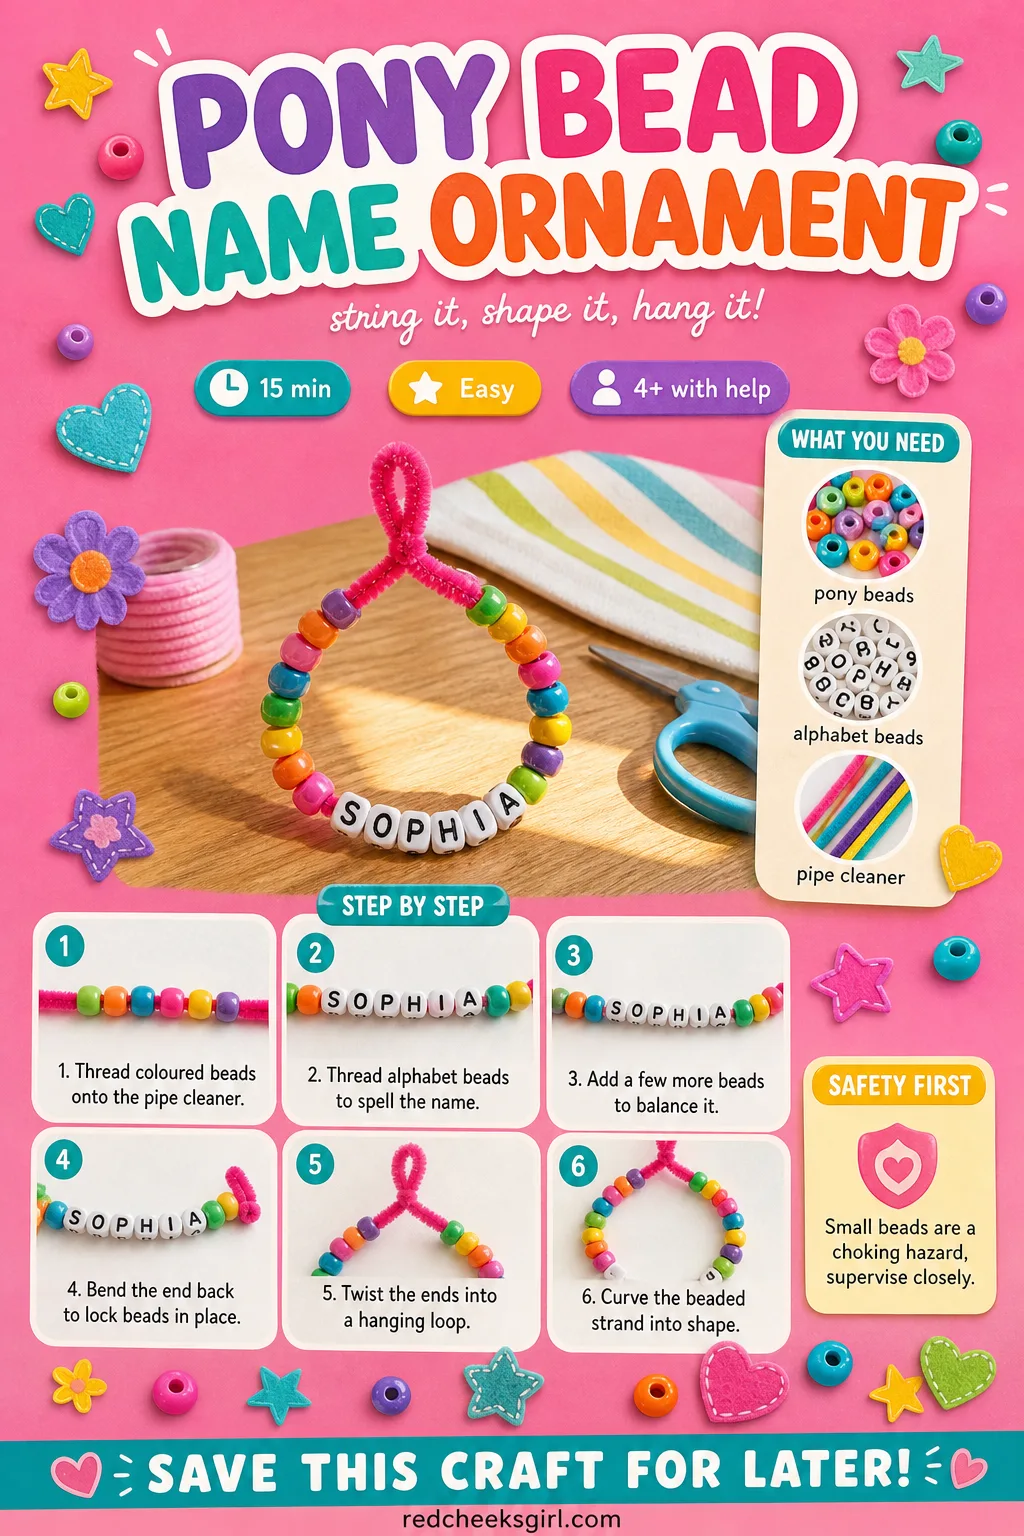
Pony Bead Name Ornament
A name spelled out in bright plastic letters, bent into a loop, that takes about as long to make as it does to read this paragraph. Small children hang these front and centre on the tree, usually with enormous pride, every single time.
What You Need
- alphabet pony beads to spell the name
- about 10 coloured pony beads
- 1 pipe cleaner, 30cm long
How to Make It
- Thread the coloured pony beads onto one end of the pipe cleaner first, leaving about 3cm bare at the tip.
- Thread the alphabet beads on in order to spell the name.
- Add a few more coloured beads after the last letter to balance the design.
- Bend the bare end back through the last couple of beads to lock everything in place, pressing it flat.
- Twist the two ends of the pipe cleaner together into a small loop at the top for hanging.
- Bend the beaded length gently into a soft curve or star shape.
Felt Christmas Stocking Keepsake
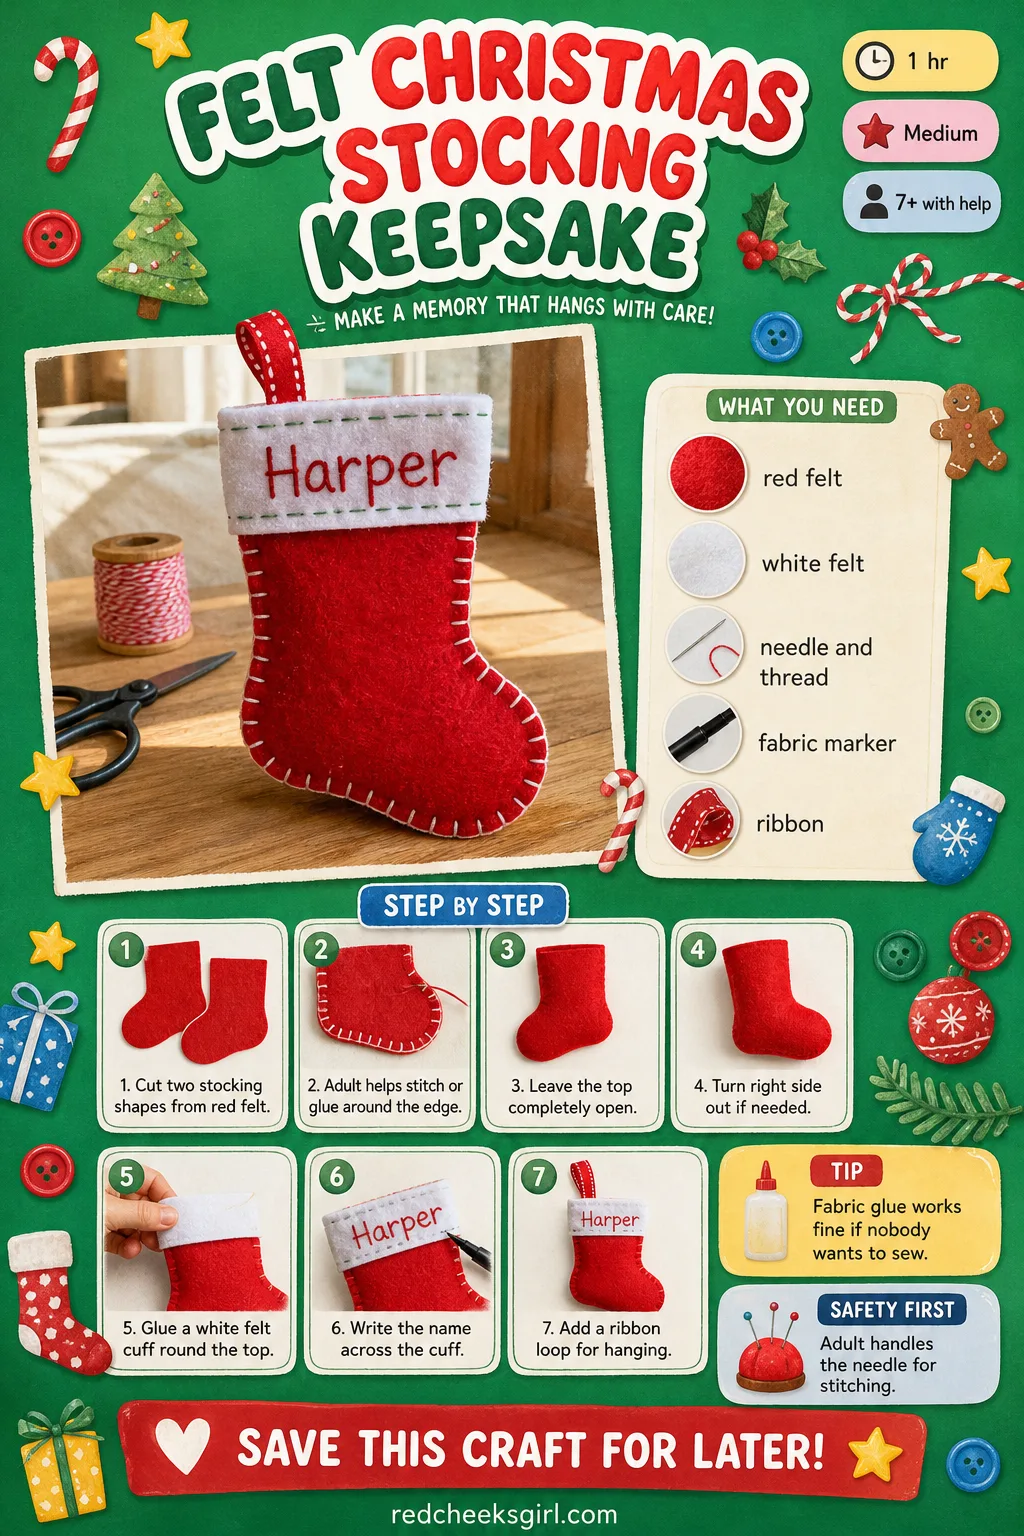
A small felt stocking with a name stitched or inked across the cuff, made to be unwrapped and admired each year rather than filled and hung on a mantel. It makes a gentle first sewing project when an adult threads the needle and sits alongside.
What You Need
- 2 sheets of red felt, 22cm x 30cm
- 1 sheet of white felt, 22cm x 8cm, for the cuff
- a needle and thread, or fabric glue
- a fabric marker
- 20cm ribbon for hanging
How to Make It
- Fold the red felt in half and cut a simple stocking shape through both layers, giving a front and back piece the same size.
- Line the two stocking pieces up and, with an adult helping, stitch or glue around the edge, leaving the top completely open.
- Turn it the right way out if you have sewn it inside out, so the stitches are hidden.
- Glue the white felt strip around the top as a cuff, overlapping the back join.
- Write the child’s name across the cuff with the fabric marker and let it dry for a few minutes.
- Fold a loop of ribbon and stitch or glue it to the inside back of the cuff for hanging.
🛍 Shopping guide
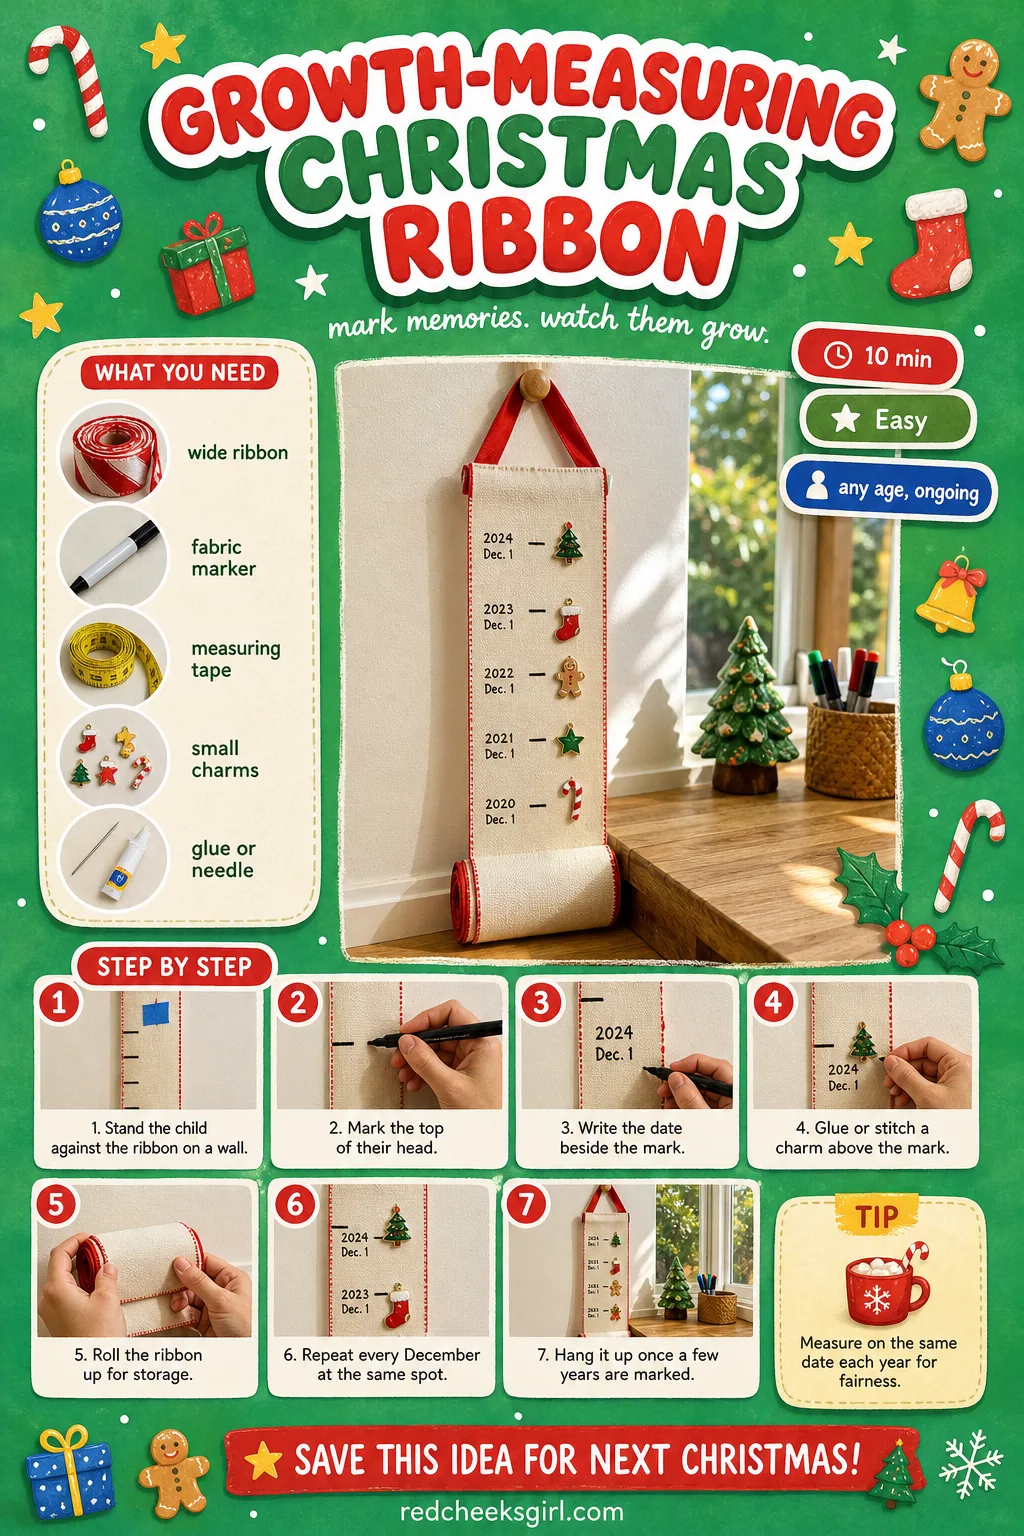
Growth-Measuring Christmas Ribbon
Instead of pencil marks on a doorframe that get painted over the next time the walls do, a ribbon comes out every December and grows a tiny charm for every year measured. It rolls up flat for storage, which is more than can be said for most things on this list.
What You Need
- 150cm of wide grosgrain ribbon
- a fabric marker or paint pen
- a measuring tape
- a small enamel or ceramic charm for each year
- needle and thread, or fabric glue
How to Make It
- Lay the ribbon flat against a wall or doorframe and ask the child to stand against it, heels down, looking straight ahead.
- Mark the top of their head on the ribbon with the fabric marker, and write the date beside the mark.
- Stitch or glue a small charm just above that year’s mark.
- Roll the ribbon loosely and secure with an elastic band or ribbon tie until next year.
- Repeat every December, adding a new mark and a new charm each time, further up the ribbon as the child grows.
- After a few years, hang the ribbon somewhere it can be seen rather than rolled away.
🛍 Shopping guide
Handprint Reindeer Mug
A mug grandma actually drinks her coffee from, not a dust-catcher on a high shelf, decorated with a palm print turned into a reindeer’s face and antlers. It survives the dishwasher’s cousin, the careful hand wash, for years afterward.
What You Need
- a plain white ceramic mug
- ceramic paint pens
- a small red paint pen or dot sticker for the nose
How to Make It
- Wash and dry the mug well so the paint grips properly.
- Press a palm flat against the side of the mug and go over the outline with the ceramic paint pen, fingers pointing up as the antlers.
- Add two eyes and a red nose at the base of the palm print.
- Leave the paint to air dry fully for the time stated on the pen, usually about 24 hours.
- An adult places the mug in a cold oven, sets it to 150C (300F), and bakes for 30 minutes once the oven reaches temperature, then lets it cool inside the oven.
- Hand wash the finished mug rather than using the dishwasher, to keep the design sharp for years.
🛍 Shopping guide
Clay Bead Bracelet Keepsake
A strand of beads a child rolled themselves, slightly lopsided, which is exactly the point of it. It gets worn a handful of times over the holidays and then kept in a drawer forever, pulled out occasionally and marvelled at.
What You Need
- 100g air-dry clay
- a wooden skewer
- acrylic paint, small pots
- a fine paintbrush
- 40cm of elastic cord
How to Make It
- Break off small pieces of clay and roll them between your palms into balls about 1cm wide.
- Push the skewer through the centre of each ball to make a bead hole, then slide it off and set it aside to dry.
- Repeat until there are enough beads to go around the wrist with a little room to spare, about 15 to 18 beads.
- Leave all the beads to dry fully for 24 hours on a flat surface, turning them once halfway through.
- Paint each bead once hard, in one colour or a pattern, and let the paint dry for another hour.
- Thread the beads onto the elastic cord and knot the ends together firmly, hiding the knot inside a bead.
🛍 Shopping guide
Pinecone Angel Ornament
A foraged pinecone becomes a small angel with a wooden bead for a head and paper wings fanned out behind, which means a walk to collect them is part of the craft. The finished angel stands on its own on a shelf just as happily as it hangs from a branch.
What You Need
- 1 pinecone per angel, about 8cm tall
- 1 wooden bead, 20mm, for the head
- cream or gold paper, folded fan style, for wings
- a hot glue gun
- a fine paint pen for the face
- 20cm gold thread
How to Make It
- Check the pinecone sits flat and steady on its base, trimming a scale off the bottom if it wobbles.
- An adult glues the wooden bead onto the top point of the pinecone for the head.
- Fold a small rectangle of paper back and forth like a fan, pinch the middle, and glue it to the back of the pinecone for wings.
- Draw a small face on the bead with the paint pen once the glue has cooled.
- Tie the gold thread around the pinecone below the wings for a hanging loop, or skip it to let the angel stand.
- Leave for ten minutes until every joint is fully set before moving it.
🛍 Shopping guide
Letter to Future Self Time Capsule
Not an object for the tree at all, just a letter sealed and labelled do not open until next Christmas, tucked away with the previous year’s letters in the same tin. The following December, everyone reads the old ones together before writing a new one, and the gap between them says more than any ornament could.
What You Need
- a sheet of paper and an envelope
- coloured pencils
- a wax seal stamp and wax, or a sticker
- a small decorative tin or box
- a label or tag for the date
How to Make It
- Ask the child what they want to remember about this year, favourite toy, best moment, what they want to be when they grow up, and write or help them write it down.
- Let them draw a quick self-portrait at the bottom of the page, exactly as they look right now.
- Fold the letter and seal it in the envelope, writing do not open until next Christmas on the front.
- If using a wax seal, an adult melts and drips the wax, then presses the stamp down for a few seconds to set.
- Place the envelope inside the tin along with any letters from previous years.
- Store the tin somewhere memorable and set a reminder to open it together next December!
🛍 Shopping guide
Frequently Asked Questions
What age should a child be for Christmas keepsake crafts?
Most of these flex up and down. Handprint and footprint crafts suit toddlers with adult help, preschoolers can take on painting and simple gluing, and elementary age children can manage more detailed photo work. Pick the craft to fit the child in front of you rather than her age on paper.
How long do salt dough keepsake ornaments actually last?
Much longer than most people expect. A properly dried salt dough ornament can keep for 30 years or more, since the salt itself works as a natural preservative. Ornaments that crack early almost always had a damp centre when they went into storage.
How do you stop a handprint ornament from cracking?
Two things matter most. Equal parts salt to flour and a dough no thinner than about a centimetre helps stop bubbling and cracking, and keeping the finished piece away from humidity and moisture during storage protects it just as much as the recipe did.
How long does salt dough take to dry or bake?
It depends entirely on thickness. A low oven around 80 to 90C for pieces five to seven millimetres thick takes about two to three hours, while air drying alone takes 48 to 72 hours. A deep handprint takes noticeably longer than a thin cutout star.
How do you store keepsake ornaments between Christmases?
Wrap each piece in bubble wrap and keep it in a container that will not get knocked about, dropped or exposed to damp. A lidded shoebox works just as well as a proper ornament box, as long as nothing heavy sits on top in storage.
Can a baby or toddler really take part in these crafts?
Yes, with the right choice of craft. Babies and toddlers do best with simple handprint or footprint crafts, or sensory play with something safe like salt dough, with an adult handling every step that involves heat, small parts or the oven.
13 christmas crafts for babies that use paint, clay, fabric and more so every keepsake looks differe

24 traditional Christmas decorations in red, green and gold, room by room, with a shoppable list for

18 Christmas Minute to Win It games — 60 seconds of pure holiday chaos! Easy setup, household supp
Leave a Reply