

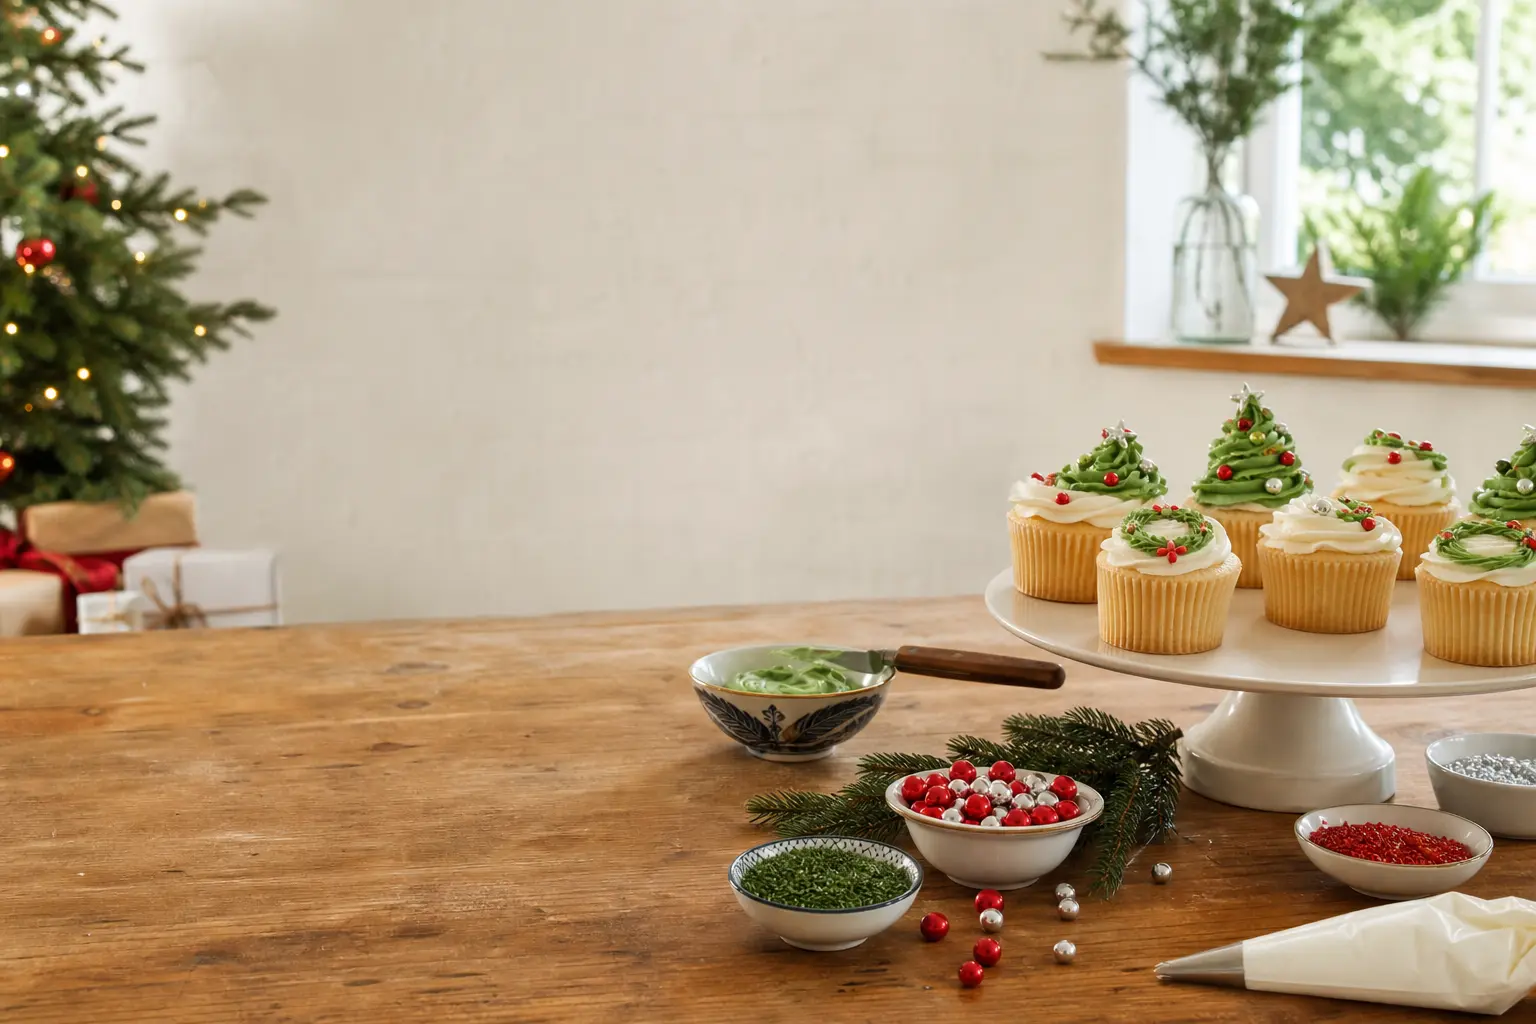
These christmas cupcakes start with a box you grabbed at the supermarket checkout. Every design here transforms plain frosted cupcakes into something that looks genuinely made, using toppings you press, dust, dip or stack into place. No piping bag nozzle set. No fondant rolling pin.
No baking. Just nineteen ideas that sit on a plate and earn a compliment. For more inspiration across the whole festive spread, browse our full round-up of christmas treats.
Each design in this list is a standalone decoration job with exact quantities, a method you can follow with the article closed, and a printable card for the counter. Most take under five minutes once your ingredients are out.
A few need a short chill, so read the make-ahead note on those before you start. All nineteen suit an adult table, though most are perfectly fine to set out for a mixed crowd.
This post contains affiliate links. If you buy through them, I may earn a small commission at no extra cost to you.
- Snow Drift Dusted Icing Sugar Cupcake
- Single Rolled Chocolate Curl Cupcake
- Pistachio Wreath Cupcake
- Upturned Ice Cream Cone Tree Cupcake
- Crushed Candy Cane Rim Cupcake
- Fresh Berry and Mint Sprig Cupcake
- Dipped Chocolate Top Cupcake
- Marshmallow Snowman Cupcake
- Shaved White Chocolate Snowfall Cupcake
- Caramel Drizzle and Sea Salt Cupcake
- Broken Honeycomb Shard Cupcake
- Single Gold Leaf Fleck Cupcake
- Mandarin Segment and Syrup Cupcake
- Biscuit Crumb Bark Top Cupcake
- Stacked Double Cupcake
- Coconut Snow Cap Cupcake
- Chocolate Button Pattern Cupcake
- Shredded Wheat Nest Cupcake
- No-Nozzle Piped Swirl Cupcake
- Frequently Asked Questions
Snow Drift Dusted Icing Sugar Cupcake
The simplest design on this list looks like a cupcake caught in a quiet snowstorm. A heavy hand with icing sugar is all it takes.
The frosting underneath acts as the adhesive, and the contrast between the white drift and whatever colour sits below it is striking on a dark plate. Make these last: icing sugar dissolves into buttercream if it sits too long in a warm room.
These contain gluten (cupcake base) and dairy (frosting). Check your cupcake pack for nuts.
Ingredients
- 1 plain shop-bought frosted cupcake
- 2 tsp icing sugar, sifted
- 1 small paper doily or circle of baking paper (optional, for a lace pattern)
Instructions
- Set the cupcake on a flat surface. If using a doily, lay it gently over the frosting without pressing down.
- Spoon the icing sugar into a fine-mesh sieve held about 15 cm above the cupcake.
- Tap the sieve steadily so the sugar falls in an even layer. Build it up in two passes for a dense drift rather than a thin dusting.
- Lift the doily straight up, if using, to reveal the lace impression underneath. Serve within two hours.

Single Rolled Chocolate Curl Cupcake
One generous chocolate curl propped at an angle does more visual work than a scattering of chips ever could. The trick is temperature: chocolate that is too cold snaps, too warm smears. Pull the bar from the fridge ten minutes before you start.
A vegetable peeler along the flat back of a chocolate bar produces a curl in a single confident stroke. This suits a dark chocolate frosted cupcake particularly well, where the curl reads as a glossy architectural detail rather than an afterthought.
Contains gluten, dairy, and soy (check your chocolate bar label).
Ingredients
- 1 plain shop-bought frosted cupcake
- 1 block (at least 30 g) good-quality dark or milk chocolate, brought to room temperature for 10 minutes
- 1 tsp cocoa powder, for dusting (optional)
Instructions
- Hold the chocolate block in one hand and a sturdy vegetable peeler in the other.
- Draw the peeler firmly along the flat back of the block in one long, even stroke. A curl should form and drop onto a piece of baking paper.
- If it only shards, the chocolate is too cold. Wait two more minutes and try again.
- Lift the curl carefully with a teaspoon or small palette knife and press its base lightly into the top of the frosting so it stands at a slight angle.
- Dust lightly with cocoa powder if the frosting is pale. Serve at room temperature.

🛍 Shopping guide
Pistachio Wreath Cupcake
Chopped pistachios pressed into frosting in a neat ring read as a Christmas wreath without requiring a single piece of special kit. The green is naturally vivid and the flavour plays beautifully against vanilla or lemon frosting.
Add three dried cranberries at equal intervals around the ring and the wreath illusion is complete. This is one of the designs that holds up overnight in the fridge, making it a strong choice for decorating the evening before.
Contains nuts (pistachio), gluten and dairy. Not suitable for nut-allergy guests.
Ingredients
- 1 plain shop-bought frosted cupcake
- 2 tbsp shelled unsalted pistachios, roughly chopped
- 3 dried cranberries
Instructions
- Spread the chopped pistachios on a small plate in an even layer.
- Turn the cupcake upside down very briefly and press the frosting edge into the pistachios to pick up a ring. Alternatively, use a teaspoon to press the nuts by hand in a circle around the outer edge of the frosting, leaving the centre clear.
- Space the three cranberries evenly around the ring, pressing each one gently into the frosting so it holds.
- Refrigerate uncovered for up to 18 hours. Bring to room temperature for 20 minutes before serving.

Upturned Ice Cream Cone Tree Cupcake
An upturned sugar cone becomes a Christmas tree in about four minutes. The cone sits point-up on a skim of extra frosting spread onto the cupcake top, which keeps it stable.
Green-tinted icing squeezed from a small bag (no nozzle) makes the branches, but green-coloured desiccated coconut pressed onto the cone with a smear of jam works just as well. Tiny silver dragees or sprinkles are the baubles.
The height of this one makes it the statement piece on a platter of otherwise flat cupcakes.
Contains gluten (cone and cupcake base), dairy, and possibly egg. Check for allergens on the cone packet.
Ingredients
- 1 plain shop-bought frosted cupcake
- 1 small sugar ice cream cone
- 1 tbsp green-tinted desiccated coconut (mix 1 tbsp coconut with 2 drops green food colouring)
- 1 tsp smooth apricot jam, warmed slightly
- 1 tsp assorted mini sprinkles or silver dragees
- 1 gold star sprinkle, for the top
Instructions
- Spread the cupcake frosting flat with the back of a spoon or butter knife so the surface is even.
- Brush the outside of the cone all over with the warm jam using a pastry brush or your fingers.
- Roll the jam-coated cone in the green coconut so it is fully coated. Press the coconut gently to adhere.
- Stand the cone point-up in the centre of the cupcake, pressing its base into the frosting firmly enough that it does not tip.
- Press sprinkles and dragees into the coconut coating to suggest baubles.
- Place the gold star at the very tip. Serve immediately or refrigerate for up to 4 hours.

Crushed Candy Cane Rim Cupcake
A band of crushed candy cane pressed into the outer ring of frosting gives an instant peppermint-and-pink-stripe effect that photographs brilliantly. The peppermint flavour cuts through sweet vanilla frosting and the red-and-white shards catch the light.
Crush the candy canes inside a sealed freezer bag using a rolling pin, which keeps the pieces from flying everywhere. Aim for irregular shards rather than a fine powder: texture is the point.
Contains gluten (cupcake base) and dairy (frosting). Candy canes are typically nut-free but check the label.
Ingredients
- 1 plain shop-bought frosted cupcake
- 2 standard candy canes (about 28 g total)
Instructions
- Seal the candy canes inside a zip-lock bag and place on a chopping board.
- Strike the bag firmly with a rolling pin until the canes break into irregular shards. Some fine dust is fine; mostly you want pieces 3-5 mm across.
- Pour the shards onto a small plate.
- Hold the cupcake by its base and roll the outer edge of the frosting through the shards, pressing lightly so they stick all the way around.
- Add a pinch of shards to the top centre if any frosting is still bare. Serve the same day.

Fresh Berry and Mint Sprig Cupcake
Three raspberries and a small sprig of fresh mint pressed into frosting look like a florist arranged them. This works best on white or cream frosting where the red and green read as Christmas colours without any extra help.
Use the freshest berries you can find and pat them completely dry before placing them: moisture is the enemy of frosting. For a make-ahead version, swap fresh raspberries for freeze-dried ones, which sit for hours without weeping.
Contains gluten and dairy. Free from the most common nut allergens, but check your cupcake pack.
Ingredients
- 1 plain shop-bought frosted cupcake (white or cream frosting preferred)
- 3 fresh raspberries, patted dry
- 1 small fresh mint sprig (3-4 leaves)
Instructions
- Pat the raspberries dry with a piece of kitchen paper. Any moisture will sink into the frosting and discolour it.
- Press two raspberries side by side slightly off-centre on the frosting, flat side down so they are stable.
- Add the third raspberry touching the first two to form a small cluster.
- Tuck the mint sprig alongside the cluster at a slight angle, pushing the stem 5 mm into the frosting to anchor it.
- Serve within 2 hours. For freeze-dried raspberries, refrigerate for up to 12 hours.

Dipped Chocolate Top Cupcake
Dunking the entire frosted top of a cupcake into melted dark chocolate creates a smooth, glossy dome that sets firm in the fridge. It looks expensive and takes about four minutes of active work plus a fifteen-minute chill.
The chocolate shell cracks satisfyingly when the fork goes in. Use a good-quality dark chocolate (at least 54% cocoa solids) so the shell is not too sweet against the frosting underneath.
A tiny sprinkle of flaky sea salt on top before the chocolate sets makes this feel genuinely grown-up.
Contains gluten, dairy, soy (check your chocolate), and egg. This design holds well for up to 24 hours in the fridge.
Ingredients
- 1 plain shop-bought frosted cupcake
- 60 g dark chocolate (54% cocoa solids or higher), broken into pieces
- 1 tsp neutral oil (sunflower or vegetable)
- Pinch of flaky sea salt
Instructions
- Melt the chocolate and oil together in a heatproof bowl set over a pan of barely simmering water, stirring until completely smooth. Do not let the bowl touch the water. Alternatively, microwave in 20-second bursts, stirring between each, until melted.
- Remove from the heat and let the chocolate cool for 2 minutes so it is still fluid but not hot enough to melt the frosting on contact.
- Hold the cupcake by its base and turn it upside down. Lower the frosted top slowly into the chocolate, submerging it fully to the edge of the cupcake case.
- Lift it straight out and allow the excess to drip back into the bowl for a few seconds.
- Turn the cupcake right-side-up and set it on a wire rack or baking paper. Scatter a pinch of flaky sea salt immediately.
- Refrigerate for 15 minutes until the shell sets firm. Keep refrigerated and serve within 24 hours.

🛍 Shopping guide
Marshmallow Snowman Cupcake
Two marshmallows stacked and anchored with a toothpick make a snowman that takes about six minutes and costs almost nothing extra. The bottom marshmallow sits on the frosting, which holds it. The top marshmallow gets a dot of black writing icing for the face.
A mini orange Tic Tac or a small snip of orange jelly sweet becomes the carrot nose.
This is the one design children in the room will point at first, but it looks equally good on an adult buffet table with a little more neatness in the face dots.
Contains gluten and dairy (cupcake), gelatin (marshmallows). Check marshmallow packs for any nut traces.
Ingredients
- 1 plain shop-bought frosted cupcake
- 2 large white marshmallows
- 1 toothpick
- Black writing icing tube (or a toothpick dipped in melted dark chocolate)
- 1 mini orange sweet or a small triangle cut from an orange jelly sweet (the nose)
- 1 small strip of red fruit leather or a length of red licorice (the scarf, optional)
Instructions
- Press the larger marshmallow flat-side-down into the centre of the frosting. It should anchor in the frosting on its own.
- Push the toothpick through the centre of the second marshmallow, leaving about 1 cm protruding from the bottom.
- Insert the protruding end of the toothpick into the top of the first marshmallow so the two marshmallows stack neatly, with a small gap between them if you like the look.
- Use the writing icing or a toothpick dipped in melted chocolate to dot two eyes and three buttons onto the top and bottom marshmallow respectively.
- Press the orange sweet or jelly triangle into the face marshmallow for the nose.
- Wrap the strip of fruit leather or licorice around the join between the two marshmallows and press the ends together at the back to form a scarf. Serve the same day.

Shaved White Chocolate Snowfall Cupcake
White chocolate shaved into thin, irregular flakes with a vegetable peeler lands on frosting like fresh snowfall. It is lighter and more delicate than the single dark chocolate curl design, and suits a pale blue or grey frosted cupcake strikingly well.
Keep the white chocolate block cold from the fridge right up until you peel: white chocolate has more cocoa butter and fat than dark, so it softens faster and smears rather than peels if it warms up.
Contains gluten, dairy, and soy (check your white chocolate label).
Ingredients
- 1 plain shop-bought frosted cupcake
- 25 g good-quality white chocolate block, kept cold
Instructions
- Take the white chocolate from the fridge and work immediately.
- Hold the block over the cupcake and draw a vegetable peeler along the flat back in short, light strokes. Thin flakes will fall directly onto the frosting.
- Build up a generous layer, rotating the cupcake a quarter turn after each pass so coverage is even.
- Serve immediately or refrigerate uncovered for up to 4 hours before the fat begins to bloom.

Caramel Drizzle and Sea Salt Cupcake
Ready-made caramel sauce drizzled from a spoon in a slow, deliberate spiral and finished with a four-flake pinch of sea salt is the simplest upmarket decoration on this list.
Buy a good jar of caramel sauce, the kind with a short ingredients list, and it will taste as good as it looks. The drizzle sets to a slightly tacky coating as it cools.
This design is ideal for a brown butter or toffee frosted cupcake but works just as well on plain vanilla. Serve within an hour of drizzling: caramel softens the frosting surface over time.
Contains gluten, dairy, and possibly egg (check your caramel sauce). Free from most nut allergens.
Ingredients
- 1 plain shop-bought frosted cupcake
- 1 tbsp ready-made caramel sauce (not caramel syrup)
- Pinch of flaky sea salt (4-6 flakes)
Instructions
- Spoon the caramel sauce into a small squeeze bottle or a zip-lock bag with one corner snipped 2 mm. This gives you control over the pour.
- Hold the bottle or bag about 10 cm above the cupcake and drizzle the caramel in a slow spiral starting from the outside edge and moving inward.
- Use the full tablespoon: do not be sparing, or the visual effect is lost.
- Immediately drop 4-6 flakes of sea salt over the wet caramel so they adhere.
- Serve within 1 hour.

Broken Honeycomb Shard Cupcake
A single shard of shop-bought honeycomb (also sold as cinder toffee or sponge toffee) pressed at an angle into frosting looks dramatic and costs almost nothing. The amber colour against white frosting is genuinely beautiful, and the caramelised sugar flavour is hard to argue with.
Honeycomb is sold in blocks at most supermarkets, often near the chocolate bars. Break it with a small hammer or rolling pin through a cloth, not your hands: the edges are sharp and sticky.
Honeycomb absorbs moisture from the frosting over time, so decorate within two hours of serving.
Contains gluten and dairy. Free from most allergens but check the pack for shared equipment warnings.
Ingredients
- 1 plain shop-bought frosted cupcake
- 1 piece shop-bought honeycomb, about 40 g
Instructions
- Wrap the honeycomb in a clean tea towel and strike once or twice with a rolling pin to break it into irregular shards. You need one large shard about 4-5 cm long, and a few smaller pieces.
- Select the most attractive large shard and press its blunt end into the frosting at a 45-degree angle so it leans to one side dramatically.
- Scatter two or three small pieces of honeycomb around the base of the shard on the frosting surface.
- Serve within 2 hours. Do not refrigerate: condensation accelerates the honeycomb dissolving.

Single Gold Leaf Fleck Cupcake
One small square of edible gold leaf placed off-centre on pale frosting is the most minimal and the most elegant design in this collection. Edible gold leaf is sold in books of sheets at cake decorating shops and online.
It transfers with a dry, clean paintbrush or the tip of a cocktail stick: any moisture makes it crumple instantly. The effect is restrained luxury, and it costs roughly 10p per cupcake at current gold leaf prices.
Pair this design with a high-quality vanilla or champagne frosted cupcake where the gold has room to read.
Edible gold leaf is free from the main fourteen allergens. The cupcake base contains gluten and dairy.
Ingredients
- 1 plain shop-bought frosted cupcake (pale frosting preferred)
- 1 sheet edible gold leaf (24-carat food-grade)
- 1 dry, clean fine-tipped paintbrush or cocktail stick
Instructions
- Open the gold leaf book carefully away from any draught. Gold leaf moves in the slightest air current.
- Use the dry paintbrush to lift one small section of gold leaf, about 1.5 cm square, from the sheet. Do not breathe out sharply while handling it.
- Hover the brush over the frosting surface and let the gold leaf fall off the brush onto the frosting slightly off-centre. It does not need to be pressed: body warmth from the frosting will make it adhere.
- Use the tip of the brush or a dry cocktail stick to gently unfold any creased edges. A crumpled texture is fine and looks natural.
- Serve at room temperature within 4 hours.

🛍 Shopping guide
Mandarin Segment and Syrup Cupcake
A fan of three tinned mandarin segments arranged on frosting and glossed with a spoonful of the tin syrup is a retro decoration that has come back around. The citrus cuts through sweet frosting and the gloss makes the whole cupcake look professionally finished.
Pat the segments dry first, then brush the syrup on top after arranging them: this way the segments hold their position and the gloss is even.
This is a strong choice when you want something that looks fresh and light on a table full of chocolatey things.
Contains gluten and dairy. Free from the most common nut allergens. Check your cupcake pack.
Ingredients
- 1 plain shop-bought frosted cupcake
- 3 tinned mandarin segments, drained and patted dry
- 1 tsp mandarin tin syrup
Instructions
- Pat the mandarin segments thoroughly dry with kitchen paper.
- Arrange the three segments in a fan shape on the frosting, slightly off-centre, with the pointed ends meeting at the centre and the curved edges facing outward.
- Press each segment gently into the frosting so it will not slide.
- Dip a pastry brush or the back of a teaspoon in the reserved tin syrup and brush it lightly over the segments and the surrounding frosting to create an even gloss.
- Serve within 2 hours. The syrup will begin to dissolve the frosting surface if left longer.

Biscuit Crumb Bark Top Cupcake
Crushed digestive biscuits or gingerbread biscuits pressed across the entire top of a frosted cupcake create a convincing bark texture.
It reads as a Yule log cross-section if you use dark chocolate frosting underneath, and as a forest floor if you use caramel or toffee frosting. The crumbs adhere without any glue: the frosting does that work.
This is also the most forgiving design in the collection for imperfect shop-bought frosting, because the crumbs hide everything underneath them.
Contains gluten and dairy. Check biscuit pack for nuts, which are common in gingerbread lines.
Ingredients
- 1 plain shop-bought frosted cupcake (chocolate or caramel frosting preferred)
- 3 digestive biscuits or 2 gingerbread biscuits (about 40 g total)
Instructions
- Seal the biscuits in a zip-lock bag and crush with a rolling pin until you have a mix of coarse crumbs and very small pieces. Avoid reducing them to fine powder: texture matters here.
- Pour the crumbs onto a small plate and spread them out.
- Press the frosted top of the cupcake face-down into the crumbs. Press firmly and rotate the cupcake slightly to ensure full coverage.
- Lift the cupcake and check for any bare patches. Fill them by pressing a small handful of crumbs onto the frosting by hand.
- Serve at room temperature. The crumbs hold well for up to 6 hours.

Stacked Double Cupcake
Two cupcakes stacked one on top of the other, with the top one slightly smaller or simply balanced with a skewer, become a miniature tower that draws attention from across a table.
This works best with a box of uniformly sized shop-bought cupcakes where you can pair them by height. The trick is a skewer or long cocktail stick through the centre of both to keep the tower stable.
Decorate the top cupcake however you like: icing sugar, a sprig of mint, or a sprinkle from any other design in this list. The scale alone is the statement.
Contains gluten and dairy. Check the cupcake pack for any other allergens.
Ingredients
- 2 plain shop-bought frosted cupcakes, as uniform in size as possible
- 1 wooden skewer or 2 long cocktail sticks
- 1 tsp icing sugar, sifted (for finishing the top)
Instructions
- Place the first cupcake on the plate or board where it will be served. It will not be moved once the tower is built.
- Push the skewer straight down through the centre of the first cupcake until 3 cm protrudes above the top.
- Lower the second cupcake onto the protruding skewer so its base sits centred on top of the first cupcake’s frosting. Press down gently until the bases touch or the tower feels stable.
- Trim the skewer flush with the top of the second cupcake’s frosting using scissors, or push it down further so it is hidden.
- Dust the top cupcake with icing sugar through a small sieve. Serve immediately at the table: do not transport once built.

Coconut Snow Cap Cupcake
A thick dome of desiccated coconut pressed into frosting looks like a generous drift of snow and requires nothing more complicated than a bowl and your hands. Use finely shredded desiccated coconut rather than the coarse variety for the most convincing snowfall effect.
This design holds in the fridge for up to 12 hours without any deterioration, making it one of the best options to prepare the night before.
A few silver pearl sprinkles pressed in after the coconut add a subtle sparkle without distracting from the overall whiteness.
Contains gluten and dairy. Coconut is a tree nut for the purposes of allergen labelling in some regions: note this for guests.
Ingredients
- 1 plain shop-bought frosted cupcake (white frosting preferred)
- 3 tbsp finely shredded desiccated coconut
- 1 tsp silver pearl sprinkles (optional)
Instructions
- Pour the desiccated coconut into a small bowl.
- Turn the cupcake upside down and press the frosted top firmly into the coconut, rotating slightly to coat the entire surface. Add more coconut if needed.
- Turn the cupcake right-side-up. Use a teaspoon to press any bare patches with loose coconut from the bowl, pressing gently to adhere.
- Scatter silver pearl sprinkles over the coconut if using.
- Refrigerate uncovered for up to 12 hours. Bring to room temperature for 15 minutes before serving.

Chocolate Button Pattern Cupcake
Arranging chocolate buttons in a concentric pattern across the top of a cupcake takes about three minutes and produces something that looks deliberately designed.
The key is consistency: use buttons of the same size and press each one in at the same depth so none sits higher than its neighbours. Start at the outside edge and work inward in rings.
Dark buttons on white frosting, or white buttons on chocolate frosting, give the sharpest contrast. Milk chocolate buttons on milk chocolate frosting also work if you want a tonal, monochrome finish.
Contains gluten, dairy, soy, and possibly egg. Check your chocolate button pack for nut traces.
Ingredients
- 1 plain shop-bought frosted cupcake
- 12-16 small chocolate buttons (milk, dark or white), all the same size
Instructions
- Line up your chocolate buttons on the counter and sort them by size so you have a uniform set.
- Starting at the outer edge of the frosting, press buttons around the perimeter in a ring, each one flat and even, with about 3 mm between each button.
- Work inward in a second ring, offsetting the buttons so they sit in the gaps between the first ring, like a brick pattern.
- Fill the centre with one or two buttons. Press each button to the same depth so the surface is level.
- Serve at room temperature within 4 hours. The buttons hold their position well and do not need refrigeration.

Shredded Wheat Nest Cupcake
Pull apart a shredded wheat biscuit, coat the strands in a tablespoon of melted milk chocolate, and shape them into a nest directly on the frosting while the chocolate is still pliable.
It is the closest this list gets to actual sugar-spinning, and it needs no special equipment at all. Three mini foil-wrapped chocolate eggs or three gold dragees sit in the nest as the centrepiece.
The chocolate-coated strands set firm in about ten minutes at room temperature, or in five in the fridge.
Contains gluten, dairy, and soy. Check for nuts on the chocolate coating pack.
Ingredients
- 1 plain shop-bought frosted cupcake
- 1 shredded wheat biscuit
- 1 tbsp milk chocolate chips or chopped milk chocolate
- 3 mini chocolate eggs or 3 gold dragees
Instructions
- Melt the chocolate chips in a heatproof bowl over a small pan of simmering water, stirring until smooth, about 2 minutes. Remove from the heat.
- Pull the shredded wheat biscuit apart into coarse strands over the bowl of melted chocolate.
- Stir the strands into the chocolate until every strand is lightly coated.
- Scoop the coated strands onto the centre of the cupcake frosting and shape them into a rough ring with a slight hollow in the centre, forming the nest shape. Work quickly before the chocolate sets.
- Place three mini eggs or dragees in the hollow of the nest.
- Leave at room temperature for 10 minutes or refrigerate for 5 minutes until the nest is set and holds its shape. Serve within 4 hours.

No-Nozzle Piped Swirl Cupcake
A piped swirl from a bag with no nozzle cuts the tip off the corner of a zip-lock bag or a disposable piping bag and uses the opening itself as the nozzle.
Cut a 5 mm hole for a thinner rope, 8 mm for a thicker one. The swirl is made by starting at the outside edge, pressing the bag firmly, and spiralling inward to a peak at the centre.
Two colours of ready-made frosting piped in alternate spirals look festive and professional. Use tinted shop-bought frosting or two contrasting colours: green and white, red and gold. The whole operation from cutting to swirl takes four minutes.
Contains gluten and dairy. Check frosting pack for egg and nut traces.
Ingredients
- 1 plain shop-bought cupcake (undecorated or scrape the existing frosting off with a knife)
- 2 tbsp ready-made frosting, one green-tinted and one white (or any two contrasting colours)
- 1 zip-lock bag or disposable piping bag
Instructions
- If the cupcake already has frosting, scrape it off cleanly with a butter knife so you have a flat, slightly sticky surface.
- Spoon green frosting into one side of the zip-lock bag and white frosting into the other side, keeping them separated. Seal the bag.
- Snip 6 mm off one bottom corner of the bag with scissors.
- Hold the bag vertically above the cupcake, tip touching the outer edge of the surface. Squeeze firmly and move in a steady inward spiral, ending with a gentle lift at the centre to form a peak.
- The two colours will emerge side by side from the same hole, producing a two-toned swirl without any extra kit.
- Serve within 4 hours. Store uncovered at room temperature.

Frequently Asked Questions
How do you decorate shop bought cupcakes?
Press, dust, dip or stack toppings directly onto the existing frosting. Shop-bought frosting is sticky enough to hold chopped nuts, crushed biscuits, chocolate buttons, shredded coconut and candy cane shards without any additional glue.
For taller decorations such as a marshmallow snowman or a cone tree, anchor the base with the frosting and add a toothpick or skewer through the centre for stability.
How do you decorate cupcakes without a piping bag?
Use a zip-lock bag with a small corner snipped off. Spoon frosting or chocolate into the bag, seal it, and cut a 5-8 mm opening. Squeeze from the top of the bag with steady pressure and spiral from the outer edge of the cupcake inward.
You can place two colours side by side inside the same bag for a two-toned swirl, no nozzle needed.
What toppings stay on cupcakes overnight?
Chopped pistachio nuts, desiccated coconut, chocolate buttons, biscuit crumbs and a dipped chocolate shell all hold well on refrigerated cupcakes for up to 12-24 hours. Fresh fruit, caramel drizzle, honeycomb shards and icing sugar drift should be added within one to two hours of serving because moisture, heat or condensation will cause them to deteriorate or dissolve.
How far ahead can cupcakes be decorated?
Most of the designs in this collection can be prepared up to 12 hours in advance and stored uncovered in the fridge. The dipped chocolate top holds for 24 hours. The coconut snow cap and pistachio wreath hold for up to 18 hours.
Designs using fresh fruit, honeycomb, caramel drizzle, icing sugar or gold leaf should be applied within two hours of serving and stored at room temperature rather than refrigerated.

15 mason jar Christmas crafts for the mantel, the table and the gift bag, each one cheap, quick and

12 free printable Christmas garlands built around a pink christmas garland palette plus red, white,

Skip the christmas tree skirt. These 17 no-sew, no-storage ideas use baskets, blankets, logs and thi
Leave a Reply