

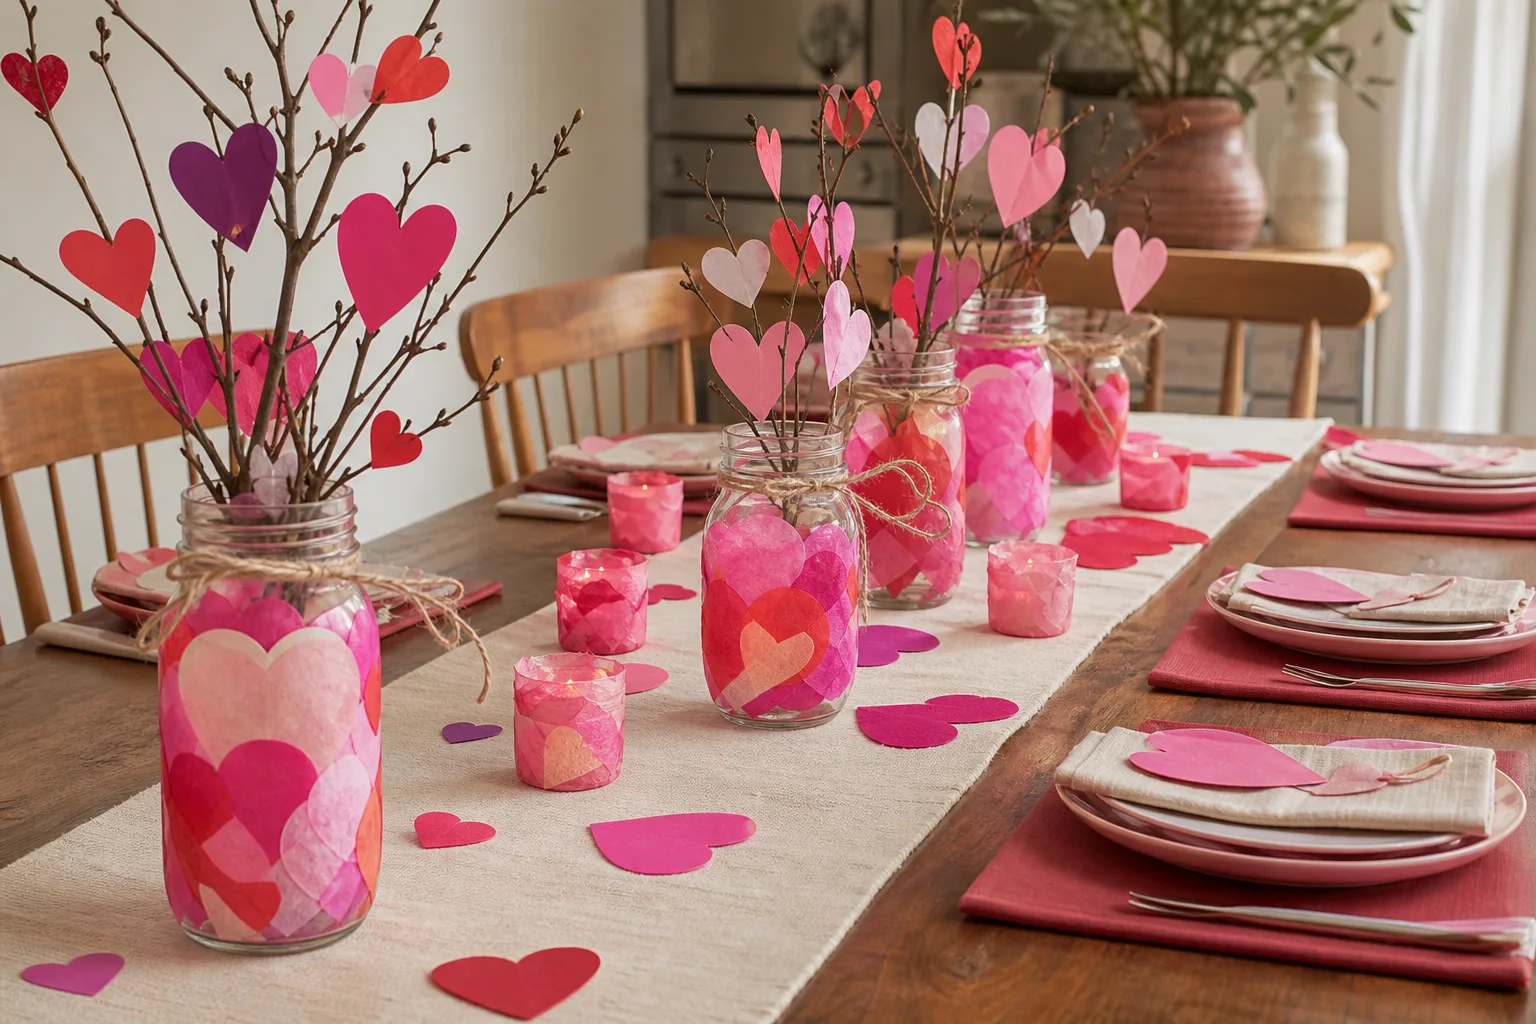
Toddlers do not care about straight edges or matching ribbon. They care about squishing paint, pressing a sticky hand onto paper and hearing someone say that is the best heart anyone has ever made. These twenty crafts lean into exactly that: big motions, forgiving materials, nothing smaller than a chunky shoelace tip anywhere near little mouths.
Every one uses three to five things you probably already have in the craft drawer or can grab in one stop at the craft aisle, and every cut, every dab of hot glue, every trip near the oven belongs to the grown-up, never the toddler. The toddler’s job is the good part: stamping, smearing, pressing, sticking.
If the afternoon needs something besides glue and paint, 18 Toddler Party Games That Are Simple and Safe fills the gap before or after the table gets messy, and once these are dry you will likely want a whole shelf more: 24 Christmas Crafts for Toddlers That Little Hands Can Truly Make on Their Own covers the same genuinely toddler-level ground for winter.
This post contains affiliate links. If you buy through them, I may earn a small commission at no extra cost to you.
Table of Contents
- Handprint Heart Card
- Footprint Heart Keepsake
- Fingerprint Heart Tree
- Cardboard Tube Heart Stamps
- Potato Stamp Hearts
- Bubble Wrap Heart Print
- Cotton Ball Painted Heart with a Clothespin
- Sticker Heart Collage
- Contact Paper Heart Window Collage
- Tissue Paper Heart Suncatcher
- Heart Paper Bag Puppet
- Paper Plate Heart Wreath with Tissue Squares
- Heart Crown from a Paper Strip and Stickers
- Love Bug Made from Paper Hearts
- Painted Heart Rock
- Foam Heart Magnet
- Big Heart Lacing Card with a Chunky Shoelace
- Salt Dough Heart Handprint
- Heart Garland with Pre-Cut Hearts on Yarn
- Coffee Filter Heart with Washable Markers and a Water Spray
- Frequently Asked Questions
Handprint Heart Card
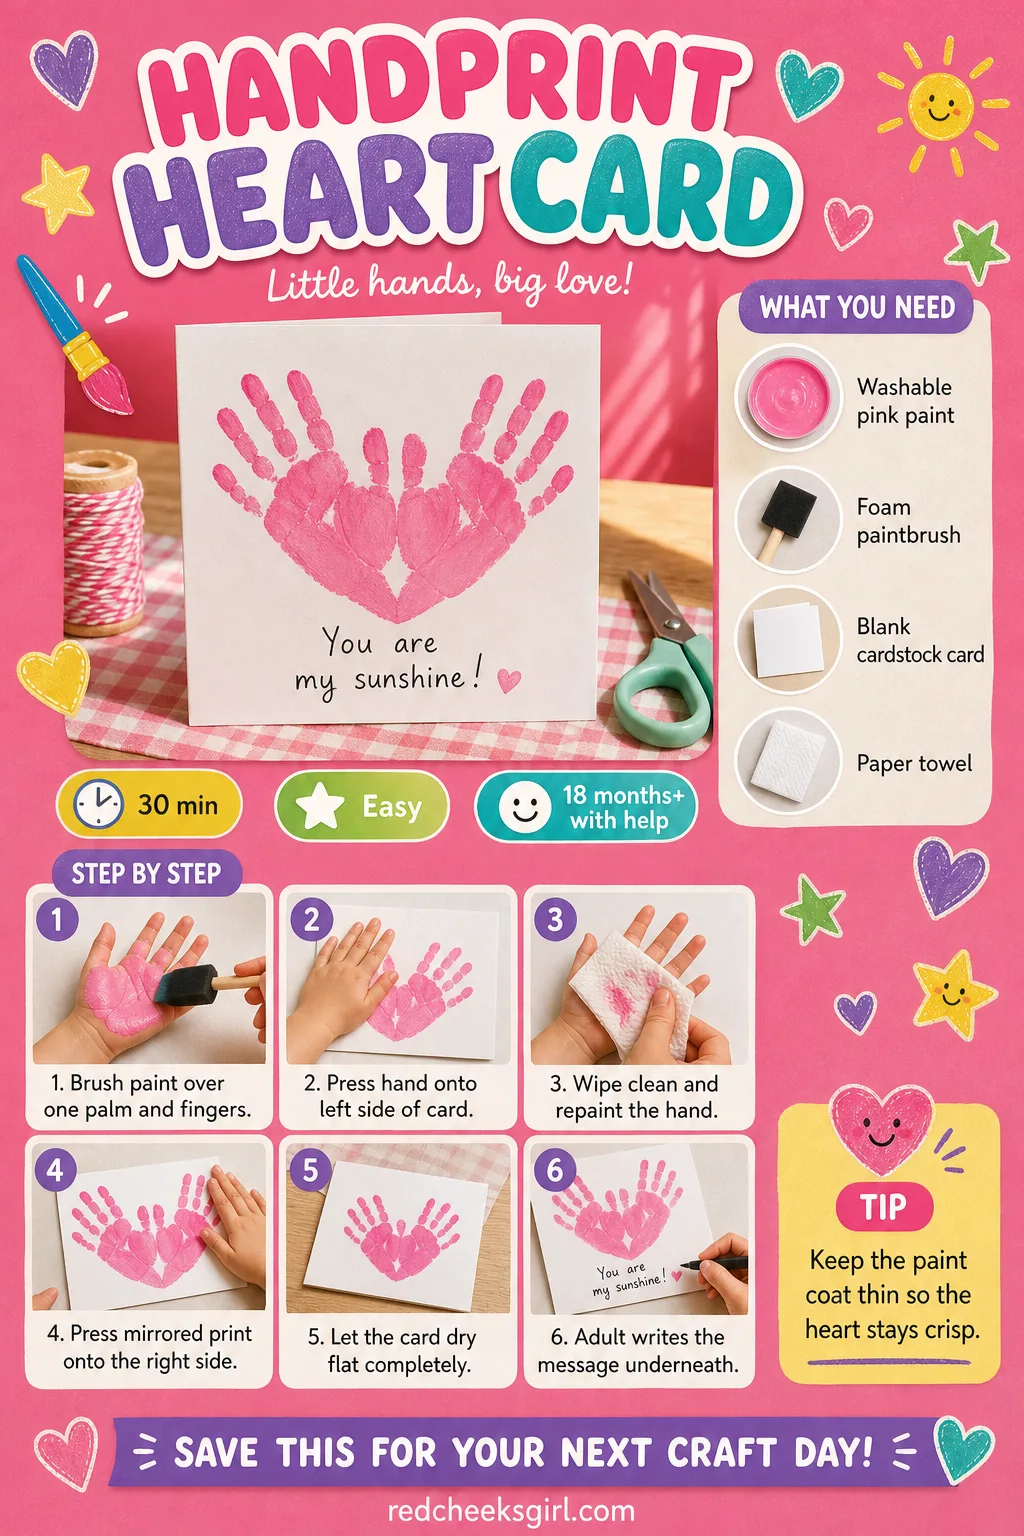
Grandparents keep these forever, which is rather the point. Two small handprints, painted and pressed so they meet in the middle, turn into an unmistakable heart with almost no skill required from anyone under three.
Keep the paint thin, because a toddler’s palm holds more of it than it looks like, and a flood turns the heart into a smudge instead of two crisp prints.
Once it dries flat for about twenty minutes, slide it into an envelope or prop it on the mantel until the date passes, then store it flat in a keepsake box so the paint never cracks.
What You Need
- Washable red or pink paint, 1 small bottle
- Foam paintbrush, 1
- Blank cardstock card, 5×7 inches, 1
- Damp wipes or paper towel, a few
How to Make It
- Lay the blank card flat and have the grown-up brush a thin, even coat of paint over one palm and all the fingers.
- Press the painted hand onto the left half of the card, fingers pointing up and outward and the wrist toward the bottom center.
- Wipe the hand clean, repaint it, and press a mirrored print on the right half so the two prints touch at the bottom and fan out at the top into a heart shape.
- Wipe sticky fingers straight away so they do not wander onto the table or clothes.
- Leave the card flat somewhere out of reach for about 20 minutes until fully dry.
- Once dry, the grown-up writes the message underneath in marker.
🛍 Shopping guide
Footprint Heart Keepsake
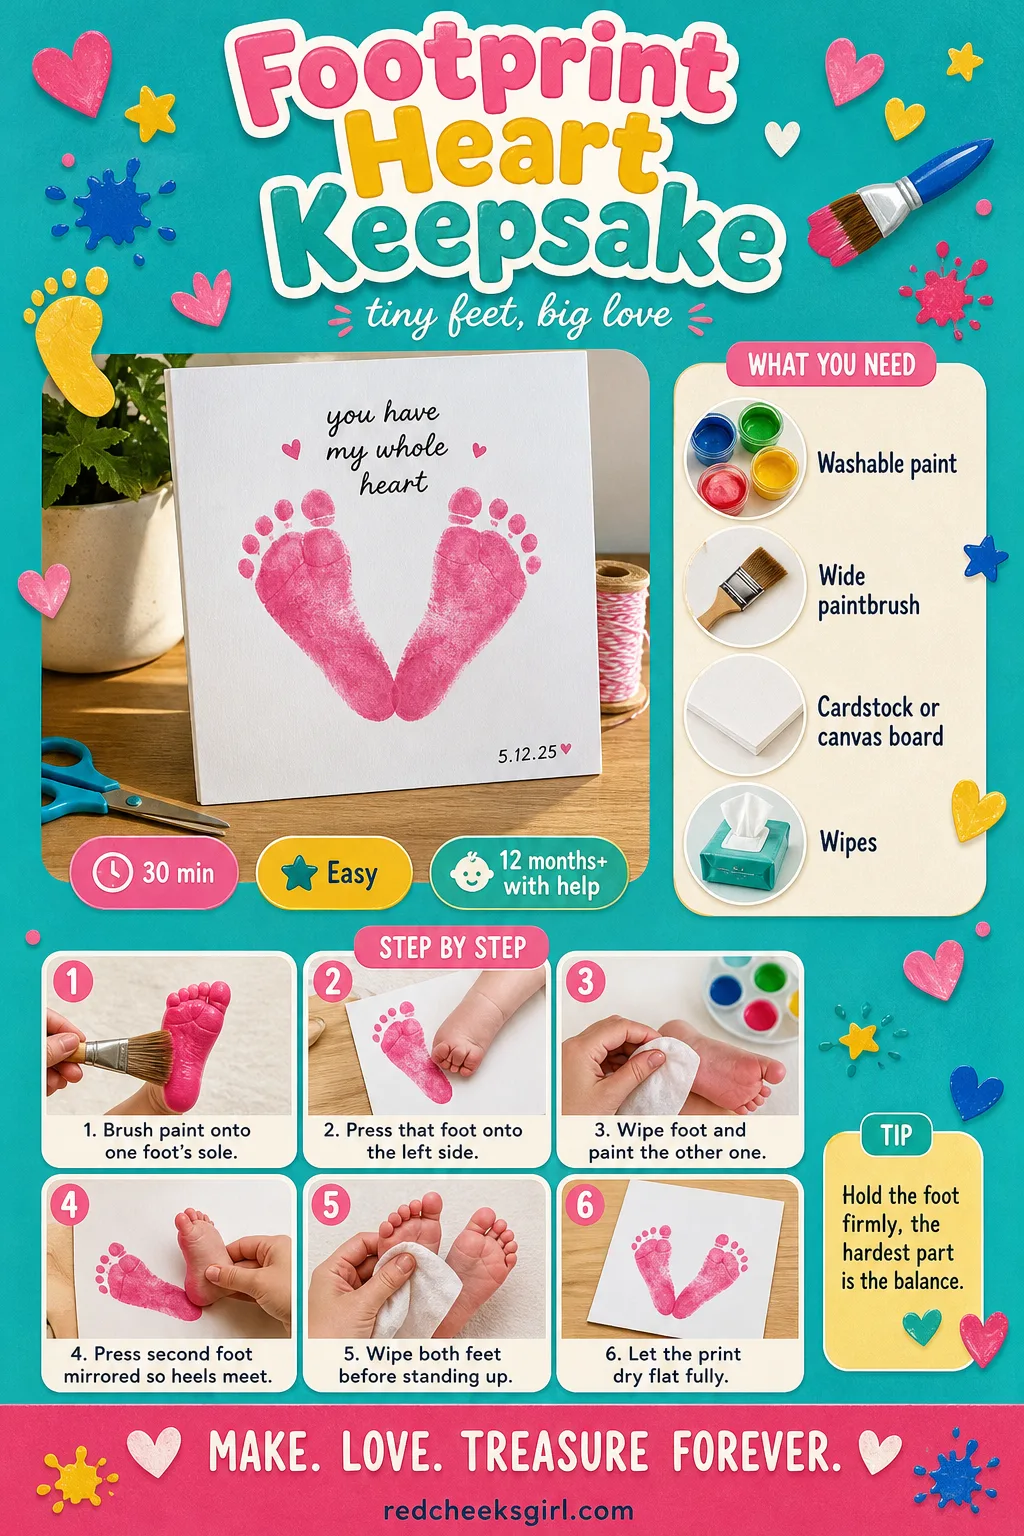
A footprint looks like nothing in particular until the two feet sit heel to heel, and then it clicks into a heart: chubby toes point outward for the top curves, heels meet in the middle for the bottom point.
This one needs a second pair of hands, because a toddler standing on wet paint is not a toddler standing still.
Once it has dried flat for half an hour, mount it on a bit of cardstock and write the date on the back before it goes into the keepsake box, since little feet grow fast and you will want proof of how small they were.
What You Need
- Washable paint, 1 small bottle
- Wide paintbrush, 1
- Cardstock or small canvas board, 8×10 inches, 1
- Wipes or damp cloth, a few
How to Make It
- Sit the toddler down and have the grown-up brush paint over the sole and underside of the toes of one foot.
- Press that foot onto the left side of the card, heel pointing toward the center and toes angled outward.
- Wipe the foot clean, paint the other foot, and press it mirrored on the right side so the two heels meet.
- Wipe both feet before anyone stands up and walks off across the floor.
- Leave the print flat to dry for 20 to 30 minutes.
- Once dry, the grown-up labels the date on the back.
🛍 Shopping guide
Fingerprint Heart Tree
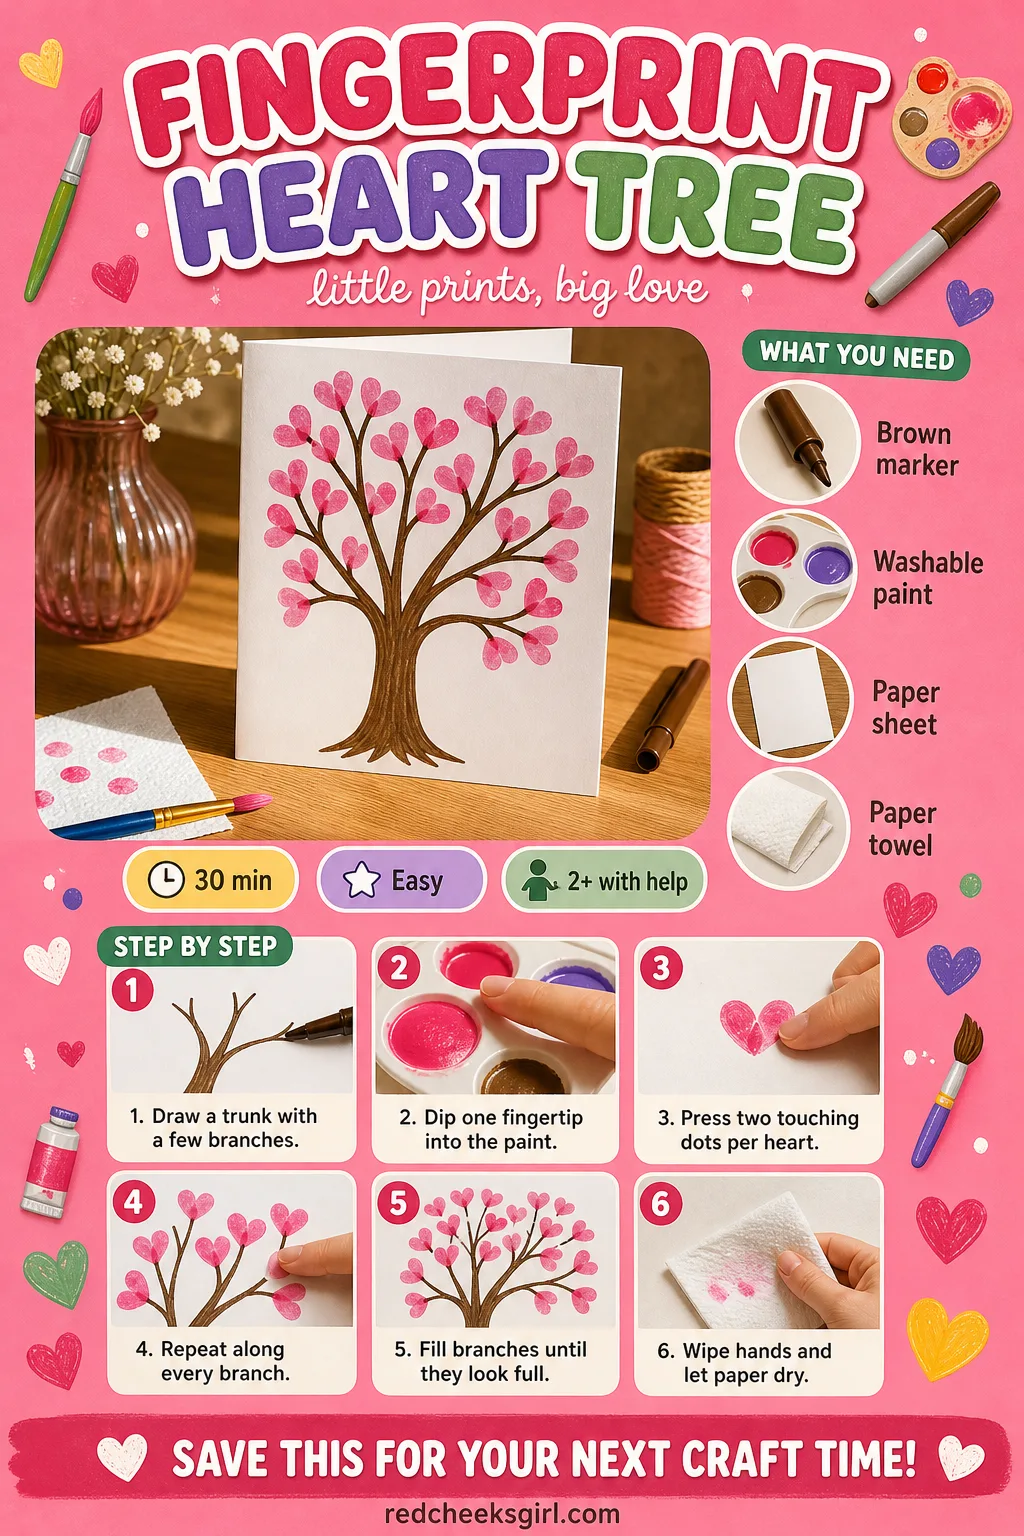
One fingertip, dipped and pressed twice, makes a tiny heart, and a whole branch of them turns a plain drawing into an orchard of love. It is slower than a full handprint and that is exactly why toddlers who are past the smear-everything stage tend to love it.
Draw the trunk ahead of time if patience is short on the day, since the drawing itself needs nothing more than a marker and a steady adult hand. Hang the finished tree on the fridge or a nursery wall, or scan it before it inevitably gets a crease.
What You Need
- Brown marker, 1
- Washable red or pink paint, 1 small bottle
- Paper or cardstock, 1 sheet, 8.5×11 inches
- Paper towel for wiping fingers
How to Make It
- The grown-up draws a simple trunk with a few branches across the lower half of the paper.
- Dip one fingertip in paint and press it onto a branch tip, then press a second dot right beside it so the two touch and form a tiny heart.
- Repeat along every branch, wiping the finger clean between colors if you are using more than one.
- Keep going until the branches look full rather than sparse, which usually takes more dots than you expect.
- Wipe hands and leave the paper flat to dry for about 15 minutes.
🛍 Shopping guide
Cardboard Tube Heart Stamps
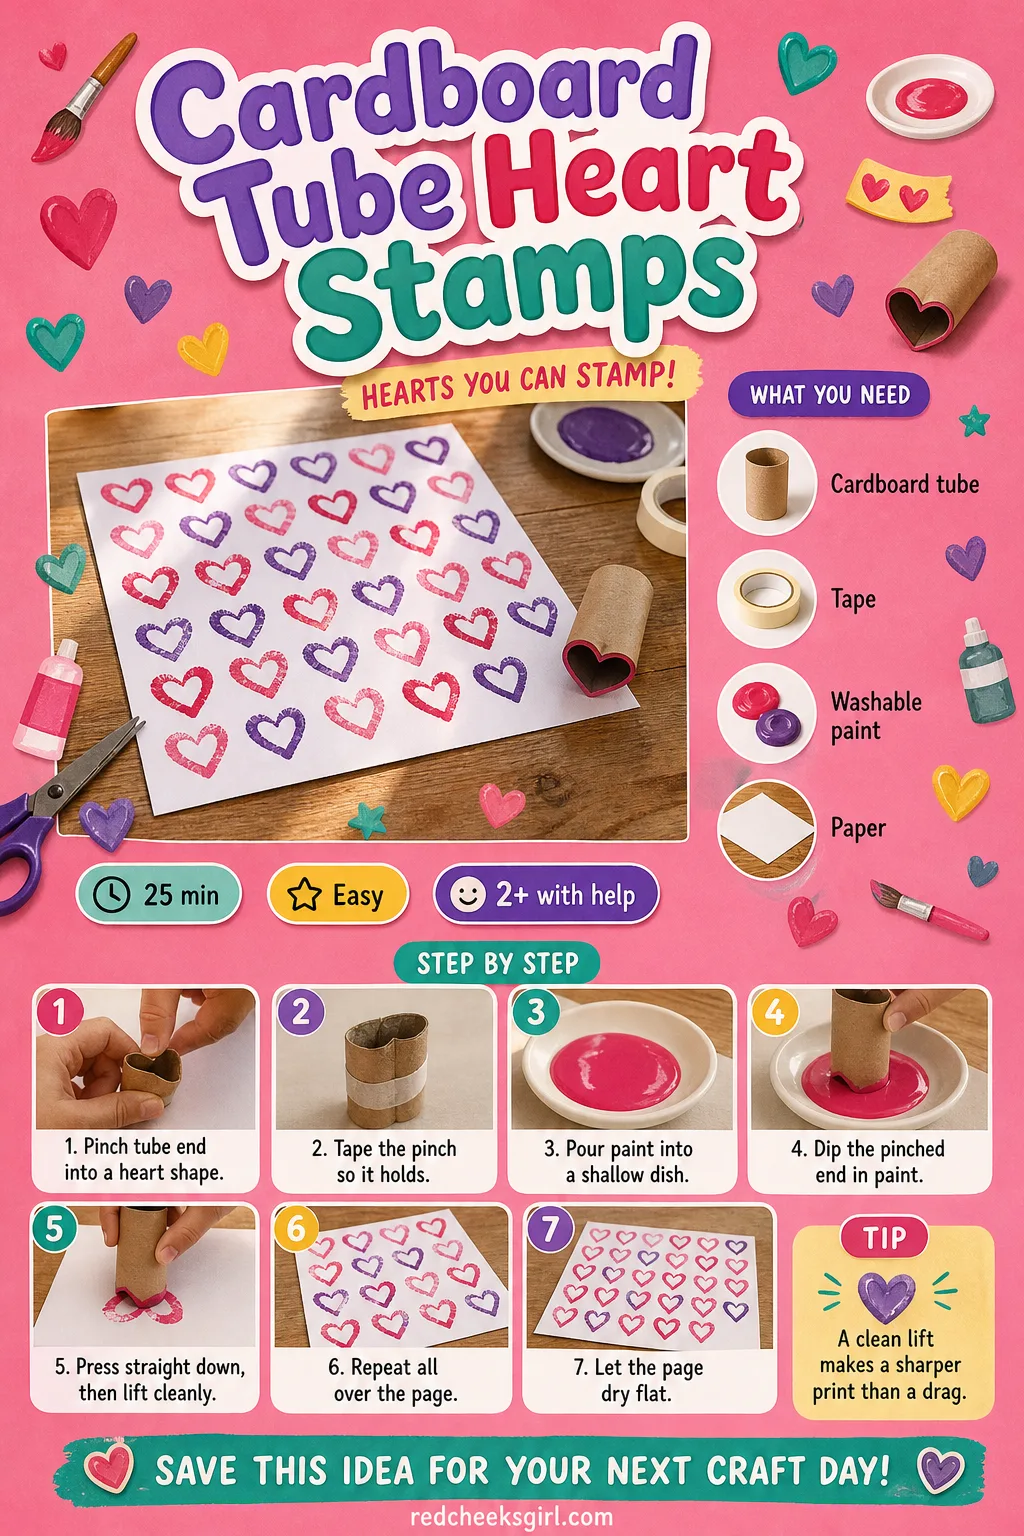
The toilet paper tube sitting in the recycling bin is one pinch away from a heart stamp, which makes this the cheapest craft on the whole list. Pinch one end into a point and the round tube becomes a heart-shaped stamp that prints the same shape every single time.
Little ones love the repetition of stamping far more than any single perfect print, so let the paper fill up with overlapping hearts in every color on hand. It needs almost no supplies and nothing to buy if the recycling bin already has a spare tube.
What You Need
- Empty cardboard tube, 1
- Tape, a short strip
- Washable paint in 2 colors, small bottles
- Paper, 1 or 2 sheets
How to Make It
- The grown-up pinches one end of the tube inward to form the dip at the top of a heart and tapes it in place so it holds its shape.
- Pour each paint color into a shallow dish or onto a paper plate.
- Dip the pinched end of the tube into the paint, coating it evenly.
- Press the tube straight down onto the paper and lift it away cleanly to reveal a heart print.
- Re-dip and repeat all over the page, swapping colors whenever it feels right.
- Leave the finished page flat to dry for about 15 minutes.
🛍 Shopping guide
Potato Stamp Hearts
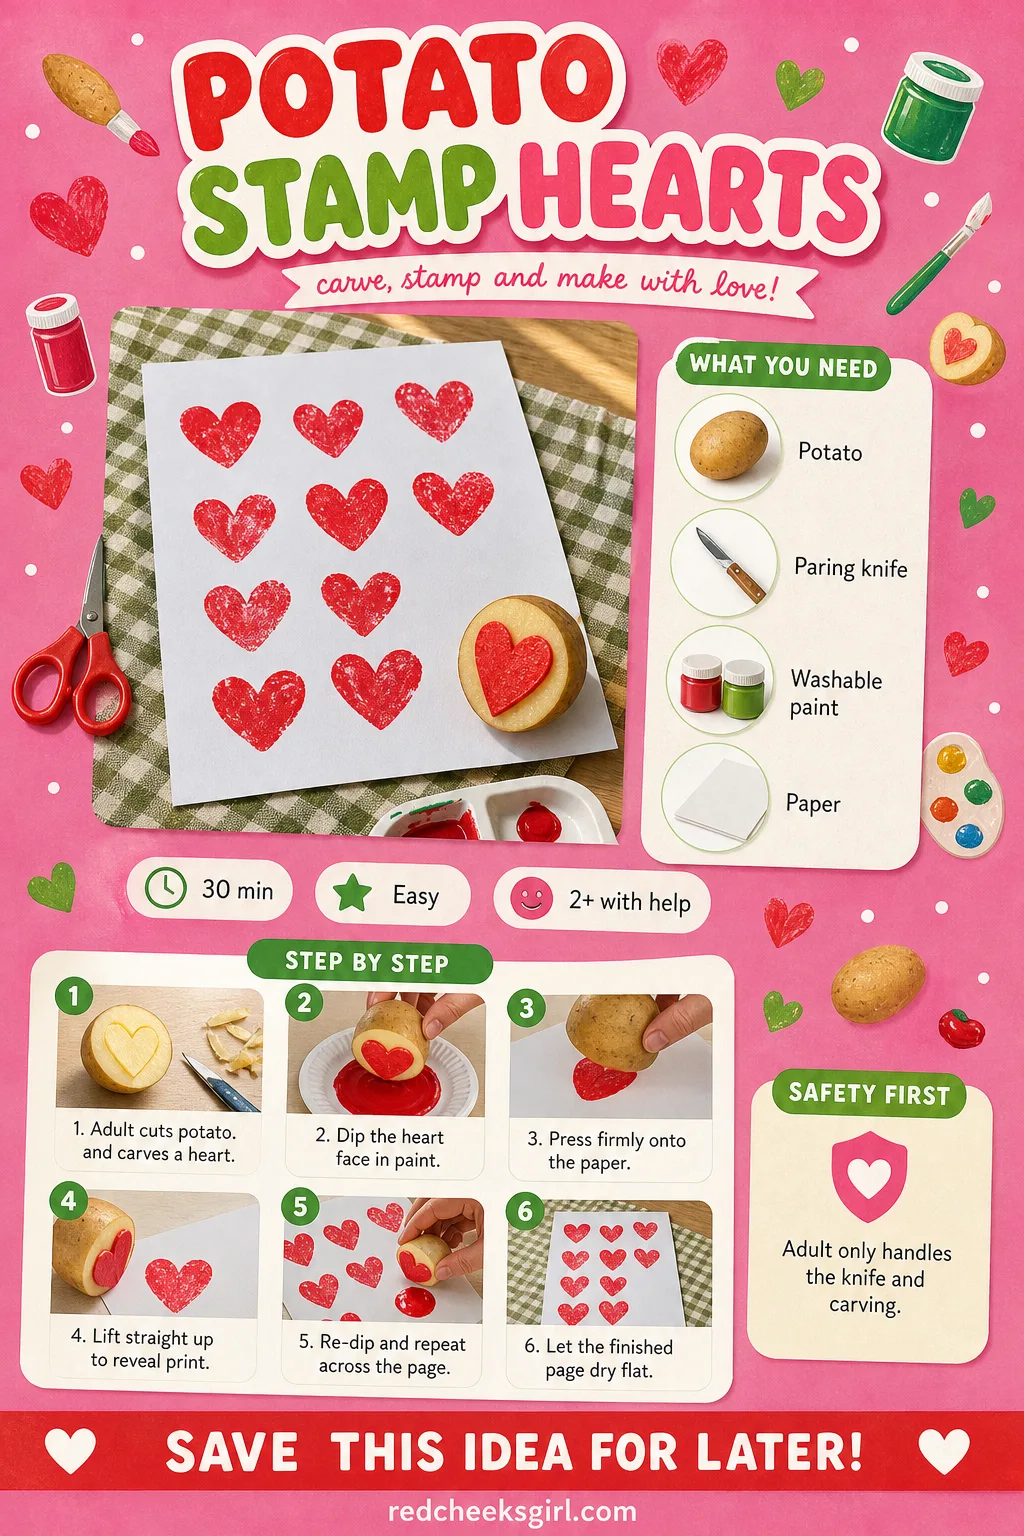
There is something about a stamp made from dinner that makes toddlers take it more seriously than any shop-bought tool. The carved face holds just enough paint to print a neat, slightly rustic heart, charmingly uneven in a way that always looks handmade because it is.
The knife work is entirely the grown-up’s job here, carving a raw potato needs a firm grip and a sharp blade nowhere near small hands. The leftover potato half keeps in the fridge for a day or two if you want to reprint tomorrow, or it goes straight in the compost.
What You Need
- Large potato, 1
- Paring knife, for the grown-up only
- Washable paint, 1-2 colors
- Paper, 1 or 2 sheets
How to Make It
- The grown-up cuts the potato in half and carves a simple heart shape into the flat cut face, trimming away everything outside the heart outline.
- Pour paint into a shallow dish and dip the raised heart face into it.
- Press the potato firmly onto the paper, hold for a second, then lift straight up.
- Re-dip after every print or two, since the paint wears off fast.
- Stamp across the whole page, turning the potato for variety if the heart is not perfectly symmetrical.
- Leave the page flat to dry for about 15 minutes.
🛍 Shopping guide
Bubble Wrap Heart Print
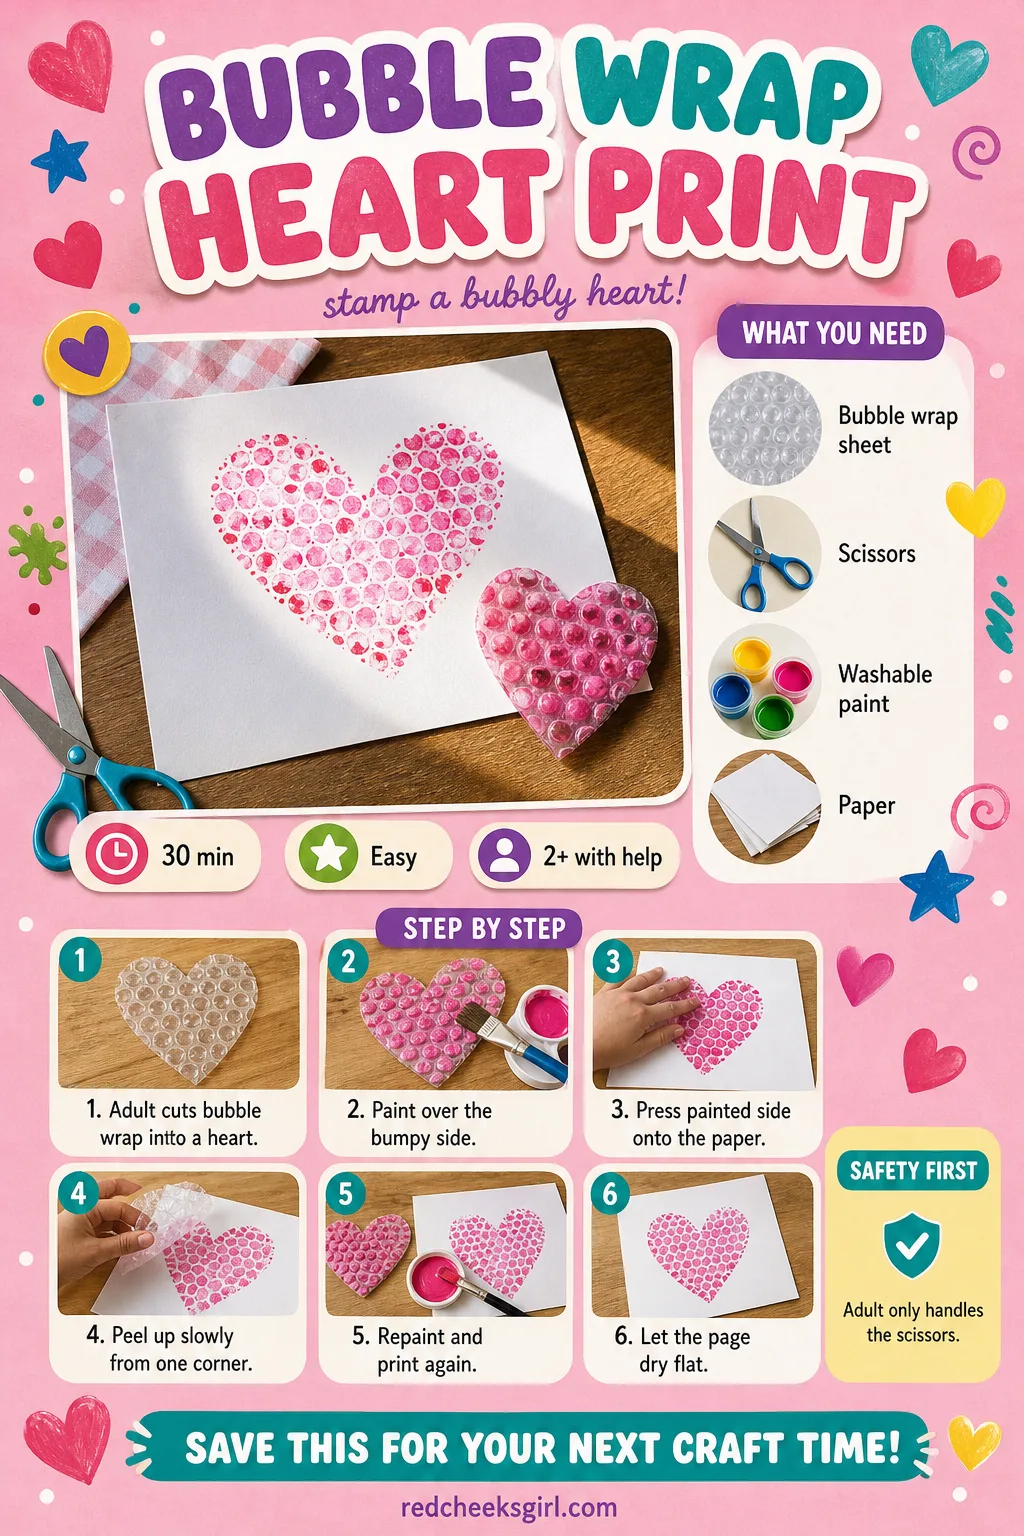
Painted bubble wrap prints like delicate lace, every little circle showing through as a dot, and a toddler who has never seen it happen before usually gasps the first time it peels away clean.
The heart shape comes from a single pair of scissors cuts, so this is a five-minute setup for the grown-up and an open-ended amount of stamping for everyone else. If bubble wrap is not on hand, a packing envelope from the last online order usually has some tucked inside.
What You Need
- Bubble wrap sheet, about 8×8 inches
- Scissors, for the grown-up
- Washable paint, 1-2 colors
- Paper, 1 or 2 sheets
How to Make It
- The grown-up cuts the bubble wrap sheet into a large heart shape.
- Lay the heart bubble-side up and brush or dab paint over the bumps.
- Press the painted side face down onto the paper, pressing gently all over with flat palms.
- Peel the bubble wrap up slowly from one corner to reveal the textured heart print.
- Repaint and repeat for more prints, perhaps layering a second color once the first dries.
- Leave the finished page flat to dry for about 15 minutes.
🛍 Shopping guide
Cotton Ball Painted Heart with a Clothespin
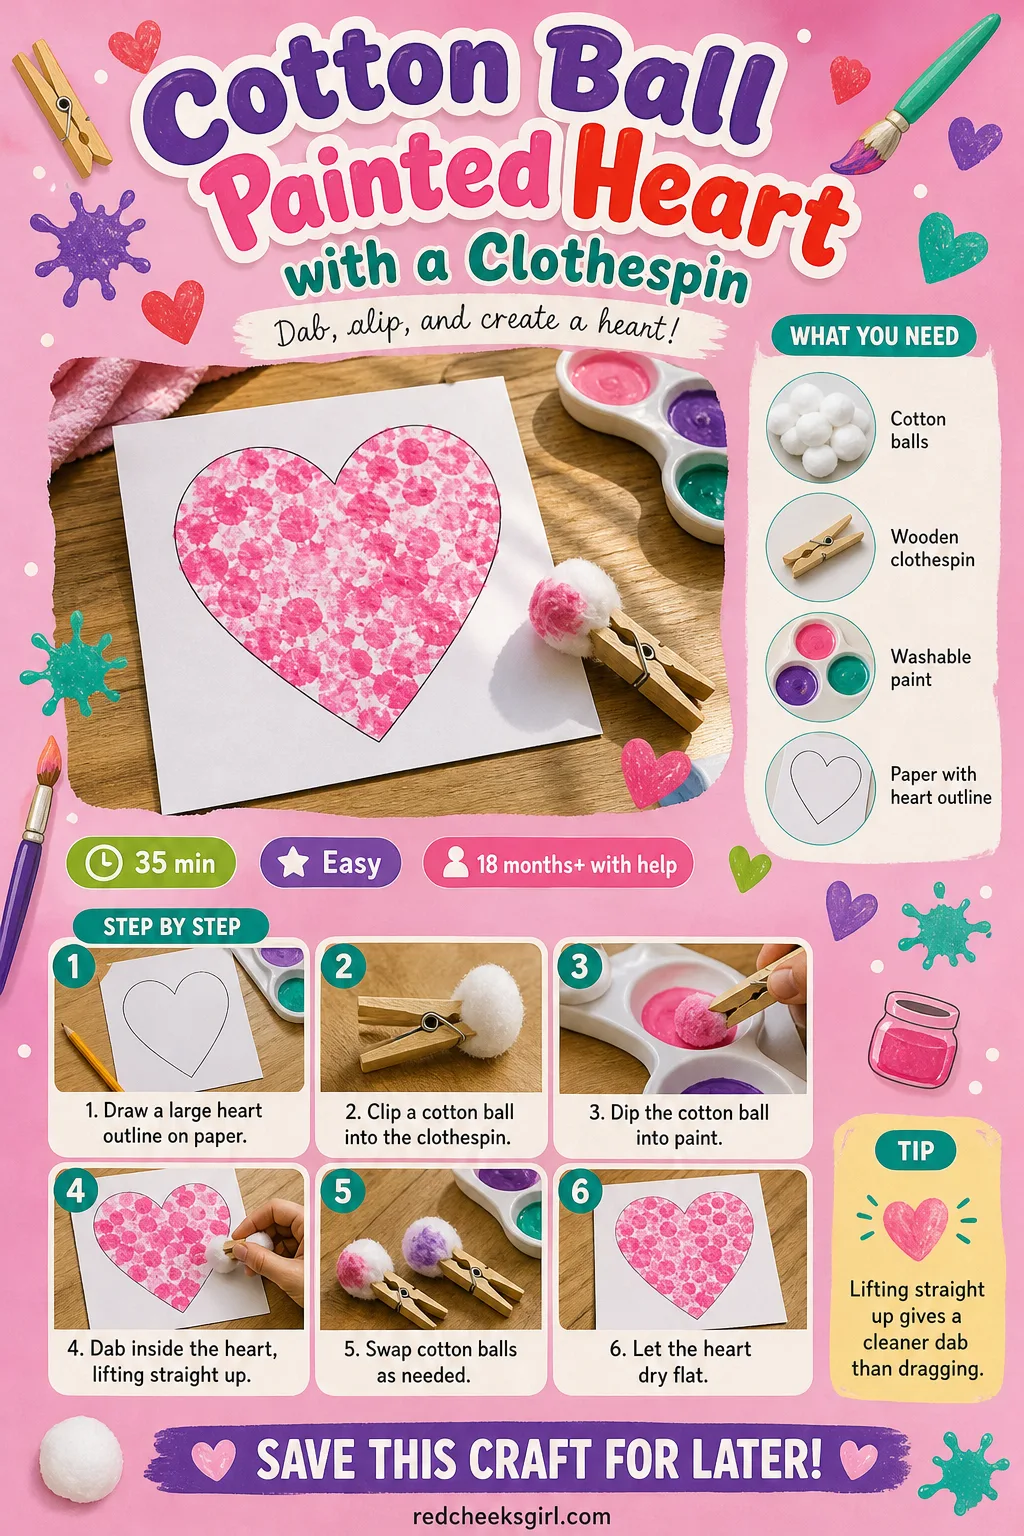
A clothespin holding the cotton ball means paint stays off little fingers entirely, which makes this the craft to reach for on a day when you would rather not scrub paint out of fingernails before dinner.
The dabbing motion is a genuine fine motor workout even though it looks like simple fun, since gripping a clothespin and aiming it at a specific spot takes real concentration at this age. Let the dabbed heart dry flat for twenty minutes before anyone touches the middle of the page.
What You Need
- Cotton balls, 4 to 6
- Wooden clothespin, 1
- Washable paint, 1-2 colors
- Paper with a large heart outline drawn on it, 1 sheet
How to Make It
- The grown-up draws or cuts a large heart outline onto the paper ahead of time.
- Clip a cotton ball into the open end of the clothespin.
- Dip the cotton ball into the paint, letting any excess drip off before it touches the paper.
- Dab the cotton ball inside the heart outline, lifting straight up between dabs rather than dragging it.
- Swap cotton balls when one gets too saturated or falls apart, and keep dabbing until the heart fills in.
- Leave the page flat to dry for about 20 minutes.
🛍 Shopping guide
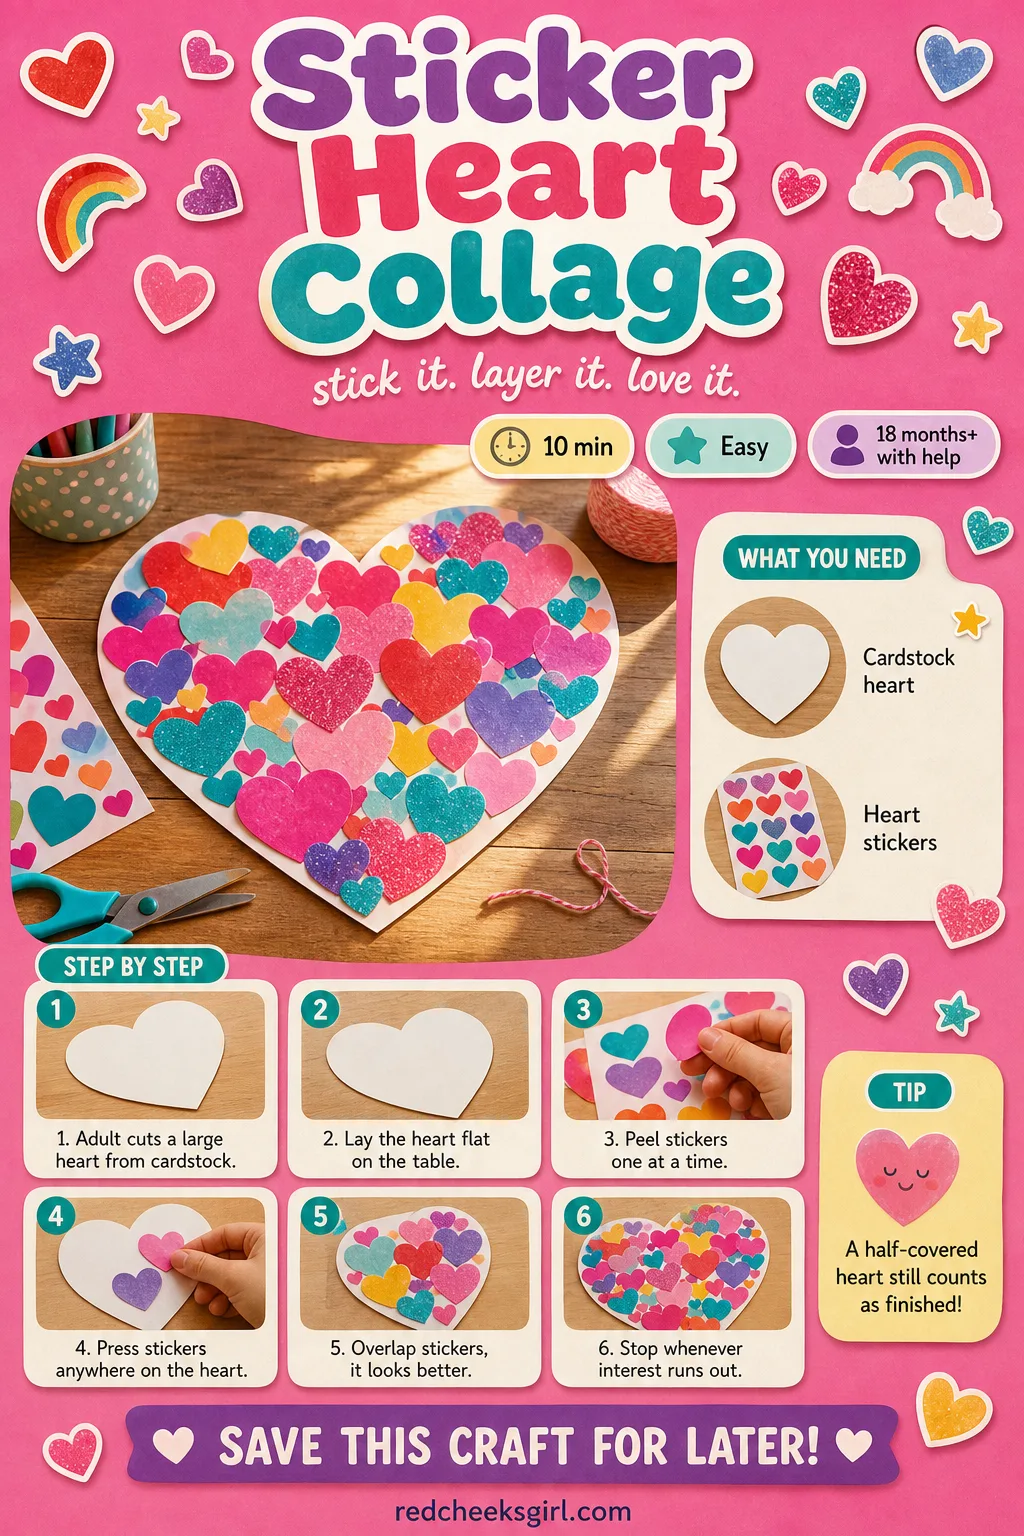
Sticker Heart Collage
No paint, no drying time, no wipes standing by: this is the one to pull out five minutes before you need to leave the house and still want something to show for the afternoon.
A single oversized heart cut from cardstock gives even the smallest fingers a big, forgiving target to stick to, and heart stickers from any craft aisle do the rest. Pin the finished collage straight to a corkboard or send it along as that day’s valentine, since it needs nothing more to be finished.
What You Need
- Large cardstock heart, cut by the grown-up, about 8 inches across
- Sheet of heart stickers, 1
How to Make It
- The grown-up cuts a large heart shape from a sheet of cardstock.
- Lay the heart flat on the table within easy reach.
- Peel one sticker at a time and hand it over, or set out a small peeled stack if little fingers cannot yet peel their own.
- Press stickers anywhere on the heart, overlapping is fine and actually looks better.
- Keep going until the heart is covered, or stop whenever interest runs out, since a partly covered heart still looks finished.
🛍 Shopping guide
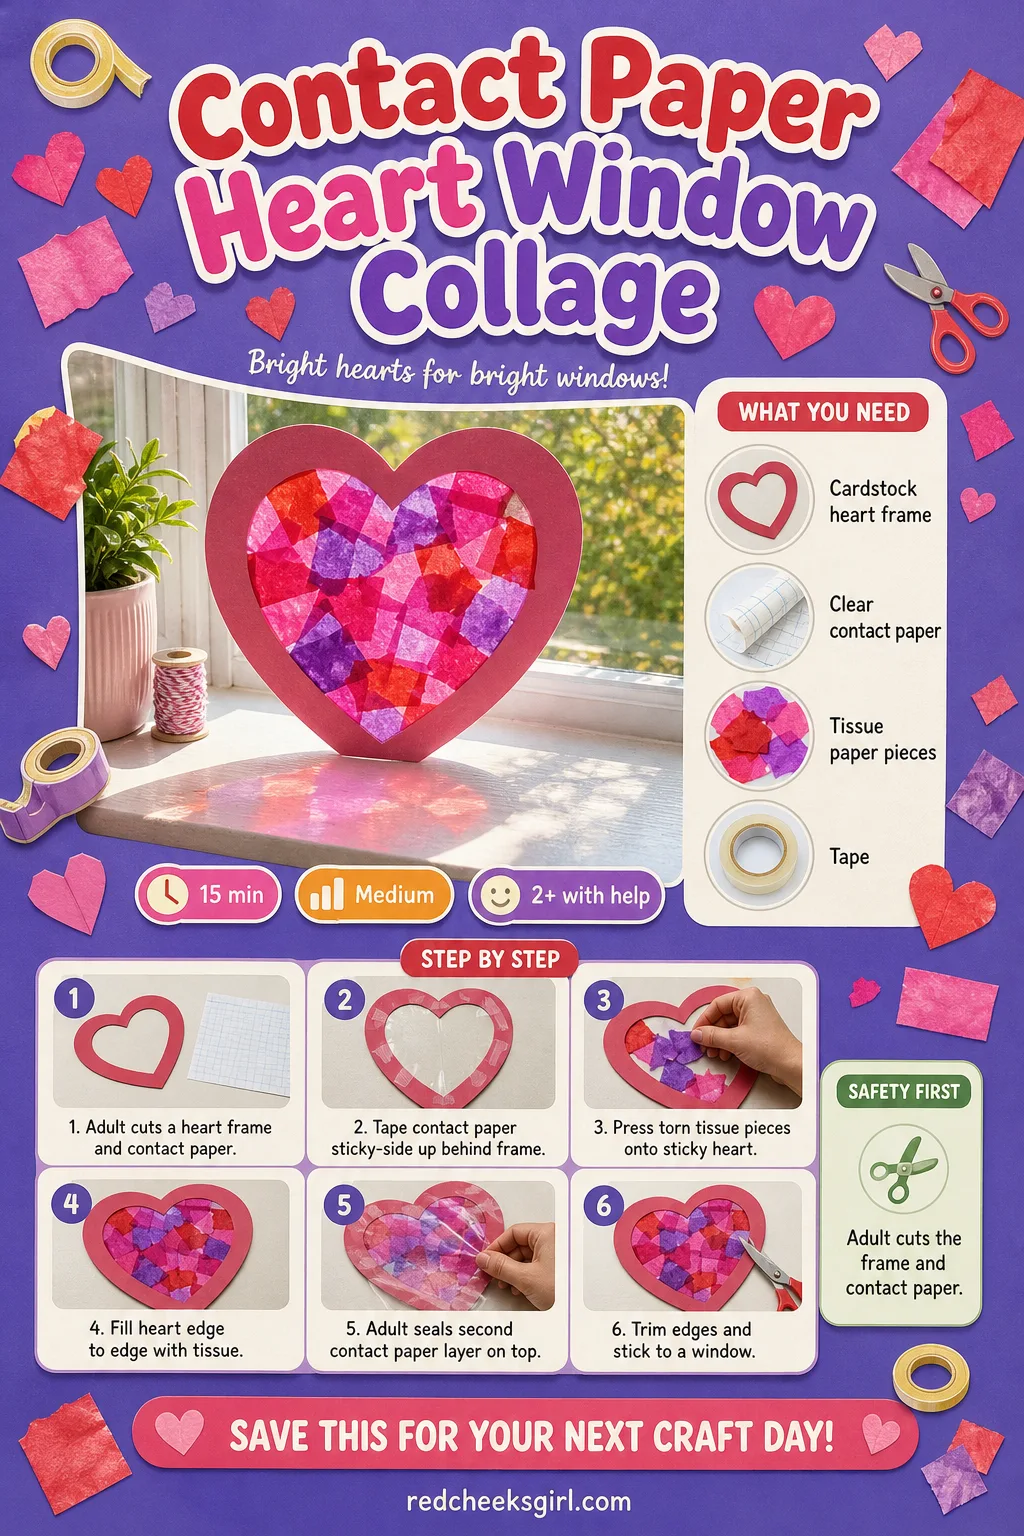
Contact Paper Heart Window Collage
Hold a piece of tissue paper up to a window and the light does something a crayon never can, and that is the whole appeal of pressing it onto sticky contact paper instead of gluing it down flat.
If drilling into anything sounds like too much for a Tuesday afternoon, nothing here needs a single tool beyond scissors, this sticks flat to glass with no tape and peels off without residue when the season changes. Pull it down after a week or two before the sun bleaches the colors.
What You Need
- Cardstock heart frame, cut by the grown-up with a heart-shaped hole in the middle, 1
- Clear contact paper, 2 pieces cut to fit the frame
- Tissue paper, torn into small pieces, several colors
- Tape, a few small pieces
How to Make It
- The grown-up cuts a heart-shaped hole out of the center of a sheet of cardstock to make a frame, then cuts two pieces of contact paper to size.
- Tape one piece of contact paper sticky-side up behind the frame’s hole, so the sticky surface shows through the heart.
- Hand over torn tissue paper pieces and let the toddler press them onto the sticky heart until it is filled edge to edge.
- The grown-up presses the second piece of contact paper, sticky-side down, over the top to seal everything in place.
- Trim away any ragged edges and tape or stick the finished panel flat against a window.
🛍 Shopping guide
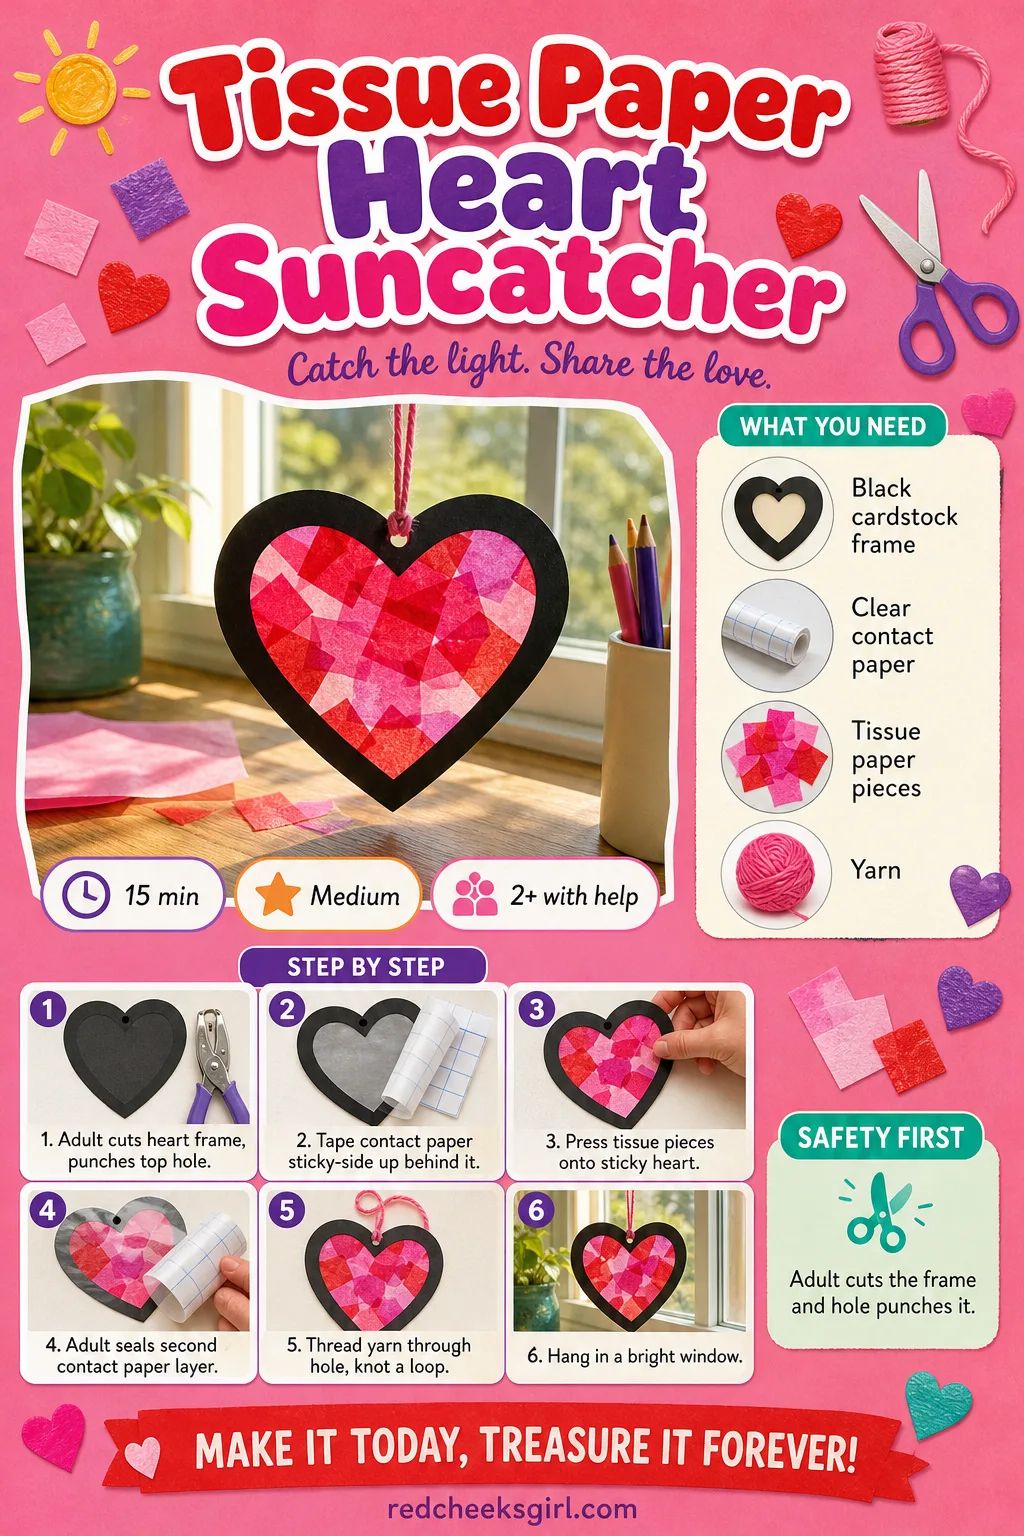
Tissue Paper Heart Suncatcher
This one hangs rather than sits flat, a single heart dangling from a loop of yarn in the window, catching light from behind in a way that makes even a wobbly, uneven tissue job look intentional.
It is the same sticky technique as the window collage, just smaller and finished off with a punched hole for hanging, so if the collage felt like too much cutting, this scaled-down version suits a quicker afternoon. Take it down and lay it flat in a drawer between seasons rather than folding it, folding cracks the contact paper.
What You Need
- Black cardstock heart frame, cut by the grown-up, about 6 inches across
- Clear contact paper, 2 pieces cut to fit
- Tissue paper, torn into small pieces
- Yarn, one 8 inch piece, for hanging
How to Make It
- The grown-up cuts a heart-shaped hole in a small square of black cardstock and punches a hole at the top point.
- Tape a piece of contact paper sticky-side up behind the heart cut-out.
- Let the toddler press torn tissue paper pieces onto the sticky heart until it is covered.
- The grown-up seals a second piece of contact paper over the top and trims the edges flush with the frame.
- Thread the yarn through the punched hole and knot it into a loop.
- Hang the finished suncatcher in a window that gets good light.
🛍 Shopping guide
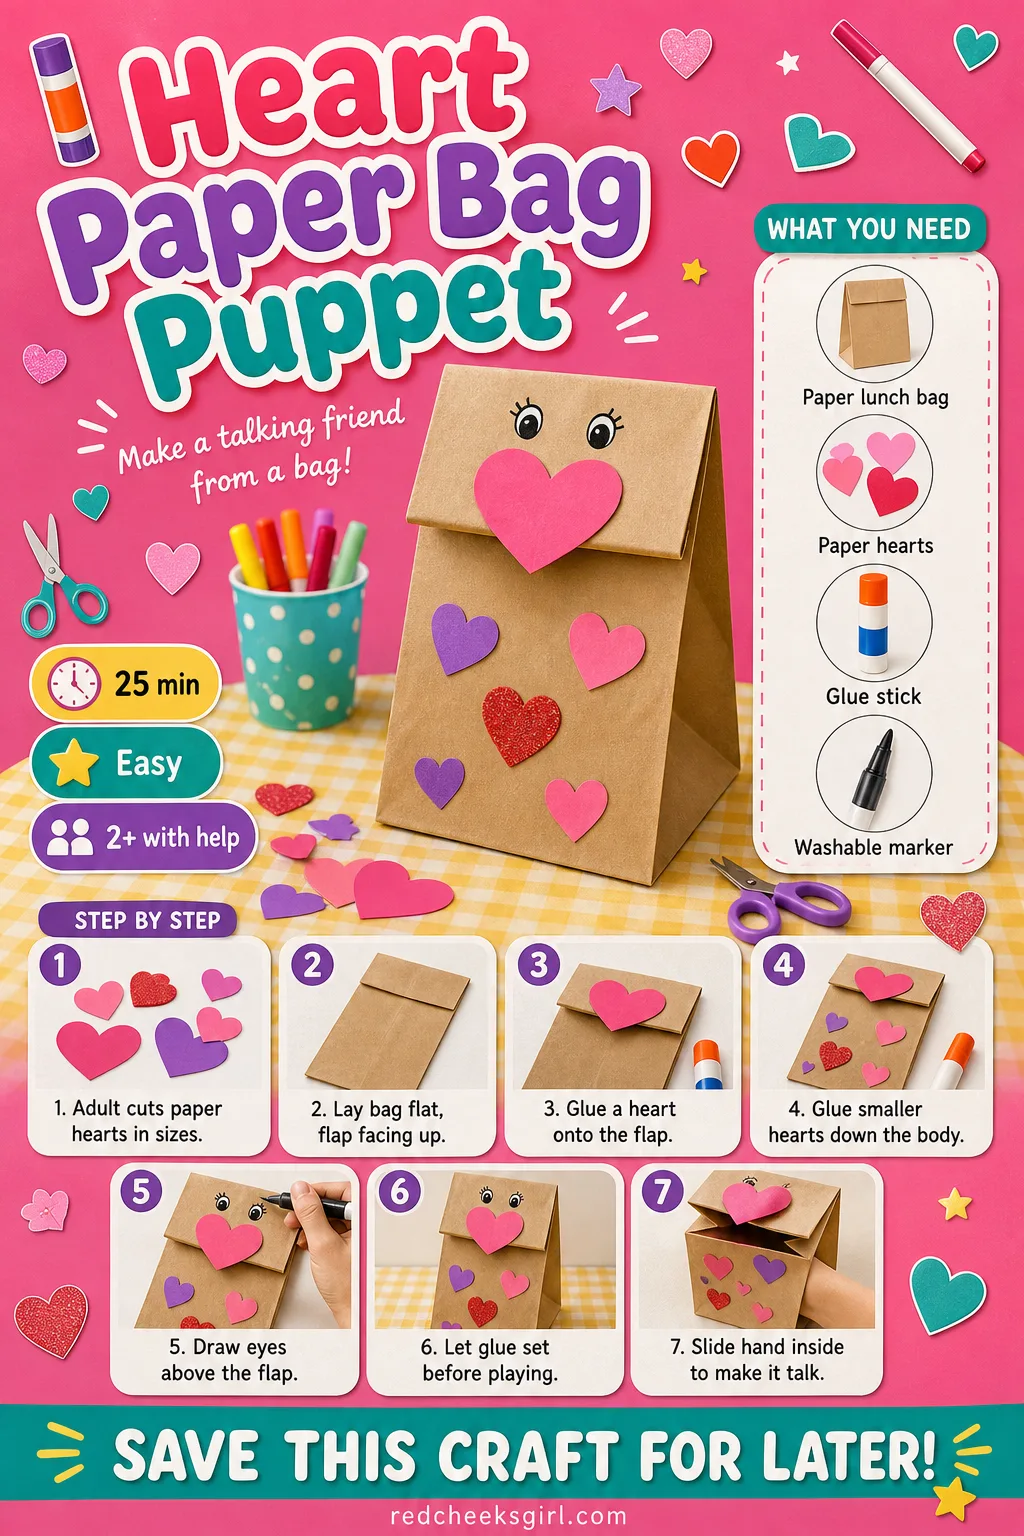
Heart Paper Bag Puppet
A flat paper bag has a built-in mouth flap just waiting to talk, and once a few paper hearts and a drawn-on face go onto it, it becomes a puppet that genuinely performs: open the flap, it talks, close it, it listens.
This is the craft to reach for when the day calls for more play than display, since the finished puppet gets used immediately rather than hung up to admire. Store it flat in a drawer between shows, bags hold their shape for weeks if nobody sits on them.
What You Need
- Small paper lunch bag, 1
- Paper hearts in 2-3 sizes, cut by the grown-up, 5 to 6 total
- Glue stick, 1
- Washable marker, 1
How to Make It
- The grown-up cuts several paper hearts in a range of sizes ahead of time.
- Lay the bag flat with the folded bottom flap facing up, this flap becomes the puppet’s mouth.
- Glue a medium heart onto the flap for the face and smaller hearts down the body as decoration.
- Draw on eyes above the flap with the marker.
- Let the glue set for about 10 minutes before anyone puts a hand inside.
- Slide a hand into the open bottom of the bag, fingers in the flap, to make the puppet talk.
🛍 Shopping guide
Paper Plate Heart Wreath with Tissue Squares
A plain paper plate with the middle cut into a heart looks like nothing much until tissue squares start piling up around the ring, and then it reads instantly as a little wreath, the kind that earns a spot on the front door for the whole month.
Scrunching tissue paper into balls is pure fine motor practice disguised as fun, and there is no wrong way to place them, a gap here and there still looks like a wreath rather than a mistake.
Hang it with a loop of ribbon taped to the back and store it flat once the season ends, tissue balls flatten if anything sits on top.
What You Need
- Paper plate, 1
- Scissors, for the grown-up
- Tissue paper, cut into 2 inch squares, about 40
- Glue stick, 1
- Ribbon, 1 short length, for hanging
How to Make It
- The grown-up cuts a heart shape out of the center of the paper plate, leaving a heart-shaped ring as the wreath base.
- Hand over a pile of tissue squares and show how to scrunch each one into a loose ball.
- Glue each scrunched ball onto the ring, working around until the whole base is covered.
- Let the glue set for about 20 minutes before moving the wreath.
- The grown-up tapes a ribbon loop to the back for hanging.
- Hang on a door or wall, away from direct rubbing that might flatten the tissue.

🛍 Shopping guide
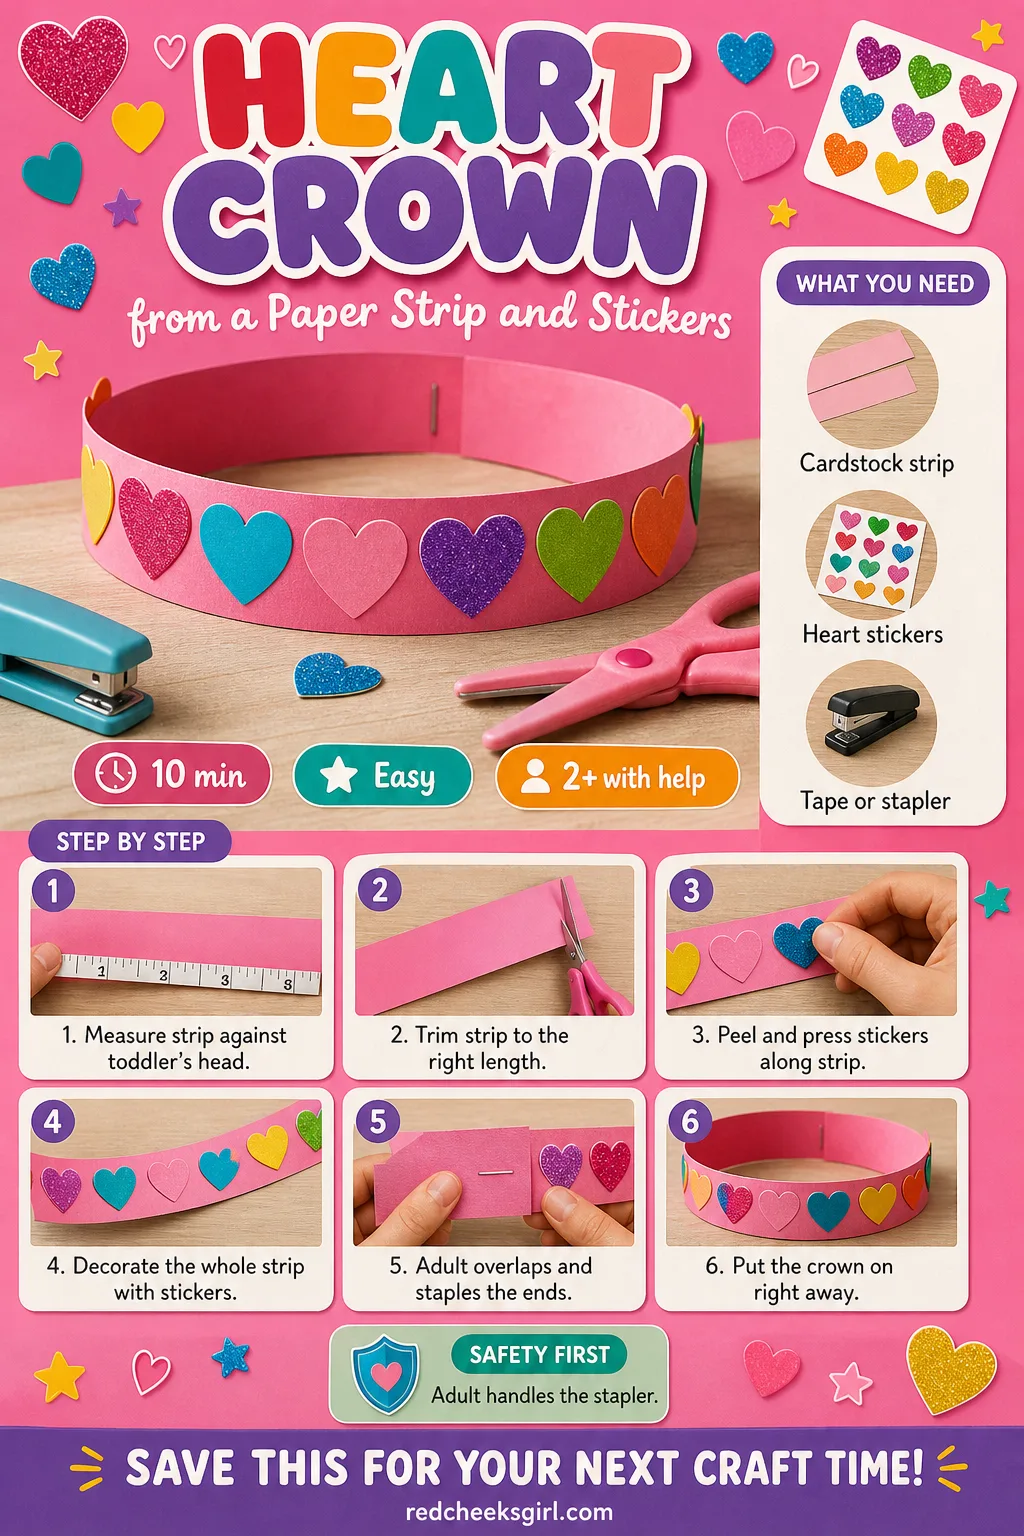
Heart Crown from a Paper Strip and Stickers
Nothing turns a toddler into the guest of honor faster than a crown they decorated themselves, and this one goes from flat strip to wearable in the time it takes to peel a sheet of stickers.
Measure the strip to the actual head before stapling, a crown that slides over the eyes gets pulled off within a minute and the craft is over before it started. Flatten it to store between wears, or just let it live on the toddler’s head until nap time ends it.
What You Need
- Cardstock strip, 2×24 inches, 1
- Heart stickers, 1 sheet
- Tape or a stapler, for the grown-up
How to Make It
- The grown-up wraps the cardstock strip around the toddler’s head to check the length and trims off any excess.
- Lay the strip flat on the table within easy reach.
- Peel heart stickers one at a time and press them along the strip, anywhere and in any order.
- Once the strip is decorated to satisfaction, the grown-up overlaps the two ends and tapes or staples them together.
- Place the finished crown on the toddler’s head right away.
🛍 Shopping guide
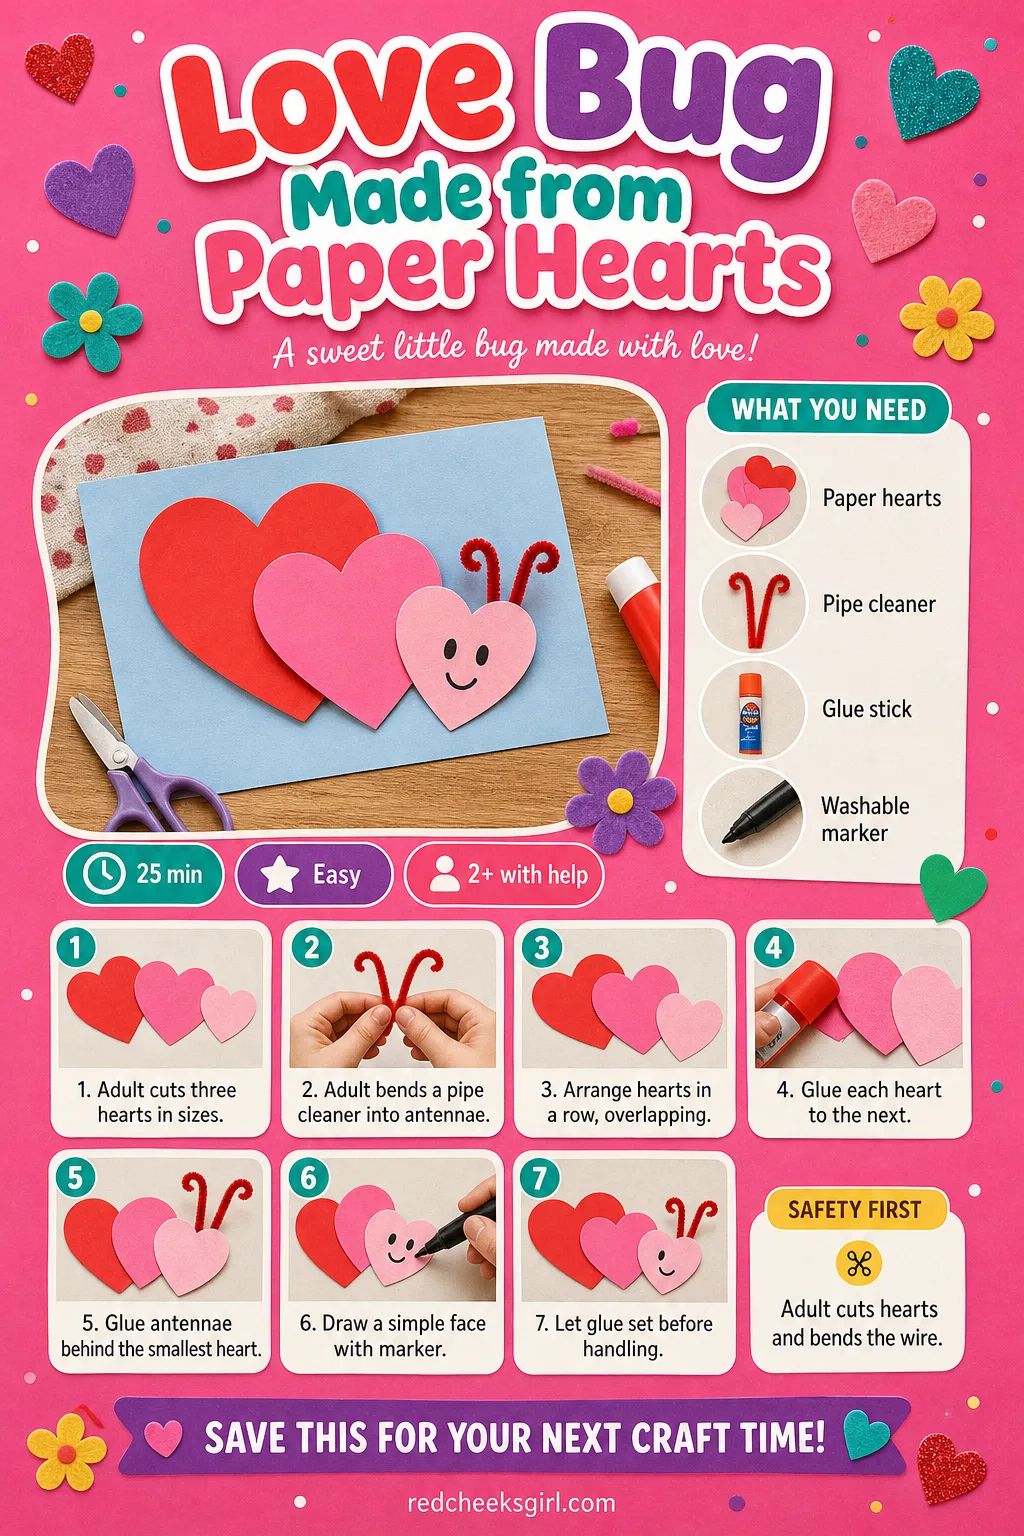
Love Bug Made from Paper Hearts
Three overlapping hearts in a row and a pair of bent antennae, and suddenly there is a bug on the table with actual personality, the kind that gets introduced by name before it is allowed to sit on the fridge.
This works well as a small-group project since each child can glue their own row of hearts while the grown-up handles the one fiddly bit, bending the antenna into shape. Store finished bugs standing up in a shoebox, they are flat enough to stack if needed.
What You Need
- Paper hearts in 3 sizes, cut by the grown-up, 3 per bug
- Pipe cleaner, 1, bent into antennae by the grown-up
- Glue stick, 1
- Washable marker, 1, for the face
How to Make It
- The grown-up cuts three hearts, small, medium and large, and bends a pipe cleaner into a V shape for antennae.
- Arrange the hearts in a row from largest to smallest on a sheet of paper, overlapping slightly.
- Glue each heart down where it overlaps the next, building the row into a caterpillar-like body.
- Tuck the bent pipe cleaner antennae behind the smallest heart, which becomes the head, and glue it in place.
- Draw on a simple face with the marker.
- Let the glue set for about 10 minutes before picking the bug up.
🛍 Shopping guide
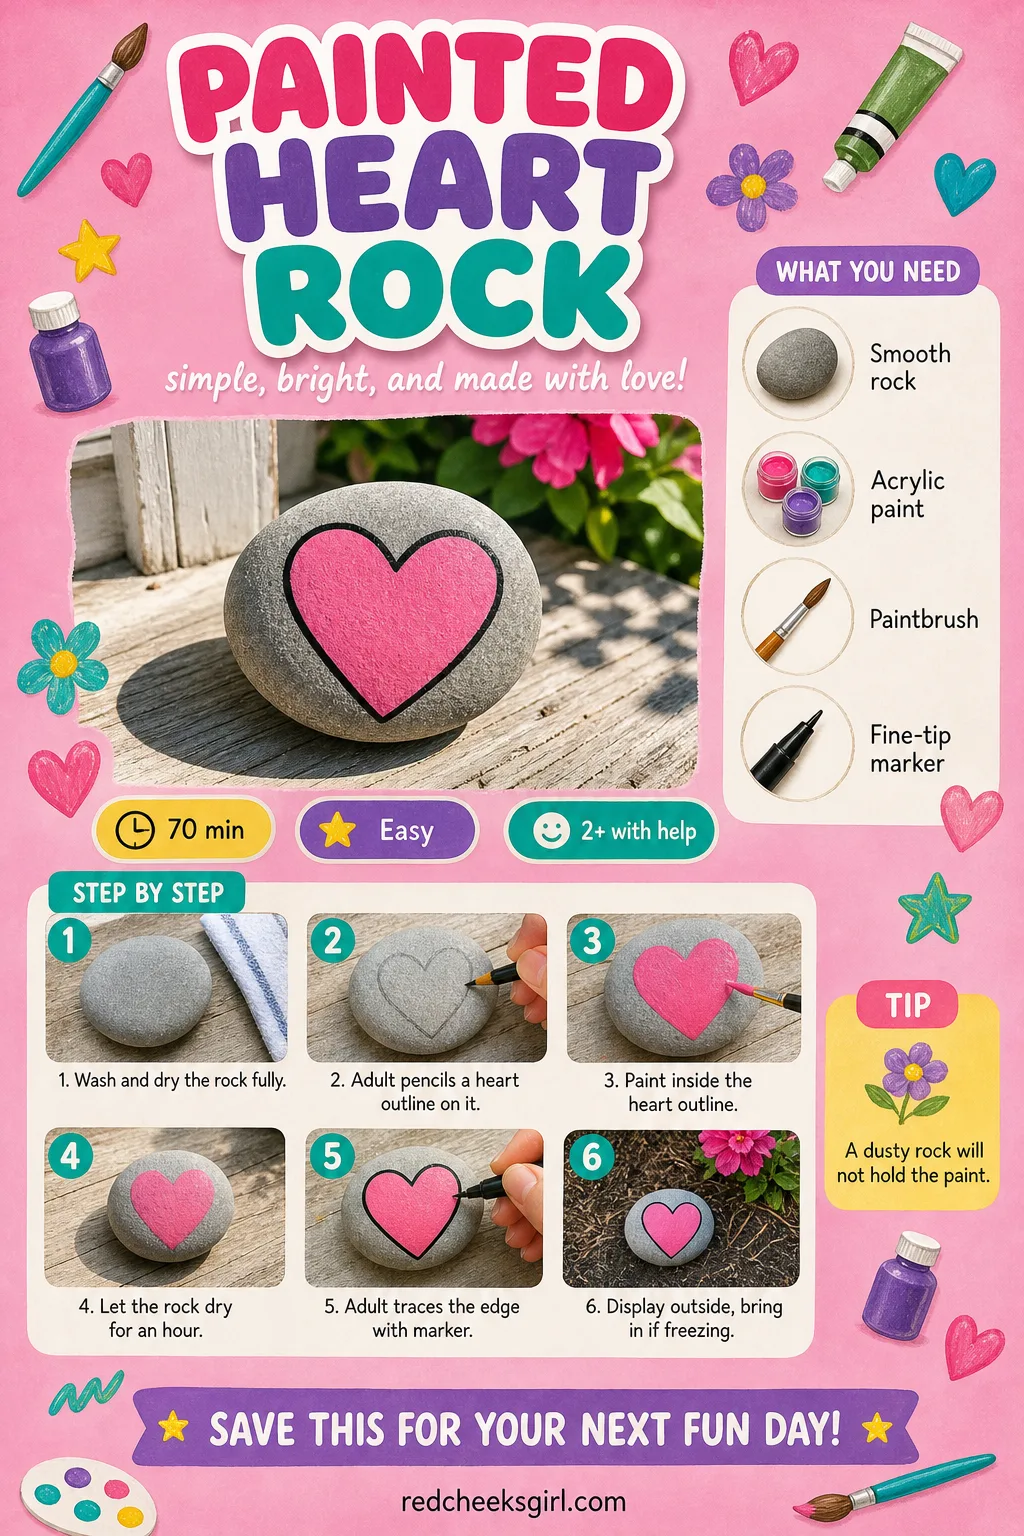
Painted Heart Rock
A rock holds paint like nothing else on this list, cool and solid under small fingers, and once it dries it is genuinely tough enough to sit outside through wind and a little rain without falling apart.
Find a smooth, flat, palm-sized stone rather than anything jagged, river rocks from the garden center work if the backyard does not have one handy. Leave it on a porch step or a windowsill as a tiny welcome, and bring it indoors over winter if the climate gets properly cold, paint can flake in a hard freeze.
What You Need
- Smooth, flat rock, palm-sized, 1
- Acrylic or washable paint, 1-2 colors
- Small paintbrush, 1
- Fine-tip marker, for the grown-up, to outline once dry
How to Make It
- Wash and dry the rock completely before starting, paint will not stick to a dusty surface.
- The grown-up lightly pencils a simple heart outline onto the rock as a guide.
- Hand over the brush and paint, and fill in the heart outline, it does not need to stay perfectly inside the lines.
- Leave the rock somewhere flat and undisturbed to dry for about an hour.
- Once fully dry, the grown-up traces the heart edge with the fine-tip marker for a crisp outline.
- Display outdoors on a step or sill, bringing it inside if hard frost is expected.
🛍 Shopping guide
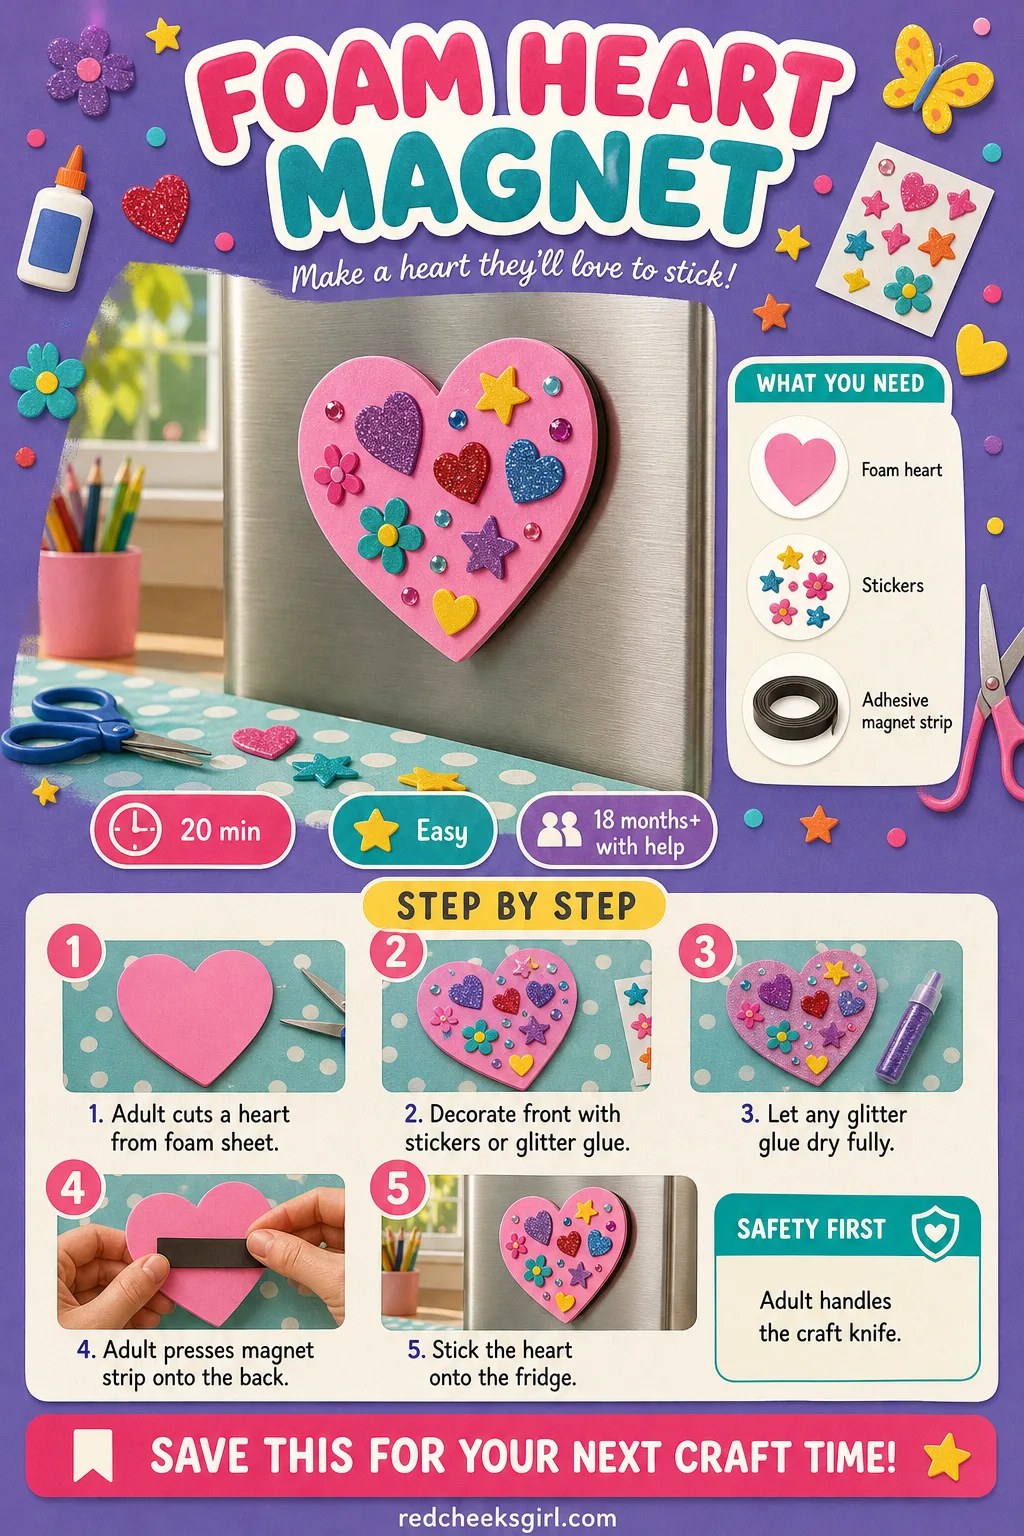
Foam Heart Magnet
A magnet earns the fridge spot that every other craft is secretly competing for, and this one gets there with almost no mess: a foam heart, a few stickers, a strip of adhesive on the back, done.
Pre-cut foam hearts from the craft aisle skip the cutting step entirely if there is no craft knife in the house, which makes this one of the quickest crafts here when time is actually short. Keep a small basket of these by the fridge, toddlers tend to rearrange them daily, which is really half the fun.
What You Need
- Pre-cut foam heart, 1, or a foam sheet cut by the grown-up
- Small stickers or glitter glue, for decorating
- Adhesive magnet strip, 1, applied by the grown-up
How to Make It
- If starting from a plain foam sheet, the grown-up cuts a heart shape from it with a craft knife.
- Lay the foam heart flat and hand over stickers or a small squeeze of glitter glue to decorate the front.
- Let any glitter glue dry for about 10 minutes before flipping the heart over.
- The grown-up peels the backing off the magnet strip and presses it firmly onto the back of the heart.
- Press the heart onto the fridge right away to help the adhesive set.
🛍 Shopping guide
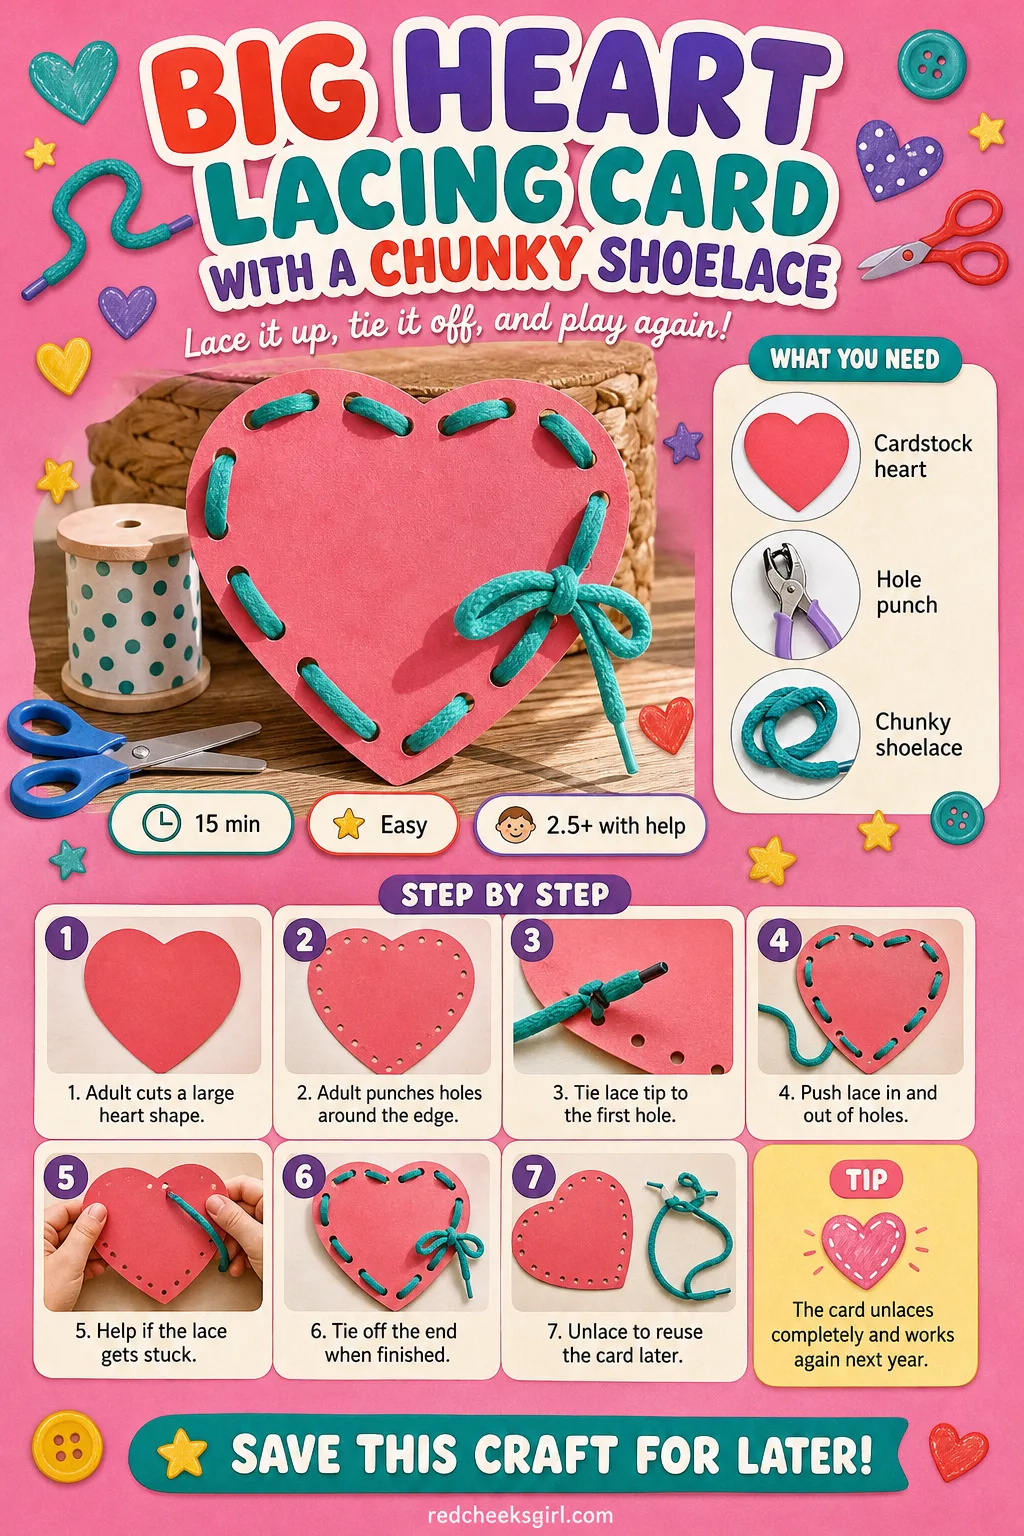
Big Heart Lacing Card with a Chunky Shoelace
Threading a shoelace in and out of holes is the kind of quiet, focused work that buys a grown-up ten actual minutes of peace, and a heart-shaped version of it still counts as a valentine craft even though it looks more like a puzzle.
Go oversized, a card the size of a dinner plate gives small hands room to miss and still land near the hole, which matters more than it sounds. Once the laces are tied off, this one is reusable: unlace it, store flat in a drawer, and the same card works again next year.
What You Need
- Large cardstock or paper plate heart, cut by the grown-up, about 10 inches across
- Hole punch, for the grown-up
- Chunky shoelace or thick cord, 36 inches, with a stiff tip
How to Make It
- The grown-up cuts a large heart shape and punches holes evenly around the edge, about an inch apart.
- Knot or tape the end of the shoelace to the first hole so it does not pull all the way through.
- Guide the toddler to push the stiff tip of the lace in and out of each hole around the heart.
- Help if the lace gets stuck or doubles back on itself, this is normal and genuinely fiddly at first.
- Keep going all the way around and tie off the end at the last hole.
- Unlace completely to reset the card for next time, it stores flat in a drawer.
🛍 Shopping guide
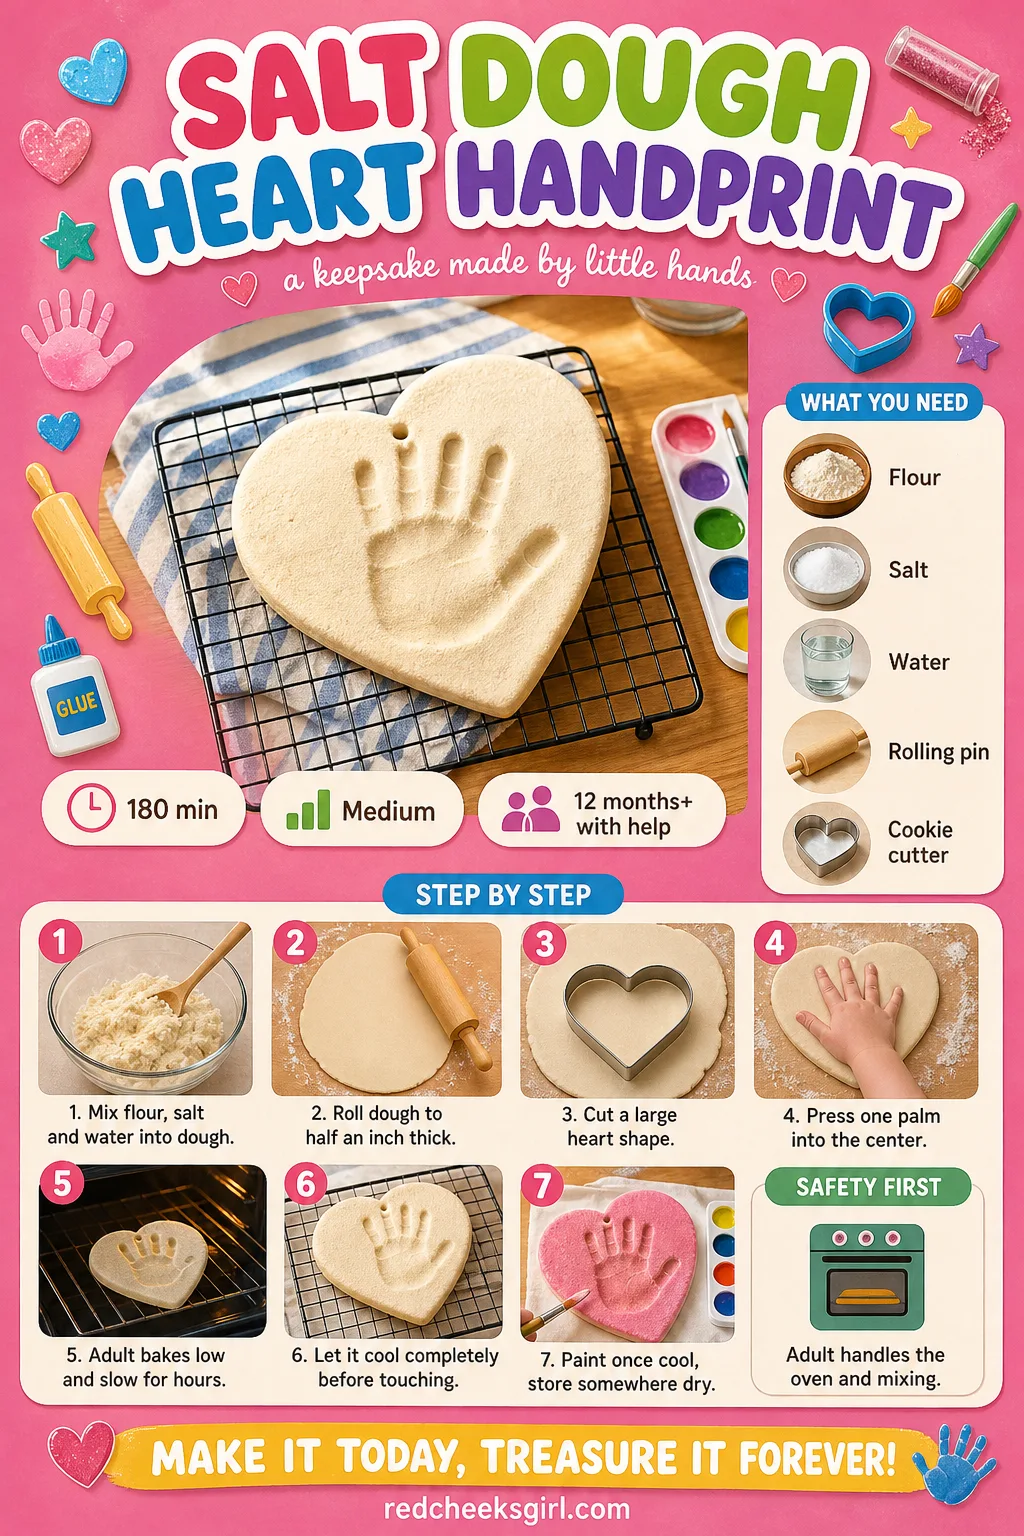
Salt Dough Heart Handprint
A handprint pressed into dough instead of paint goes from party craft to something closer to a family keepsake, since baked salt dough hardens like a soft biscuit and can last on a shelf for years rather than fading in a drawer.
The oven time is the real wait here, low and slow for a couple of hours, so this is a morning project with an evening reveal rather than something finished before lunch. Once cool and painted if you like, store it somewhere dry, salt dough softens again in damp air, so skip the bathroom shelf.
What You Need
- Plain flour, 1 cup
- Table salt, 1/2 cup
- Water, 1/2 cup, mixed in by the grown-up
- Rolling pin, 1
- Large heart cookie cutter, or a heart shape cut freehand by the grown-up
How to Make It
- The grown-up mixes flour, salt and water into a dough, kneading until smooth, then rolls it out to about half an inch thick.
- Cut a large heart shape from the dough with the cookie cutter, or shape one freehand, and smooth the edges.
- Lay the heart flat on a baking sheet and guide the toddler to press one palm firmly into the center, holding steady for a few seconds.
- The grown-up bakes the dough at a low oven temperature, around 200°F (95°C), for 2 to 3 hours, until it feels hard all the way through.
- Let it cool completely on the tray before touching, it is fragile while warm.
- Paint the cooled heart if you like, then store it somewhere dry rather than a steamy bathroom.
🛍 Shopping guide
Heart Garland with Pre-Cut Hearts on Yarn
A string of hearts across a doorway or crib rail turns an ordinary room into one that is clearly celebrating something, and this version comes together fast because every heart arrives already cut, the only job left is threading.
Stiffen the end of the yarn with a dab of tape so it acts like a needle tip, a floppy string and a punched hole fight each other for a surprisingly long time otherwise.
Once the day passes, loop the whole garland around a hanger and tuck it in a drawer, ready to restring next year without a single new cut.
What You Need
- Pre-cut paper or felt hearts, about 4 inches each, 10
- Yarn, 1 piece, 60 inches
- Hole punch, for the grown-up
- Tape, a small piece, to stiffen the yarn end
How to Make It
- The grown-up punches one hole near the top of each of the 10 hearts.
- Wrap a small piece of tape tightly around one end of the yarn so it stays stiff and pokes through holes easily.
- Thread the stiffened yarn end through the hole of one heart and slide it down to where you want it to sit.
- Keep threading hearts on one at a time, spacing them evenly along the length of yarn.
- Once all 10 are on, the grown-up ties a loop at each end of the yarn for hanging.
- Hang the garland across a doorway, crib rail, or window, out of reach of pulling hands if it hangs low.

🛍 Shopping guide
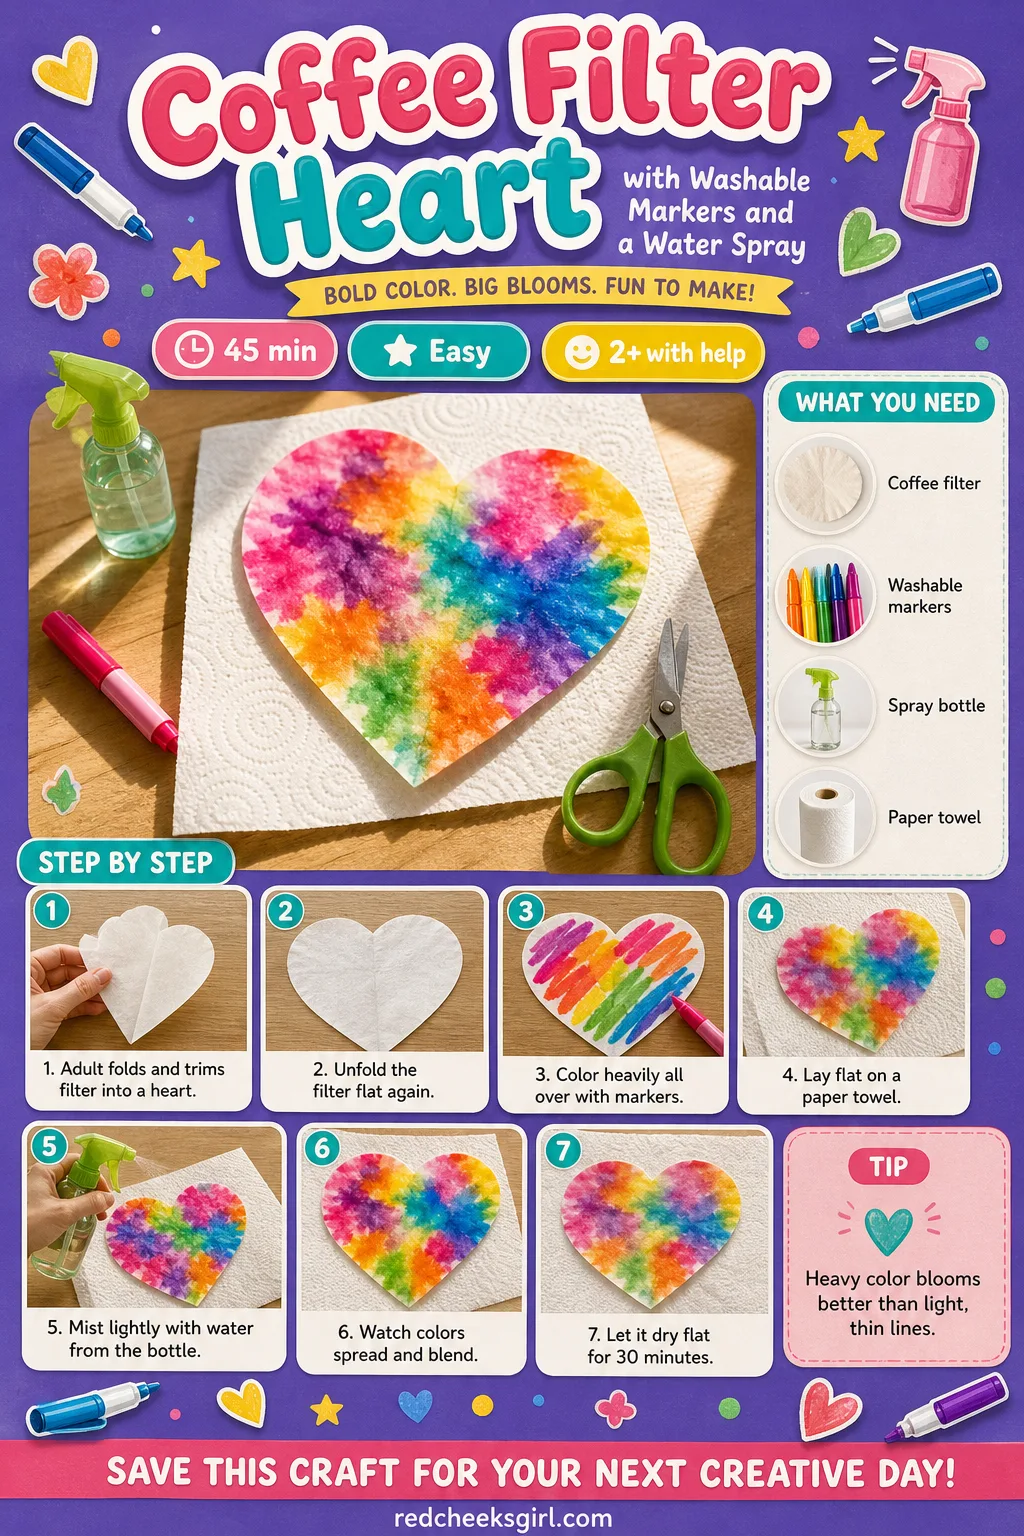
Coffee Filter Heart with Washable Markers and a Water Spray
The moment the water hits the marker lines, the colors bleed and bloom into something closer to watercolor than anything a toddler drew on purpose, and that small bit of magic is exactly why this one gets requested again and again.
Color heavily rather than lightly, since a filter colored in thin lines just goes pale and washes out once sprayed, while a heavily scribbled one blooms into proper color. Let it dry completely flat on a paper towel for about half an hour before hanging it, a still-damp filter tears if it is moved too soon.
What You Need
- Coffee filter, 1, round, basket style
- Washable markers, 2-3 colors
- Small spray bottle filled with water, 1
- Paper towel, for drying on
How to Make It
- The grown-up folds the coffee filter in half, trims it into a rough heart shape, then unfolds it flat again.
- Hand over the markers and color heavily all over the filter, scribbling is actually the right technique here.
- Lay the colored filter on a paper towel and mist it lightly with water from the spray bottle, letting a grown-up guide the first few pumps if the trigger is stiff.
- Watch the colors spread and blend as the water soaks in, this is the part toddlers tend to want to repeat.
- Leave the filter flat and undisturbed to dry for about 30 minutes.
- Once fully dry, hang the heart in a window or tape it to a wall.
🛍 Shopping guide
Frequently Asked Questions
What Valentine crafts can a 2 year old actually do?
A 2 year old can manage stamping, dabbing, sticking stickers and pressing a hand or foot into paint, all with a grown-up handling any cutting or hot glue. Stamping with a potato or cardboard tube and sticker collages tend to hold attention longest at this age.
How do you make a heart suncatcher for toddlers?
Stick torn tissue paper pieces onto a heart-shaped piece of contact paper, then seal a second layer of contact paper over the top so the colors stay put. Hang the finished heart in a sunny window once a grown-up has trimmed the edges flush.
Are Valentine crafts for toddlers safe, with no choking hazards?
Yes, as long as beads, buttons, pom poms and anything small enough to swallow stay out of the mix. Paint, paper, tissue squares, foam hearts and chunky laces are all sized safely for toddlers when a grown-up handles cutting and gluing.
How do you keep toddler Valentine crafts mess-free?
Choose crafts with no loose paint at all, like sticker collages, foam magnets or contact paper collages, since nothing needs a brush or a wipe-down afterward. For anything with paint, a damp cloth within reach matters more than any special product.
How far in advance can toddlers make Valentine crafts?
Most of these can be made up to a week or two ahead, since paper, paint and stickers hold their color well before the date arrives. Salt dough needs the most lead time because of the two to three hour bake, so start that one earliest.
How do you store handprint and footprint keepsakes?
Keep them flat rather than folded or rolled, since dried paint cracks at a crease. A labeled keepsake box or a plastic sleeve in a memory book protects the paper or canvas from bending for years.
21 grown-up Valentine decorations for the whole house, from a front door heart wreath to lace table

23 galentines party decor ideas for a living room done in pink and red, from a balloon backdrop and

18 station-by-station valentine class party ideas for kids, from a photo booth backdrop to a card ex
Leave a Reply