

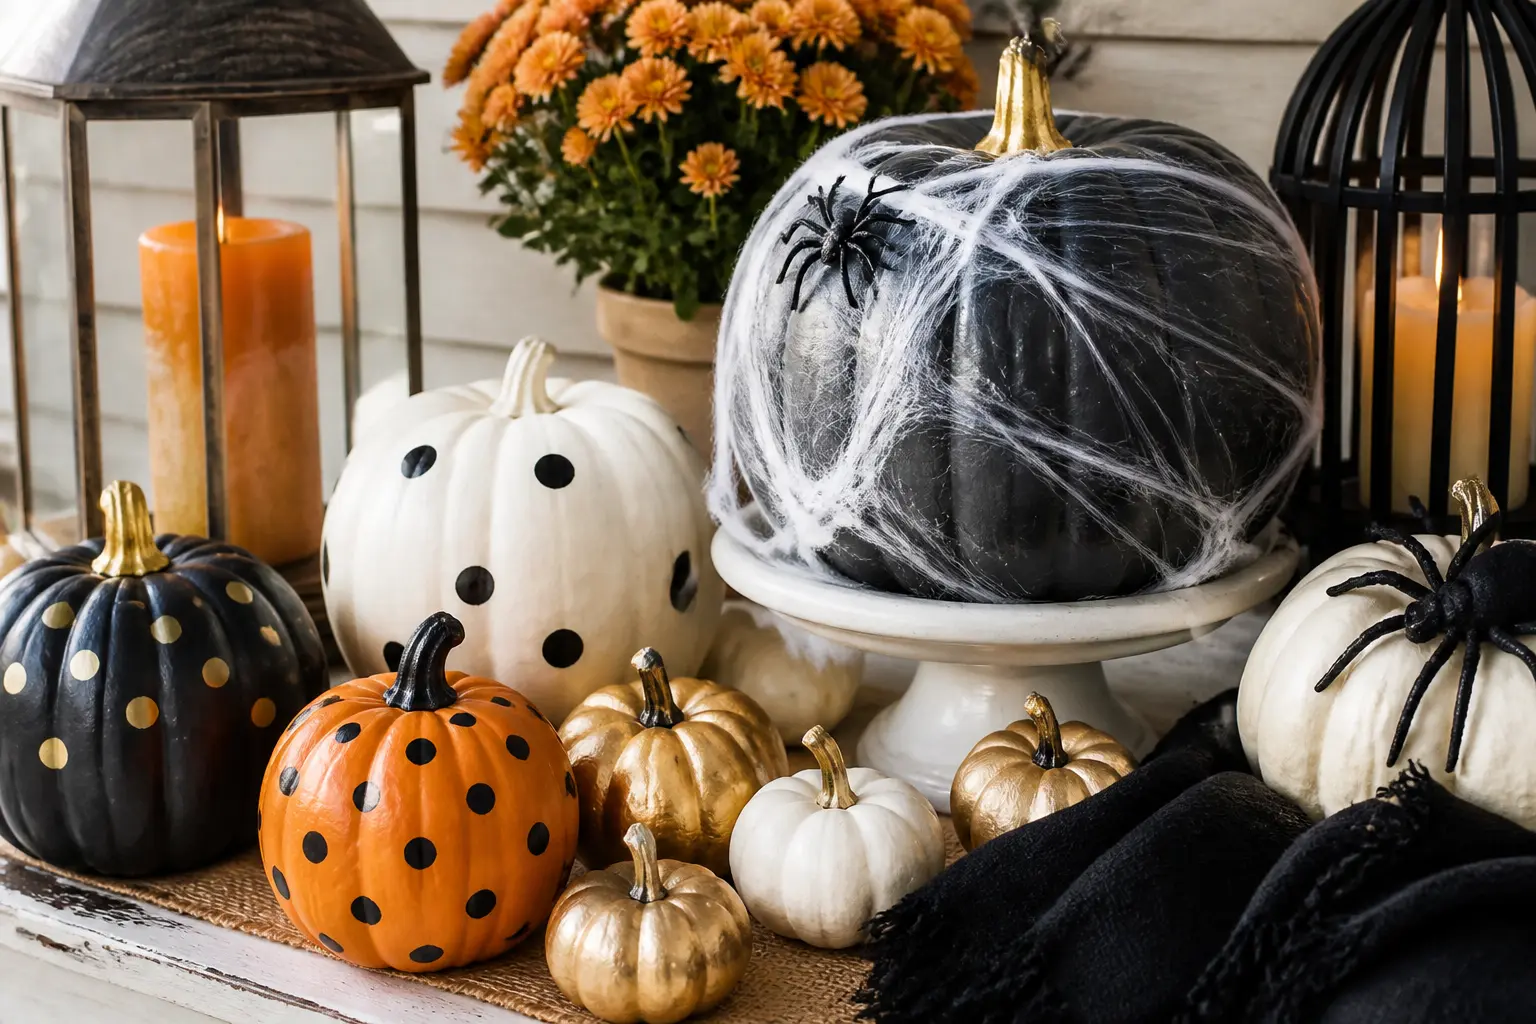
Easy DIY Halloween decorations should not feel like homework. Everything on this list takes three steps or fewer, uses materials you can grab at a craft store or pull from a recycling bin, and finishes in a single evening, start to cleanup.
The rule here is simple: if it needs a second night, it does not make the list. What does make the list are fifteen projects that look intentional without being fussy, and that you can actually finish before the season is half over.
Once your space is dressed, you will want games to match. 25 Seriously Fun Halloween Party Games and 30 Unforgettable Halloween Party Ideas and Games both pick up where this list leaves off.
This post contains affiliate links. If you buy through them, I may earn a small commission at no extra cost to you.
Glowing Jar Projects
A lit jar does more atmospheric work than almost anything else you can make in an evening. The warm glow through painted or draped glass reads immediately as Halloween without screaming it, and battery tea lights mean zero fire risk and no candle-sitting duty during a party.
All three jar projects below use the same basic logic: transform a glass container, then drop a light inside. Vary the sizes and cluster them on a windowsill or mantel for a grouped effect that looks curated rather than scattered.
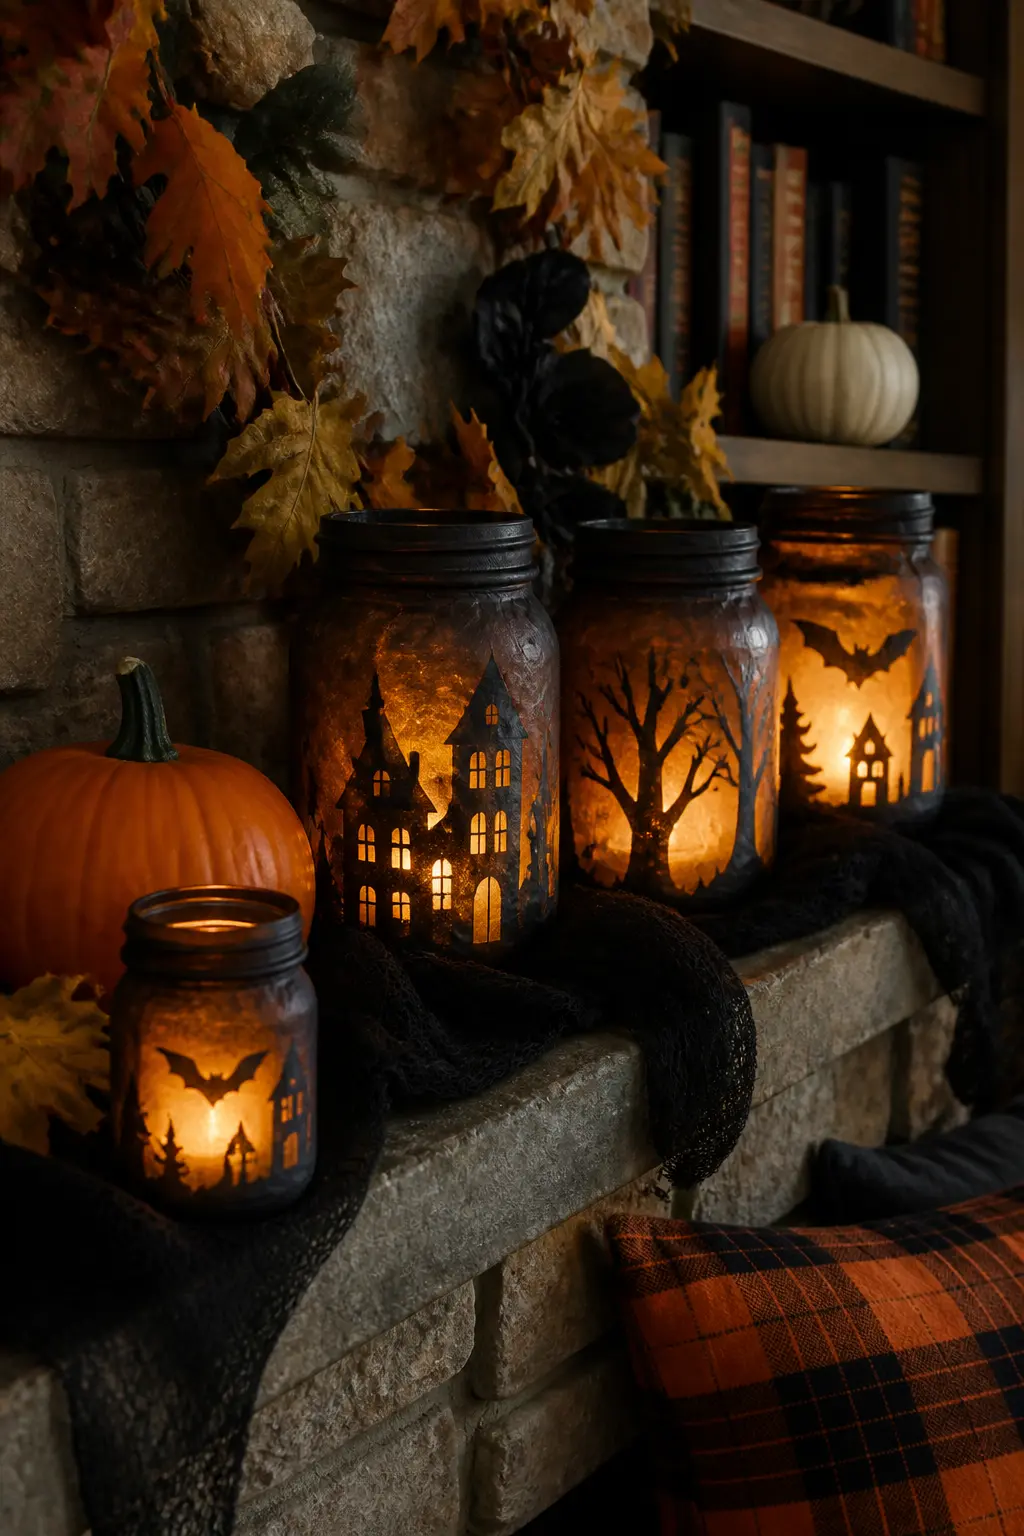
Mason Jar Luminary
Brush mod podge directly onto the outside of a clean mason jar. Press torn or cut pieces of black tissue paper onto the wet surface, overlapping slightly, and smooth out air bubbles with your finger. Let it dry for twenty minutes while you cut a small ghost or skull face from black cardstock and glue it to the front.
Drop a battery tea light inside and set the jar near a window or on a mantel. The tissue paper filters the light into a warm amber glow, and the black face reads sharply against it. One jar is good. Five jars in a cluster, in graduated sizes, is a whole moment.
🛍 Shopping guide
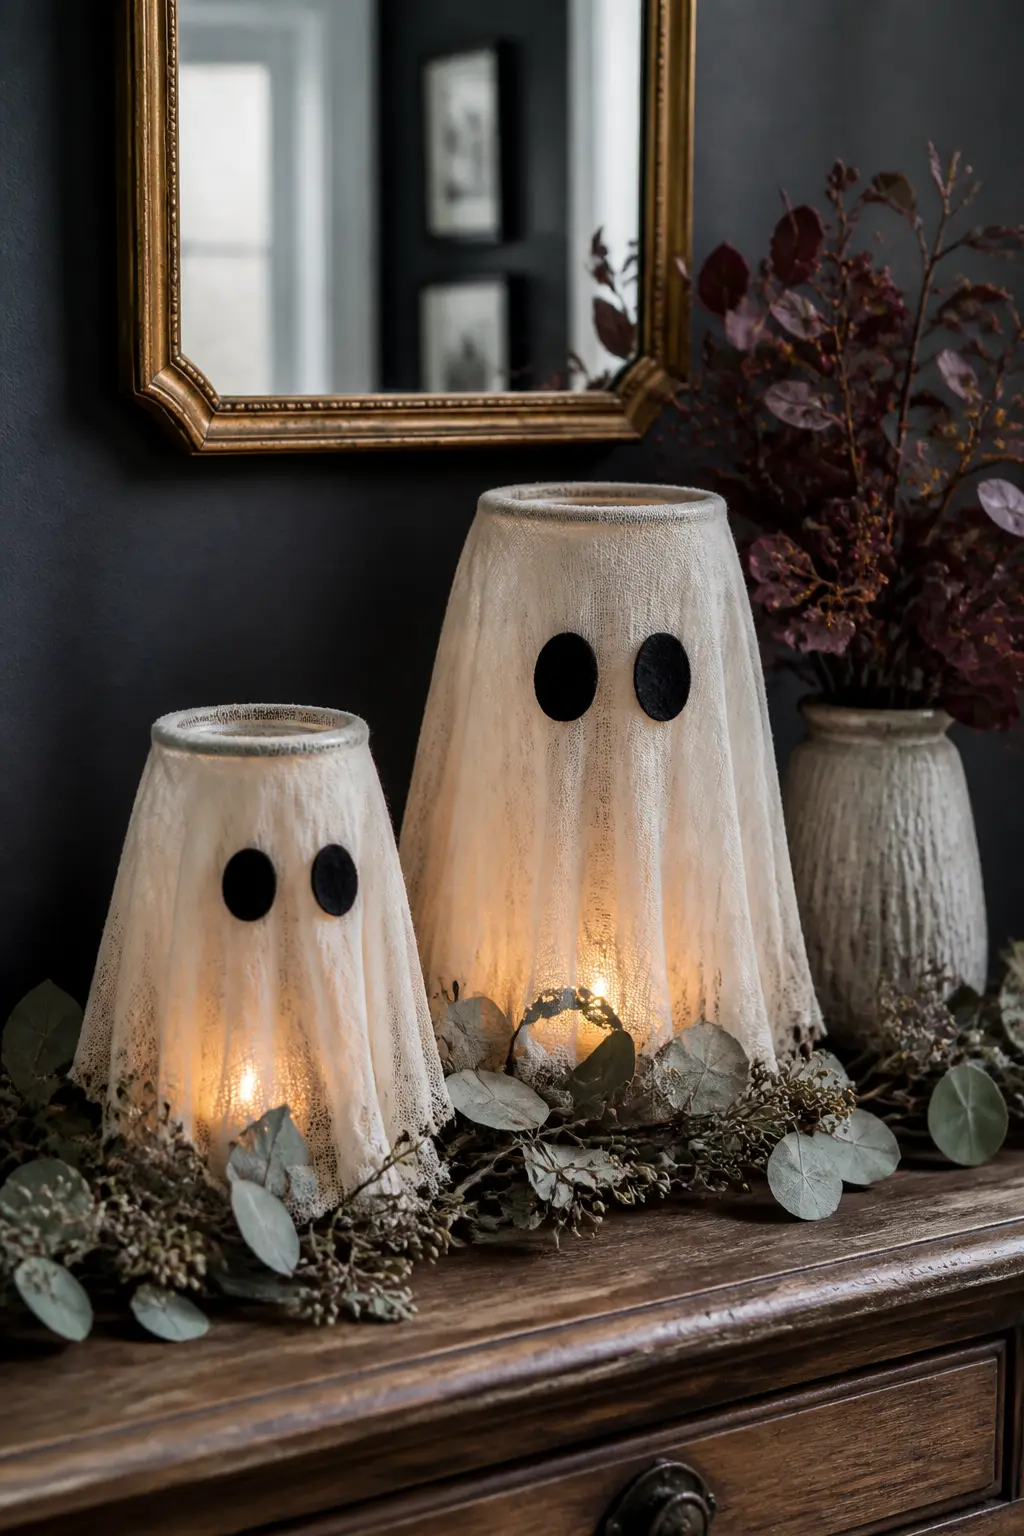
Muslin Spirit Jar
Take a tall glass jar, something in the pasta-sauce or pickle-jar range. Drape a square of muslin loosely over the top so it falls around the sides like a little robe. Gather the fabric at the neck of the jar and secure it with a rubber band or a loose knot, then tie a piece of twine over the band to hide it.
Cut two small oval eyes from black felt and glue them onto the front of the fabric. Drop a battery light inside before you drape the muslin, so the glow comes through the weave. The effect is soft and slightly eerie: a lit ghost that looks handmade in the best possible way.
🛍 Shopping guide
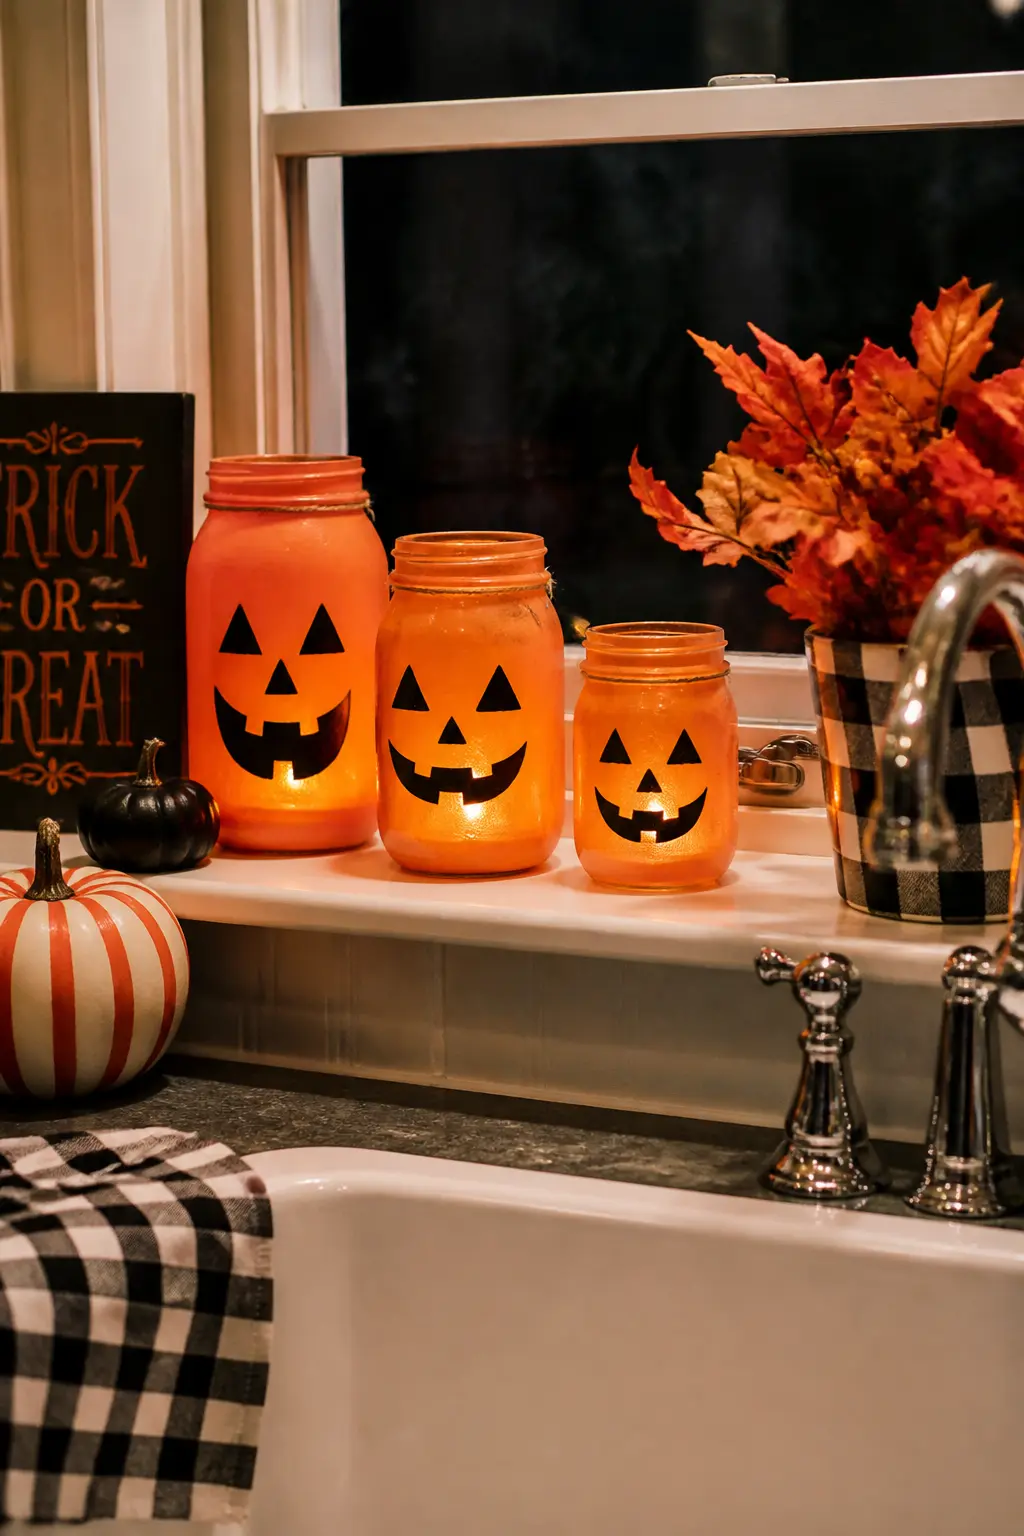
Painted Pumpkin Face Jar
Paint the outside of a clean glass jar with orange acrylic paint. Two coats cover well; let the first dry before adding the second. Once the orange is dry, draw a jack-o-lantern face on the front using a black paint pen. Keep the features bold and simple so they read clearly when backlit.
Drop a battery tea light inside. The orange glass concentrates the glow and the black face goes nearly opaque, so the light pours out around it rather than through it. Line up two or three jars in different sizes on a windowsill for the full carved-pumpkin effect without the mess of actual carving.
🛍 Shopping guide
Outdoor Touches
The front of the house sets expectations before anyone rings the bell. These two projects work in a garden bed, on a porch step, or along a path, and neither one minds a bit of weather.
Painted Ghost Rocks
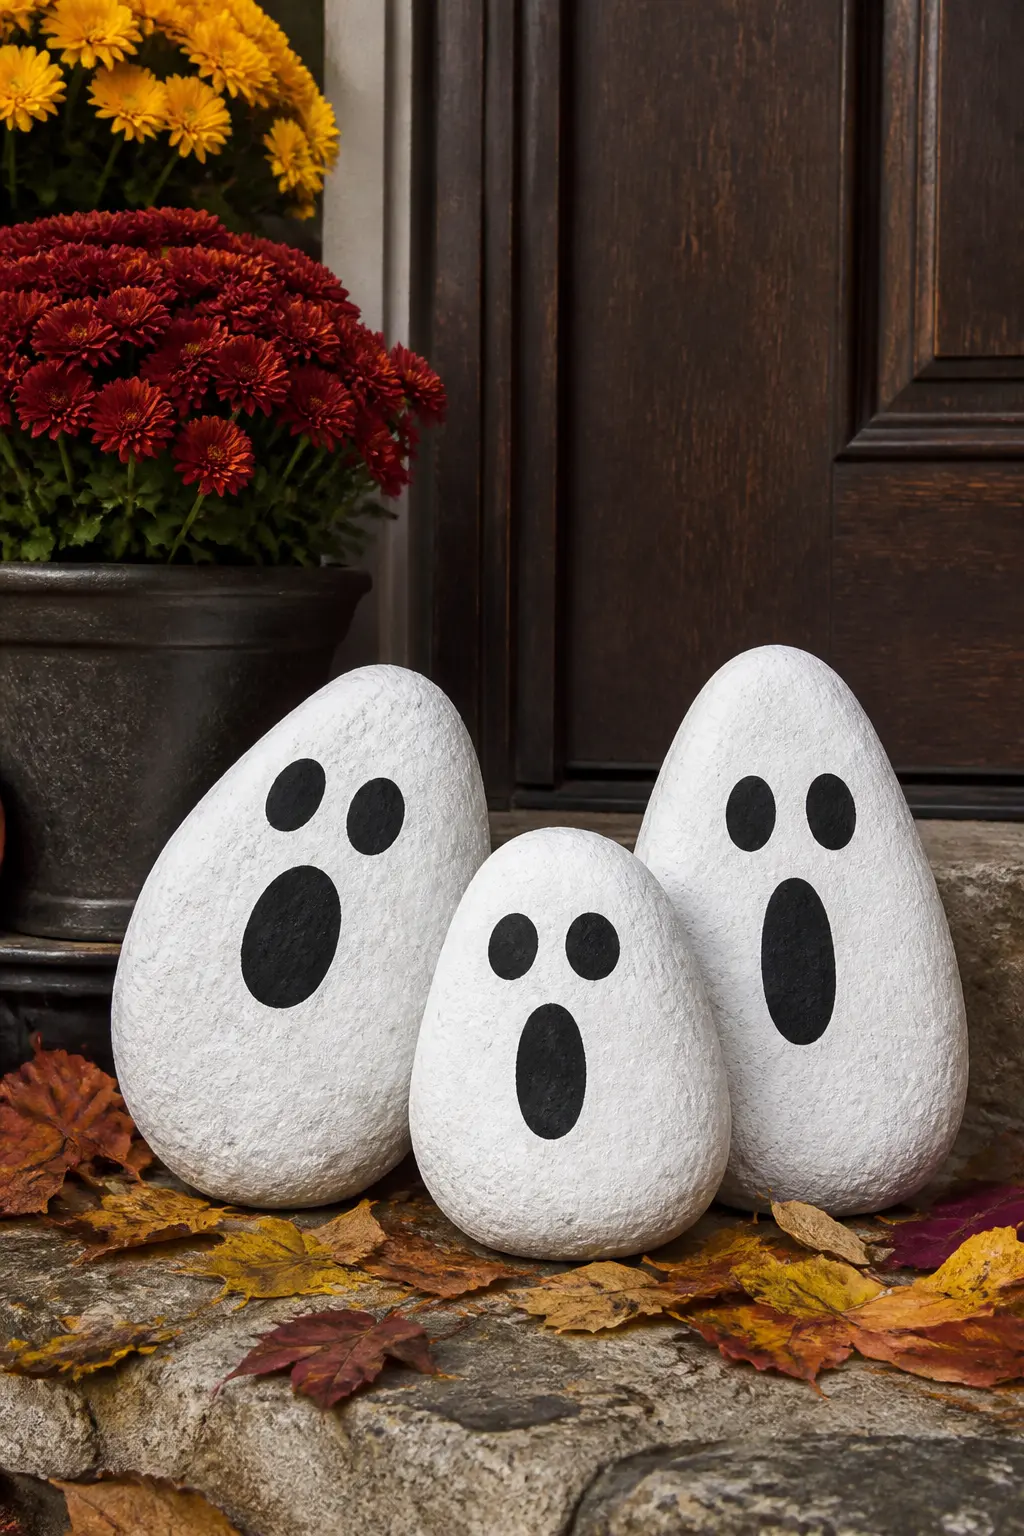
Start with smooth, palm-sized rocks. River rocks or landscaping stones work perfectly. Coat each one in white paint and let it dry fully, which takes about thirty minutes in dry air. Once the surface is opaque, draw a ghost face with a black paint pen: two oval eyes and a small open mouth.
Set them in clusters along a garden path, on porch steps, or half-hidden in leaf piles. They weather reasonably well and look charming rather than spooky, which makes them the right call if your neighborhood skews toward young trick-or-treaters.
🛍 Shopping guide
Garlands and Wall Pieces
Vertical and horizontal surfaces are the fastest way to shift the feeling of a room. Garlands travel across a mantel, a stair rail, or a window frame. Wall clusters go up in minutes and come down just as fast with no damage, which matters if you rent.
Cut a few bats in different sizes while you are at it: the scraps from one project often supply the next one on this list.
Paper Bat Garland
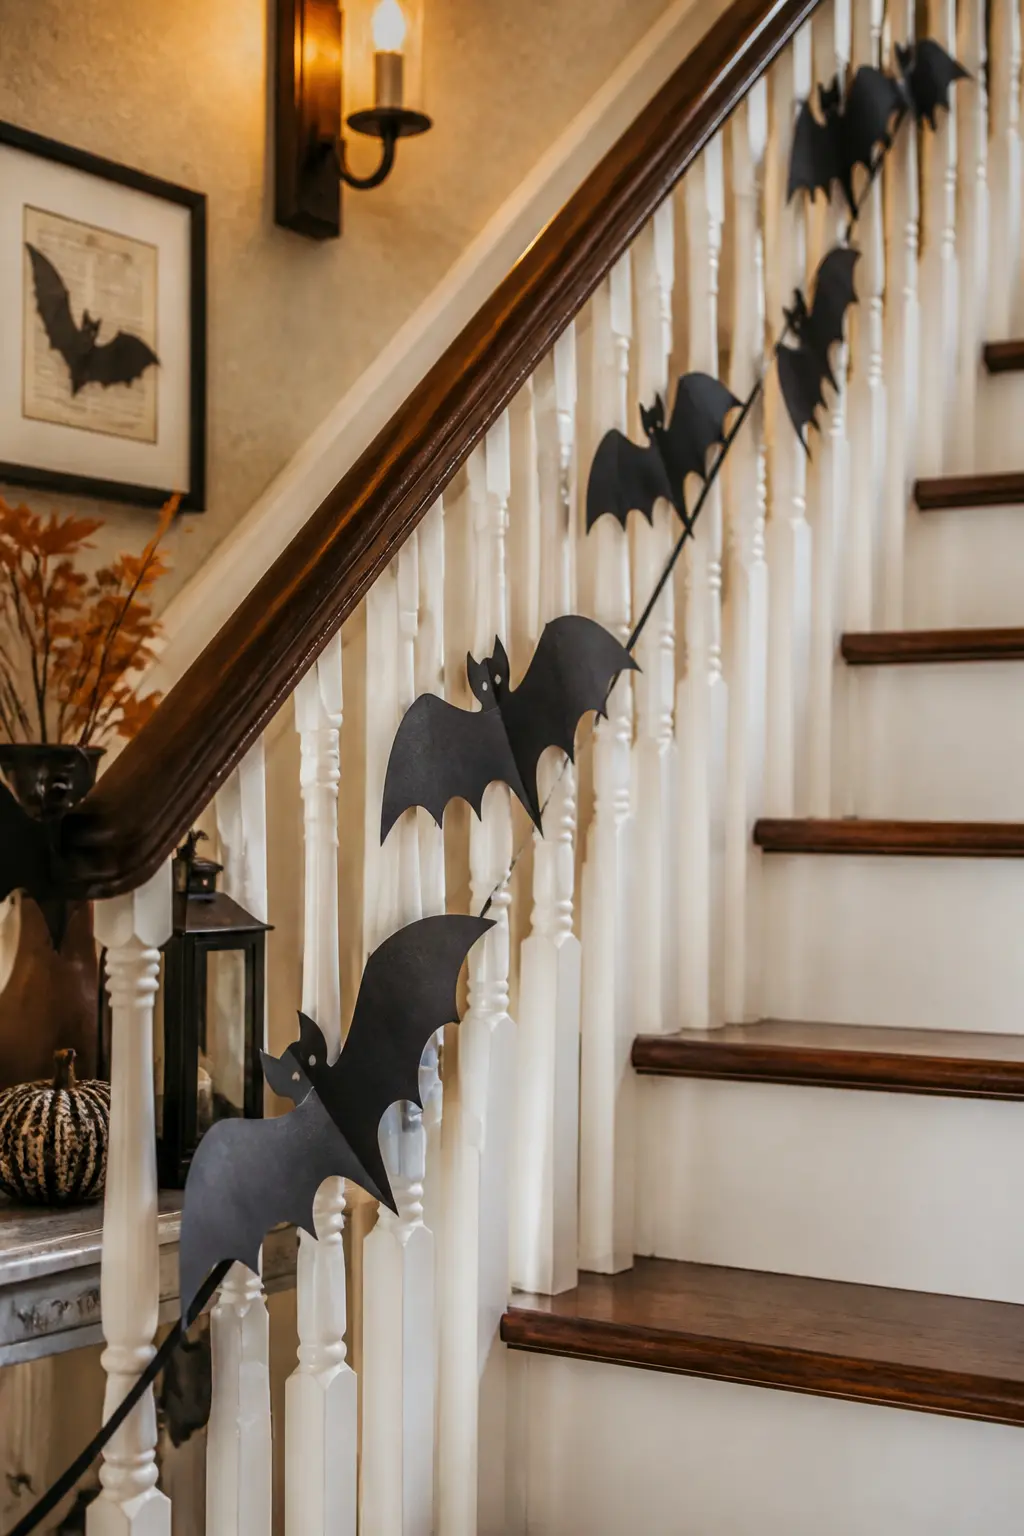
Print or trace a simple bat shape onto black cardstock, then cut as many as you need. Ten bats covers about four feet of garland; scale up from there. Fold each bat in half lengthwise so the wings angle slightly upward rather than lying flat, which is the detail that makes this look dimensional.
Run a length of black or clear string across your cutting surface and glue each bat along it, spacing them evenly. Let the glue set for a few minutes before you pick up the garland. Drape it across a mantel, a stair rail, or a window frame.
🛍 Shopping guide
Spider Web Corner
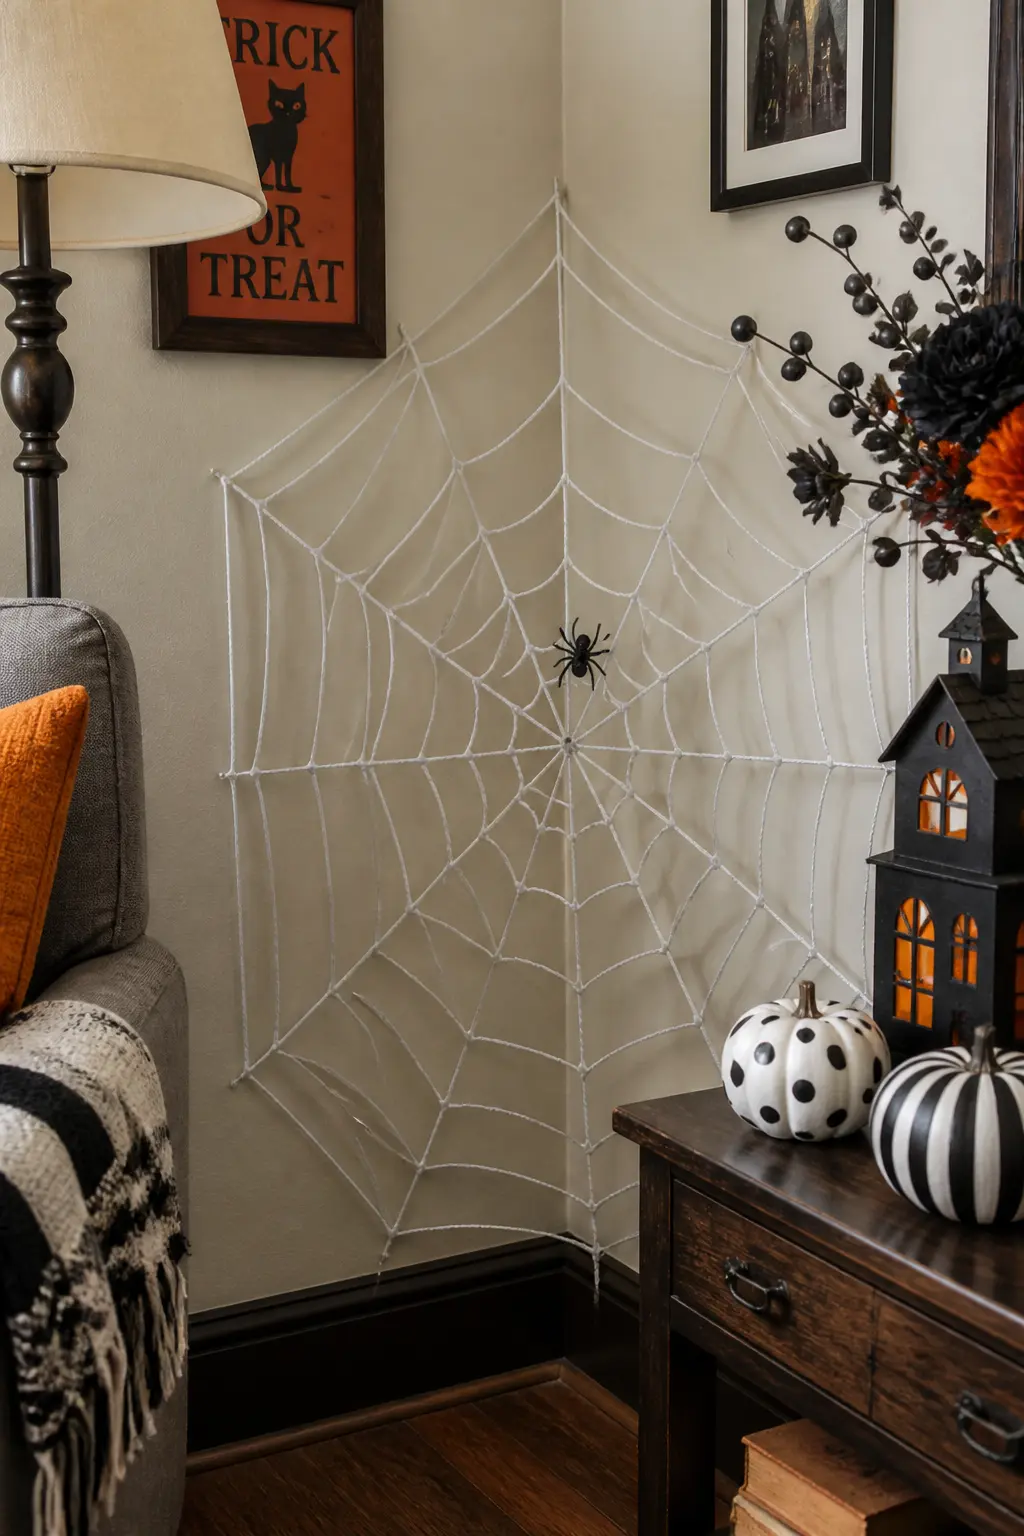
Choose an interior corner where two walls meet, somewhere between knee height and ceiling height. Press four or five push pins into each wall, forming a fan of anchor points. Run a length of white yarn from the center point out to each pin as spokes, pulling it taut and knotting it at each end.
Then weave the yarn in a loose spiral back toward the center, looping it around each spoke as you go. It does not need to be perfect. Irregular spacing actually reads more convincingly as a real web. Finish with a plastic spider from a bag of party-store spiders tucked into the center.
🛍 Shopping guide
Bat Wall Cluster
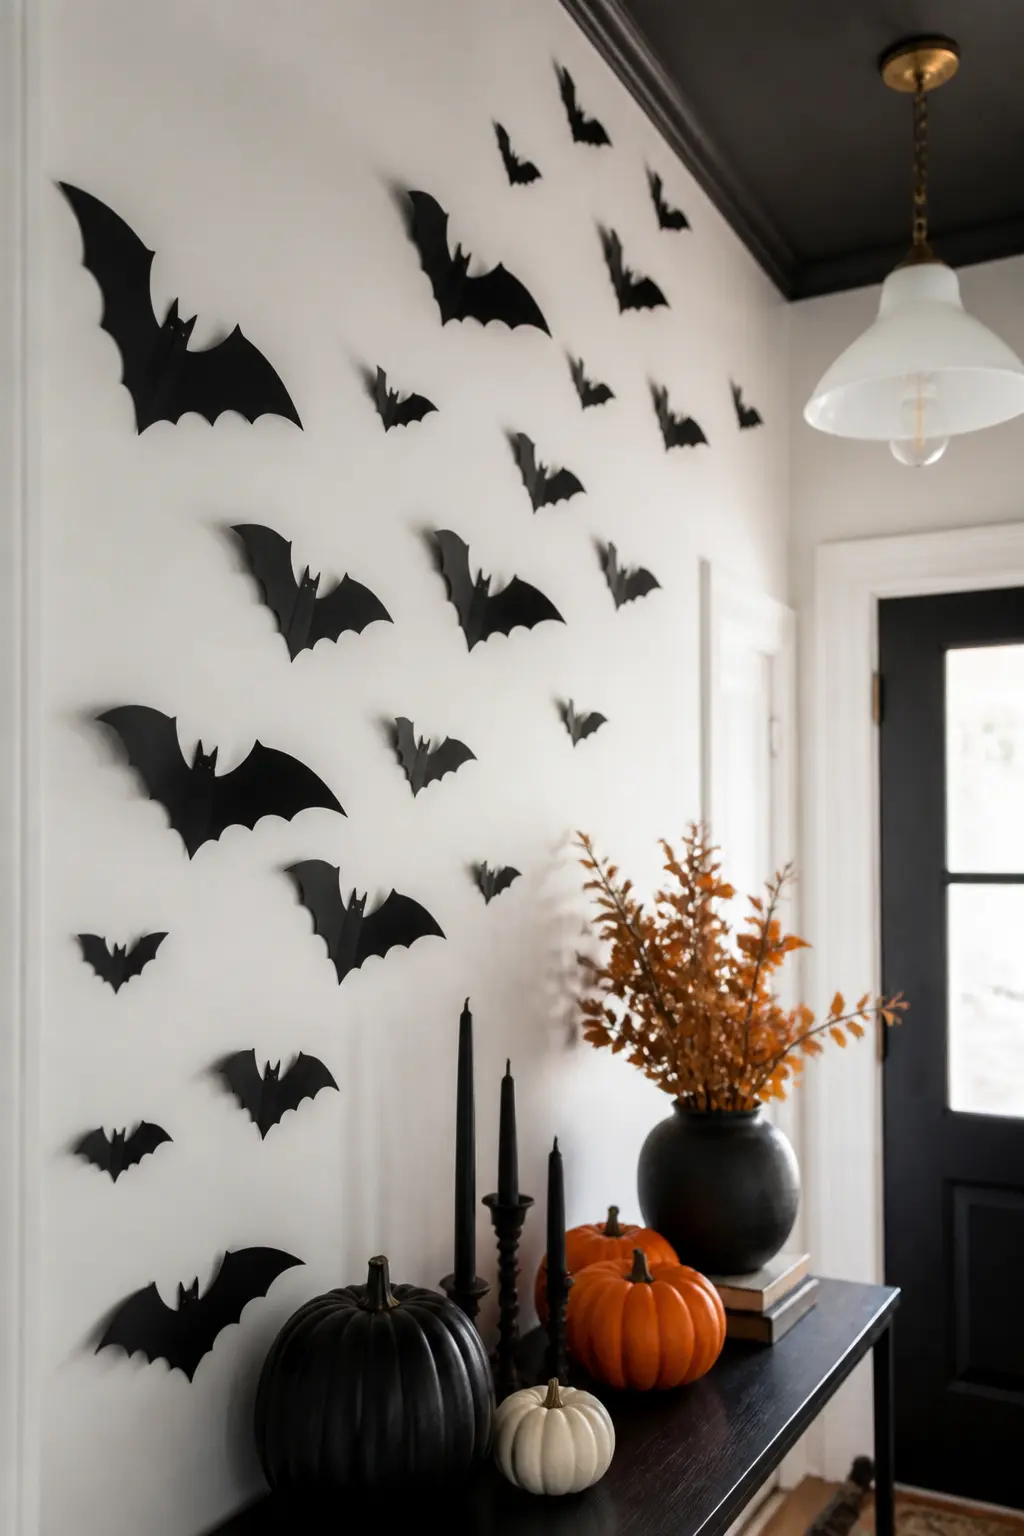
Cut bats from black cardstock in three sizes: small, medium, and large. The variation in scale is what makes this look composed rather than random. Tape them to a wall in a loose diagonal line that curves upward, as if the bats are launching from a single point and spreading out.
Before you press each bat flat, pinch the wings along the fold line so they angle forward, away from the wall. That small bend catches light and shadow and makes the cluster look dimensional. Removable tape means no damage when you take them down, and the whole installation goes up in under thirty minutes.
🛍 Shopping guide
Door and Window Effects
Guests see the door and the windows before they enter, so a small amount of effort here pays back in first impressions. Both projects below use materials you likely have on hand, and neither one leaves a mark on the surface.
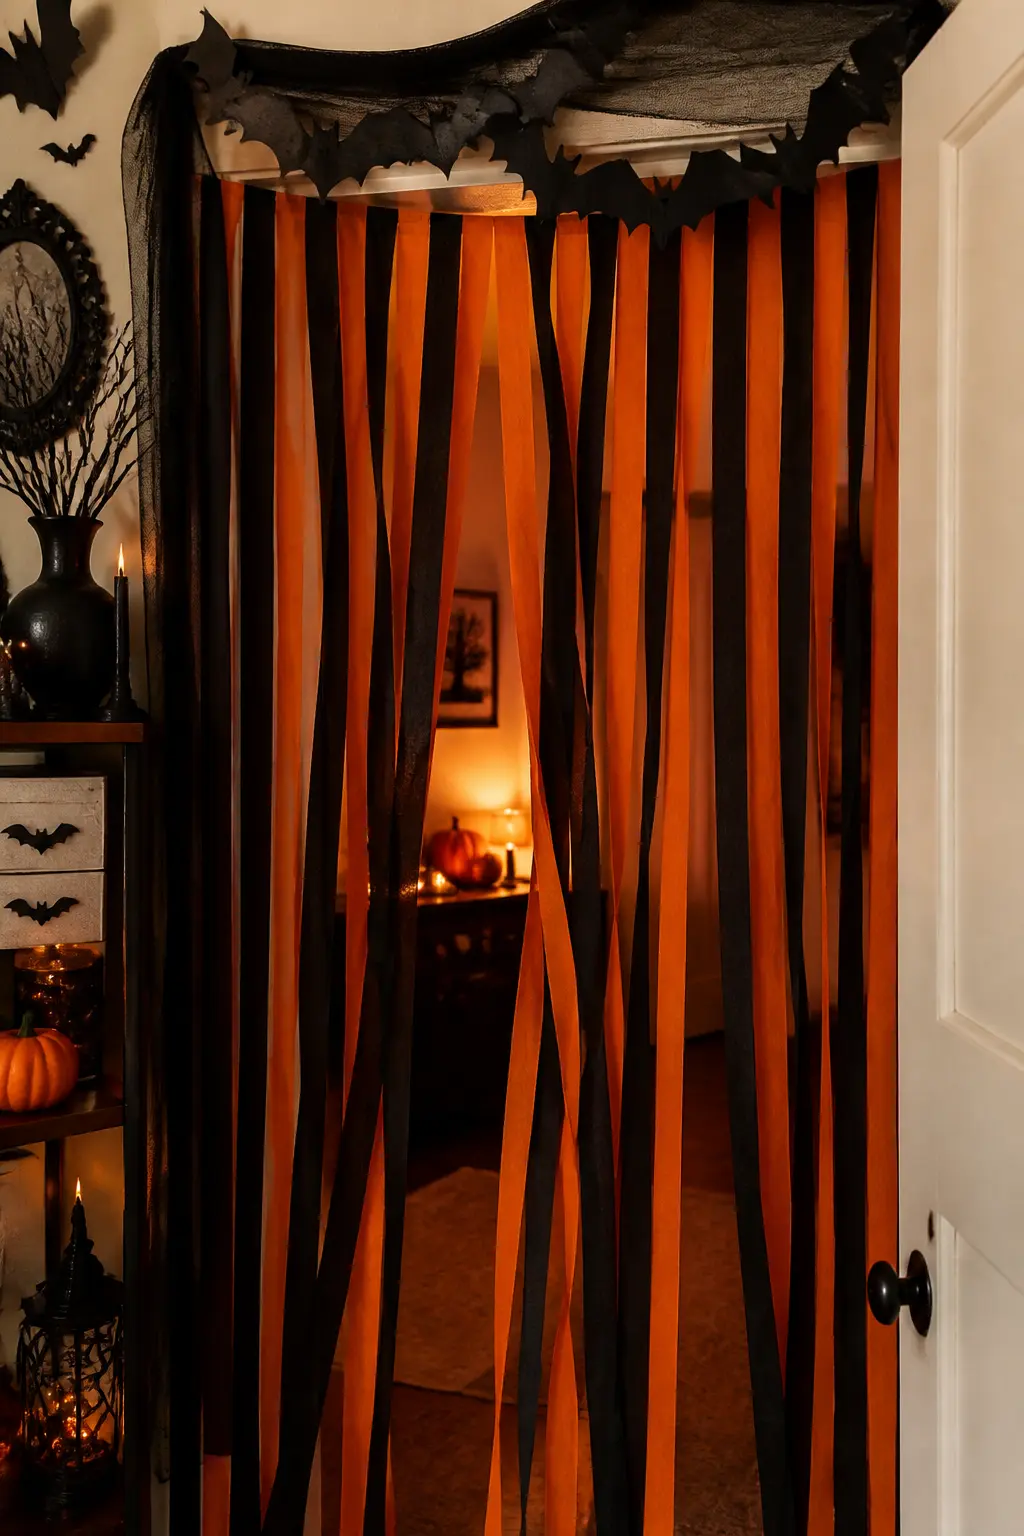
Ribbon Door Streamer
Measure your doorway height and cut lengths of ribbon two or three inches longer than that measurement. Alternate black and orange ribbon, or go all black if you want something more adult. Tie each length onto a tension rod or a wooden dowel, pushing the knots together so the ribbons hang close and there are no gaps.
Hang the rod in the doorway using the tension, a nail, or two cup hooks. Guests walk through the ribbons to enter. It is a small theatrical moment that costs almost nothing and takes about fifteen minutes.
🛍 Shopping guide
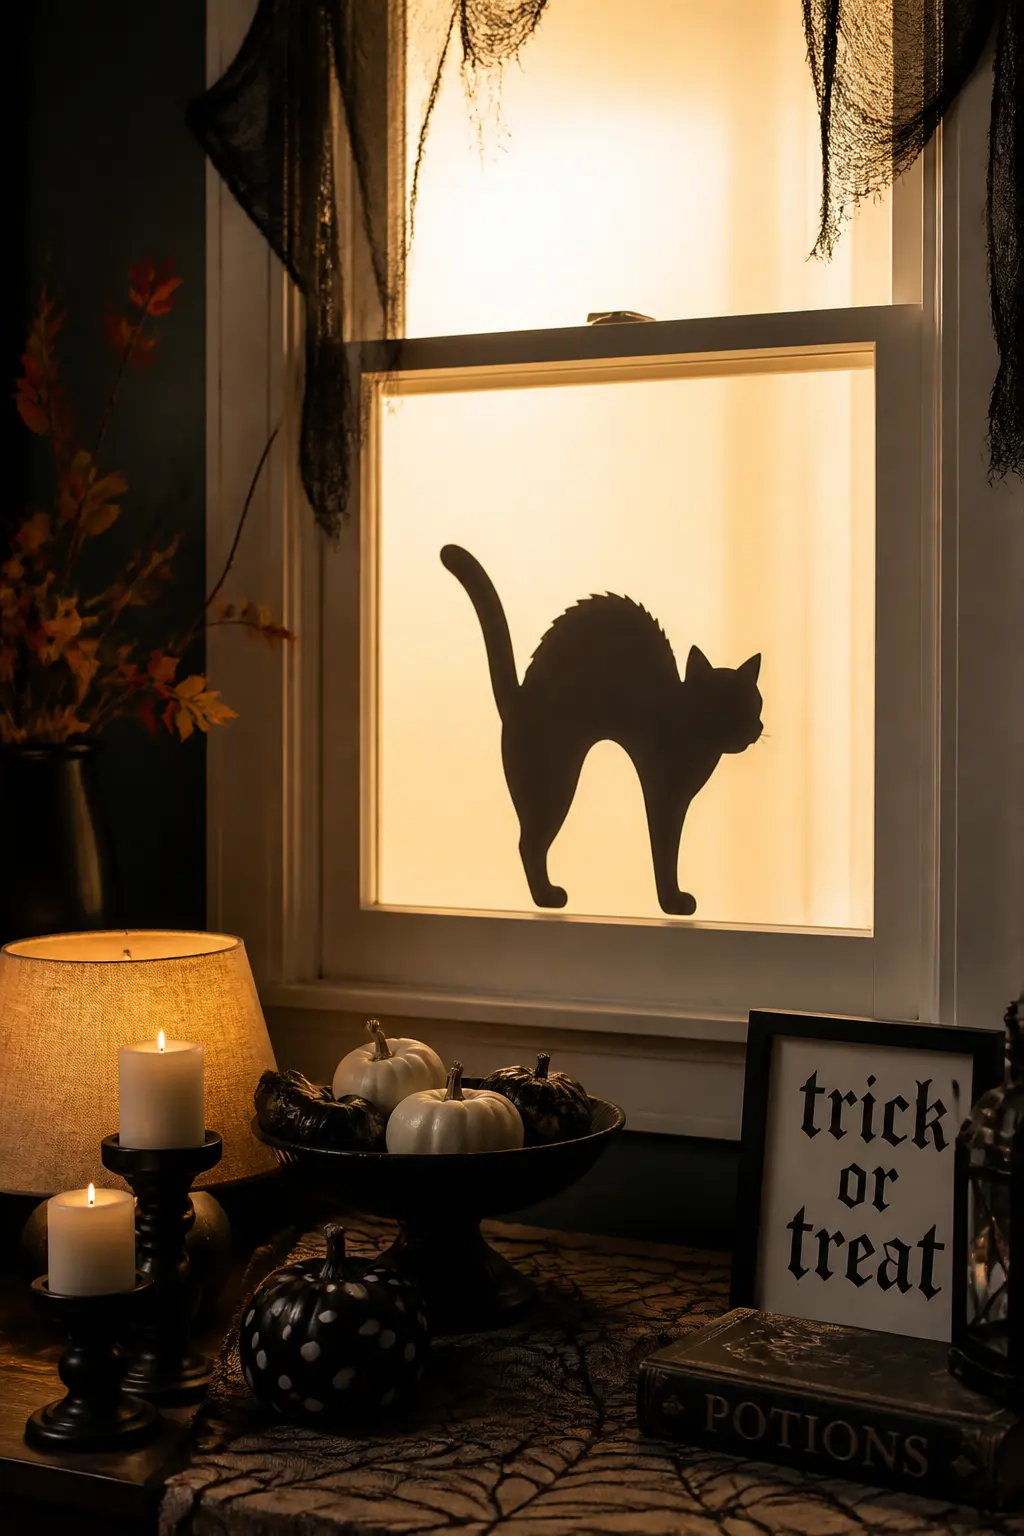
Silhouette Window Cling
Cut a silhouette from black cardstock: a cat arching its back, a crow, a witch hat, a bare tree. Keep the shape simple enough that it reads from the street in one glance. Tape the cutout to the inside of a window with the shape facing outward.
Place a lamp or a string of lights behind it so the cardstock goes dark and the surrounding glass glows. From outside, the effect looks like a shadow pressed against the glass. From inside, the lamp just lights the room normally. Two silhouettes on neighboring windows, slightly different heights, look deliberate and eerie.
🛍 Shopping guide
Vases and Vessels
A plain vase or a jar is a blank canvas. Paint it, draw on it, and fill it with something seasonal. These projects use dried branches, which you can find in any yard or pick up at a florist for almost nothing, and they hold their shape for weeks.
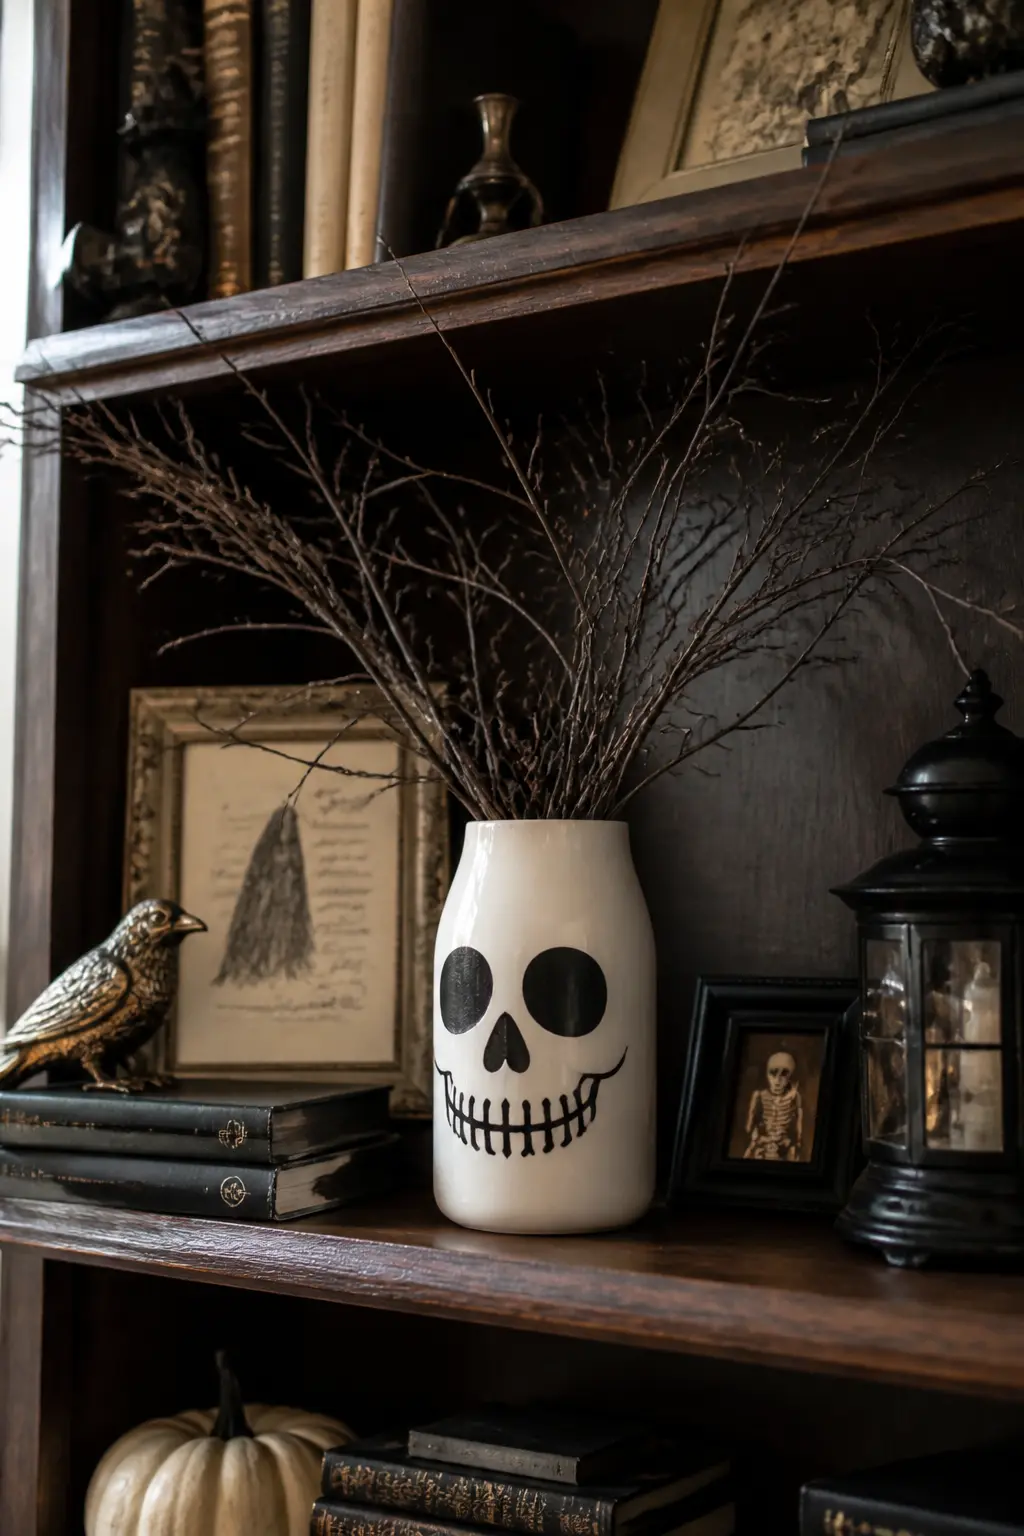
Painted Skull Vase
Take a plain ceramic or glass vase, any shape that has a smooth front surface. Paint it white and let it dry completely: one coat on glass usually needs two passes to go fully opaque. Once dry, draw a skull face on the front with a black paint pen. Keep the eye sockets large and the nose a small inverted triangle; that reads as a skull from across the room.
Fill the vase with dried branches, dark dried florals, or a bundle of bare sticks. The white skull face reads against the dark stems behind it. Set it on a bookshelf, a side table, or a console and it anchors the whole surface.
🛍 Shopping guide
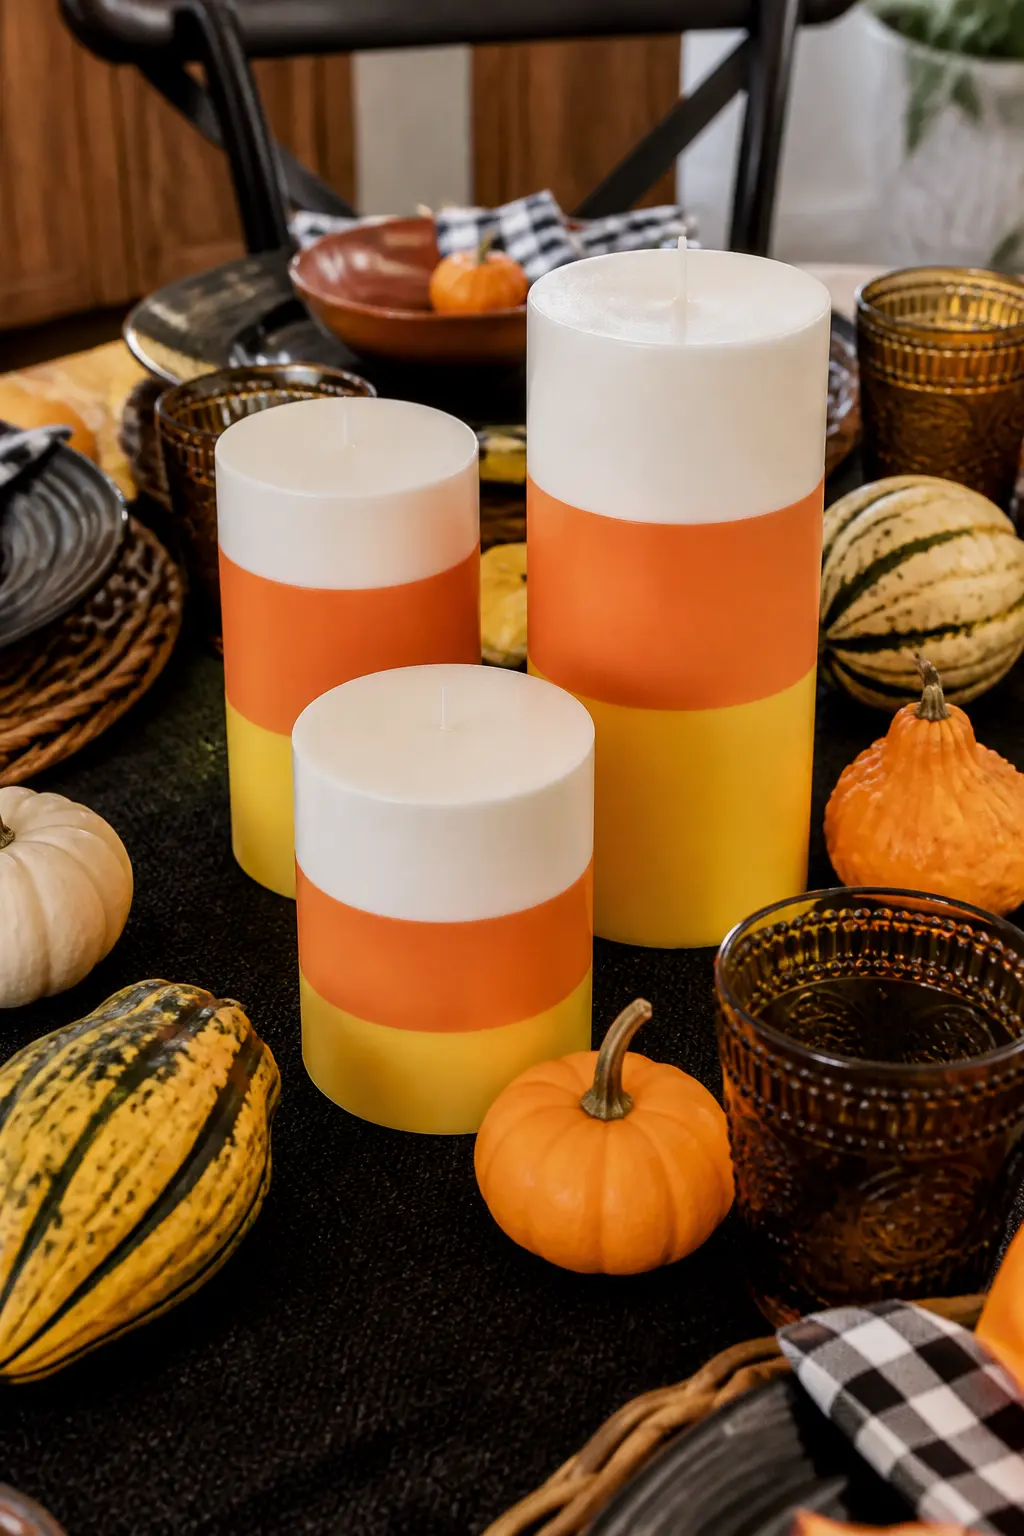
Candy Corn Candle Wrap
Cut three bands of cardstock: one white, one orange, and one yellow, each long enough to wrap around a pillar candle with a small overlap. The bands should together cover the full height of the candle, with yellow at the base, orange in the middle, and white at the top, mimicking a candy corn from bottom to tip.
Glue each band in place and let the seam dry before you set the candle down. Do not burn an actual candle inside a paper wrap: pair this with a battery-operated pillar candle so the wrap stays safe and intact all season.
🛍 Shopping guide
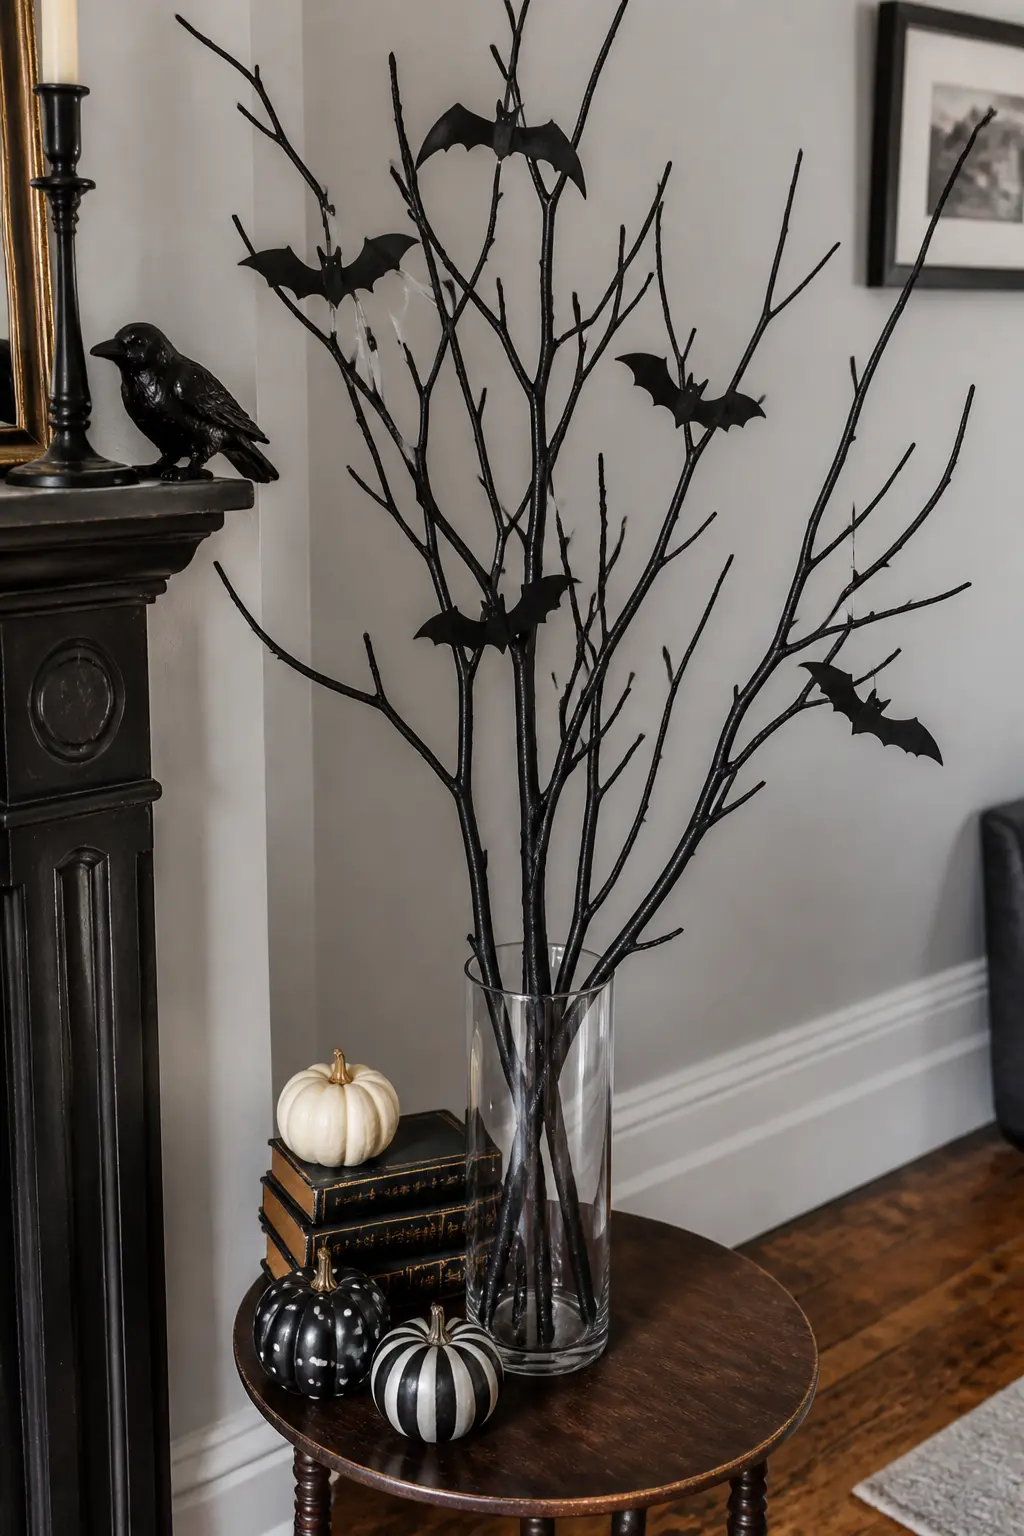
Painted Branch Vase
Gather bare branches, either foraged or bought, and spray them with matte black spray paint outdoors or in a well-ventilated space. One coat covers well; let them dry for about twenty minutes. While the branches dry, cut small bat shapes from black cardstock and glue one to the end of each branch tip, or tuck a few along the length.
Arrange the finished branches in a tall vase and set it in a corner or against a light-colored wall where the silhouette reads clearly. The paper bats look like they have landed on the branches, and the whole thing takes less than forty minutes from start to placed.
🛍 Shopping guide
Fabric and Fiber Projects
Fabric brings texture that paper and paint cannot. A wreath, a ghost, a broom: each one uses inexpensive materials and rewards a slightly loose, imperfect hand. Precision is not the point here. Atmosphere is.
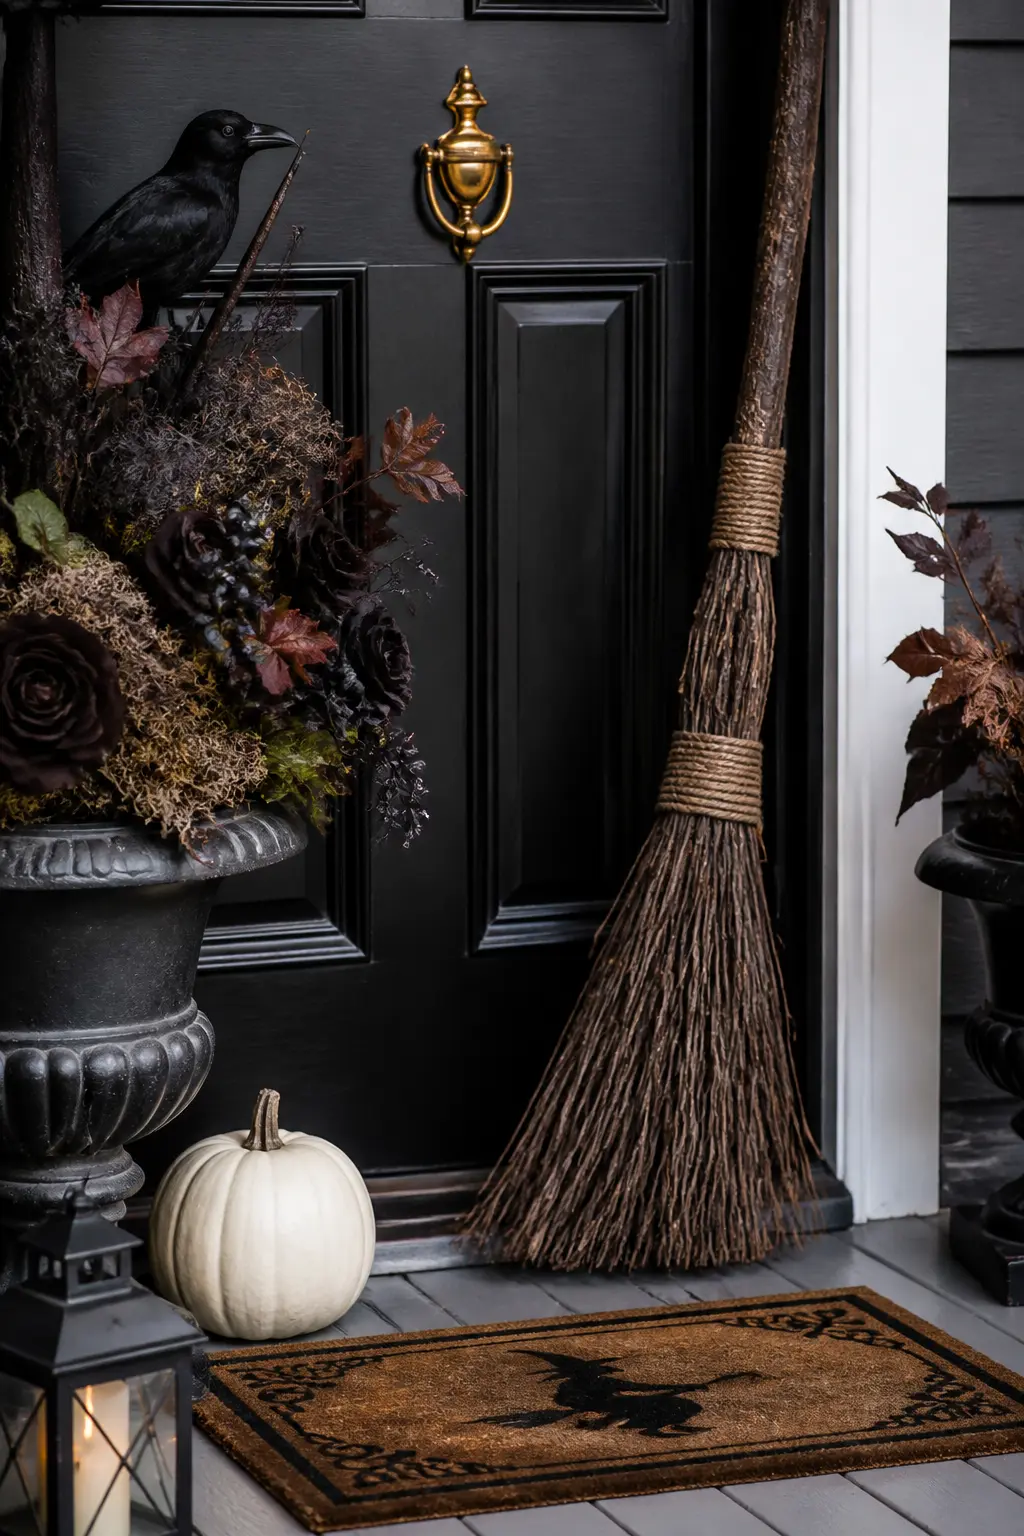
Twig Bundle Broom
Collect thin, flexible twigs from the yard or buy a bundle of birch or willow branches from a craft store. Lay them in a bundle around the bottom few inches of a straight stick or dowel, with the bristle ends pointing down and out. Hold the bundle against the stick while you wrap twine tightly around the junction, working your way up about three inches.
Knot the twine securely and trim the bristle ends so they are roughly even. Lean the finished broom against a front door, a fireplace, or a fence post. It looks like something pulled from a prop house and costs almost nothing.
🛍 Shopping guide
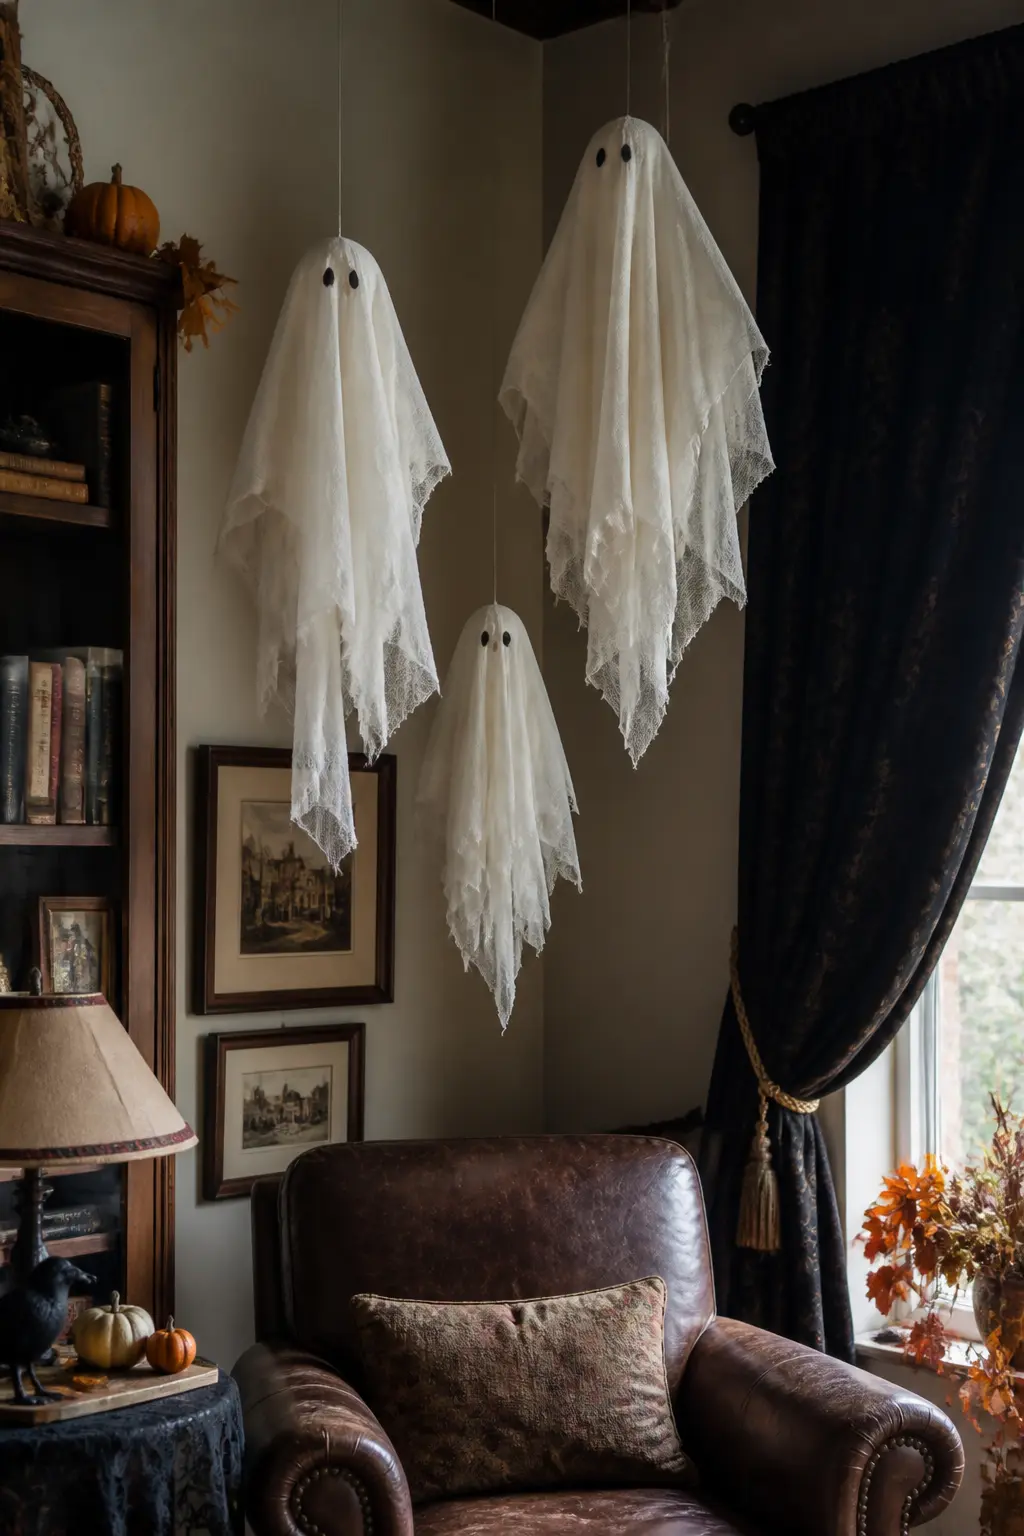
Hanging Muslin Ghosts
Cut a square of muslin large enough to drape over a foam ball with at least eight inches of fabric hanging below it. Place the ball in the center of the fabric, gather the fabric underneath the ball, and tie a length of string tightly around the neck to hold the ball in place. The fabric below the knot falls into a skirt.
Draw two eyes on the front with a black marker. Keep them simple: two dots, two ovals, or two small circles with a tiny dot inside. Tie a longer piece of string to the neck knot and hang the ghost from a ceiling hook, a curtain rod, or a branch. Make three in different sizes and hang them at different heights.
🛍 Shopping guide
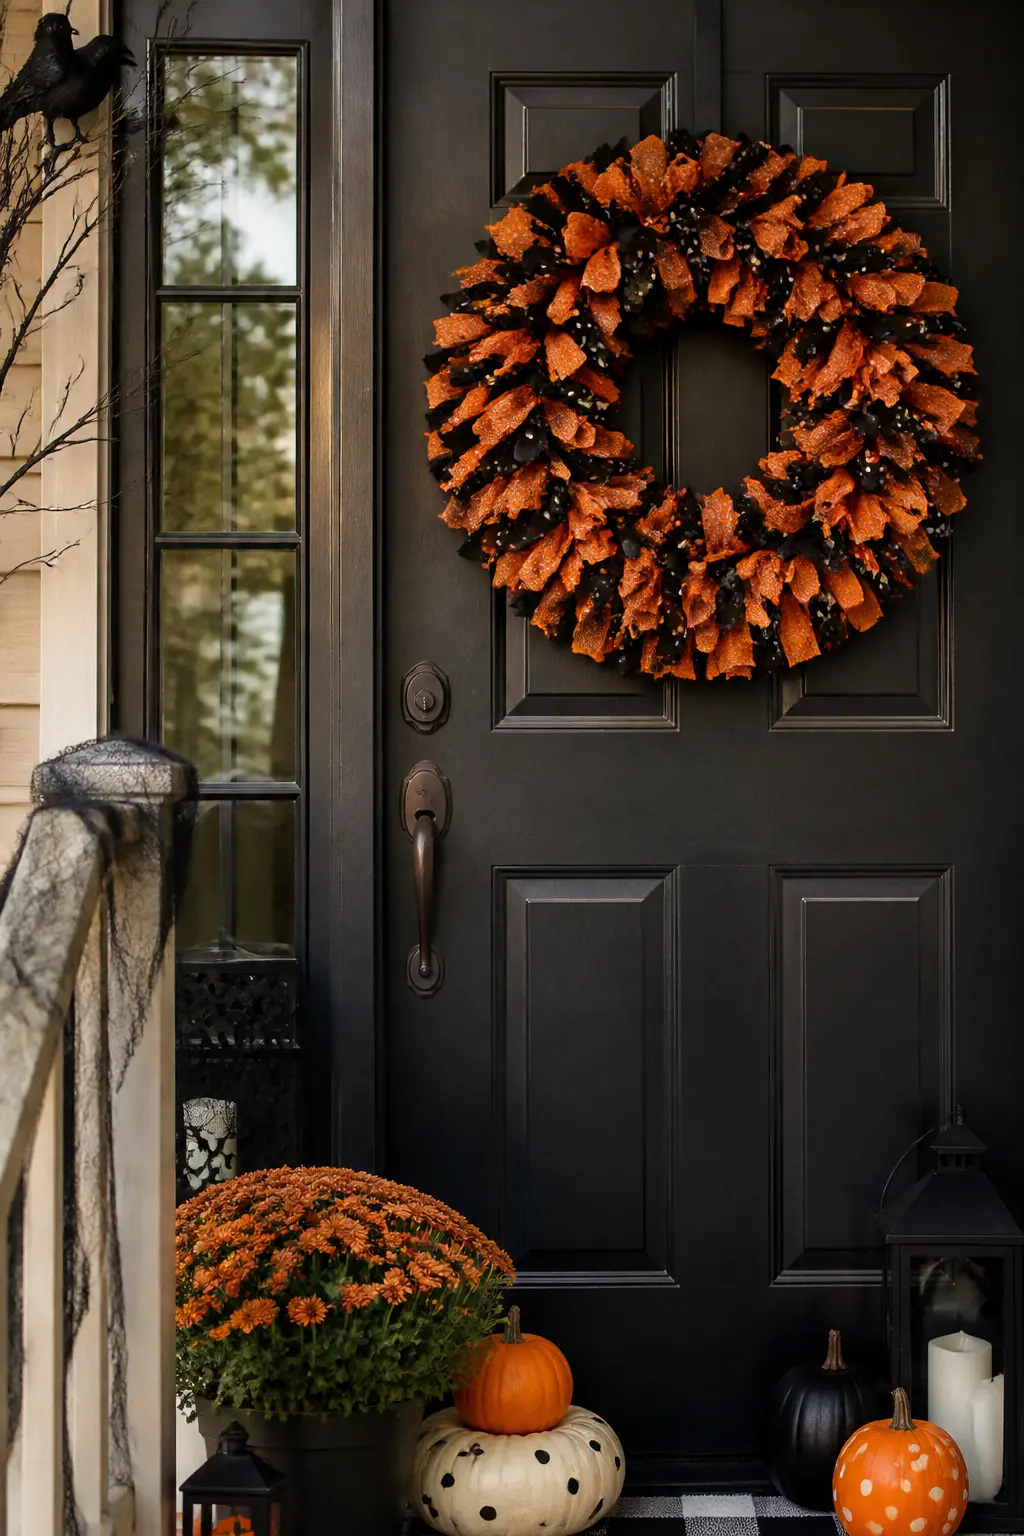
Fabric Strip Wreath
Cut black and orange fabric scraps into strips about one inch wide and eight inches long. Fabric does not need to be cut precisely; torn strips have a slightly frayed edge that adds texture. Fold each strip in half and loop it onto the wire wreath form with a simple lark’s head knot, pulling it snug.
Work around the form, alternating colors or going in patches, pushing each knot tight against the last so the wire disappears. A fourteen-inch form takes about sixty to eighty strips and fills out in about thirty minutes. Hang the finished wreath on the front door with a simple ribbon loop.
🛍 Shopping guide
Finishing Touches: Before You Call It Done
Stand in the doorway of each room and look. One glowing jar on a shelf reads as an afterthought. Three jars at different heights read as a decision. Move things into groups and vary the levels: a tall branch vase behind a short rock, a garland looping in front of a window cling.
Lighting does half the work for free. Dim the overheads, let the battery lights glow, and the whole room shifts. These decorations were designed for exactly that kind of low light, which is also why the steps stay so short: at dusk, nobody studies the brushstrokes.
Frequently Asked Questions
How long do these easy DIY Halloween decorations actually take to make?
Every project on this list finishes in one evening. Most take between fifteen and forty-five minutes. The fabric strip wreath and the spider web corner sit at the longer end; the silhouette window cling and the ribbon door streamer are the fastest, closer to fifteen minutes each.
Do any of these use real candles?
None of them need to. All three jar projects and the muslin ghosts use battery-operated lights. The candy corn candle wrap specifically calls for a flameless pillar candle because of the paper wrap. Battery lights are safer, last longer, and you never have to babysit them during a party.
Can these decorations go outdoors?
The painted ghost rocks and the twig bundle broom both handle outdoor conditions well, especially if you seal the rocks with outdoor mod podge. The ribbon door streamer works under a covered porch. The rest are designed for indoor use and will not hold up in rain or heavy humidity.
What if I cannot find smooth rocks for the painted ghost rocks?
Craft stores and garden centers sell bags of smooth river rocks year-round, usually in the floral or gardening section. You can also order them online. Look for rocks that are roughly palm-sized with a flat face: that is the surface you will paint.
Will the bat wall cluster and silhouette window cling damage my walls or windows?
Not if you use the right tape. Removable painter’s tape or Command-style strips leave no residue on most painted walls and glass surfaces. Press the tape on and pull it off slowly at a low angle when you are ready to take the decorations down.
Which of these decorations photographs best for social media?
The mason jar luminary cluster, the hanging muslin ghosts, and the painted branch vase all photograph well because they have a strong silhouette and look best in low, warm light. Shoot them after dark with only the battery lights on and turn off any overhead fixtures for the most dramatic result.
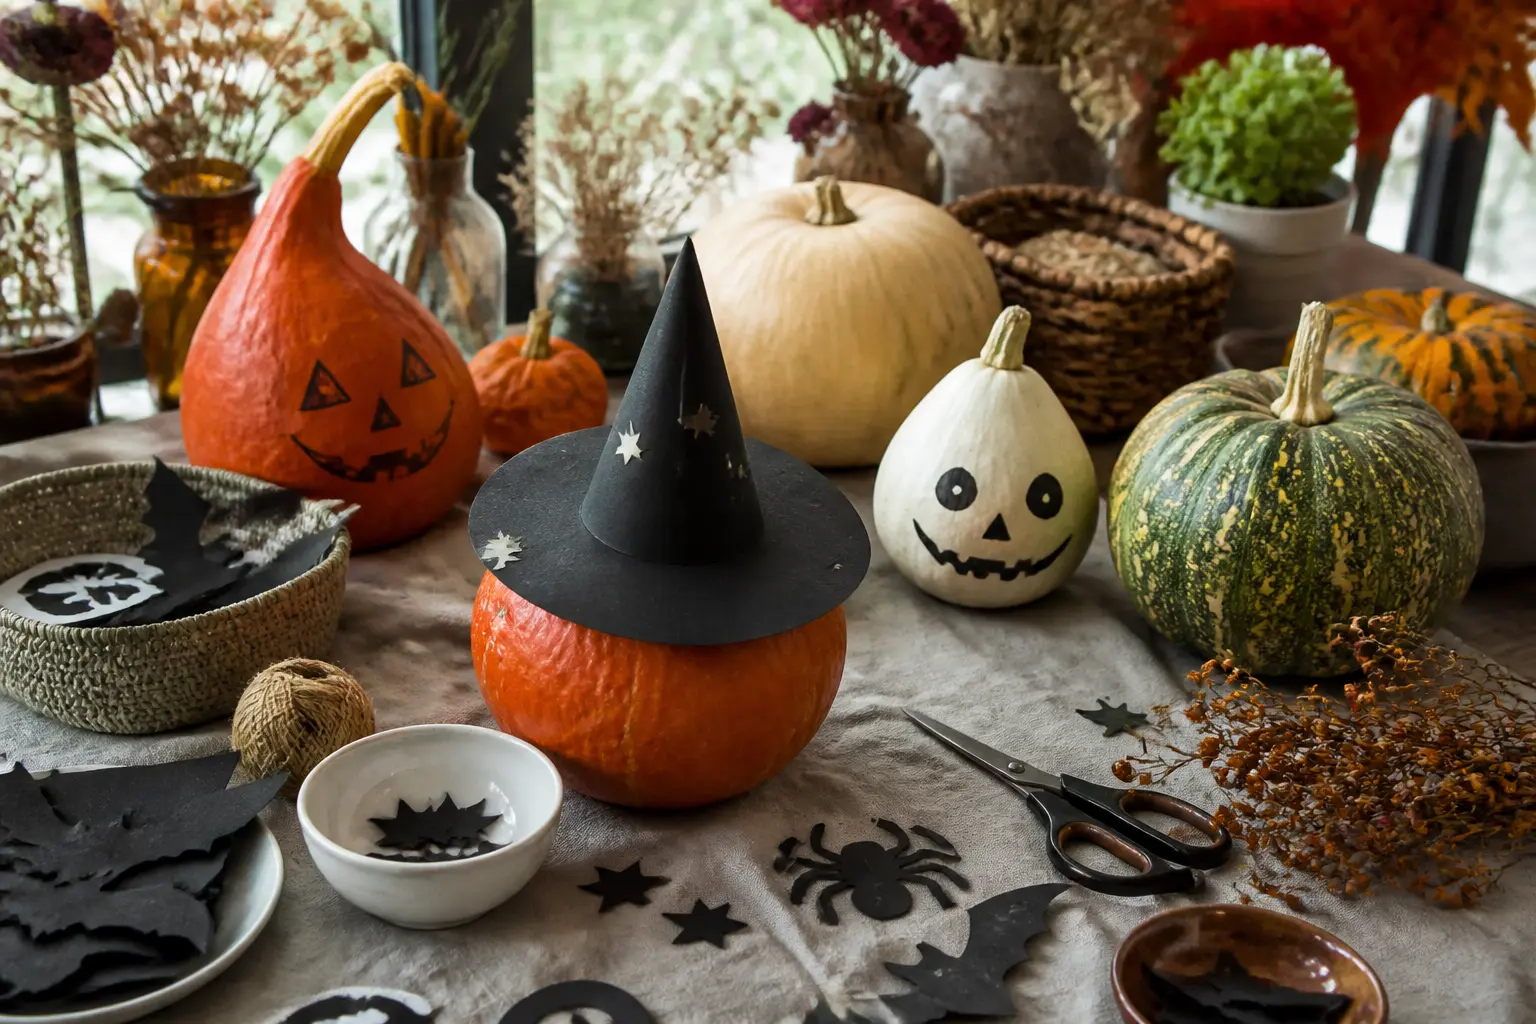
18 halloween crafts for adults that look intentional on a shelf or mantel: matte black bottles, wax-

Boo basket ideas for boyfriends that feel personal and intentional: gourmet snacks, grooming picks,
15 easy Halloween party appetizers that look spooky and taste amazing — from Mummy Pigs in Blanket
Leave a Reply