

31 Christmas Crafts for Kids That Turn Into Something Else Halfway Through
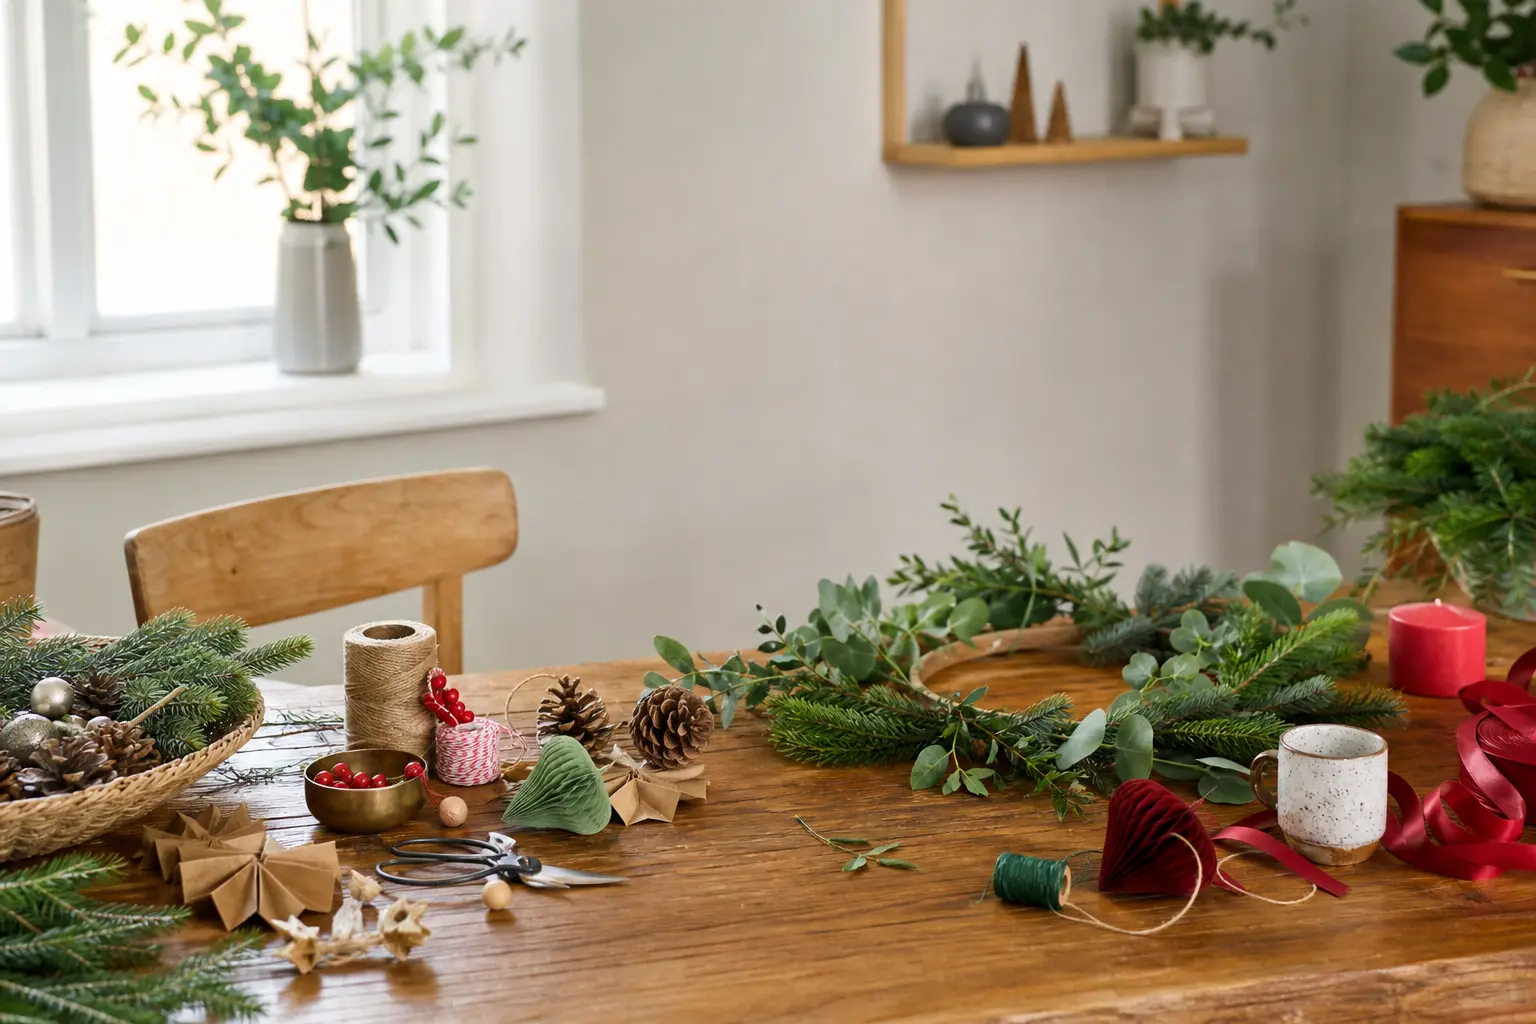
The best christmas crafts for kids are the ones where something happens. Not at the end, when the glue is dry and the moment has passed, but right in the middle: a fold that becomes a bell, a smudge that becomes a sky, a pinch that becomes a nose. That mid-point reveal is what keeps a ten-year-old and a four-year-old both at the table.
Every craft here is ordered by how long it takes, so if attention runs out after twenty minutes, stop. Whatever is finished is already good. Nothing here needs hot glue, nothing needs two days to dry, and almost everything starts with something already in the recycling bin. For more ideas beyond this list, the christmas activities for kids page has free printables for the whole of December. If you want games to go alongside the making, christmas party games for kids has twenty ideas ready to run.
This post contains affiliate links. If you buy through them, I may earn a small commission at no extra cost to you.
- Pipe Cleaner Candy Cane
- Fingerprint Fairy Lights Card
- Paper Cup Bell
- Handprint Reindeer Card
- Wax Resist Snowflake Painting
- Coffee Filter Stained Glass Window
- Sponge Print Snowflake
- Cardboard Tube Snowman
- Chalk Pastel Northern Lights
- Pinecone Bird Feeder
- Sock Snowman
- Paper Bag Gingerbread House
- Torn Paper Christmas Tree Collage
- Yarn-Wrapped Cardboard Star
- Milk Carton Paper Lantern
- Paper Chain Circle Wreath
- Frequently Asked Questions
Pipe Cleaner Candy Cane
This is the fastest craft on the table and the most satisfying. One straight white pipe cleaner goes in, one red candy cane comes out, and the whole thing takes under five minutes. Hang it on a branch, loop it onto a gift tag, or let the child wear it as a finger ring for the afternoon.
The trick people miss: start the twist at the very top and work downward in one smooth spiral rather than pinching random sections. When the twist is even, the stripes look intentional. When it wanders, it looks like a mistake, and the child will know.
What You Need
- 1 white pipe cleaner, standard 30 cm length
- 1 red pipe cleaner, standard 30 cm length
How to Make It
- Hold the red and white pipe cleaners side by side, tips aligned at the top.
- Pinch both together at the top with one hand, then use the other hand to twist the red cleaner around the white in a slow, even spiral from top to bottom. One full rotation every 2 cm gives a classic barber-pole stripe.
- When you reach the end, press the two tail ends together and fold them in so no sharp wire is exposed. An adult should check this fold.
- Curl the top 4 cm into a hook shape. That is the moment it becomes a candy cane: the hook changes everything.
- Hang or display immediately, no drying needed.

🛍 Shopping guide
Fingerprint Fairy Lights Card
A plain white card goes in, a string of glowing lights comes out, and the transformation happens one fingerprint at a time. This is a genuine keepsake: small fingers pressed in tangerine, lime and gold make a row of coloured bulbs that no bought card can replicate. Post it, frame it, or tuck it inside a gift.
Use a fine black marker for the wire and the little caps above each bulb, and draw that part before the printing so the ink is dry when fingers arrive. The reveal happens when the child adds the last bulb and suddenly sees the whole string lit.
What You Need
- 1 blank white card, at least A6 (10 x 15 cm)
- Washable finger paint in at least 3 colours (red, yellow, green, or any bright mix)
- 1 fine-tip black marker
- Scrap paper for test prints
How to Make It
- With the black marker, draw a single looping wire across the card from left to right, letting it dip in shallow curves. Leave small upward ticks every 3 cm along the wire: these are the bulb caps.
- Let the marker dry for five minutes so it does not smear when fingers touch the card.
- Press one finger lightly into a blob of paint on a scrap piece of paper first, to judge how much paint is needed. Too much and the print blurs; just enough gives a clean oval.
- Press the painted finger below one of the black caps, bulb-end down. Lift straight up without rocking. That single print is the first bulb.
- Continue along the wire, switching colours freely. Let the child choose the order.
- Once all bulbs are printed and the paint is touch-dry (about five minutes), use the black marker to add a tiny rectangle cap connecting each bulb to its tick on the wire. The string of lights appears complete at this step.

🛍 Shopping guide
Paper Cup Bell
A plain paper cup sits mouth-up on the table looking like a cup. Turn it upside down, add a ribbon clapper, and it becomes a Christmas bell in under ten minutes. Painted gold or silver, it is convincing enough to hang in a window.
The moment that changes it is the flip: children who have been painting a boring cup suddenly see a bell shape appear. Keep that flip as the last act, after the paint is dry, so the reveal lands properly.
What You Need
- 1 plain white paper cup, 250 ml size
- Gold or silver poster paint
- 1 x 30 cm length of narrow ribbon, 6 mm wide
- 1 small jingle bell, 15 mm (or a rolled foil ball)
- A hole punch or pencil tip to pierce the base
- PVA glue or a glue stick
How to Make It
- Paint the outside of the cup gold or silver. Two thin coats give a more even finish than one thick one. Leave the cup mouth-up to dry, about fifteen minutes per coat.
- While the paint dries, thread the ribbon through the jingle bell and knot it so the bell hangs about 3 cm from one end of the ribbon.
- An adult pierces a small hole in the centre of the cup base using a sharp pencil tip or hole punch.
- Thread the long end of the ribbon up through the hole from inside the cup, pulling until the bell sits just inside the rim.
- Knot the ribbon on the outside of the base to stop it pulling back through, and tie the remaining tail into a hanging loop.
- Turn the cup upside down. The wide rim becomes the bell mouth, the base becomes the crown, and the ribbon clapper and jingle bell hang perfectly inside.

🛍 Shopping guide
Handprint Reindeer Card
A brown handprint looks like nothing in particular until the thumb turns upright: suddenly there is a reindeer face, ears fanned out in fingers, antlers rising from the wrist. The reveal is fast and genuinely surprising, which is exactly why this one works for three-year-olds and eight-year-olds in the same sitting.
Brown paint, a red circle for the nose, two white dot eyes. Done. It is also one of the better gifts to post to a grandparent, because it carries the scale of the child’s hand at this exact age.
What You Need
- 1 sheet of white card, A5 minimum, 200 gsm
- Brown washable poster paint
- Red and black poster paint or marker
- White poster paint or white gel pen for dot eyes
- A flat plate or tray for the paint
How to Make It
- Pour brown paint onto the plate and spread it to roughly palm size.
- Press the child’s hand into the paint, fingers spread wide and thumb pointing outward to one side (not upward yet). Lift and press firmly onto the card, thumb pointing to the right or left, fingers spread as the antlers.
- Lift the hand straight up without smearing and set it aside to wash while the print dries. The print looks like a blob with fingers at this stage. That is correct.
- Once the print is touch-dry (about ten minutes), rotate the card so the thumb points upward. The face appears: the palm is the head, the four fingers are two antlers, and the thumb becomes the ear.
- Add two small white dots for eyes near the top of the palm circle, then a black dot pupil on each.
- Paint or stamp a red circle in the lower third of the palm for the nose. The reindeer is complete.

🛍 Shopping guide
Wax Resist Snowflake Painting
The child draws a snowflake in white wax crayon on white paper. Nothing is visible. That invisible drawing is the suspense. Then a wash of thin blue or purple paint sweeps across, and the snowflake blooms out of the page as the wax repels the paint. It is genuinely magic and children ask to do it again immediately.
The fiddly part is the wax drawing: it must be firm and heavy, because a light mark will not resist the paint well enough to show clearly. Press hard. The result stores flat and looks beautiful taped to a window.
What You Need
- 1 sheet of smooth white paper, A4, at least 90 gsm
- 1 white wax crayon (not a water-soluble one)
- Blue or purple watercolour paint, or very diluted poster paint
- A wide, soft paintbrush, at least 2 cm wide
- A small cup of water
How to Make It
- With the white wax crayon, draw a six-pointed snowflake firmly onto the white paper. Press as hard as the child can: the crayon layer needs to be thick enough to repel paint. At this stage the drawing is almost invisible, which is part of the game.
- Add small dots and lines radiating from the snowflake tips for extra detail. More wax means a more dramatic reveal.
- Mix the watercolour or diluted poster paint to a watery, translucent consistency: it should run easily off the brush. Too thick and it sits on the wax rather than flowing around it.
- Load the brush and sweep it across the paper in broad strokes, left to right. Watch the snowflake rise out of the paint as the blue flows around the wax. Work quickly while the wash is wet for the most even result.
- Allow to dry flat for about eight minutes. The snowflake will be bright white against a blue or purple sky.

🛍 Shopping guide
Coffee Filter Stained Glass Window
A flat white coffee filter goes in, a glowing stained-glass window comes out, and the moment it is taped to a pane of glass with winter light behind it, the whole thing lights up like a real panel. The colours are set with washable marker and water, which means the process is safe, cheap and endlessly repeatable.
This one rewards a five-year-old who wants to fill in spaces methodically as much as a younger child who just wants to swipe colour across. Both outcomes look good against the light.
What You Need
- 1 round basket-style coffee filter, size 4 or equivalent
- Washable markers in at least 4 colours
- A spray bottle filled with water, or a damp sponge
- A sheet of greaseproof paper to work on
- Tape to hang
How to Make It
- Open the coffee filter flat and lay it on the greaseproof paper. The greaseproof stops it sticking to the table as it gets wet.
- Colour the filter in sections with the markers, pressing firmly. Leave small gaps between colours if a stained-glass lead-line look is wanted, or fill edge to edge for a more watercolour result.
- When the filter is coloured, mist it lightly with the spray bottle or dab it gently with the damp sponge. Watch the colours bleed and blend into the paper fibres. This is the moment that changes everything: the harsh marker edges soften into something that genuinely looks like glass.
- Leave flat to dry on the greaseproof paper for at least fifteen minutes. Do not rush this: a damp filter tears easily.
- Once dry, peel it gently from the greaseproof paper. Tape it directly to a window with the light behind it. The colours deepen immediately.

🛍 Shopping guide
Sponge Print Snowflake
The child cuts a circle of sponge, dips it in white paint, and presses it onto blue paper expecting a blob. What appears instead is a delicate six-armed snowflake, because the sponge was cut from the corner of a hexagonal template. The pattern is already in the object: the pressing just reveals it.
This one works for a group: cut several sponge shapes in advance and let each child press a different one so the finished sheet shows a whole flurry of different snowflakes.
What You Need
- 1 clean kitchen sponge (the plain rectangular type, not a scrubber)
- Scissors for adult use
- White poster paint
- 1 sheet of dark blue or black card, A4, 200 gsm
- A flat plate or tray for paint
- A pencil
How to Make It
- An adult draws a simple six-pointed star shape on the sponge with pencil, about 5 cm across. The points should be thin and long rather than fat, to look like snowflake arms.
- An adult cuts around the star shape with scissors. Cut slowly: sponge compresses easily and springs back, so let the scissors do the work.
- Pour white paint onto the plate to a depth of about 3 mm, just enough to coat the sponge face.
- Press the sponge face-down into the paint, then lift and dab once on scrap paper to remove any excess. Too much paint fills the gaps between the arms and loses the snowflake shape.
- Press the sponge firmly onto the dark card and lift straight up. The six-armed snowflake appears in one move. Repeat across the card, rotating the sponge slightly between prints for variety.
- Leave to dry for ten minutes. Add a second colour (pale blue or silver) for a second layer of overlapping snowflakes once the first is dry.

🛍 Shopping guide
Cardboard Tube Snowman
A toilet roll tube starts the afternoon as exactly that. Pinch the middle between two fingers and it narrows into a waist. Now there is a head, a body, and the whole snowman shape is already there before a single sticker is added. This is the craft where the physical transformation does the work.
Paint it white, add a black paper hat cut from card, draw on the face, and wrap a strip of fabric scrap around the middle for a scarf. It stands unsupported on a shelf. Stores flat if the pinch is released, though most children will not want to undo it.
What You Need
- 1 cardboard toilet roll tube
- White poster paint
- Black and orange poster paint or markers
- 1 strip of black card, 3 x 10 cm, for the hat
- 1 strip of fabric or paper, 1 x 15 cm, for the scarf
- PVA glue
- Small buttons or googly eyes (optional, adult must check age suitability for small parts)
How to Make It
- Paint the outside of the tube white all over. One coat is usually enough on cardboard. Stand upright on scrap paper to dry for fifteen minutes.
- While it dries, roll the black card strip into a small cylinder and glue the edge to make a hat tube, then cut a 1 cm fringe at one end and fold the fringe outward to make a brim. Glue the brim flat.
- Once the tube is dry, pinch the upper third of the tube between thumb and forefinger, pressing inward from both sides until the tube narrows to about 1 cm at that point. This is the neck. The tube now has a distinct head above and a body below.
- Use a small amount of PVA on the inside of the pinched area to hold the pinch in place. Allow two minutes to set.
- Draw or paint on a face: two dot eyes, a carrot-orange nose triangle, and a row of small dots for the mouth.
- Glue the hat to the top of the head. Tie or loop the scarf strip around the neck pinch.

🛍 Shopping guide
Chalk Pastel Northern Lights
This is the one that wins the afternoon. A child draws a horizon line, adds a few stick trees in black pastel below it, and the paper above the line looks like nothing. Then a finger smudges the green and purple and blue chalk across the dark sky and the northern lights appear in one sweep. It takes about twenty minutes and looks like something framed.
Use black or very dark navy paper: the chalk only glows against darkness. Spray with cheap hairspray once finished to stop the smudging, and an adult should do that step outdoors.
What You Need
- 1 sheet of black or dark navy card, A4, 200 gsm
- Chalk pastels in green, purple, blue, white and yellow
- Black oil pastel or black chalk for the tree silhouettes
- A cotton wool ball or fingertip for smudging
- Hairspray (adult use only, outdoors)
How to Make It
- Draw the horizon line roughly one-third up from the bottom of the card in black oil pastel. Add simple pointed tree silhouettes below: two or three irregular triangles is enough. Press firmly with the black so the trees are solid.
- With green chalk pastel, make loose horizontal sweeping strokes above the horizon line, pressing lightly. Overlap blue beside the green, then purple at the top, then add thin lines of white and yellow.
- Use a fingertip or cotton wool ball to smudge the chalk in slow horizontal curves, starting from the centre of each colour band and moving outward. This is the reveal: the harsh chalk lines soften into glowing aurora ribbons.
- Add a few white chalk dots scattered across the sky for stars. Do not smudge these: they should stay crisp.
- An adult sets the finished picture with a light spray of hairspray outdoors, holding the can 30 cm from the surface. Leave to dry for five minutes before touching.

🛍 Shopping guide
Pinecone Bird Feeder
A dry pinecone is already sculptural; rolled in seeds it becomes a genuine bird feeder that works outdoors for up to two weeks. The transformation is tactile and satisfying: the peanut butter fills every scale and the seeds stick into the gaps, turning the cone dense and heavy and purposeful. Hang it from a bare winter branch and watch it get visitors.
This is also one of the few crafts here with an outcome the child can observe after the afternoon is over, which extends the satisfaction considerably.
What You Need
- 1 large dry pinecone, at least 8 cm long
- 3 tablespoons smooth peanut butter (or sunflower seed butter for nut-free settings)
- 4 tablespoons mixed wild bird seed
- 1 x 40 cm length of garden twine or jute string
- A flat plate or sheet of greaseproof paper for rolling
- A butter knife or old spoon
How to Make It
- Tie the twine firmly around the top scales of the pinecone with a double knot, leaving a long tail for hanging. Tug it to make sure it is secure: it will carry the weight of the seed-laden cone outdoors.
- Spread peanut butter over the entire surface of the cone using the butter knife, working it into the gaps between the scales. The cone should look thoroughly coated, not just dabbed.
- Pour the bird seed onto the plate and roll the coated cone in it, pressing gently so the seeds embed into the peanut butter. Turn the cone as you go so all sides are covered.
- Leave the cone on greaseproof paper for five minutes to firm up slightly.
- Carry it outside by the twine and hang it from a branch at eye level for a child, low enough to observe but out of reach of ground-level cats.

🛍 Shopping guide
Sock Snowman
A clean white sock sits on the table looking like a sock. Two elastic bands and a turn of the cuff later, it is a snowman. The transformation is almost comedic in how fast it happens, and children who are used to not being allowed to cut or glue can do the whole thing themselves.
Fill with rice rather than cotton wool: rice gives the snowman a satisfying weight and keeps its shape better when stood upright. The facial features can be tiny black buttons (adult must supervise for children under five) or drawn on with marker.
What You Need
- 1 clean white ankle sock
- 200 g uncooked white rice
- 2 elastic bands
- Small black buttons or black marker for eyes and buttons
- A strip of fabric or ribbon, 1 x 20 cm, for a scarf
- A small circle of orange felt, 2 cm diameter, for the nose
- PVA glue or a needle and thread for felt (adult use if sewing)
How to Make It
- Turn the sock inside out. This is the reveal step: the smooth side faces outward and looks cleaner and more snow-like.
- Fill the sock with rice to about two-thirds full. Distribute the rice so the lower section is plumper than the upper section, making a natural body-and-head proportion.
- Wrap one elastic band tightly around the sock about one-third from the top. This creates the neck and separates body from head.
- Wrap the second elastic band around the top of the sock, just above the rice, and fold the empty cuff down over it to make a simple hat.
- Tie the fabric strip around the neck elastic band as a scarf to hide it.
- Glue or press small black buttons onto the head for eyes, and glue the orange felt circle for the nose. Use marker instead for children under five, to avoid small-parts risk.

🛍 Shopping guide
Paper Bag Gingerbread House
A plain brown paper lunch bag sits flat on the table. Cut two rectangle windows and a door from the front panel, tuck a battery tea light inside, fold the top into a roof point, and an entire lit gingerbread house appears. The cutting is the moment: each window opens the structure from a flat bag into a room with light pouring out of it.
An adult must do the cutting with scissors or a craft knife, but everything else is child-led. Decorate the outside with stickers, marker, or strips of washi tape for the gingerbread trim before the light goes in.
What You Need
- 1 brown paper lunch bag, standard size (approx 18 x 10 cm base)
- Scissors (adult use) or craft knife and cutting mat (adult use)
- 1 battery-operated LED tea light
- Stickers, washi tape, or markers for decoration
- A ruler and pencil
How to Make It
- Keep the bag folded flat. On the front panel, use a ruler and pencil to mark two rectangle windows, each about 4 x 3 cm, placed in the upper half of the bag. Add a small rectangle door at the base centre, about 3 x 4 cm.
- An adult cuts out the windows and door cleanly with scissors or a craft knife. Cut through the front panel only, not the back.
- Decorate the outside of the bag with stickers, washi tape stripes, or marker-drawn icing swirls before opening the bag. It is much easier to decorate while flat.
- Open the bag and place the LED tea light inside on the base. Switch it on.
- Fold the top of the bag: press the two side panels inward so the bag collapses into a flat-top shape, then fold that flat top down into a roof point and crease firmly. Two or three strips of tape hold the roof fold in place.
- Set the house on a surface and turn off the overhead light. The windows glow orange and the whole thing looks like a lit cottage.

🛍 Shopping guide
Torn Paper Christmas Tree Collage
No scissors, no cutting, no waiting. The child tears green paper into rough triangles and places them on a white sheet, piece by piece, working upward from the widest base. Nothing looks like a tree until the final piece lands at the top. That is the reveal: one torn triangle, placed last, makes the whole arrangement snap into a Christmas tree shape.
Use different shades of green if possible (wrapping paper, tissue paper, magazine pages) for a layered, dimensional look. A torn brown rectangle at the base makes the trunk. Glue everything down at the end with a glue stick, which is the step that fixes the tree permanently into being.
What You Need
- 1 sheet of white card, A4, 200 gsm, as the background
- Green paper in 2-3 shades: wrapping paper offcuts, tissue paper, magazine pages
- Brown paper scrap for the trunk
- A glue stick
- Small star sticker or gold paper scrap for the tree topper
How to Make It
- Tear the green paper into rough irregular triangles of different sizes, from about 2 cm to 8 cm across. The irregular edges are part of the look: do not try to make them neat.
- Tear a small brown rectangle about 2 x 4 cm for the trunk. Set it aside.
- Without glue, arrange the torn green pieces on the white card in a triangle formation: widest at the bottom, narrowing upward. Overlap pieces slightly. Leave gaps: they add depth.
- Place pieces one at a time from the bottom row upward. When the top piece is placed and the tree shape is complete, pause and look at it. This is the reveal moment worth pausing for.
- Place the brown trunk piece below the tree. Add the star sticker or a small gold paper triangle at the very tip.
- Once satisfied with the arrangement, glue each piece in place with the glue stick, working from the bottom up so pieces do not slide. Press each piece flat and hold for a few seconds.

🛍 Shopping guide
Yarn-Wrapped Cardboard Star
A five-pointed star cut from cardboard looks flat and dull. Wrap yarn around it, weaving from point to point, and it gains structure and dimension with every pass. The last wrap is the moment: the star lifts slightly off the surface as the yarn tension builds, and it becomes a three-dimensional object that spins when hung.
Any chunky yarn works. Variegated yarn in white and silver gives an ice effect; red and gold gives something warmer. Finish with a loop at the top point for hanging.
What You Need
- 1 piece of corrugated cardboard, at least 20 x 20 cm
- Scissors (adult use for cutting cardboard)
- A pencil
- Chunky yarn, 1 x 50 g ball (about 80 m), any colour
- A large blunt tapestry needle or a clothespeg clip to manage yarn
- Tape to secure yarn ends
How to Make It
- An adult draws a five-pointed star on the cardboard, roughly 15 cm from tip to tip, and cuts it out. Cut small notches at each of the five points: these hold the yarn and stop it slipping.
- Tape one end of the yarn to the back of the star near one point.
- Bring the yarn over the front of the nearest point, through its notch, and pull it across to the opposite notch, going through that notch and around to the back.
- Continue wrapping, always passing through a notch before crossing to another point. The pattern does not need to be perfect: the star builds up texture and colour whatever order is chosen.
- Wrap the centre area several times by weaving the yarn over and under the existing strands crossing the middle. This is where the star gains depth and lift.
- When the cardboard is well covered and the star feels firm, cut the yarn, thread the tail through the last notch, and knot it at the back. Cut a 15 cm length of yarn and tie it through the top point notch as a hanging loop.

Milk Carton Paper Lantern
A rinsed one-litre milk carton is cut open, fitted with a battery tea light, and becomes a paper lantern in about twenty minutes. The cutting is the turning point: the moment the windows are open, light pours through and the carton becomes architectural rather than domestic. Cover the outside with torn tissue paper in white and gold for a frosted-glass effect.
This is the craft that photographs best on a dark afternoon. Line several on a windowsill and the effect is genuinely beautiful.
What You Need
- 1 clean empty one-litre milk carton
- Scissors (adult use) or craft knife and cutting mat (adult use)
- White and gold tissue paper, torn into pieces roughly 5 x 5 cm
- PVA glue diluted 1:1 with water
- A wide paintbrush, about 2 cm
- 1 battery-operated LED tea light
How to Make It
- An adult cuts off the top of the carton cleanly at the shoulder seam, leaving the four main sides as walls of even height.
- An adult cuts a rectangle window from each of the four sides, leaving at least 1.5 cm border around each window. The windows should be as large as possible while keeping the border intact: this is what the light shows through.
- Brush diluted PVA onto one outside panel of the carton, then lay torn tissue paper pieces over it, overlapping the edges. Brush more diluted PVA over the top of each piece. Work panel by panel until all four sides are covered. Leave any glue on the windows: it will dry clear and add a frosted look.
- Leave to dry for five minutes. The tissue will feel slightly stiff when dry and translucent when held to light.
- Place the LED tea light inside the carton on the base, switch it on, and set the lantern over it. The light glows through the tissue-covered windows in warm gold.

Paper Chain Circle Wreath
A paper chain looks like a paper chain until the last link loops back and joins the first, and suddenly the strip becomes a full circle. Held up, it is a wreath. Laid flat, it is a centrepiece. The child has been making a line for ten minutes, and the closing of that line into a ring is a genuine spatial surprise.
Use alternating red and green strips for the classic version, or let the child pick their own colour pattern. The more links, the fuller the circle. Forty links makes a wreath about 25 cm across. For more Christmas wreath inspiration beyond this basic form, the christmas wreath crafts for kids article goes much further.
What You Need
- 40 strips of red and green paper, each 2 x 15 cm (A4 paper cut lengthways into 4 strips makes 4 strips per sheet)
- A stapler (adult use) or glue stick
- Scissors (adult use for cutting strips)
How to Make It
- An adult cuts the paper into strips: 2 cm wide and 15 cm long. Mix red and green, or let the child choose any colour pattern they want. Stack them in order if a repeating pattern is planned.
- Take the first strip, curl it into a loop, and staple or glue the ends together. This is the first link.
- Thread the next strip through the first loop, curl it, and staple or glue. Continue threading and closing, alternating colours, until all forty strips are used. Keep the links loose enough that the chain can flex: an over-tight chain will not curve smoothly into a circle.
- To close the wreath, thread the last strip through both the final open loop and back through the very first link, then staple or glue. The chain instantly forms a circle. Hold it up: it is a wreath.
- Hang it as is, or add a small bow of ribbon at the top join. Store by unhooking the final link: it becomes a chain again and lies flat.

🛍 Shopping guide
Frequently Asked Questions
What Christmas crafts for kids take under fifteen minutes?
The pipe cleaner candy cane takes five minutes flat. The fingerprint fairy lights card, the wax resist snowflake, and the handprint reindeer all land well under fifteen minutes of active work. The sock snowman is also fully complete in fifteen minutes with no drying wait. Order the crafts in this list from the top and stop whenever you need to: everything above the paper bag gingerbread house is done within fifteen minutes of active time.
What Christmas crafts for kids need no hot glue?
Every craft in this list is hot-glue-free by design. Bonds are made with a standard glue stick, diluted PVA, elastic bands, tape, or yarn wrapping. The only adult-only steps involve scissors, a craft knife for cutting carton windows, or a stapler. Nothing here needs a glue gun.
What are good Christmas crafts for kids of different ages together?
The torn paper tree collage and the coffee filter stained glass window both scale naturally across ages: a three-year-old tears paper while a seven-year-old plans the composition. The fingerprint fairy lights card works for any age because each child adds their own prints to a shared card. The pinecone bird feeder is good for mixed ages because rolling and pressing suits small hands, while an older child can tie the twine and manage the hanging.
How do I do Christmas crafts for kids without a huge mess?
Cover the table with a cheap plastic tablecloth or a single layer of newspaper before anything comes out. Offer one colour of paint at a time rather than the whole set. For the sponge print and the fingerprint card, keep a damp cloth beside each child so hands can be wiped between colours without a trip to the sink. The wax resist painting, torn paper collage, yarn star, pipe cleaner candy cane, and sock snowman involve no paint at all, so those are the natural choices for a low-mess afternoon.
15 mason jar Christmas crafts for the mantel, the table and the gift bag, each one cheap, quick and

Transform your impossible Christmas shopping challenge with these 13 unexpected gifts that create me
25 Christmas paper crafts for mantels, windows, trees and gift wrap, with full materials, timings an
Leave a Reply