

18 Christmas Crafts to Sell That Look Like a Shop Stall, Not a Craft Table
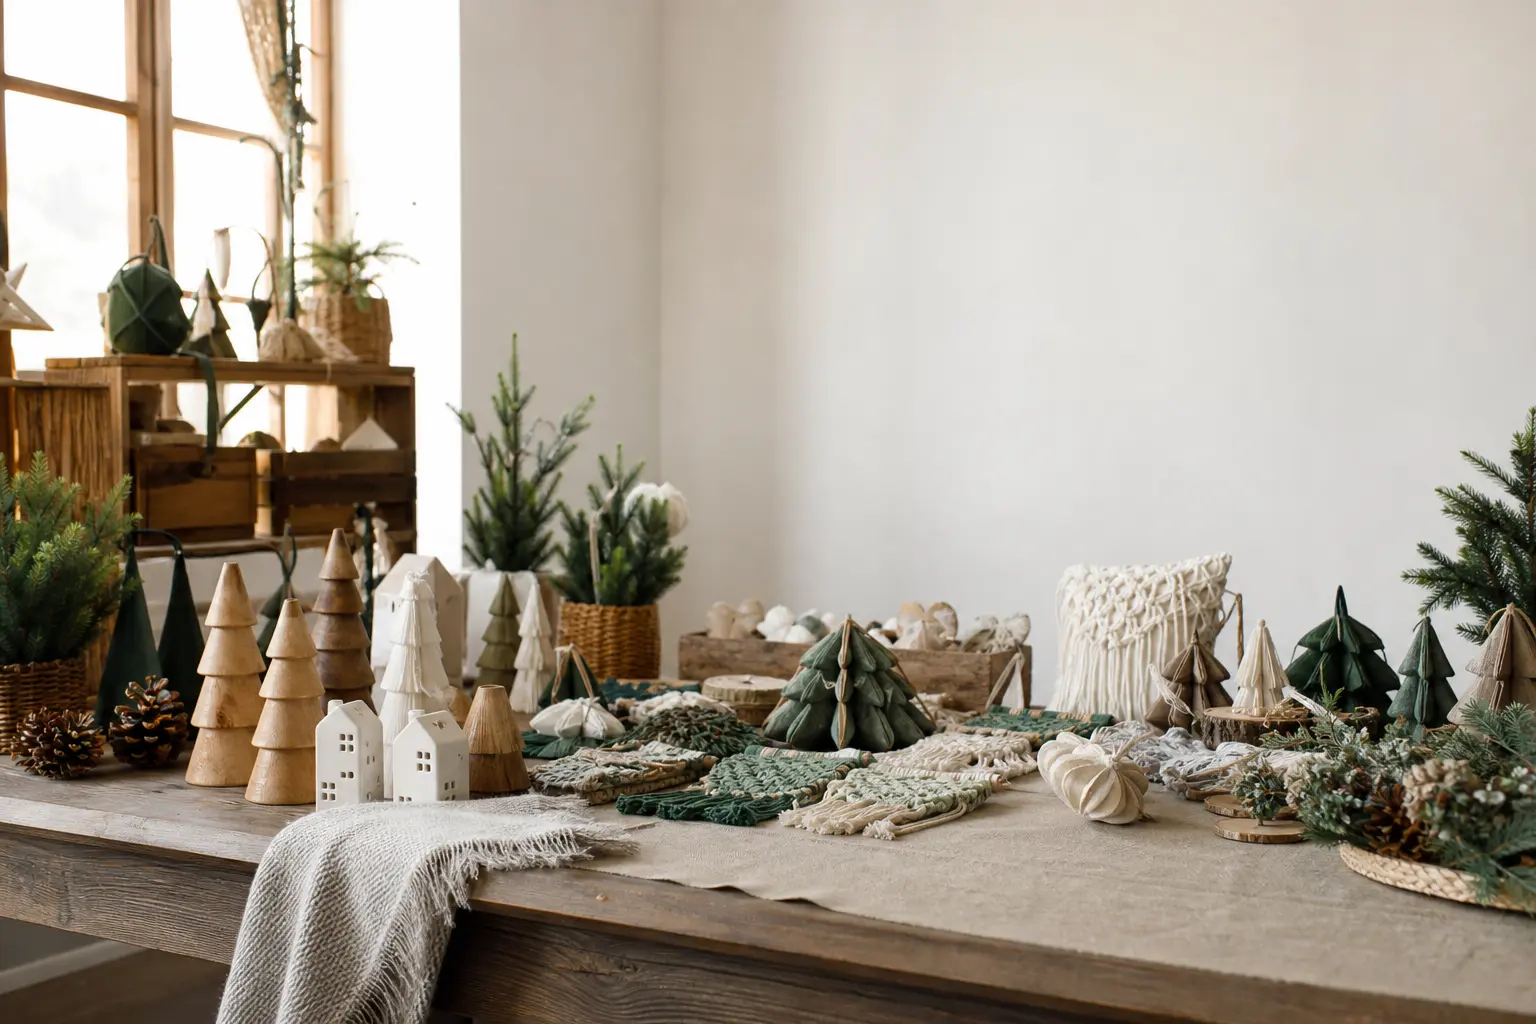
The best christmas crafts to sell are not the cleverest ones.
They are the ones that read as a line, a collection, a point of view, so a buyer sees a stall and thinks ‘I want all of it’ instead of ‘I’ll take this one thing.’
Every craft here uses the same palette of cream, black and one metallic, and every piece photographs beside the others without looking like a coincidence. Think of it as a product range, not a craft pile.
All eighteen items belong to the same visual family. Most use the same three or four materials in rotation, which also means your supply runs are short and your unit costs fall the more you make.
A few of these christmas crafts for adults sit at a price point that makes impulse buying easy; others anchor the table as a higher-ticket gift set. Postage notes are included for each one, because ‘does this fit a letter box?’
matters as much to an Etsy seller as the making does.
The full cluster of ideas lives in the hub piece on christmas crafts. If wood is your main material, the round-up on christmas wood crafts goes deeper on grain prep and finishing. And if you are experimenting with clay alongside these, the guide to polymer clay christmas pieces is worth a read before you fire anything.
This post contains affiliate links. If you buy through them, I may earn a small commission at no extra cost to you.
- Stamped Wood Slice Ornaments
- Beaded Bow Keychains
- Hand-Poured Soy Candles in Thrifted Teacups
- Block-Printed Linen Zip Pouches
- Bottle-Cap Metallic Mini Wreaths
- Felt Gnomes with Hidden EOS Lip Balm
- Marbled Gold Ornaments, Sold as a Trio
- Engraved Wood Slice Coasters
- Pressed Flower Bookmarks
- Hand-Lettered Mini Canvases
- Beeswax Firestarters in Bundles of Three
- Embroidered Stocking Cuffs
- Clay Ring Dishes, Snowflake Stamped
- Painted Mini Gift Crates
- Knitted Mug Cosies
- Block-Printed Tea Towels
- Pressed Herb Sachets, Resin-Free
- Soy Wax Melts in Kraft Boxes
- Frequently Asked Questions
Stamped Wood Slice Ornaments
A raw wood slice is nothing special on its own. Lay buffalo check over the grain in black ink and suddenly the wood does half the decorative work for you, showing through the gaps in the pattern like a natural linen.
These hang as a set of three on identical jute loops, and three matching ornaments photograph together far better than one.
Store flat in a kraft box lined with tissue. Ship as a small parcel: the slices are rigid and need a stiff envelope or a small box so they do not snap in transit.
What You Need
- 3 raw wood slices, 8 cm diameter, pre-drilled with a 5 mm hole at the top
- Black ink pad, permanent pigment type
- Buffalo check rubber stamp, approximately 6 cm square
- 60 cm natural jute twine, cut into three 20 cm lengths
- Fine sandpaper, 220 grit
- Clear matte sealant spray
How to Make It
- Sand each slice lightly in the direction of the grain until it feels smooth under your thumb, then wipe away the dust with a barely damp cloth and leave to dry completely.
- Press the buffalo check stamp firmly onto the ink pad until it is fully loaded, then centre it on the face of the slice and press straight down without rocking it. The wood grain will show through the gaps in the pattern, which is exactly what you want.
- Lift the stamp cleanly and check the impression. If a corner missed, re-ink just that corner and press again before the first layer dries.
- Leave flat for at least 90 minutes until the ink is bone-dry to the touch. Rushing this step smears the pattern when you seal it.
- Spray two light coats of matte sealant over the face and edges, leaving 20 minutes between coats. The surface should feel smooth and not tacky when done.
- Thread a length of jute through the pre-drilled hole and tie a simple loop knot. Trim the ends so both tails are equal.

🛍 Shopping guide
Beaded Bow Keychains
Seed beads in cream, black and gold on a single length of stretch cord, finished with a grosgrain bow and a gold lobster clasp: small, flat, and they sit in a dish on your table like a jewellery display.
Sell these in sets of two because one looks like a sample. They fit in a standard padded envelope and qualify for letter rate in most postal systems, making them one of the cheapest items here to ship.
What You Need
- Seed beads in cream, black and gold, size 6/0, approximately 40 beads per keychain
- 0.5 mm clear elastic beading cord, 50 cm per keychain
- 2 gold lobster clasps, 20 mm
- 2 gold split rings, 10 mm
- 60 cm cream grosgrain ribbon, 10 mm wide, cut into two 30 cm lengths
- Clear nail varnish or bead-locking glue
How to Make It
- Cut a 50 cm length of elastic cord and fold it in half so you are working with a doubled strand, which keeps the cord from snapping during wear.
- String the beads in a repeating pattern: two cream, one black, one gold. Aim for about 18 to 20 beads total on the doubled cord, or enough to circle a keychain fob without bunching.
- Bring both ends together and tie a surgeon’s knot (right over left, then left over right, pulled tight). Dab a tiny drop of clear nail varnish on the knot and leave for five minutes before trimming the tails to 2 mm.
- Attach the split ring to the lobster clasp, then loop the beaded strand onto the split ring so it hangs freely.
- Fold the grosgrain ribbon in half and pinch the fold into a bow shape. Secure the centre with a tight wrap of the same ribbon and knot it at the back.
- Thread the bow’s centre tail through the split ring beside the beaded strand so the bow sits above the beads, then trim the bow tails at a neat diagonal.

🛍 Shopping guide
Hand-Poured Soy Candles in Thrifted Teacups
A bone-china teacup keeps the height well under that of a coffee cup, which means it photographs at eye level and does not loom over shorter items on the stall.
One stamped word on a kraft sticker, the same font across every cup, ties them into a set even when the cup patterns differ slightly. These need a small parcel for posting: the teacup is fragile and needs bubble wrap plus a rigid box.
Sell in person or offer local pickup to keep postage costs down.
What You Need
- Thrifted bone-china teacups, one per candle, roughly 200 ml capacity
- 200 g natural soy wax flakes per cup
- Pre-tabbed cotton wicks sized for a 7 cm diameter vessel
- Fragrance oil, one scent only, 6% by weight of wax (approximately 12 g per cup)
- A pouring jug and a kitchen thermometer
- Kraft sticker labels, 5 cm x 2 cm, one per cup
- A letter stamp set and a black ink pad for labelling
- Wooden wick-centring sticks or two pencils taped together
How to Make It
- Warm the teacup in a low oven (50 degrees C) for five minutes so it does not crack when warm wax hits cold china. An adult must handle the warm cup and the hot wax throughout.
- Melt soy wax flakes in the pouring jug set in a pan of simmering water, stirring occasionally, until the wax reads 75 degrees C on the thermometer.
- Remove from heat and cool to 60 degrees C, then stir in the fragrance oil for one full minute. Pouring too hot burns off the scent; this temperature is the sweet spot.
- Press the wick tab firmly to the centre of the cup base, then lay the centring sticks across the rim and thread the wick between them so it stands straight.
- Pour wax slowly to about 1 cm below the rim, leaving space for a top-up later. As soy wax cures it shrinks and sinks slightly in the centre.
- After two hours at room temperature, re-melt a small amount of wax and pour a thin top-up layer to level the surface. Leave undisturbed for a further two hours.
- Trim the wick to 5 mm. Stamp your chosen word onto the kraft label and press it to the front of the cup in a straight line.

🛍 Shopping guide
Block-Printed Linen Zip Pouches
Natural linen, a single block print in cream ink, black ink or gold ink (one colour per batch, three colours across the collection), and a brass zip that picks up the metallic in the palette.
The same stamp used on the wood slice ornaments keeps the stall reading as one family. These lie flat and weigh almost nothing: a single pouch fits a large letter envelope and qualifies for letter rate.
Sold in a trio of colours they become a gift set that moves at a higher price.
What You Need
- Pre-made natural linen zip pouch blanks, approximately 20 cm x 14 cm, brass zip
- Fabric block printing ink in cream, black or gold (one colour per batch)
- The same buffalo check or snowflake block stamp used elsewhere in the range
- A flat foam brayer, 10 cm wide
- A piece of firm cardboard to slide inside the pouch while printing
- Baking paper
- An iron set to medium-high, no steam
How to Make It
- Slide the cardboard inside the pouch so the front panel is taut and flat, with no zip-lining showing through the fabric. This stops the ink bleeding through to the back.
- Roll a thin, even layer of fabric ink onto the foam brayer, then roll the ink onto the stamp face until the pattern is evenly loaded but not drowning in ink. Too much ink blurs the edges; a medium coat gives clean lines.
- Press the stamp firmly onto the centre of the pouch front, hold for five seconds without shifting, then lift cleanly. If a corner is faint, re-ink that corner only and press once more.
- Leave the pouch flat with the cardboard still inside for at least 60 minutes until the print is completely touch-dry. Do not pull the cardboard out early: it will distort the fabric and smear the wet ink.
- Once dry, lay a sheet of baking paper over the printed area and press with a dry iron on medium-high for 30 seconds, moving the iron slowly. This heat-sets the ink so the pouch is washable. An adult must do this step.
- Remove the cardboard and hang the pouch for another 30 minutes before folding for packaging.

Bottle-Cap Metallic Mini Wreaths
Every cap flattened, painted in one metallic (gold, silver or copper, pick one and use only that across the whole range), then bent into a shallow cup and wired together in a ring.
The finish looks more intentional than it sounds: a full wreath of gold bottle caps on a stall of cream and black pieces reads as art, not a school project.
These are firm and flat enough for a padded envelope; they do not qualify for letter rate but a small parcel rate covers them easily.
What You Need
- 40 to 45 steel bottle caps, clean and dry
- Gold (or silver or copper) metallic spray paint
- Craft wire, 26 gauge, one 3 m length
- Round-nose pliers and flat-nose pliers
- A 15 cm diameter cardboard circle as a form
- A low-tack mat or old newspaper for spraying
- 30 cm cream grosgrain ribbon, 15 mm wide, for the hanging loop
How to Make It
- Lay the bottle caps in a single layer on newspaper or a low-tack mat and spray with two thin coats of metallic paint, leaving 20 minutes between coats. Once dry, flip them and spray the underside too. An adult must use the spray paint in a ventilated space.
- When fully dry, press each cap face-down on a firm surface and use your thumb to push the centre down slightly, forming a shallow cup shape. This catches the light and adds texture to the finished wreath.
- Cut the craft wire into 8 cm lengths. An adult must handle wire cutting.
- Hold two caps back to back, insert a wire length through the crimped edge of both and twist three times with the flat-nose pliers to lock them together. Repeat until you have pairs.
- Arrange the pairs around your 15 cm cardboard circle form, overlapping slightly, and wire each pair to its neighbours until you have a full ring. The cardboard is just a guide: remove it when the ring holds its own shape.
- Make a small loop from the remaining wire and twist it onto the top of the wreath for hanging. Thread the grosgrain ribbon through the loop and knot it.

Felt Gnomes with Hidden EOS Lip Balm
The EOS egg is the gnome’s body: it needs no body pattern, no stuffing, no wire armature. Felt forms the hat and beard, a wooden bead is the nose, and the whole thing disassembles so the lip balm is still usable.
Practical gifts outsell purely decorative ones at Christmas markets. These need a small parcel for posting because of the EOS egg’s depth, but sell quickly enough in person to make batch production worthwhile.
What You Need
- EOS sphere lip balm, one per gnome (any flavour, kept in original packaging)
- Cream wool felt, one A4 sheet per two gnomes
- Hot glue gun and glue sticks
- One 20 mm natural wooden bead per gnome (the nose)
- Cream or white faux fur trim, 5 cm wide, 10 cm length per gnome
- Black seed beads, 2 per gnome (the eyes)
- A craft knife and cutting mat
How to Make It
- Cut a quarter-circle from the felt with a radius of 12 cm. This becomes the hat cone. Roll it into a cone shape and hot-glue the straight edges together. An adult must use the hot glue gun throughout.
- Trim the base of the cone so it sits flat on the work surface, then glue the cone to the top of the closed EOS egg. Hold it firmly for 30 seconds while the glue grips.
- Cut the faux fur trim into a 10 cm strip for the beard. Pinch the strip at one end to gather it slightly and glue it to the lower half of the EOS egg directly below where the hat meets the egg. This is the fiddly part: hold it in place rather than pressing it flat, because pressed fur loses its fluff.
- Glue the wooden bead nose just above the beard, centred on the egg seam line. Two black seed beads glued either side of the hat base become the eyes.
- The EOS egg opens at its equator without removing the hat or beard, so the recipient can use the lip balm straight away.

🛍 Shopping guide
Marbled Gold Ornaments, Sold as a Trio
Clear glass baubles dipped through gold acrylic paint floated on water: no two are identical, but sold as a trio in a kraft box they become a cohesive product. The technique takes ten minutes of active work but needs an overnight dry.
The trio format is key here. Single marbled ornaments look one-off; three in a box look like a gift. These need a small parcel: glass baubles are fragile and need individual tissue wrapping inside a rigid box.
What You Need
- 3 clear glass baubles, 8 cm diameter, with removable caps
- Gold acrylic craft paint, one tube or small pot
- A wide, shallow container (a washing-up bowl works well), filled with cold water
- A wooden skewer per bauble
- Kraft gift box sized to hold three 8 cm baubles, with a lid
- Cream tissue paper for packing
How to Make It
- Remove the cap from one bauble and slide the skewer through the hanger hole so you can hold the bauble without touching it.
- Squeeze a few drops of gold acrylic paint onto the surface of the water. The paint will spread into a thin film: give it a single gentle swirl with the skewer tip to create a loose marble pattern. Do not over-swirl or the pattern becomes muddy.
- Lower the bauble slowly through the paint film at an angle, rotating it gently as it breaks the surface so the paint wraps around the glass unevenly. Lift it straight up and the paint film will cling to the glass.
- Hold the bauble over the bowl for 30 seconds while the excess drips off, then rest the skewer across the rim of the bowl so the bauble hangs freely without touching anything.
- Leave overnight. The acrylic dries hard and clear so the marbling looks almost like enamel. Replace the cap once the bauble is fully dry.
- Nest all three in the kraft box on a layer of tissue, replace the lid, and add a single kraft sticker with the same stamped word used across the range.

Engraved Wood Slice Coasters
Four coasters laser-engraved or hand-routed with a single snowflake motif, finished with the same clear matte sealant used on the ornaments, and stacked into a bundle tied with jute and a stamped kraft tag.
The stack is its own packaging: nothing else to buy, nothing to assemble in the morning rush. These need a small parcel because of weight, but the gift-set format justifies the postage cost at a higher price point.
If you do not have access to a laser cutter, a wood-burning pen works for the snowflake and gives the same seared finish.
What You Need
- 4 raw wood slices, 10 cm diameter, sanded to 220 grit on both faces
- A wood-burning pen with a fine tip, or access to a laser engraver
- A printed or traced snowflake template, 6 cm wide
- Graphite transfer paper, one sheet
- Clear matte sealant spray
- 60 cm natural jute twine for bundling
- One kraft tag, 7 cm x 3.5 cm, stamped with the same word as the candle labels
- Fine cork sheet, self-adhesive, cut into four 9 cm diameter circles
How to Make It
- Sand each slice on both faces until smooth, then wipe away the dust. Place the graphite transfer paper on the top face of the slice and lay the snowflake template on top. Trace around the pattern firmly with a ballpoint pen: the graphite deposits a faint line on the wood to follow.
- Heat the wood-burning pen and trace along the transferred lines slowly and steadily. An adult must handle the wood-burning pen at all times. Move at a consistent speed: pausing too long in one spot scorches a dark patch you cannot remove.
- Once all four slices are engraved, let them cool completely, then blow away any fine ash with a breath.
- Spray both faces of each coaster with two light coats of matte sealant, leaving 20 minutes between coats. This seals the wood against condensation rings.
- Peel and press a cork circle onto the underside of each coaster. The cork stops the coaster skidding and protects surfaces.
- Stack the four coasters, wrap jute twice around the stack and knot it at the front. Loop the kraft tag through the knot so it sits flat on top.

Pressed Flower Bookmarks
One exact size, every time: 5 cm x 18 cm. That discipline is what makes a basket of these look like a product instead of a clearance tray.
Press the flowers in advance (they need two to three weeks in a heavy book), laminate them with the same strip of text along the bottom edge of each one, cut to the exact same size with a guillotine, and punch one hole at the top for the same ribbon tail.
These fit a standard letter envelope with room to spare. Letter rate. Stack beautifully in a tin on the stall.
What You Need
- Pressed flowers and leaves, dried for at least 3 weeks (pansies, violas and small ferns work well)
- White card, 300 gsm, cut into 5 cm x 18 cm strips, one per bookmark
- PVA glue thinned slightly with water (one part water to four parts glue)
- A small paintbrush for gluing
- A laminator and A4 laminating pouches, 125 micron
- A guillotine or a craft knife and metal ruler, for trimming to size
- A 3 mm hole punch
- Cream grosgrain ribbon, 3 mm wide, 15 cm lengths
How to Make It
- Lay the white card strips on a flat surface. Brush a thin layer of thinned PVA across the top two-thirds of each strip, working quickly as PVA dries fast.
- Arrange pressed flowers on the glued area, pressing them flat with the brush handle rather than your fingertips (which bruise petals). Leave a 1 cm margin on all sides.
- Leave to dry fully for at least two hours: the card must be completely flat before laminating. Any moisture buckles the pouch.
- Feed each bookmark into an A4 laminating pouch alongside up to four others, then run through the laminator at the medium-heat setting. An adult must use the laminator and guillotine.
- Once cool, use the guillotine to trim each bookmark to exactly 5 cm x 18 cm. This consistency is the whole point: vary the flowers as much as you like, but keep the dimensions identical.
- Punch a hole 1 cm from the top of each bookmark, thread a 15 cm ribbon length through, and knot it so both tails hang equally.

Hand-Lettered Mini Canvases
Three phrases, same three canvases, same typeface, same palette: cream canvas, black lettering, a single gold flourish. Leaned in a row on a shelf they read as one piece of wall art.
Choose your three phrases before you start and do not deviate across the batch, because consistency is what makes them a product. At a stall, lean them against a small crate for height.
These fit a padded envelope for posting: stiff enough not to crease, light enough for large-letter rate in most postal systems.
What You Need
- Mini stretched canvases, 15 cm x 10 cm, pack of six or more
- Black acrylic paint, one small tube
- Gold acrylic paint, one small tube
- A fine liner brush, size 1, and a detail brush, size 0
- A chalk pencil for sketching the lettering before painting
- A ruler
How to Make It
- Use the chalk pencil and ruler to draw three faint horizontal guidelines across the canvas, dividing it into thirds. These disappear under the paint and keep your lettering straight without a lightbox.
- Sketch the phrase lightly in chalk between the guidelines. Keep the letterforms simple: a clean sans-serif hand is faster to batch-produce and photographs more crisply than fussy script.
- Load the fine liner brush with black acrylic and trace over your chalk sketch in smooth strokes. Work from left to right so your hand does not rest on wet paint. The chalk lines smudge easily at this stage; that is fine, they will vanish.
- Leave to dry for 30 minutes. The chalk guidelines will disappear as the paint dries. If any chalk remains, brush it away gently with a dry watercolour brush.
- Use the detail brush and gold acrylic to add one small flourish, a star, a dot cluster or a simple leaf, at the end of the last word. This single gold mark ties the canvas into the wider palette without overworking it.
- Leave to dry fully for another hour before stacking or packaging. Stack with a sheet of tissue paper between each canvas to prevent scratching.

🛍 Shopping guide
Beeswax Firestarters in Bundles of Three
Pinecones dipped in tinted beeswax and bundled with jute and a stamped tag: one of the cheapest things here to make in bulk. Collect pinecones for free, melt the wax in batches, and the dipping takes about two seconds per cone.
The visual repetition of a basket of identical bundles is exactly the kind of thing that stops buyers. These are flat enough for a large letter envelope if the cones are small (under 8 cm). Larger cones need a small parcel.
What You Need
- 12 dry pinecones, approximately 6 to 8 cm tall, fully open and clean
- 200 g beeswax pellets or blocks
- Candle dye in red or black, one small disc, for a uniform tint (optional but cohesive)
- A metal pouring jug
- A kitchen thermometer
- Natural jute twine, one 90 cm length per bundle of three
- Kraft tags, 5 cm x 2.5 cm, stamped as above
- Baking paper or a silicone mat for setting
How to Make It
- Melt beeswax in the metal jug set in a pan of simmering water until it reaches 80 degrees C. Add the candle dye disc and stir until fully dissolved. An adult must handle the hot wax throughout.
- Hold a pinecone by its stem or tip with kitchen tongs and dip it into the wax, submerging it fully for two seconds. Lift it out and let the excess drip back into the jug for about five seconds.
- Set the wax-coated cone on the baking paper. The wax sets quickly: you will see it turn from glossy to matte within about one minute.
- Repeat with all twelve cones, re-heating the wax briefly if it thickens too much to dip cleanly.
- Once all cones are set and cool (allow 30 minutes), group them in threes and wrap jute around the bundle twice, tying it firmly at the front in a simple bow. Thread a stamped kraft tag onto the bow before pulling it tight.

🛍 Shopping guide
Embroidered Stocking Cuffs
Sold flat, pre-finished, sized to slip over any standard stocking top: 35 cm wide, 12 cm tall, with a casing along the top edge that the buyer threads over their own stocking.
A simple running stitch snowflake in cream thread on cream linen, or black thread on cream, or gold thread on cream: three versions, same template, same size. Flat, light and flexible. These fit a large letter envelope folded once, or a padded envelope without folding.
Letter rate or large-letter rate depending on your postal service.
What You Need
- Natural linen fabric, 40 cm x 15 cm per cuff (the extra allows for seams)
- Embroidery thread in cream, black or gold, one skein per three cuffs
- An embroidery needle, size 7
- An embroidery hoop, 15 cm diameter
- A snowflake template traced onto water-soluble stabiliser, 8 cm wide
- Sharp fabric scissors
- A sewing machine or a needle and thread for the casing hem
- An iron and pressing cloth
How to Make It
- Press the linen with a hot iron and pressing cloth so it lies completely flat. Cut to 40 cm x 15 cm using sharp fabric scissors. An adult must use the iron and scissors.
- Centre the water-soluble stabiliser snowflake template on the linen and pin it in place. Hoop the linen in the embroidery hoop so the design is taut.
- Embroider the snowflake using a simple running stitch along all the template lines. Pull the thread at a consistent tension: loose stitches pucker the linen when the stabiliser dissolves.
- When the embroidery is done, hold the hooped fabric under cool running water until the stabiliser dissolves fully, then lay flat to dry. Never rub the linen while the stabiliser is still present.
- Once dry, press flat again. Fold the top edge 2 cm to the wrong side, fold again and stitch along the folded edge to create the casing. This is the channel that slides over the stocking top.
- Fold the short ends in by 1 cm each, right sides facing, and stitch along those edges to neaten. Press flat, fold in half widthways, and package in a glassine bag tied with the same jute and tag used across the range.

🛍 Shopping guide
Clay Ring Dishes, Snowflake Stamped
Air-dry clay, one snowflake stamp, one glaze colour applied by hand after drying, and a ring dish that photographs beautifully flat or at a slight angle. The stamp is the same one used across the range.
Make them in batches of six at a time: the clay takes 24 to 48 hours to dry fully and you cannot rush it. Sold singly or in pairs.
These need a small parcel because of weight and fragility, wrapped individually in tissue inside a rigid box.
What You Need
- Air-dry clay, white, approximately 80 g per dish
- A rolling pin and two 5 mm guide sticks or wooden dowels
- A round cutter, 10 cm diameter (a drinking glass rim works)
- A snowflake rubber stamp, same as used across the range
- A small bowl to form the dish curve over, approximately 12 cm diameter, lined with cling film
- Gold acrylic craft paint or a water-based glaze, one colour
- A sponge dauber or a wide flat brush for the glaze
- Clear water-based varnish, satin finish
How to Make It
- Knead the clay until it is smooth and pliable, then roll it out between the guide sticks so it is an even 5 mm thick throughout.
- Press the round cutter or glass rim firmly into the clay and lift the cut circle away from the rest. Smooth any rough edges with a damp fingertip.
- Press the snowflake stamp firmly onto the centre of the circle and lift cleanly. The impression should be crisp and about 1 mm deep: shallow impressions disappear under the glaze.
- Lay the circle gently over the cling-film-lined bowl so it drapes into a shallow dish shape. Leave it over the bowl for the full 24 to 48 hours until completely hardened. Moving it early causes cracking at the rim.
- Once hardened, remove from the bowl and apply the gold glaze or acrylic paint across the interior of the dish with a sponge dauber, working the colour into the snowflake impression. Wipe the rim with a clean damp cloth for a clean edge. Leave to dry for two hours.
- Seal with two thin coats of clear satin varnish, leaving one hour between coats. The finished dish should feel smooth and non-porous on the interior.

Painted Mini Gift Crates
Raw balsa or pine mini crates, painted in one flat colour from the palette (cream, black or a warm charcoal), lined with the same cream tissue used throughout the range, and stacked empty on the stall as display and stock at the same time.
A buyer picks one up, fills it themselves at home. These need a small parcel to ship: the crate is rigid and cannot be folded. Paint in batches and line the tissue after painting so it stays clean.
What You Need
- Raw mini wooden gift crates, approximately 18 cm x 12 cm x 8 cm
- Chalk paint in cream or charcoal black, one 250 ml tin covers approximately twelve crates
- A wide flat brush, 3 cm
- Fine sandpaper, 400 grit, for distressing after painting (optional but good)
- Clear matte wax or matte sealant spray
- Cream tissue paper, two sheets per crate, cut or torn to fit loosely
- A stamped kraft tag wired to the crate handle with the same 26-gauge gold wire used in the wreath
How to Make It
- Place the crate on newspaper and brush chalk paint over all outer surfaces in long smooth strokes. Work with the wood grain where it is visible. One coat is usually enough with chalk paint: it is thick and opaque.
- Leave to dry for 45 minutes. The paint will look powdery and matte, which is correct.
- If you want a slightly worn look (and it photographs well), rub a folded piece of 400-grit sandpaper lightly along the edges and corners until a little wood shows through. Do not sand the flat faces.
- Seal with a thin coat of clear matte wax rubbed in with a cloth, or a light mist of matte sealant spray. Leave to cure for one hour.
- Scrunch two sheets of cream tissue paper loosely and tuck them into the crate so they billow over the top edge. Do not fold the tissue flat: the volume is part of the display.
- Cut a 15 cm length of gold wire. Thread it through the hole in the kraft tag, loop it around the crate handle and twist the ends together with the flat-nose pliers to secure. An adult should use the pliers if younger makers are helping.

Knitted Mug Cosies
One yarn, one colourway, one size that fits a standard 350 ml mug: 22 cm circumference unstretched, 9 cm tall, cast off with a single button closure. The repeatability is the whole point.
If you knit ten identical ones they look like stock; if you knit ten in seven different yarns they look like experiments. These are flat, light and flexible. They fit a padded envelope with room to spare: large-letter rate in most postal services.
What You Need
- 50 g ball of DK weight yarn in one colourway (cream, oatmeal or a warm neutral)
- 4 mm straight knitting needles
- One button, 20 mm diameter, cream or natural wood
- A tapestry needle for seaming and weaving ends
- Blocking mat and pins, or a clean towel
How to Make It
- Cast on 40 stitches using a long-tail cast on, which gives a neat, slightly stretchy edge suited to wrapping around a mug.
- Work in 2×2 rib (knit 2, purl 2) for 9 cm. The ribbing grips the mug without needing a seam: it stretches over the widest point and hugs back in.
- On the final row, cast off 4 stitches at the centre of the row to form a buttonhole, cast on 4 stitches in the same position, then cast off the remaining stitches. This keeps the buttonhole neat and prevents it from stretching out in use.
- Seam the short ends together using mattress stitch and a tapestry needle, leaving the button tab end open. Weave in all ends.
- Wet-block briefly by dipping the finished cosy in cool water, squeezing (do not wring) and pinning flat to the blocking mat or a towel. Leave to dry fully, about 4 hours.
- Sew the button to the opposite end from the buttonhole, centred, and fasten off. Fold flat for packaging.

Block-Printed Tea Towels
A single woodcut or lino motif, repeated in a grid across a natural cotton tea towel blank: simple, graphic, and unmistakably handmade without looking amateurish. The same block used on the pouches unifies the range further.
Print two or three colourways from the same palette, stack them folded and tied with jute on the stall, and they sell themselves. Flat, light, and foldable: these fit a large padded envelope. Large-letter rate in most postal systems.
What You Need
- Natural cotton tea towel blanks, approximately 70 cm x 50 cm, pre-washed and ironed
- Fabric block printing ink in cream, black or gold (same inks as the pouches)
- A lino cut or rubber block stamp with the motif already carved, approximately 8 cm square
- A flat foam brayer, 10 cm wide
- A firm flat surface covered with a folded blanket or felt for printing (a soft underlay helps the ink transfer cleanly)
- Baking paper and a dry iron
How to Make It
- Lay the tea towel flat on the padded surface and smooth out all creases with your hands. Any fold or bump will show as a broken print line.
- Roll a thin, even coat of fabric ink onto the brayer, then roll the loaded brayer across the stamp face until the motif is evenly coated but not flooded.
- Plan your grid first: for a 70 cm x 50 cm towel, five repeats across and three rows down, evenly spaced, creates a balanced all-over pattern. Mark the positions lightly with a chalk pencil before you begin stamping so you do not have to guess mid-print.
- Press the stamp firmly at the first marked position and hold for five seconds without rocking. Lift cleanly. Re-ink the brayer and stamp between each print: fabric ink dries quickly on the stamp face and a dry stamp gives a patchy impression.
- Once all repeats are printed, leave the towel flat and untouched for at least 90 minutes.
- Lay baking paper over the printed surface and press with a dry iron on medium-high for 30 to 45 seconds per section, moving the iron in slow circles. An adult must do this step. The heat-set ink is then machine-washable at 40 degrees.

🛍 Shopping guide
Pressed Herb Sachets, Resin-Free
Dried lavender or rosemary sealed inside a small organza or muslin square, face decorated with a pressed sprig of the same herb laid under a strip of clear iron-on adhesive film, then tied with the same cream grosgrain ribbon used across the range.
No resin, no silicone, no special equipment beyond an iron. These are fragrant, flat, and photogenic in a shallow basket. They fit a padded envelope at large-letter rate. Sell in threes with the stems fanned so they photograph like a bouquet.
What You Need
- 6 natural muslin or organza squares, 10 cm x 10 cm, hemmed or heat-sealed on all edges
- Dried lavender or rosemary, approximately one heaped tablespoon per sachet
- Pressed herb sprigs (same herb), pressed and dried for at least 3 weeks
- Clear iron-on adhesive hem tape, 2 cm wide (found in sewing and fabric shops)
- Cream grosgrain ribbon, 10 mm wide, 25 cm per sachet
- An iron set to medium heat, no steam
How to Make It
- Spoon one heaped tablespoon of dried herb into the centre of a muslin square. Gather the four corners together and pinch them firmly so the herbs sit in a tight bundle at the bottom.
- Wrap the ribbon around the gathered neck of the sachet three times and tie a tight knot, then a bow on top of the knot. The sachet should feel firm, not floppy.
- Cut a 9 cm length of iron-on adhesive tape and lay it sticky-side down on the front of the sachet pouch, just below the ribbon gather.
- Lay a pressed herb sprig along the centre of the tape, face up, so it is framed by the fabric around it.
- Cover with a sheet of baking paper and press with a medium-heat dry iron for 15 seconds. An adult must use the iron. The tape bonds the sprig to the fabric without glue, resin or any visible fixative.
- Leave to cool for five minutes before touching: the tape is very hot immediately after pressing and can lift if moved too soon.

🛍 Shopping guide
Soy Wax Melts in Kraft Boxes
One scent, one mould shape (a simple round or snowflake cavity), packaged in a folded kraft box with a single stamped label. The visual impact comes from opening a box to find six identical melts nested in tissue, not from variety.
Make these in the same session as the teacup candles to share the melted wax: pour candles first (they need exact temperature), then lower the remaining wax slightly and pour the melt moulds with whatever is left.
These fit a padded envelope: they are flat, light and robust. Large-letter rate in most postal systems.
What You Need
- 200 g natural soy wax flakes
- Fragrance oil, same scent as the teacup candles, 6% by weight (approximately 12 g)
- A silicone mould with round or snowflake cavities, each cavity approximately 15 ml
- A metal pouring jug and a kitchen thermometer
- Kraft folding gift boxes, 10 cm x 8 cm x 2 cm, one per six melts
- Cream tissue paper, one sheet per box
- Stamped kraft labels, same as used across the range
How to Make It
- Melt the soy wax in the pouring jug over a bain-marie until it reaches 75 degrees C. An adult must handle the hot wax throughout.
- Remove from heat and cool to 60 degrees C, then stir in the fragrance oil for a full minute. Use a thermometer: pouring too hot burns the scent away.
- Pour the wax into the mould cavities slowly and evenly, filling each one to just below the lip. A small tip: pour from a low height so air bubbles do not form.
- Leave undisturbed for at least two hours. Soy wax sets slowly and any movement while it is setting creates a rough, uneven surface. After two hours, the tops should be fully opaque and smooth.
- Chill the mould in the fridge for 30 minutes if the melts resist popping out. Flex the silicone gently from the underside rather than pulling from the top, and they will release cleanly.
- Line a kraft box with a sheet of cream tissue, nestle six melts inside in two rows, fold the box closed and press the stamped label across the opening flap to seal it.

🛍 Shopping guide
Frequently Asked Questions
What Christmas crafts to sell are cheapest to post?
Pressed flower bookmarks, beaded bow keychains, herb sachets, linen zip pouches, knitted mug cosies, embroidered stocking cuffs and printed tea towels all fit a large letter or padded letter envelope in most postal systems, keeping postage costs low.
Marbled glass ornaments, wood slice coasters, bottle cap wreaths and mini gift crates are heavier or fragile and need a small rigid parcel, so price those with postage built in.
What sells best at a Christmas craft fair?
Practical gifts with a clear use, a visible handmade quality and a price under the amount people spend without thinking twice. Wax melts, firestarter bundles, beeswax candles and small textiles sell steadily because buyers understand them instantly.
A curated stall where every item shares a palette and a finish sells faster than an eclectic one: buyers who stop for one thing often pick up two or three more from a collection that reads as a set.
How do I price Christmas crafts to sell?
Start with your total material cost per piece, including packaging. Multiply that by three for a wholesale price and by six for a retail price.
Then check your time: divide your desired hourly rate by the number of pieces you can produce in an hour and add that to the retail price.
If the result feels high for the market, look for ways to reduce material cost or speed up production through batching, not by lowering your margin.
Postage for online sales should be calculated separately and either charged to the buyer or folded into the item price.
When should I start making Christmas crafts to sell?
Most experienced market sellers begin production in late summer for a November or December fair. Pieces with long lead times, such as pressed flower bookmarks (three weeks of pressing), knitted cosies and embroidered cuffs, need the longest runway.
Wax items, stamps and printed textiles can be made in faster batches closer to the season. For Etsy, list items at least eight weeks before the main shopping period so the algorithm has time to index them before peak search traffic arrives.

18 christmas activities for kids preschool age, all thick lines and big shapes. Ten free printables
Sabrina Carpenter Christmas Aesthetic: 20 Retro Glam Decor Ideas in Baby Pink, Satin Bows and Tinsel
Sabrina Carpenter Christmas aesthetic decor for a whole house: baby pink, cherry red and cream, sati

20 plaid Christmas decor ideas for a tartan cabin look, room by room, with tartan throws, buffalo ch
Leave a Reply