

No oven, no piping bag, no pastry school. These 12 birthday treats are assembled from good ingredients with one deliberate move each: a crack of chocolate bark, a neat layer of cream, a coat of gold sprinkles. That one move is what separates them from a supermarket shelf. Mixed audience means every recipe here is completely alcohol-free and safe for kids and adults together. Common allergens (dairy, gluten, nuts) are flagged at the top of each recipe. Need inspiration for what to do once the food is on the table? The 25 Birthday Party Games for Every Age and Any Budget list has you covered, and the Berry Sweet Birthday Party ideas pair beautifully with half the recipes below.
This post contains affiliate links. If you buy through them, I may earn a small commission at no extra cost to you.
- Chocolate Bark Broken Into Shards
- Berry and Cream Layer Glasses
- Chocolate Dipped Strawberries Rolled in Crumbs
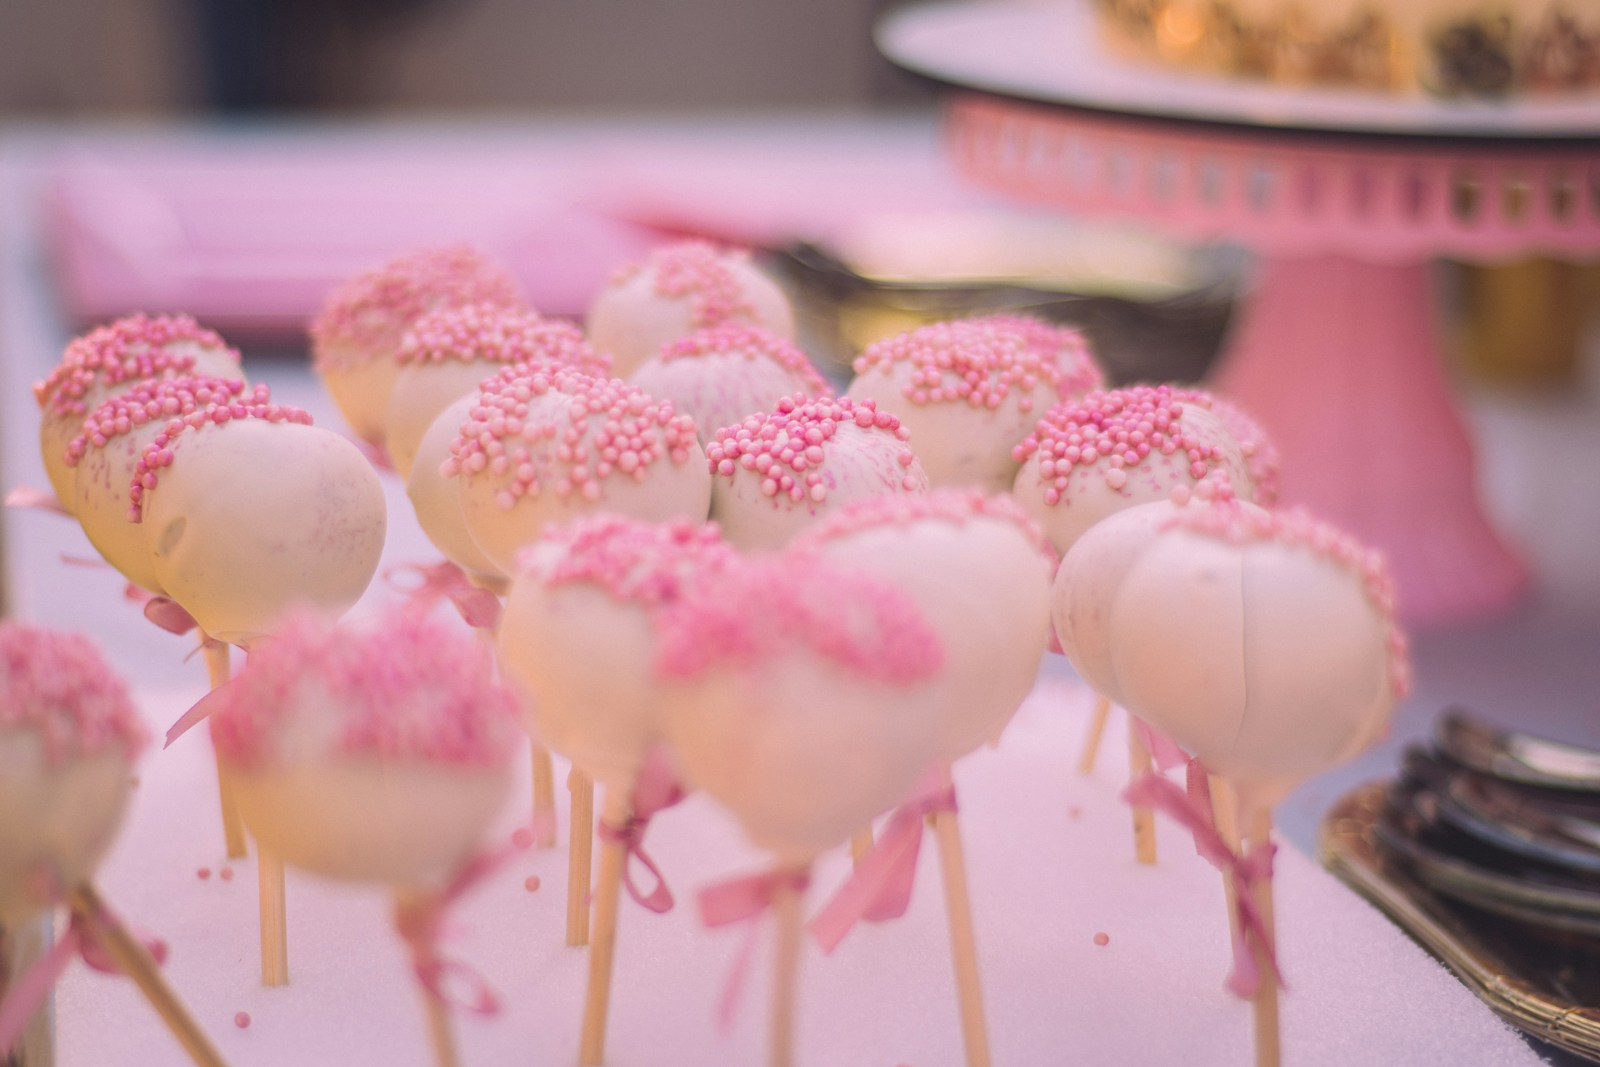
- Marshmallow Pops Rolled in Sprinkles
- No Bake Cheesecake Jars
- Rice Krispie Squares Cut and Iced
- Biscuit Sandwiches With Cream Between
- Truffles Rolled by Hand and Boxed
- Fruit Skewers Threaded on Paper Straws
- Yoghurt Bark Broken Into Pieces
- Popcorn Tossed With Chocolate and Bagged
- Ice Cream Sandwiches Made From Shop Biscuits
- Frequently Asked Questions
Chocolate Bark Broken Into Shards
The visual hook here is pure colour. Bright freeze-dried raspberries and chopped pistachios land on dark chocolate before it sets, and when you snap the slab into jagged shards the contrast is genuinely striking. No mold, no thermometer, no skill required. Make it the night before and keep it in a cool room, not the fridge, so the chocolate stays glossy. Contains dairy (depending on chocolate choice) and nuts.
Swap the pistachios for sunflower seeds if the party has a nut allergy. White chocolate on top of dark, drizzled in a thin zigzag before the toppings go on, adds a second colour without any extra effort.
Ingredients
- 300 g dark chocolate (70%), finely chopped
- 30 g freeze-dried raspberries
- 30 g shelled pistachios, roughly chopped
- 2 tablespoons rainbow sprinkles
- 1 teaspoon flaky sea salt
- 50 g white chocolate, finely chopped (for drizzle)
Instructions
- Line a large baking sheet with parchment paper and set it on a flat surface.
- Melt the dark chocolate in a heatproof bowl set over a pan of barely simmering water, stirring until completely smooth, then remove from the heat.
- Pour the melted dark chocolate onto the lined sheet and spread it into a rough rectangle about 5 mm thick using a spatula.
- Melt the white chocolate the same way, then drizzle it over the dark layer in thin zigzag lines using a spoon.
- Scatter the freeze-dried raspberries, pistachios, sprinkles and sea salt evenly across the surface before the chocolate begins to firm.
- Leave at room temperature for 30 minutes until fully set, then lift the slab and snap it into irregular shards by hand.

🛍 Shopping guide
Berry and Cream Layer Glasses
Layers are the trick. Spoon them carefully and the stripes of deep red berry compote against white cream are enough to make people reach for their phones before their spoons. Use small tumblers or jam jars for a casual party, or proper dessert glasses for something that feels more considered. Contains dairy.
Make the compote up to two days ahead and refrigerate it. Assemble the glasses up to four hours before the party and keep them chilled. The cream needs to be whipped to soft peaks only; stiff cream looks wrong through glass.
Ingredients
- 400 g mixed berries (fresh or frozen and thawed), divided
- 3 tablespoons caster sugar
- 1 tablespoon lemon juice
- 400 ml double cream
- 2 tablespoons icing sugar
- 1 teaspoon vanilla extract
- 100 g digestive biscuits, crushed to coarse crumbs
- Extra whole berries to finish
Instructions
- Warm 250 g of the berries in a small saucepan with the caster sugar and lemon juice over medium heat for 5 minutes, stirring until the sugar dissolves and the fruit breaks down into a loose compote. Remove from the heat and allow to cool completely.
- Whip the double cream with the icing sugar and vanilla extract until it holds soft peaks.
- Spoon a tablespoon of biscuit crumbs into the base of each glass.
- Add a layer of whipped cream, then a spoonful of berry compote, then a few of the remaining fresh berries.
- Repeat the cream and compote layers once more, finishing with a swirl of cream and a whole berry on top.

🛍 Shopping guide
Chocolate Dipped Strawberries Rolled in Crumbs
A plain chocolate-dipped strawberry is fine. One rolled in crushed golden biscuits or toasted coconut while the chocolate is still wet becomes something people actually talk about. The crumb coat is the trick: it adds crunch you can hear. Contains dairy and gluten (check the biscuits). Nut-free as written.
Dip and roll these on the same evening you plan to serve them. The strawberries weep moisture after about 12 hours and the chocolate loses its snap. Pat the berries completely dry before dipping or the chocolate slides straight off.
Ingredients
- 20 large strawberries, washed and dried thoroughly
- 200 g milk chocolate, finely chopped
- 100 g white chocolate, finely chopped
- 60 g shortbread biscuits, blitzed to fine crumbs
- 40 g desiccated coconut, lightly toasted
- 2 tablespoons hundreds-and-thousands sprinkles
- 1 teaspoon coconut oil (to thin the chocolate)
Instructions
- Line a tray with parchment and set three small shallow bowls with the shortbread crumbs, toasted coconut and sprinkles each in one.
- Melt the milk chocolate with half the coconut oil in a heatproof bowl over simmering water, stirring until smooth.
- Melt the white chocolate with the remaining coconut oil in a separate bowl the same way.
- Hold a strawberry by the hull and dip it two-thirds into the milk chocolate, letting the excess drip back into the bowl for a few seconds.
- Immediately roll the lower half of the dipped berry through one of the crumb bowls, pressing gently so the coating sticks.
- Place on the lined tray and repeat with all berries, varying the coatings and alternating between milk and white chocolate for colour contrast.
- Leave at room temperature for 20 minutes until the chocolate is completely set.

Marshmallow Pops Rolled in Sprinkles
Marshmallow pops are the easiest thing on this list and the most photogenic. Thread a large marshmallow onto a paper straw, dip it in melted white chocolate, then roll it straight into a bowl of jumbo rainbow sprinkles before the chocolate sets. The visual hook is the dense, colourful crust against the white puff underneath. Contains dairy and gelatin. Naturally gluten-free.
Make these up to 24 hours ahead and stand them upright in a glass or a foam block to set and store. Do not stack or bag them until the chocolate is completely firm or the sprinkles transfer and smear.
Ingredients
- 16 large marshmallows
- 16 paper straws or cake-pop sticks
- 200 g white chocolate, finely chopped
- 1 teaspoon vegetable oil
- 80 g jumbo rainbow sprinkles
- 30 g pink sanding sugar
- Gold or silver edible glitter (optional, about 1 tablespoon)
Instructions
- Push a paper straw or stick firmly through the flat base of each marshmallow, stopping about halfway through so it holds without tearing out the top.
- Melt the white chocolate with the vegetable oil in a heatproof bowl over simmering water, stirring until completely smooth, then transfer to a deep narrow cup (a mug works) for easier dipping.
- Set three shallow bowls with the jumbo sprinkles, sanding sugar and edible glitter.
- Dip each marshmallow into the melted chocolate, twisting as you lift to coat it evenly and let the excess fall away.
- Roll the coated marshmallow immediately through the sprinkle or sugar bowl of your choice.
- Stand the finished pops upright in a glass or foam block and leave for at least 15 minutes until the chocolate is firm.

No Bake Cheesecake Jars
Individual jars mean no slicing, no serving anxiety and a built-in vessel for transport. The visual hook is a clean three-layer column visible through the glass: golden crumb, white cream cheese filling, glossy fruit topping. Chill them, lid on, and they travel well. Contains dairy and gluten.
The filling can be made up to two days ahead and piped into jars the morning of the party. Keep them refrigerated and add the fruit topping within two hours of serving so it stays bright and glossy.
Ingredients
- 200 g digestive biscuits, crushed to fine crumbs
- 80 g unsalted butter, melted
- 450 g full-fat cream cheese, at room temperature
- 150 ml double cream
- 80 g icing sugar, sifted
- 2 teaspoons vanilla extract
- 1 tablespoon lemon juice
- 250 g strawberry or raspberry jam
- 200 g fresh raspberries or sliced strawberries
Instructions
- Stir the biscuit crumbs and melted butter together until every crumb is coated, then press 2 heaped tablespoons of the mixture firmly into the base of each jar.
- Beat the cream cheese with the icing sugar, vanilla extract and lemon juice in a large bowl until smooth and no lumps remain.
- Whip the double cream in a separate bowl to soft peaks, then fold it gently into the cream cheese mixture until just combined.
- Spoon or pipe the filling over the crumb base in each jar, filling to about two-thirds full, then smooth the top with a small spoon.
- Refrigerate the filled jars for at least 2 hours until the filling is firm and set.
- Stir the jam in a small bowl to loosen it, then spoon a layer over each jar and arrange the fresh fruit on top before serving.

Rice Krispie Squares Cut and Iced
The trick is the icing. A plain Rice Krispie square is a bake-sale staple. Score it into neat rectangles, then pipe a line of brightly coloured royal icing across the top of each one and add a single large sprinkle while it is still wet, and you have something that looks considered. The crunch, audible when you bite, is the sensory hook. Contains dairy and gluten.
Press the mixture into the tin as soon as it comes together: it sets fast and becomes impossible to smooth if you pause. Line the tin with overlapping parchment so the slab lifts out cleanly in one piece. Cut into squares before icing, not after.
Ingredients
- 50 g unsalted butter
- 300 g marshmallows
- 180 g puffed rice cereal (Rice Krispies)
- 1 teaspoon vanilla extract
- 150 g royal icing sugar
- 2 tablespoons water
- Pink or yellow gel food colouring
- 16 large statement sprinkles or sugar stars (one per square)
Instructions
- Line a 20 x 20 cm tin with two sheets of overlapping parchment and lightly grease it.
- Melt the butter in a large heavy-based saucepan over medium heat. Add the marshmallows and stir continuously until completely melted and smooth. Remove from the heat and stir in the vanilla extract.
- Tip the puffed rice cereal into the pan and stir quickly until every piece is coated in the marshmallow mixture.
- Transfer to the prepared tin immediately, press down firmly into an even layer using a lightly greased spatula or your hands, and leave to set at room temperature for 30 minutes.
- Lift the slab from the tin and cut into 16 equal squares.
- Whisk the royal icing sugar with the water and a small amount of gel food colouring until smooth and thick but pipeable. Pipe a stripe across the top of each square and press a statement sprinkle into the wet icing. Leave to dry for 10 minutes before serving.

Biscuit Sandwiches With Cream Between
Two biscuits and a filling between them: the oldest concept on this list and the one most people underestimate. The trick is the filling colour. Tint the buttercream bright pink or coral, press the biscuits together until the cream squeezes to the edge in an even ring, then roll that exposed edge through sprinkles. The layered cross-section is the visual hook. Contains dairy and gluten.
These hold at room temperature for up to 6 hours, which makes them good candidates for a treat table. Use round biscuits with a flat base for the cleanest edge. Bourbon creams, digestives or plain round shortbreads all work well.
Ingredients
- 24 round flat biscuits (digestives or plain shortbread rounds)
- 120 g unsalted butter, softened
- 220 g icing sugar, sifted
- 2 tablespoons whole milk
- 1 teaspoon vanilla extract
- Pink or coral gel food colouring
- 60 g fine sprinkles or hundreds-and-thousands (for the edge)
Instructions
- Beat the softened butter with an electric hand mixer until pale and fluffy, about 2 minutes.
- Add the sifted icing sugar in two batches, beating well between each addition. Pour in the milk and vanilla extract and beat until the buttercream is smooth and creamy.
- Add a small amount of gel food colouring and beat again until the colour is even throughout. Adjust the shade with more colouring if needed.
- Spoon or pipe a generous tablespoon of buttercream onto the flat side of one biscuit, then press a second biscuit on top, flat side down, until the cream reaches the edge in a neat ring.
- Pour the sprinkles into a shallow bowl and roll the exposed buttercream edge of each sandwich through them, pressing lightly so they adhere.
- Arrange on a plate or board to serve, or store in a single layer in a box.

Truffles Rolled by Hand and Boxed
Hand-rolled chocolate truffles boxed in a small gift box are the birthday treat that reads as the most effortful and requires the least equipment. Ganache, a bowl, a hand, and a coating: that is the entire process. Roll some in cocoa powder, some in finely chopped freeze-dried strawberries, some in rainbow sprinkles. The three-colour assortment in a box is the visual hook. Contains dairy. Gluten-free.
The ganache needs at least 2 hours in the fridge to firm enough to roll, so make it the night before. Cold hands roll cleaner truffles: run them under cold water and dry them thoroughly between batches.
Ingredients
- 200 g dark chocolate (70%), finely chopped
- 120 ml double cream
- 20 g unsalted butter, cut into small cubes
- 1 tablespoon golden syrup
- 1 teaspoon vanilla extract
- 30 g cocoa powder (for rolling)
- 20 g freeze-dried strawberry powder (for rolling)
- 30 g rainbow sprinkles (for rolling)
Instructions
- Place the chopped chocolate in a heatproof bowl. Heat the double cream in a small saucepan over medium heat until it just begins to simmer, then pour it over the chocolate. Leave for 2 minutes without stirring.
- Add the butter, golden syrup and vanilla extract, then stir from the centre outward in slow circles until the ganache is completely smooth and glossy.
- Cover the bowl with cling film and refrigerate for at least 2 hours until firm enough to scoop.
- Set three shallow bowls with the cocoa powder, strawberry powder and rainbow sprinkles.
- Scoop heaped teaspoons of ganache and roll each one quickly between cold palms into a rough ball. Work fast as the ganache melts in warm hands.
- Drop each ball into a coating bowl and roll to cover, then lift out and place on a parchment-lined tray. Refrigerate the finished truffles for 20 minutes before boxing.

Fruit Skewers Threaded on Paper Straws
A fruit platter is passive. A fruit skewer on a paper straw is a birthday treat you can pick up and eat. Thread the fruit in a deliberate colour sequence, warm tones first: mango, pineapple, orange segments, then a pink strawberry at the top. That gradient is the visual hook, and it needs no cooking, no sugar, nothing but a sharp paring knife and a little patience. Naturally vegan, gluten-free and nut-free.
Thread the skewers up to 4 hours ahead and keep them on a tray covered with damp kitchen paper in the fridge. Serve with a small bowl of lime-spiked honey for dipping: 3 tablespoons of runny honey stirred with the juice of half a lime.
Ingredients
- 1 small ripe mango, peeled and cut into 2 cm cubes (about 200 g)
- 200 g fresh pineapple, cut into 2 cm cubes
- 2 large oranges, peeled and segmented
- 200 g large strawberries, hulled
- 150 g red grapes
- 3 tablespoons runny honey
- Juice of half a lime
- 16 paper straws (sturdy, not wax-coated)
Instructions
- Prepare all the fruit and lay it out in separate groups by colour so you can thread in sequence.
- Stir the honey and lime juice together in a small dipping bowl and set aside.
- Thread each paper straw in the order: one cube of pineapple, one cube of mango, one orange segment folded in half, one grape, then one strawberry at the top, pushing each piece down firmly so the straw holds them without bowing.
- Lay the finished skewers on a tray lined with kitchen paper as you go, arranging them so the colours face the same direction.
- Cover with damp kitchen paper and refrigerate until needed, then serve alongside the honey-lime dipping sauce.

Yoghurt Bark Broken Into Pieces
Yoghurt bark looks like an art project. Spread thick Greek yoghurt onto a lined tray, add a swirl of strawberry jam through it, then scatter fresh kiwi slices and pomegranate seeds across the surface before it freezes. The visual hook is the jewelled surface: deep red and bright green against white. Break it into rough pieces straight from the freezer. Naturally gluten-free. Contains dairy.
This one has to stay frozen until the moment it is served. It softens fast at room temperature, so it is not a candidate for a treat table left out for an hour. Bring it out, pass it round, and eat it cold. The contrast between the frozen yoghurt and the fresh fruit pieces is the point.
Ingredients
- 500 g full-fat Greek yoghurt
- 2 tablespoons honey
- 1 teaspoon vanilla extract
- 3 tablespoons strawberry jam
- 1 kiwi, peeled and thinly sliced
- 80 g pomegranate seeds
- 30 g freeze-dried strawberry slices
- 2 tablespoons desiccated coconut
Instructions
- Line a large baking sheet with parchment, making sure it sits completely flat in the freezer before you begin.
- Stir the Greek yoghurt, honey and vanilla extract together until combined, then spread the mixture onto the lined sheet in an even layer about 1 cm thick.
- Drop teaspoons of strawberry jam across the surface and use a skewer or toothpick to drag them into loose swirls.
- Arrange the kiwi slices across the top, then scatter over the pomegranate seeds, freeze-dried strawberry slices and desiccated coconut.
- Freeze for at least 2 hours until solid. Lift the frozen slab from the sheet and break it into rough pieces by hand or with a sharp knife. Keep frozen until the moment of serving.

Popcorn Tossed With Chocolate and Bagged
Popcorn dressed in chocolate and packed into clear cellophane bags tied with a ribbon is a party favour and a snack in one. The visual hook is the glossy shards of set chocolate coating each kernel: it looks like something from a cinema gift shop. Drizzle two colours of chocolate for extra drama. Contains dairy. Naturally gluten-free.
Bag the popcorn once the chocolate is fully set and the mixture is completely cool. Warm popcorn in a sealed bag steams itself into something soft and sad. Let it sit on a tray for at least 20 minutes before bagging. If you want a salty-sweet version, add half a teaspoon of flaky salt to the warm mixture before spreading.
Ingredients
- 90 g unpopped popcorn kernels (or 320 g ready-popped plain popcorn)
- 1 tablespoon vegetable oil (if popping from kernels)
- 150 g milk chocolate, finely chopped
- 80 g white chocolate, finely chopped
- 1 teaspoon coconut oil
- 30 g rainbow sprinkles
- Half a teaspoon flaky sea salt (optional)
Instructions
- If popping from kernels, heat the vegetable oil in a large lidded saucepan over medium-high heat. Add the kernels, cover and shake the pan occasionally until the popping slows to one pop every 3 seconds. Tip into a very large bowl and discard any unpopped kernels.
- Melt the milk chocolate with the coconut oil in a heatproof bowl over simmering water until smooth. Melt the white chocolate separately in the same way.
- Pour the milk chocolate over the popcorn and toss quickly with two large spoons until every piece has a thin coating.
- Spread the coated popcorn in a single layer across two parchment-lined trays.
- Drizzle the white chocolate in thin streams over the top and scatter over the sprinkles and sea salt if using.
- Leave at room temperature for 25 minutes until the chocolate is fully set and the popcorn is crisp, then divide into bags and seal.

🛍 Shopping guide
Ice Cream Sandwiches Made From Shop Biscuits
The shop does the hard work. Buy two types of good biscuit, choose an ice cream in a colour that contrasts with them, and press a thick slab between two biscuits. Roll the exposed ice cream edge in sprinkles and refreeze for 30 minutes. The visual hook is the clean layer of vivid ice cream visible from the side. Contains dairy and gluten.
Soften the ice cream at room temperature for 10 minutes before scooping: it needs to be pliable, not liquid. Work fast, freeze for at least 30 minutes after assembly, then wrap each sandwich individually in wax paper or cling film so they do not stick together. These must travel in a cooler with ice packs.
Ingredients
- 24 large flat biscuits (chocolate chip cookies, digestives or shortbread rounds)
- 1 litre good-quality strawberry or mango ice cream
- 80 g rainbow sprinkles
- 30 g pink or gold sanding sugar
Instructions
- Line a large tray that fits in your freezer with parchment and place it in the freezer to chill while you work.
- Remove the ice cream from the freezer and leave at room temperature for 10 minutes until it is soft enough to scoop but not runny.
- Scoop a generous 2-tablespoon ball of ice cream onto the flat side of one biscuit, then press a second biscuit on top, flat side down, applying even pressure until the ice cream reaches the edge in a level ring.
- Pour the sprinkles and sanding sugar into a shallow bowl and mix them together. Roll the exposed ice cream edge through the mixture, pressing gently to coat.
- Place each finished sandwich on the lined tray and return it to the freezer immediately.
- Freeze for at least 30 minutes until fully firm, then wrap each sandwich individually in a square of wax paper and store in the freezer until ready to transport.

Frequently Asked Questions
Which of these birthday treats can be made the day before?
Chocolate bark, truffles, no-bake cheesecake jars (without the fruit topping), biscuit sandwiches, marshmallow pops and chocolate-dipped popcorn all hold well overnight. Yoghurt bark can be frozen the night before and kept there. Chocolate-dipped strawberries and ice cream sandwiches are best made on the day.
Which treats work for a child’s birthday party?
Every recipe in this list is alcohol-free and suitable for children. Marshmallow pops, fruit skewers on paper straws, rice krispie squares and chocolate bark are the biggest hits with younger guests. Check allergen notes for each recipe if any guests have dairy, gluten or nut allergies.
How do I transport these birthday treats safely?
Most travel in a lidded tin or box at room temperature. Ice cream sandwiches and yoghurt bark must travel in a cooler with ice packs and stay frozen. Berry layer glasses need to travel upright in a chilled cool bag.
Do I need any special equipment for these no-bake treats?
A heatproof bowl for melting chocolate (a large ceramic bowl over a saucepan works), a hand mixer for the biscuit sandwich buttercream and the cheesecake filling, and a lined baking tray cover most of the list. Marshmallow pops benefit from a foam block for drying. Everything else uses standard kitchen kit.
How many birthday treats should I make per person?
For a mixed spread where guests help themselves, plan for 2 to 3 pieces per person across the whole table. If you are bringing one recipe as a gift or a contribution, a batch of 16 to 24 pieces covers 8 to 12 people comfortably when paired with other food.
Last July I showed up to a backyard potluck with a bag of chips and a store-bought container of past
If you’re craving something sweet without the carbs weighing you down, you’re in for a t
High cortisol levels wreak havoc on the body—causing anxiety, weight gain, poor sleep, and con
Leave a Reply