

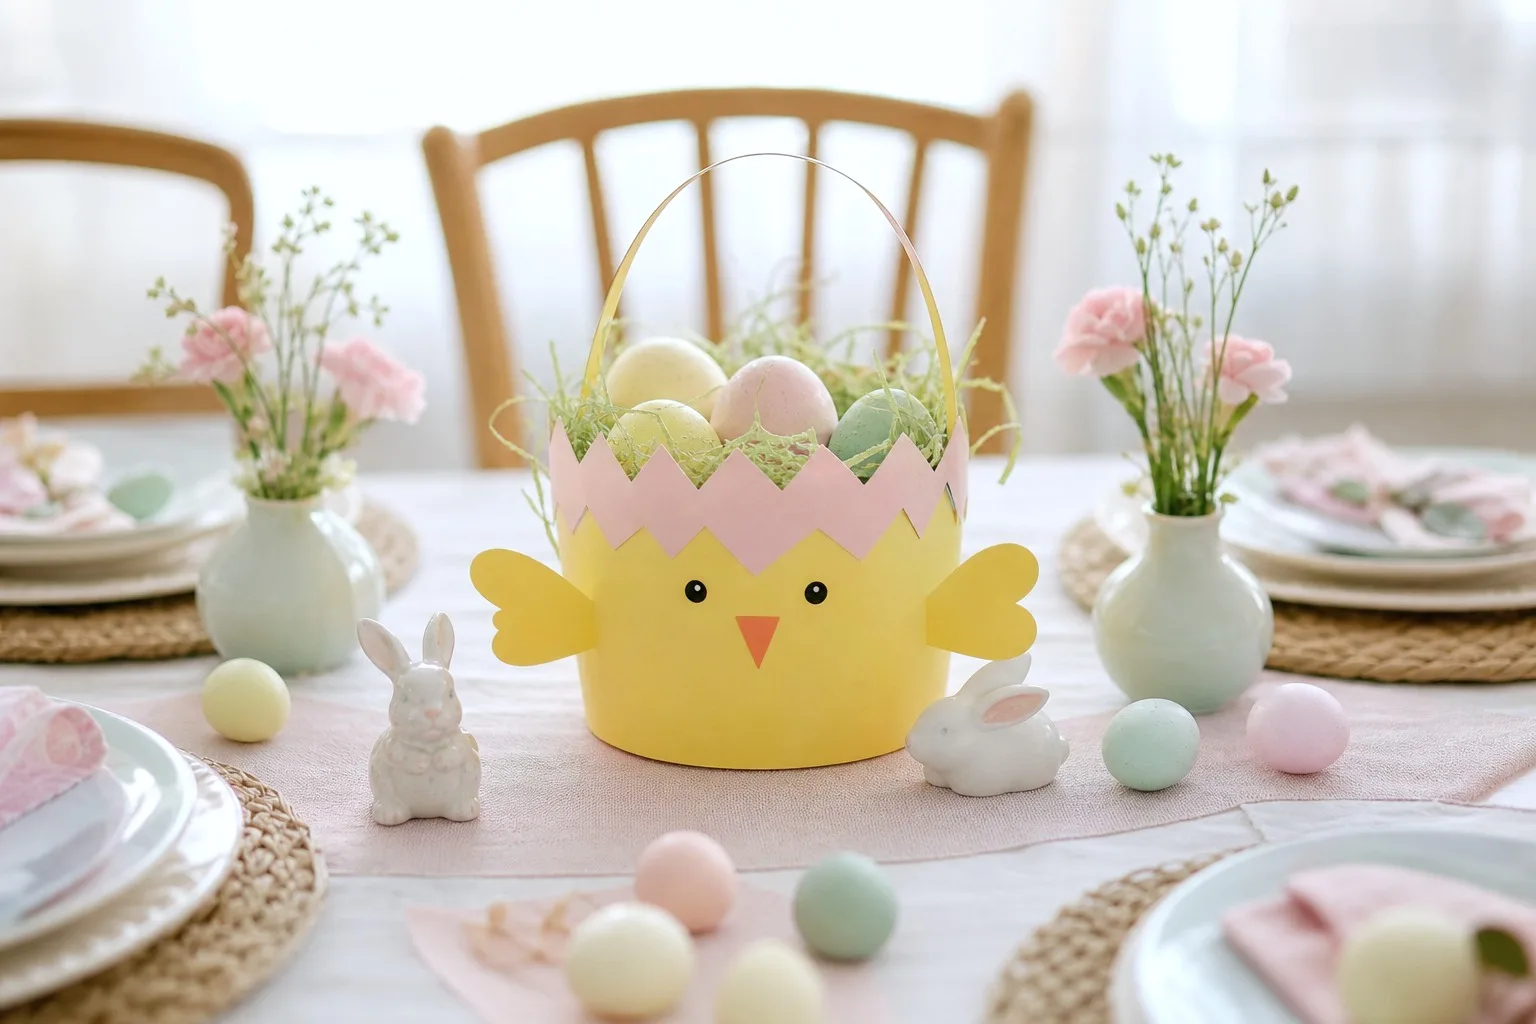
A toddler does not care about a neat edge or a straight line. She cares about the squelch of paint under a palm and the moment a blank page turns into a chick.
These twelve crafts are built around that: three to five things you likely already have, four to six steps short enough to survive a toddler’s attention span, and nothing small enough to go in a mouth. No googly eyes, no buttons, no loose pom poms rolling under the sofa.
Cover the table before you start and keep a damp cloth within reach, that is the whole of the prep talk.
If the egg hunt itself needs organising too, 22 Easter Party Games for Kids Beyond the Egg Hunt covers the rest of the afternoon, and 18 Indoor Easter Games You Can Play Right Now (No Setup Required) is worth bookmarking for the inevitable rainy one.
This post contains affiliate links. If you buy through them, I may earn a small commission at no extra cost to you.
Table of Contents
Handprint Chick
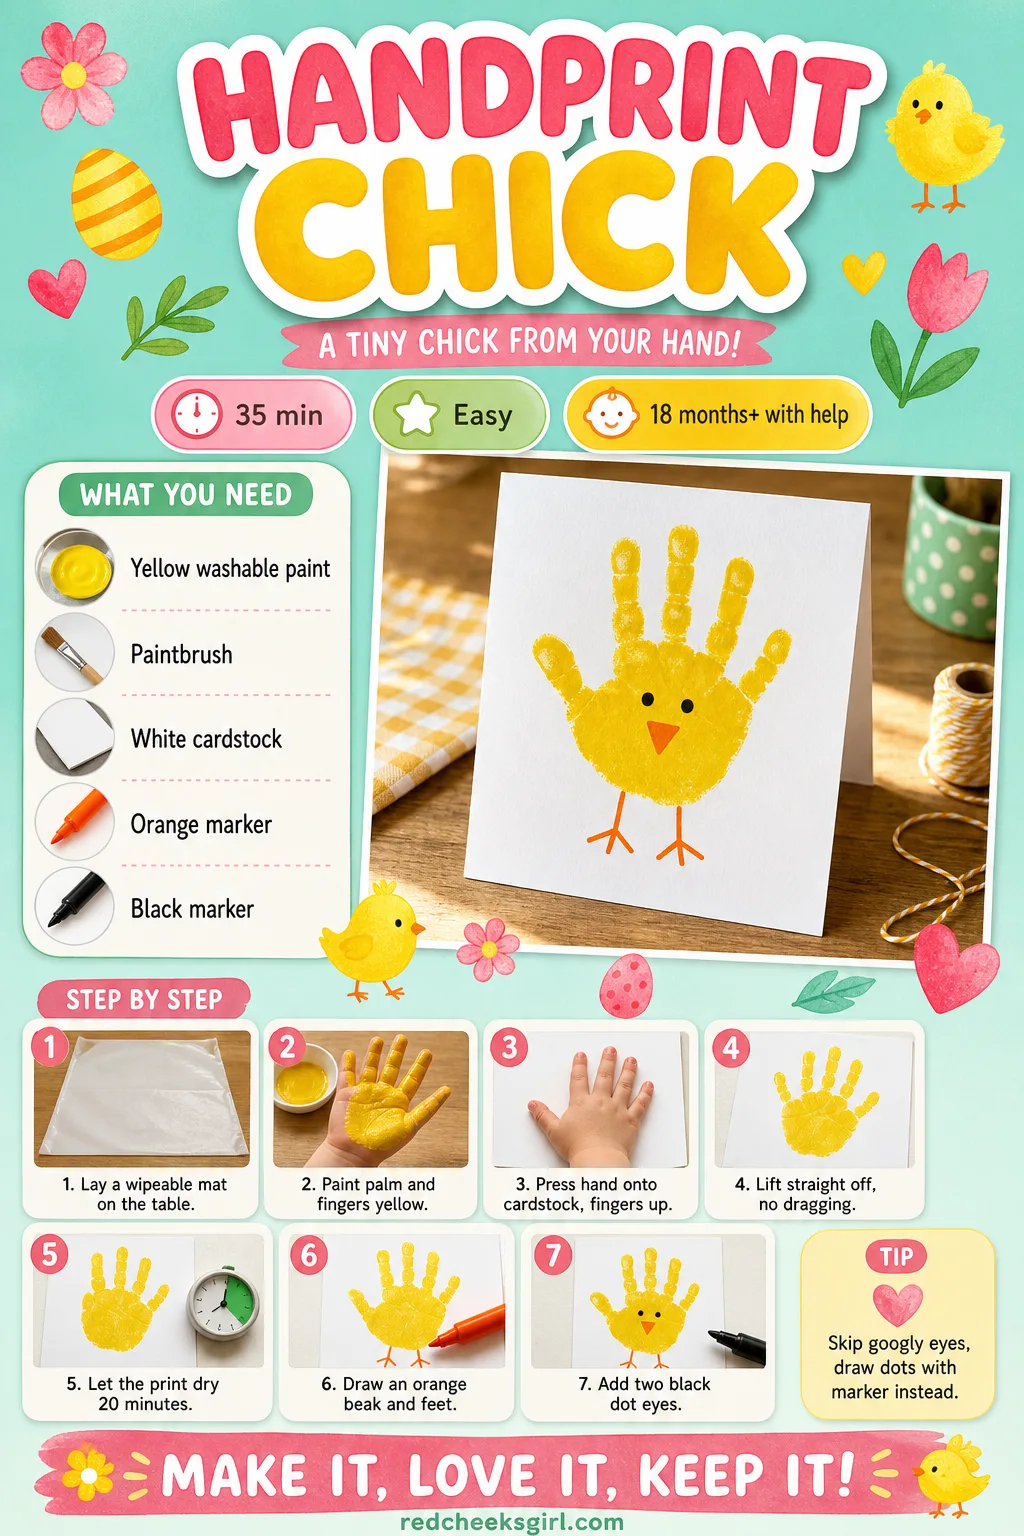
Give her yellow paint and a blank page and she already knows what to do with it, even if the result does not look like a chick until you add the beak. This one goes straight on the fridge or into a card for grandparents, the handprint itself is the keepsake, the marker details are just the finishing touch.
Skip the googly eyes here. A dot of black marker does the same job and never comes unstuck in little fingers.
Handprint Chick
What You Need
- Yellow washable paint
- 1 paintbrush or sponge
- A4 white cardstock
- Orange marker
- Black marker
How to Make It
- Lay down a wipeable mat before starting.
- Paint the child's palm and fingers yellow.
- Press the hand onto the cardstock, fingers up.
- Lift straight off without dragging the print.
- Let the print dry fully, about 20 minutes.
- Draw an orange beak and feet with marker.
- Add two black dot eyes to finish.
Good to Know
🛍 Shopping guide
Handprint Bunny
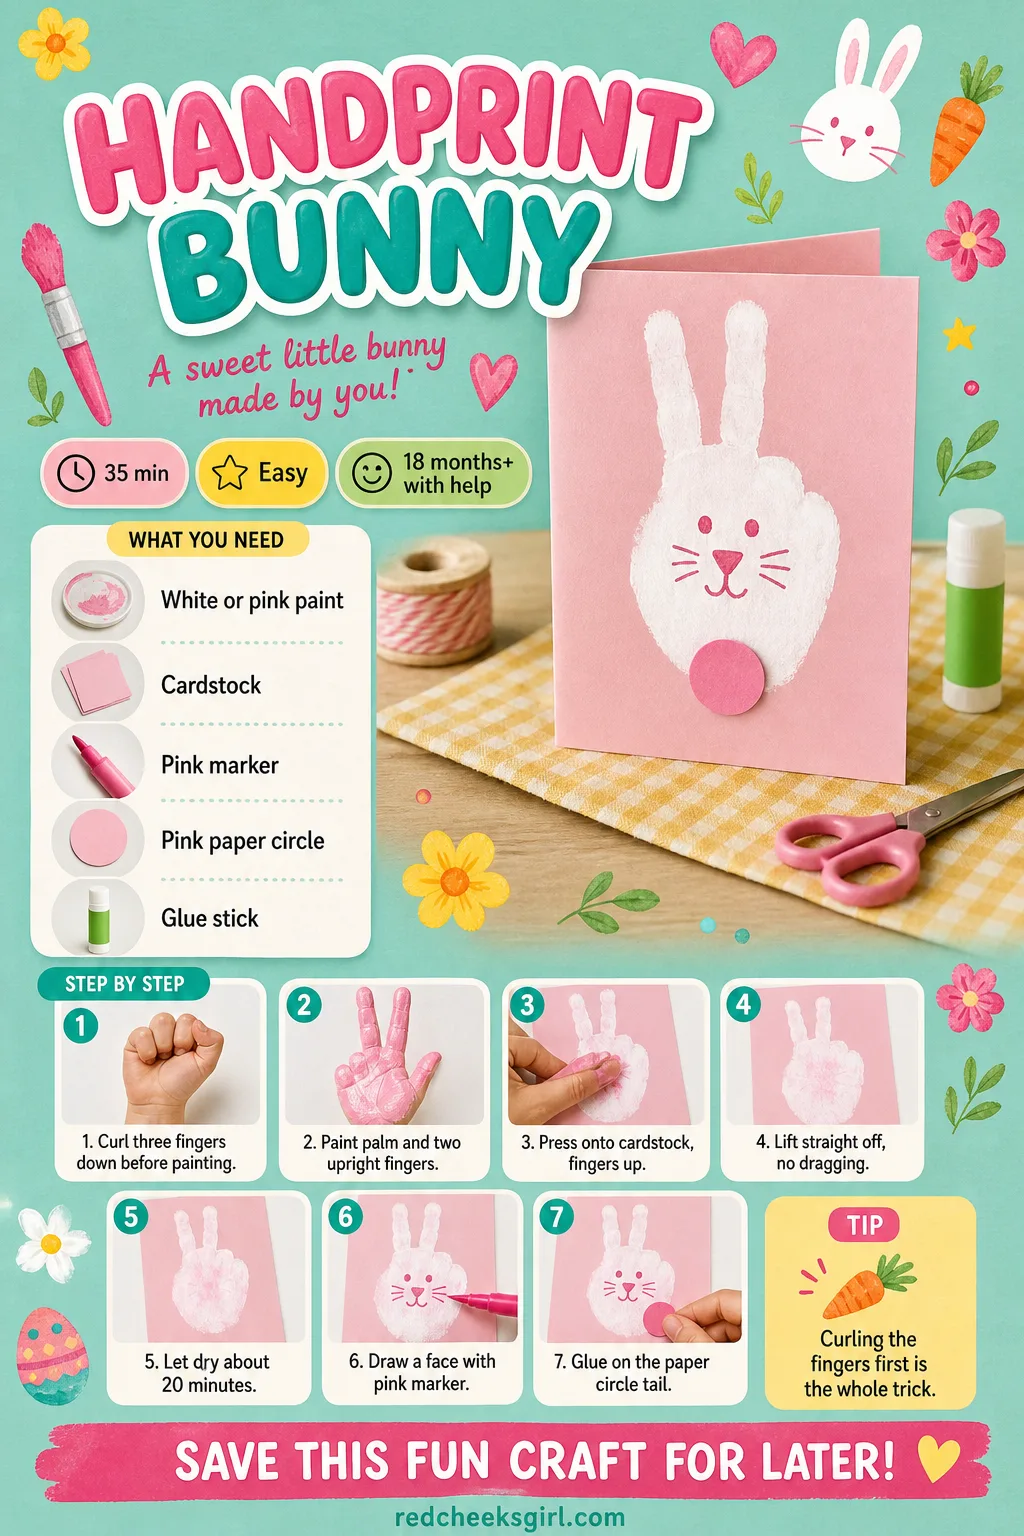
This one trades the whole spread hand for a trick: curl the thumb, ring finger and pinky down before painting, and only the two middle fingers stand up as ears. It takes a second to get right, but once it clicks the print does most of the work for you.
Pin it to a ribbon board instead of the fridge if you want it to last longer than the season, paint on paper fades fast in direct sun.
Handprint Bunny
What You Need
- White or pink washable paint
- A4 cardstock
- Pink marker
- 3cm pink paper circle
- Glue stick
How to Make It
- Curl thumb, ring finger and pinky down.
- Paint the palm and two remaining fingers.
- Press hand onto cardstock, fingers up.
- Lift straight off and let dry 20 minutes.
- Draw a round face in pink marker.
- Glue the paper circle on as the tail.
Good to Know
🛍 Shopping guide
Footprint Carrot
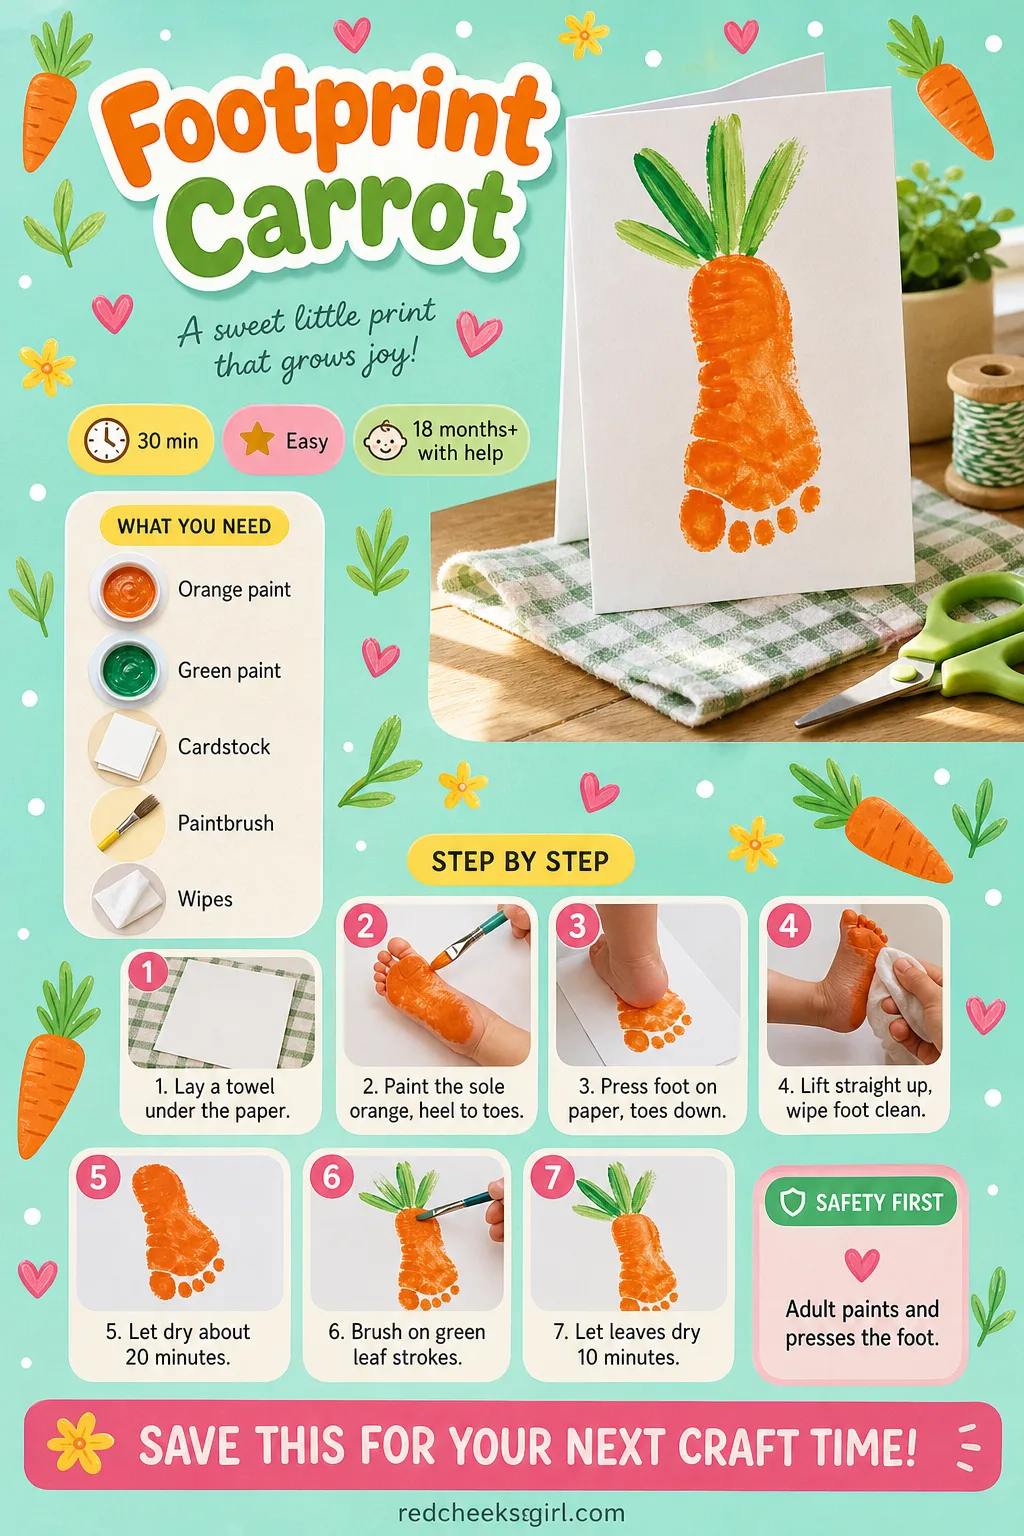
The sole of a toddler foot is naturally carrot shaped, which is the only reason this one works so well without anyone trying very hard. The heel becomes the leafy top, the toes taper into the point, and the whole thing looks intentional even though it is mostly luck.
Do this one outside or over a towel if you would rather not paint a foot indoors at all.
Footprint Carrot
What You Need
- Orange washable paint
- Green washable paint
- A4 cardstock
- 1 paintbrush
- Wipes
How to Make It
- Lay a towel under the paper.
- Paint the sole of the foot orange.
- Press foot onto cardstock, toes down.
- Lift straight up and wipe foot clean.
- Let the orange print dry 20 minutes.
- Brush green leaf strokes from the heel end.
- Let the leaves dry 10 more minutes.
Good to Know
🛍 Shopping guide
Fork Painted Chick
Nobody tells you the back of a dinner fork makes a surprisingly convincing feather texture, dragged and twisted in paint until the shape looks fluffy instead of flat. It is a strange little trick and toddlers genuinely like the motion of it, the dragging feels different from a normal brush stroke.
Use a fork you will not mind dedicating to craft duty from now on, or scrub it thoroughly before it goes back in the drawer.
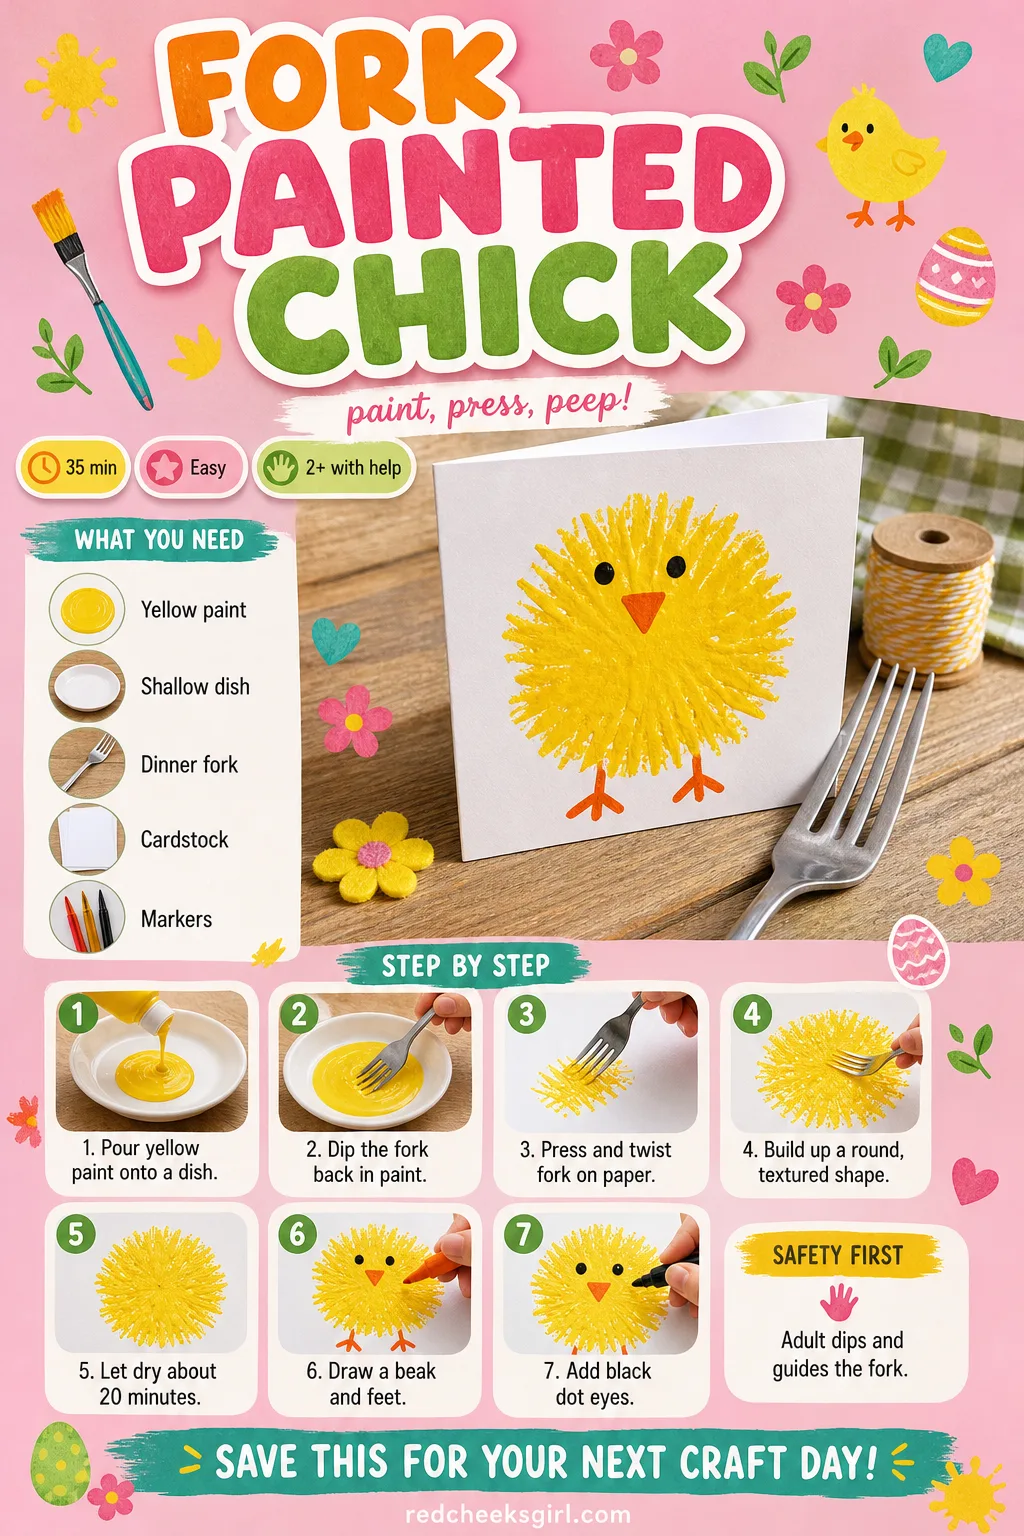
Fork Painted Chick
What You Need
- Yellow washable paint
- 1 shallow dish
- 1 dinner fork
- A4 cardstock
- Orange and black marker
How to Make It
- Pour yellow paint onto a shallow dish.
- Dip the back of the fork in paint.
- Press and twist the fork on the paper.
- Build up overlapping prints into a round shape.
- Let the texture dry about 20 minutes.
- Draw an orange beak and feet.
- Add black dot eyes to finish.
Good to Know
🛍 Shopping guide
Cotton Ball Bunny With Fluffy Tail
This is the one that actually smells like Easter, somehow, all that white against pale paper. The glue stays visible under the cotton for a minute or two, which is useful, it tells you exactly where there is still room to press one more ball on.
Draw the bunny outline yourself the night before if your toddler would rather jump straight to the fun part than wait for you to sketch it.
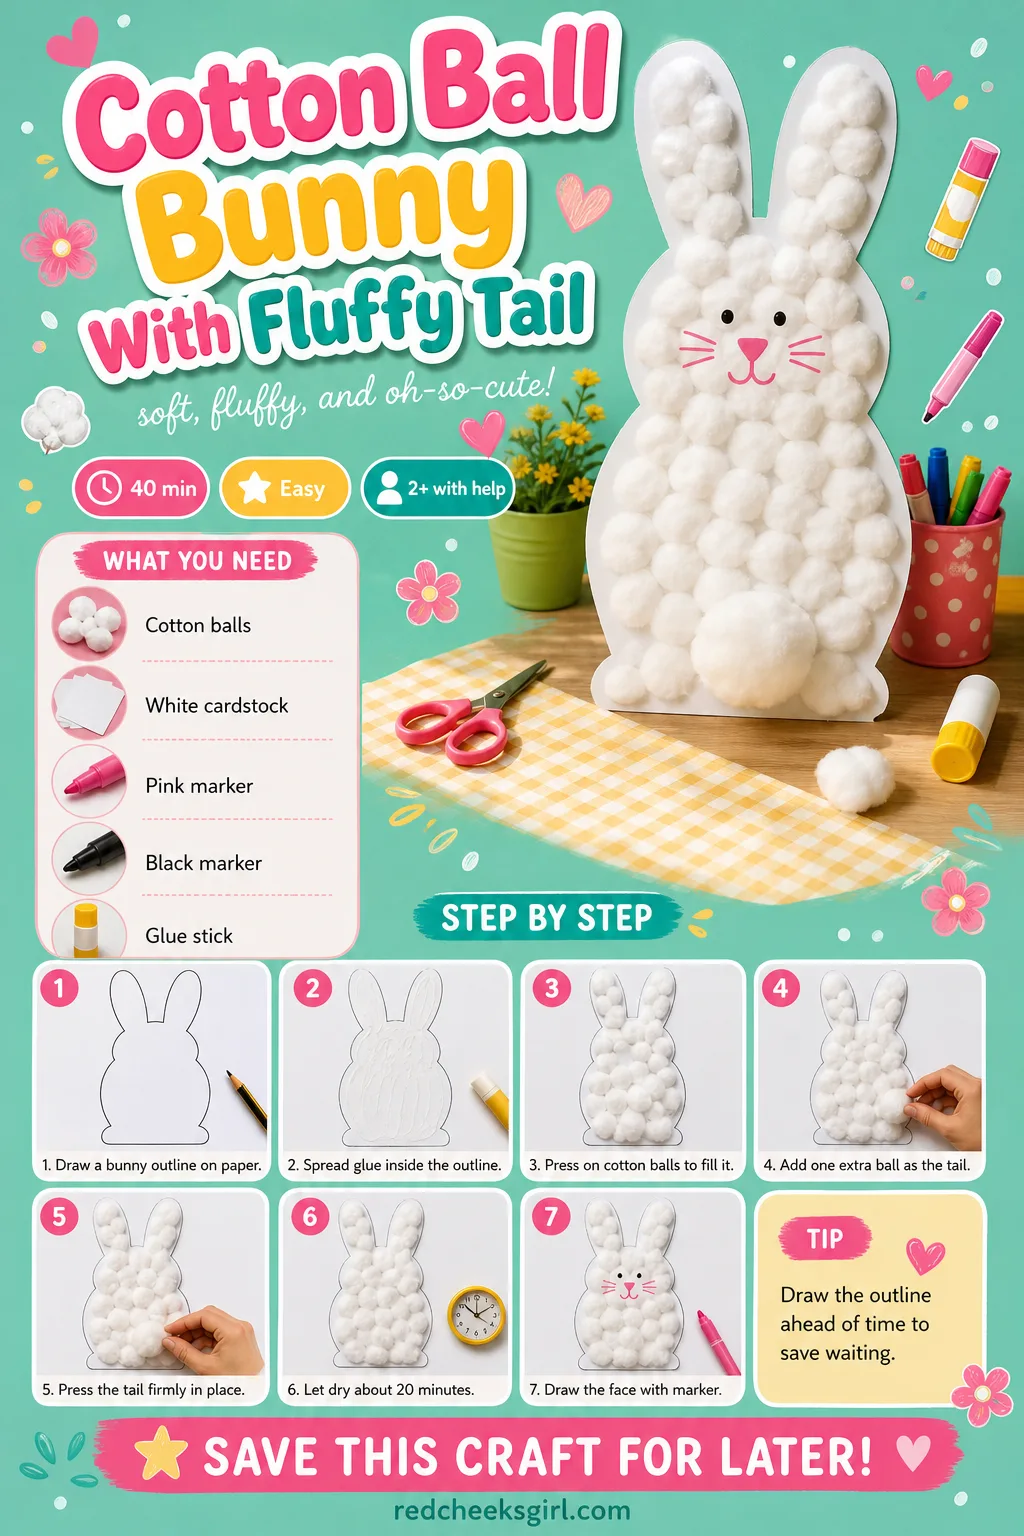
Cotton Ball Bunny With Fluffy Tail
What You Need
- 10-12 cotton balls
- White cardstock, A4
- Pink marker
- Black marker
- Glue stick
How to Make It
- Draw a bunny outline on the cardstock.
- Spread a thin layer of glue inside it.
- Press cotton balls onto the glued shape.
- Add one extra ball low down as the tail.
- Press the tail ball firmly to stand proud.
- Leave flat to dry about 20 minutes.
- Draw the face with marker.
Good to Know
🛍 Shopping guide
Paper Plate Easter Basket
She can decorate every inch of this one and the basket still holds up to being carried around the garden an hour later, which is more than you can say for most toddler craft. It genuinely gets used, that is the whole point of it.
Fill it with shredded paper and a few wrapped eggs once the paint has set, or hand it over empty for the egg hunt itself.
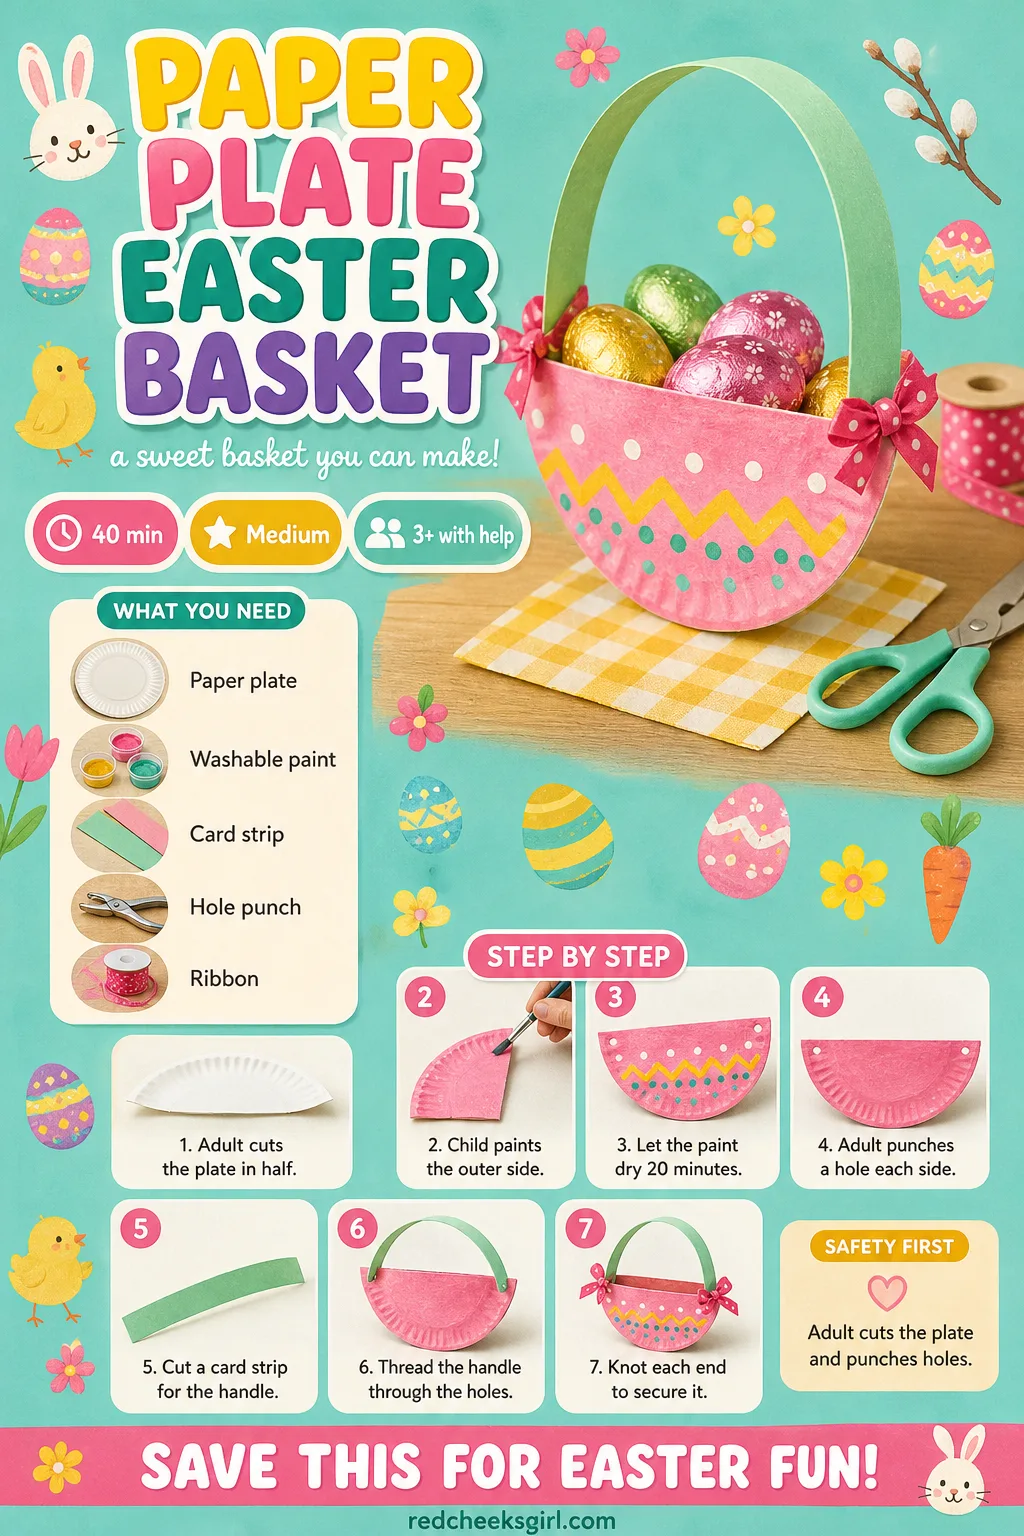
Paper Plate Easter Basket
What You Need
- 1 paper plate, 23cm
- Washable paint or crayons
- 1 card strip, 30cm
- Hole punch
- Ribbon or yarn, 40cm
How to Make It
- Adult cuts the paper plate in half.
- Child paints the outer side of one half.
- Let the paint dry about 20 minutes.
- Adult punches a hole on each side rim.
- Adult cuts a 30cm card strip for the handle.
- Thread the handle through both holes.
- Knot or tape each end to secure it.
Good to Know
🛍 Shopping guide
Bubble Wrap Printed Egg
This is the craft to reach for on a day she wants to paint but you cannot face the full palm-print clean-up. The bubbles print a dotted, slightly speckled pattern that looks deliberately pretty, and the technique itself, pressing rather than brushing, suits short attention spans.
Tape the bubble wrap down first or it slides around under the paint and the print comes out smeared instead of crisp.
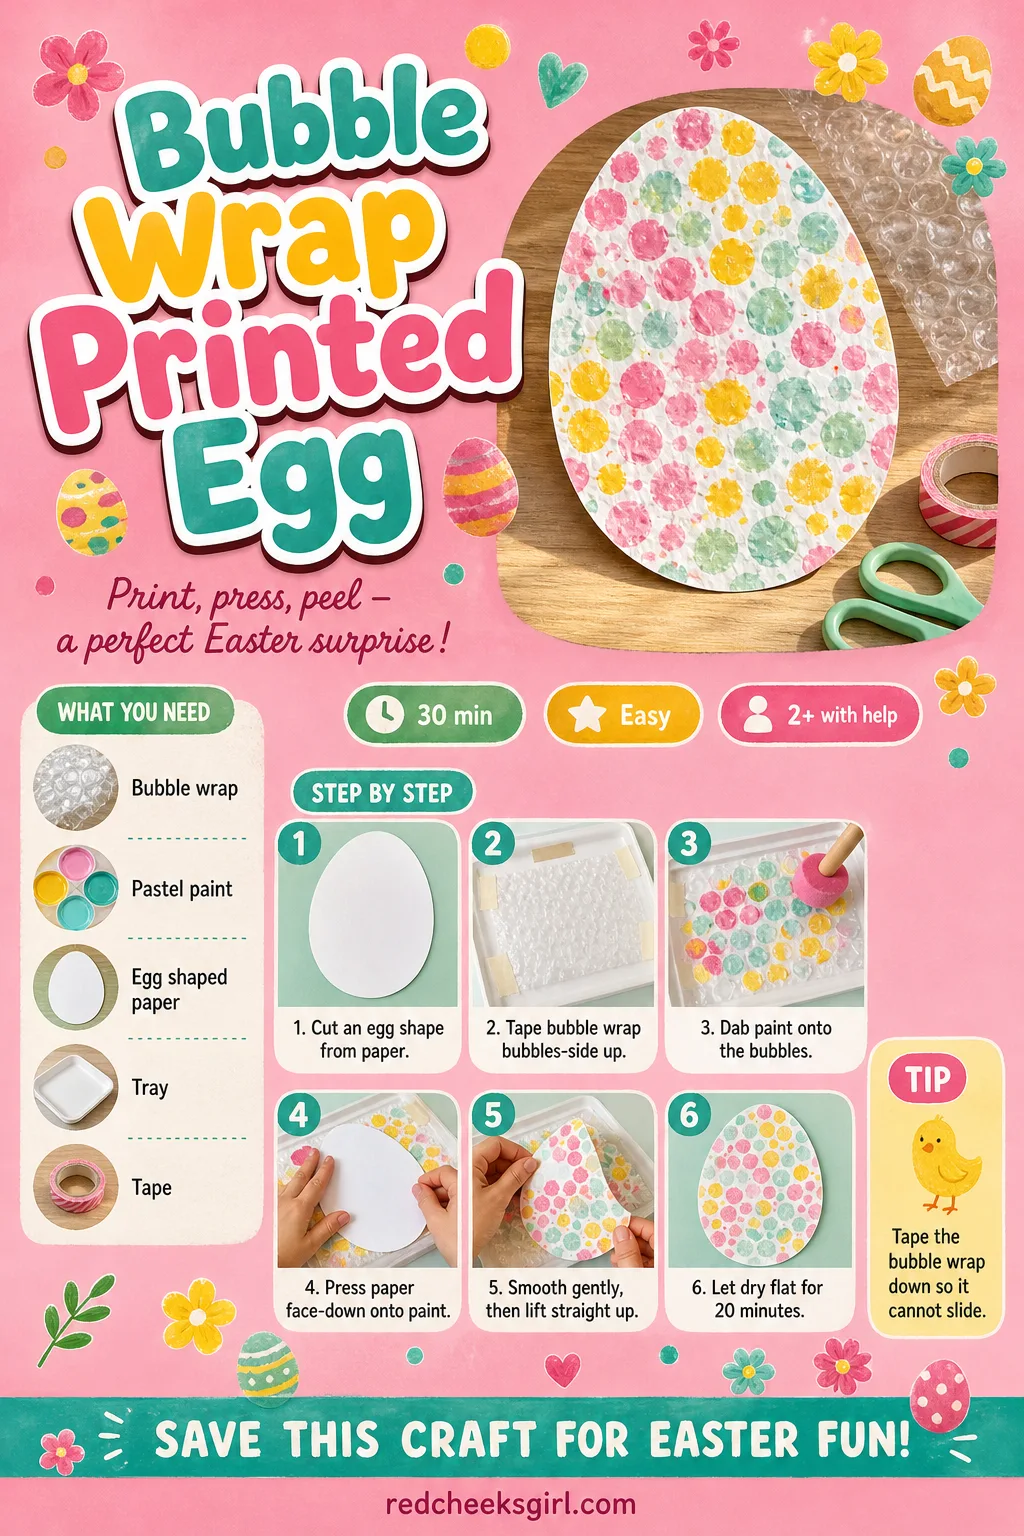
Bubble Wrap Printed Egg
What You Need
- Bubble wrap, 20cm square
- Pastel washable paint, 2-3 colours
- A4 cardstock, egg shape
- Shallow tray
- Sticky tape
How to Make It
- Adult pre-cuts an egg shape from cardstock.
- Tape the bubble wrap down, bubbles facing up.
- Dab paint directly onto the bubbles.
- Press the egg paper face-down onto the paint.
- Smooth gently then lift straight up.
- Let the print dry flat, 20 minutes.
Good to Know
🛍 Shopping guide
Tissue Paper Egg On Contact Paper
No glue, no brush, no waiting for anything to dry, which makes this the one to pull out right before dinner needs starting. The sticky sheet does every bit of the holding, she only has to press.
Hang it in a window where the afternoon light comes through, the colors glow in a way paint never quite manages on its own.
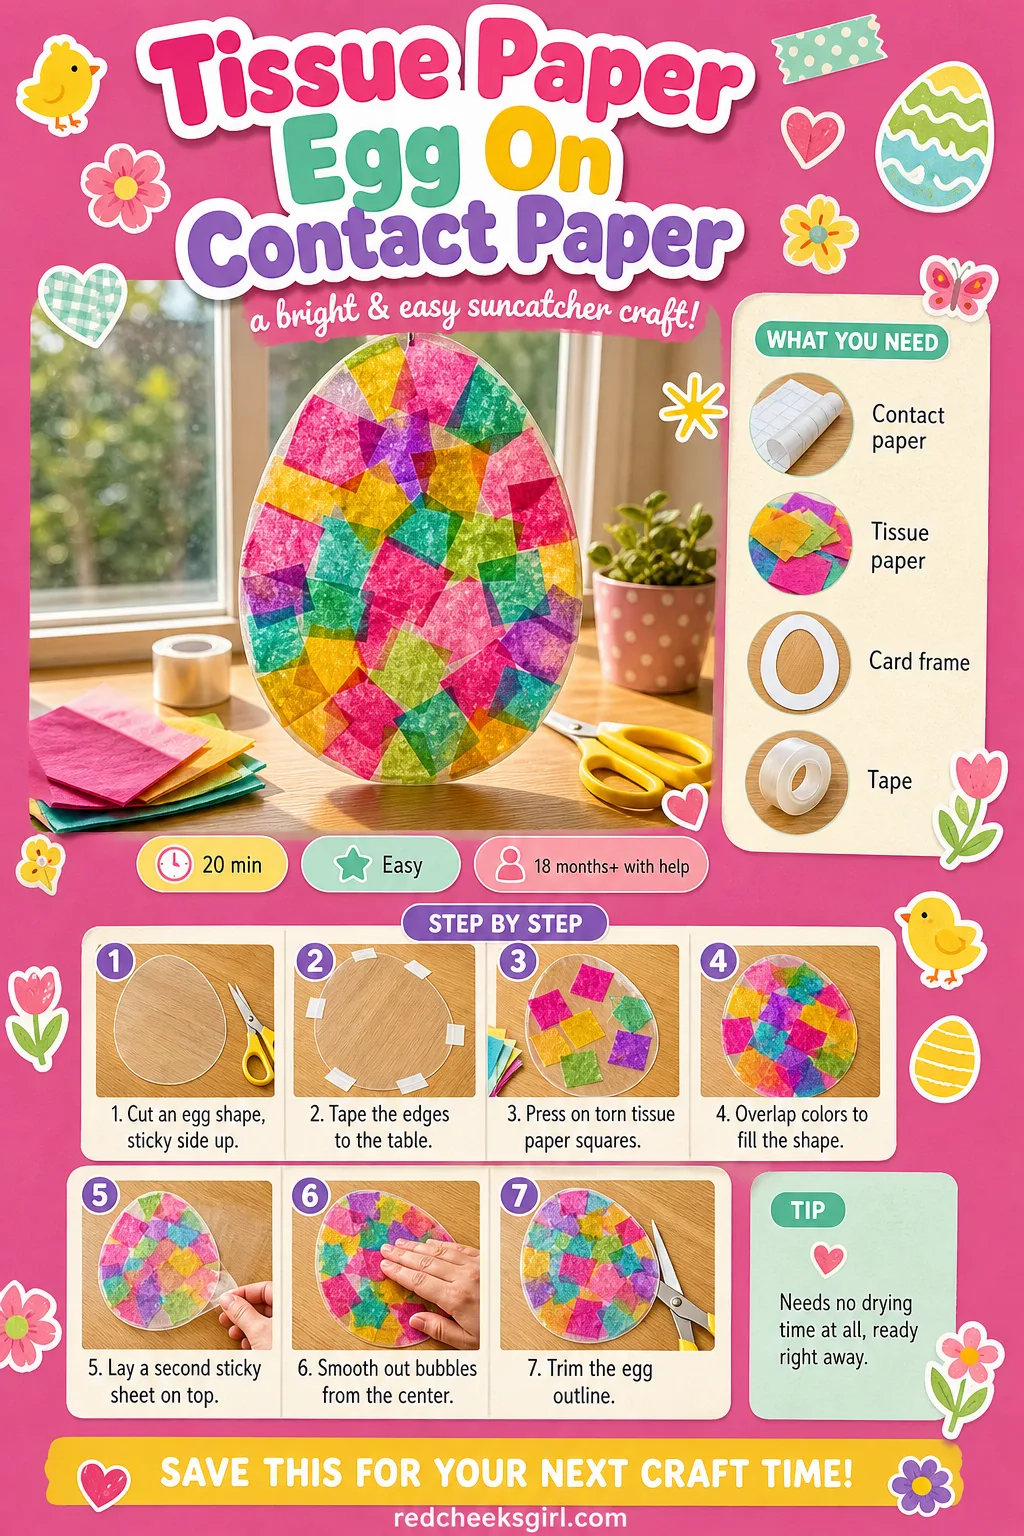
Tissue Paper Egg On Contact Paper
What You Need
- Clear contact paper, two 20cm squares
- Tissue paper squares, 4-5 colours
- Card for frame, optional
- Sticky tape
How to Make It
- Cut an egg shape from contact paper, sticky up.
- Tape the edges to the table.
- Press torn tissue squares onto the sticky side.
- Overlap colours until the shape fills up.
- Lay a second sticky sheet on top.
- Smooth out air bubbles from the centre out.
- Trim around the egg outline.
Good to Know
🛍 Shopping guide
Sponge Painted Easter Egg
A sponge takes the fine motor skill out of the equation entirely, a toddler can pat and press without ever needing the wrist control a paintbrush asks for. The speckled finish it leaves looks halfway to marbled, far nicer than the effort involved would suggest.
This one works just as well with a store bought sponge shape if cutting your own feels like one job too many.
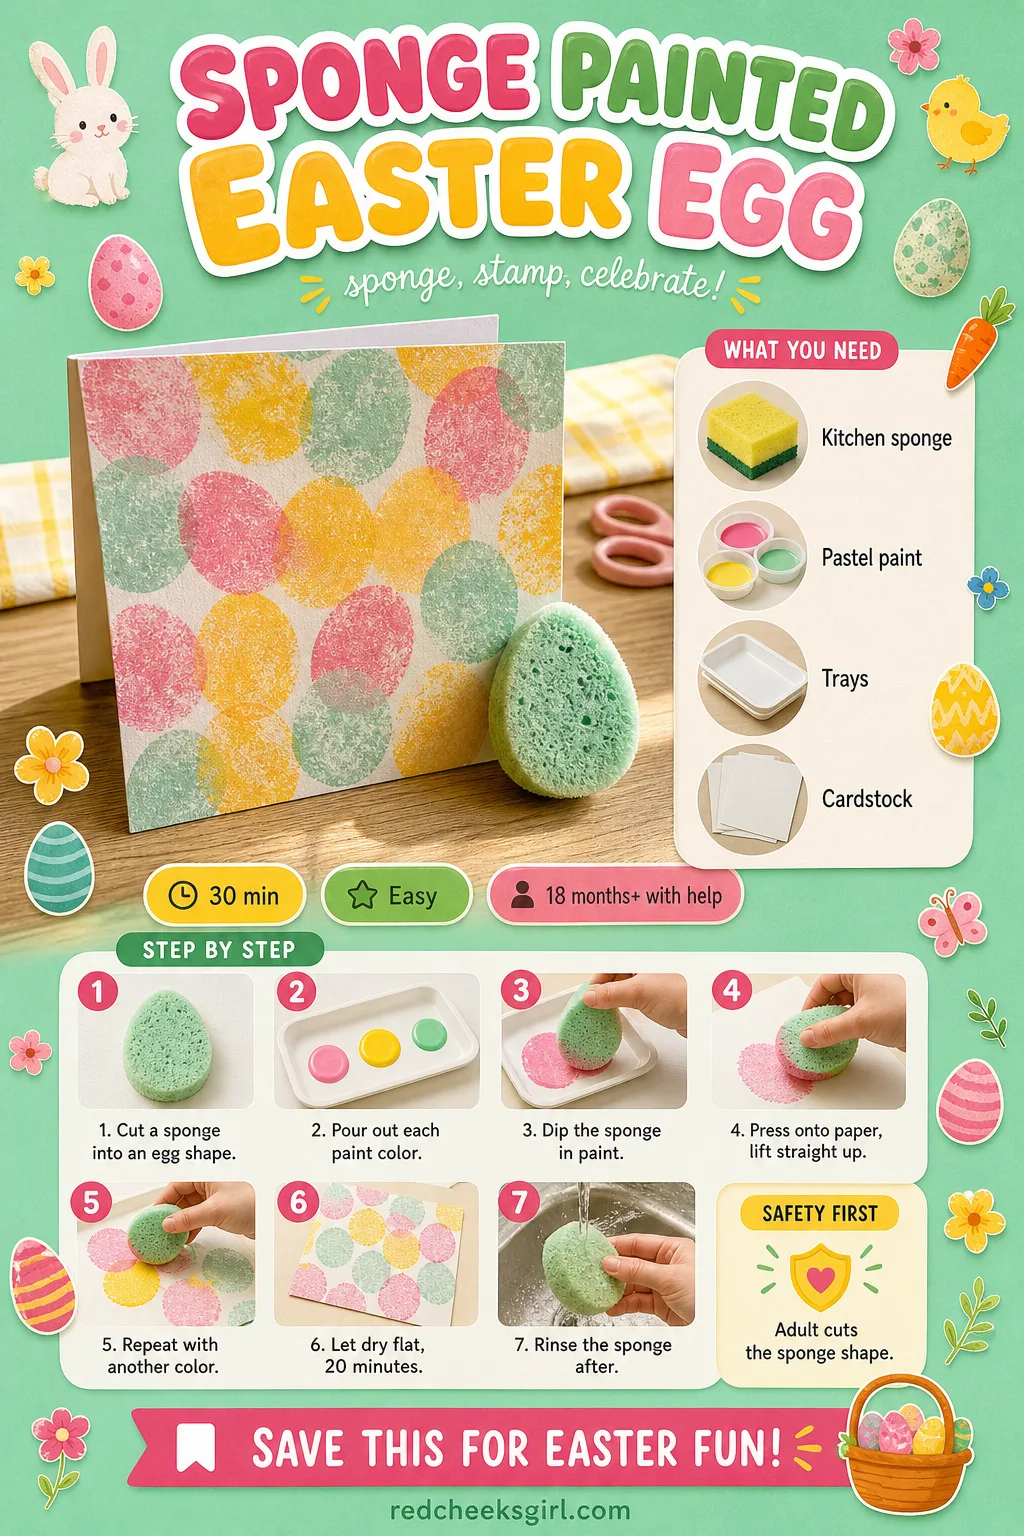
Sponge Painted Easter Egg
What You Need
- 1 kitchen sponge, egg shape
- Pastel washable paint, 2-3 colours
- Shallow trays
- A4 cardstock
How to Make It
- Adult cuts a sponge into an egg shape.
- Pour a shallow puddle of each paint colour.
- Dip the sponge in paint.
- Press onto the cardstock, lift straight up.
- Repeat in a different colour, overlapping prints.
- Let the page dry flat, 20 minutes.
- Rinse the sponge for next time.
Good to Know
🛍 Shopping guide
Paper Plate Chick
Flat, cheerful, and done in one sitting, this is the chick to make when the morning is slipping away and you need something finished before snack time. The whole plate goes yellow, a face lands in the middle, and that is genuinely most of it.
Punch a hole at the top afterward and it becomes a hanging decoration instead of just another page on the pile.
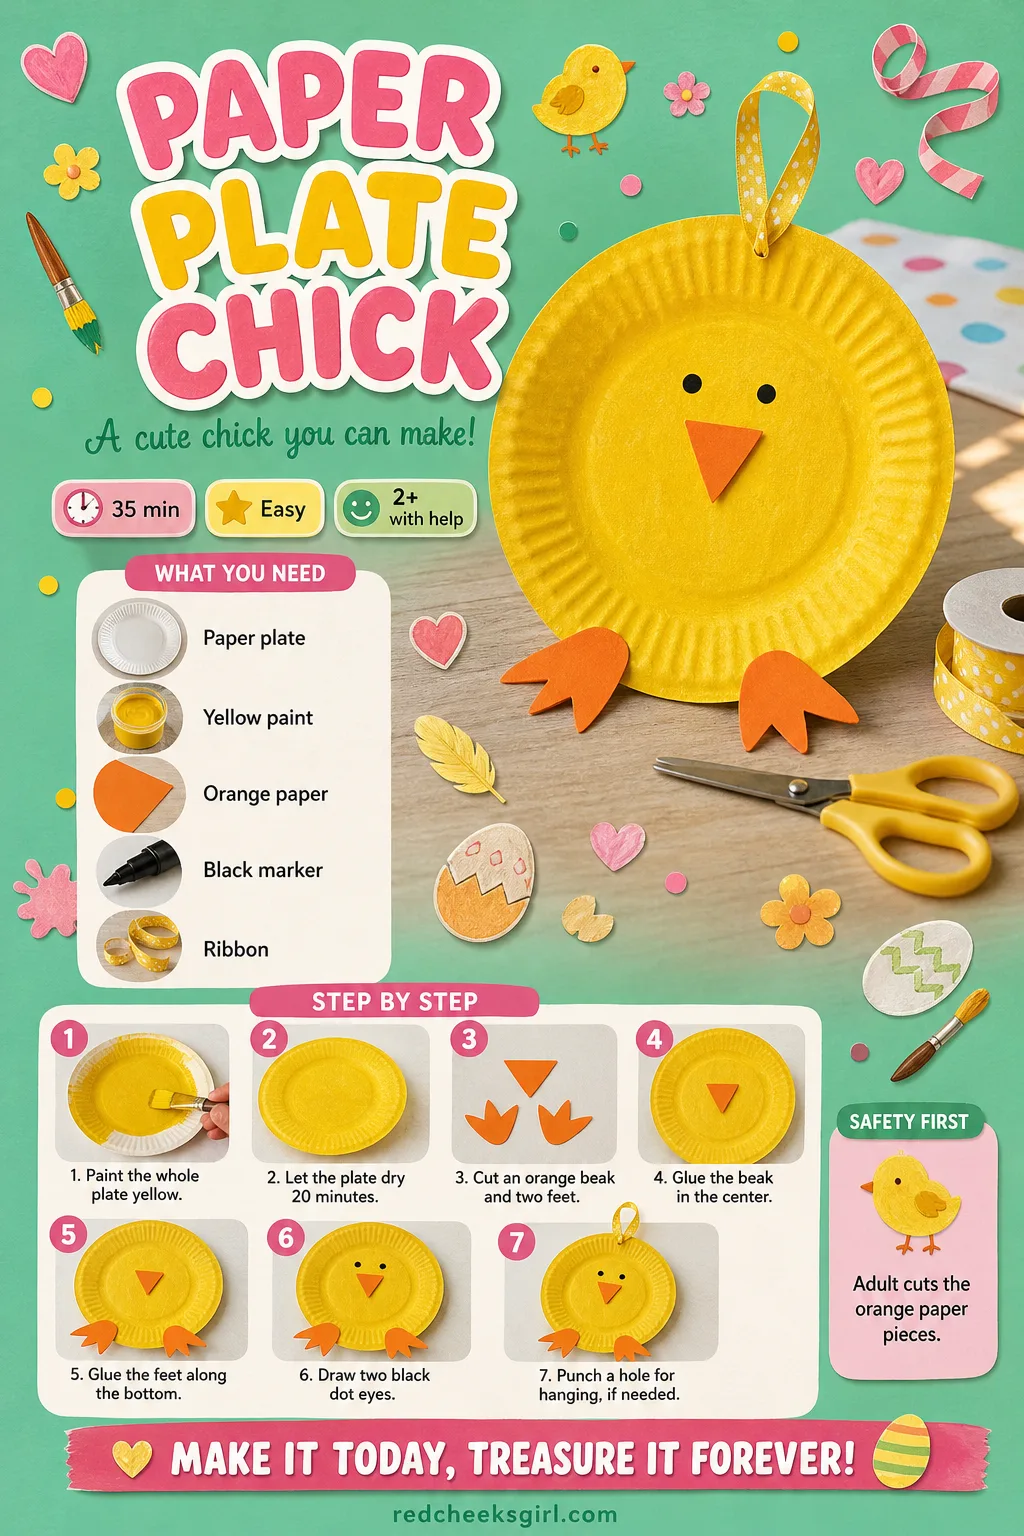
Paper Plate Chick
What You Need
- 1 paper plate, 18-23cm
- Yellow washable paint
- Orange paper beak and feet
- Black marker
- Ribbon, optional
How to Make It
- Paint the whole plate yellow.
- Leave the plate flat to dry, 20 minutes.
- Adult cuts an orange beak and two feet.
- Glue the beak in the centre of the plate.
- Glue the feet along the bottom rim.
- Draw two black dot eyes.
- Punch a hole and thread ribbon, if hanging.
Good to Know
🛍 Shopping guide
Celery Stamp Flower Card
The base of a celery stalk, cut straight across, prints a rose-shaped ring that looks far more deliberate than a kitchen offcut has any right to. It turns this into a flower stamp, and the card it makes ends up good enough to actually send to someone.
If celery is not in the fridge, the base of a leek does the same trick, just in a looser, leafier pattern.
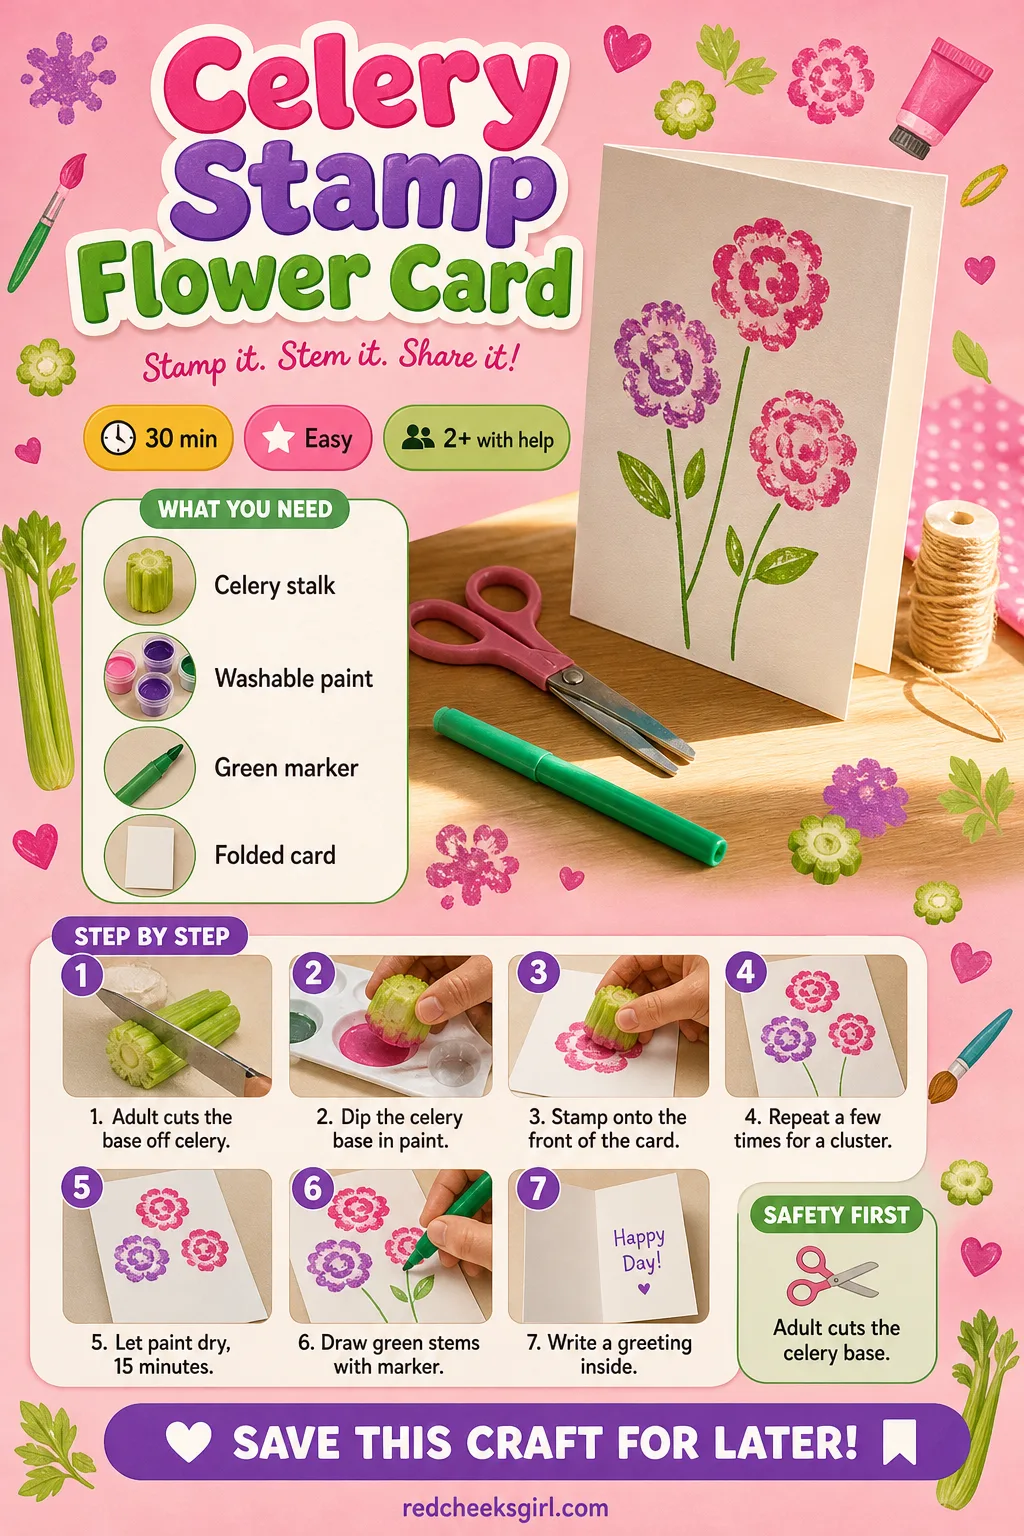
Celery Stamp Flower Card
What You Need
- 1 celery stalk
- Pink or purple washable paint
- Green marker
- A5 folded cardstock
How to Make It
- Adult cuts the base off the celery.
- Pour a little paint onto a plate.
- Press the celery base into the paint.
- Stamp it onto the front of the card.
- Repeat two or three times for a cluster.
- Let the paint dry, about 15 minutes.
- Draw green stems and leaves once dry.
Good to Know
🛍 Shopping guide
Cupcake Liner Chick
Two paper liners, flattened and layered, give this chick a crinkled, slightly three-dimensional texture that stands it apart from every other chick on this list. It sits a little proud of the page rather than flat, which makes it a nice one to prop against a vase instead of pinning up.
Standard yellow liners from the baking aisle work fine, you do not need anything Easter branded.
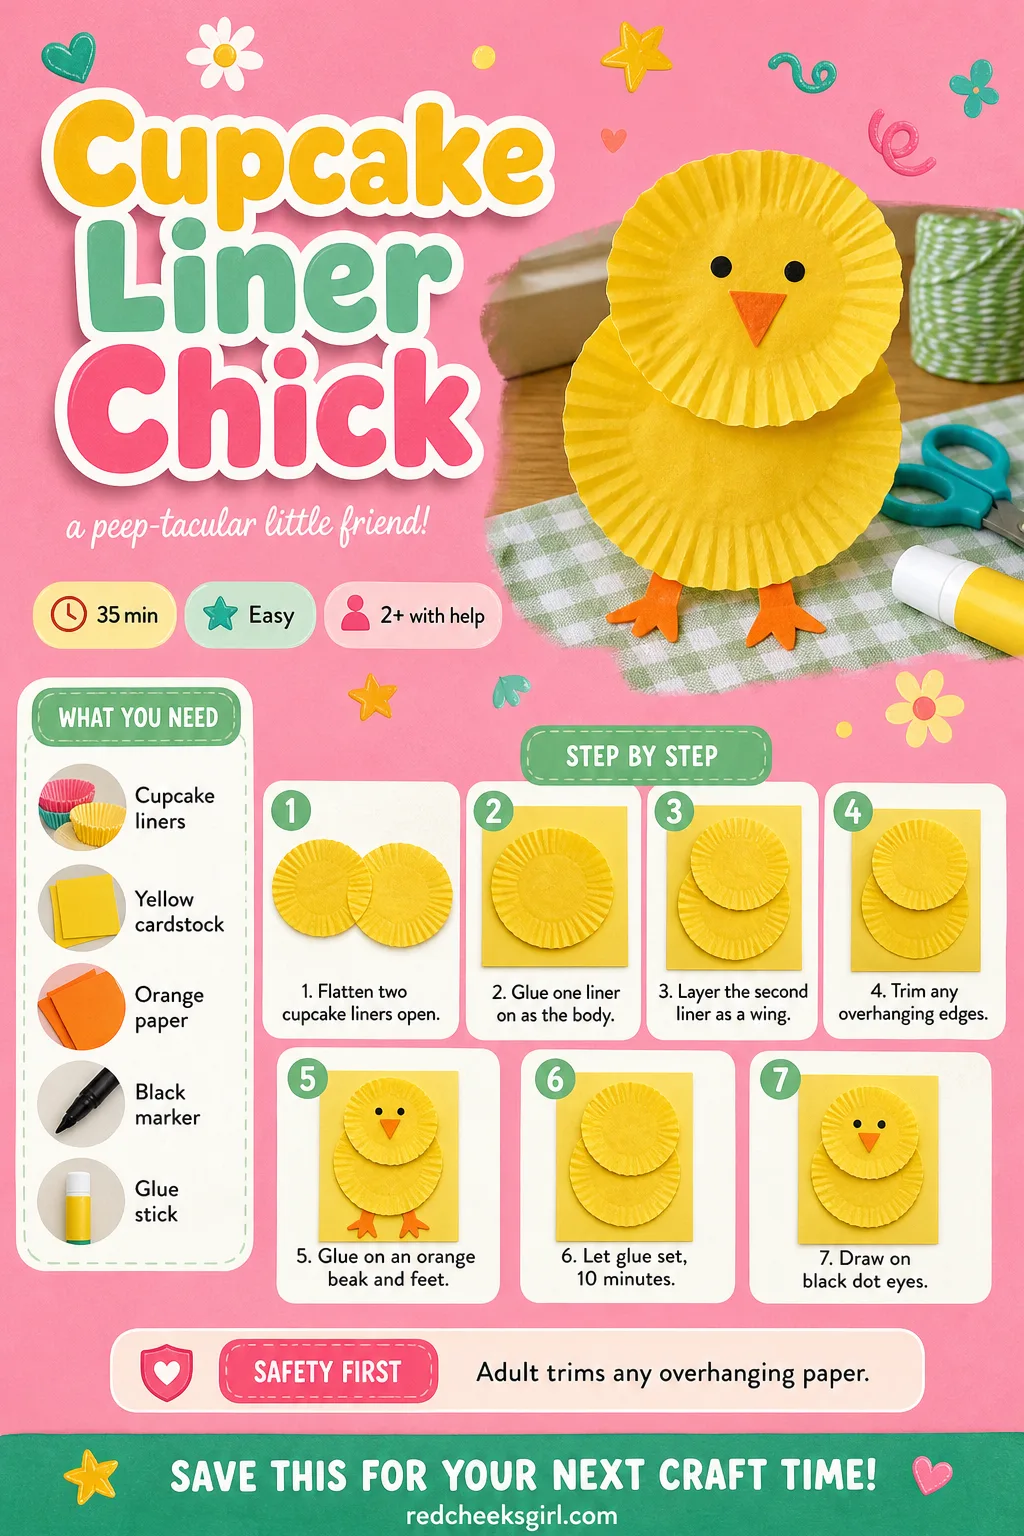
Cupcake Liner Chick
What You Need
- 2 yellow cupcake liners
- Yellow cardstock, oval shape
- Orange paper beak and feet
- Black marker
- Glue stick
How to Make It
- Flatten two cupcake liners open.
- Glue one liner on as the body.
- Layer the second liner as a wing or head.
- Trim any overhang from the liners.
- Glue on the orange beak and feet.
- Let the glue set, about 10 minutes.
- Draw black dot eyes, then let dry flat.
Good to Know
🛍 Shopping guide
Frequently Asked Questions
What age can toddlers start doing Easter crafts?
Most toddlers can take part from around twelve to eighteen months with an adult guiding the actual pressing or dabbing. By two or three, they manage a glue stick and simple stamping almost on their own.
How do I stop Easter crafts from getting too messy with a toddler?
Washable paint and a wipeable mat under the paper solve most of the mess before it starts. Favour stamping and dabbing techniques, like a sponge or a fork, over full handprints if you want an easier clean-up.
What should I do with all the Easter crafts my toddler makes?
Date each piece on the back in pencil, photograph it, then keep only a handful of favourites in a flat memory box or folder. The rest can go once the photo is taken.
Are these Easter crafts safe for toddlers with no choking hazards?
None of these crafts use loose small pieces such as beads, buttons or googly eyes, every face is drawn on with marker instead. An adult should still handle all cutting and supervise the glue.
How long does an Easter craft take with a toddler?
Most of these take ten to twenty minutes of actual hands-on time. Add the drying wait and a session runs thirty to forty minutes start to finish, so plan for a snack while the paint sets.
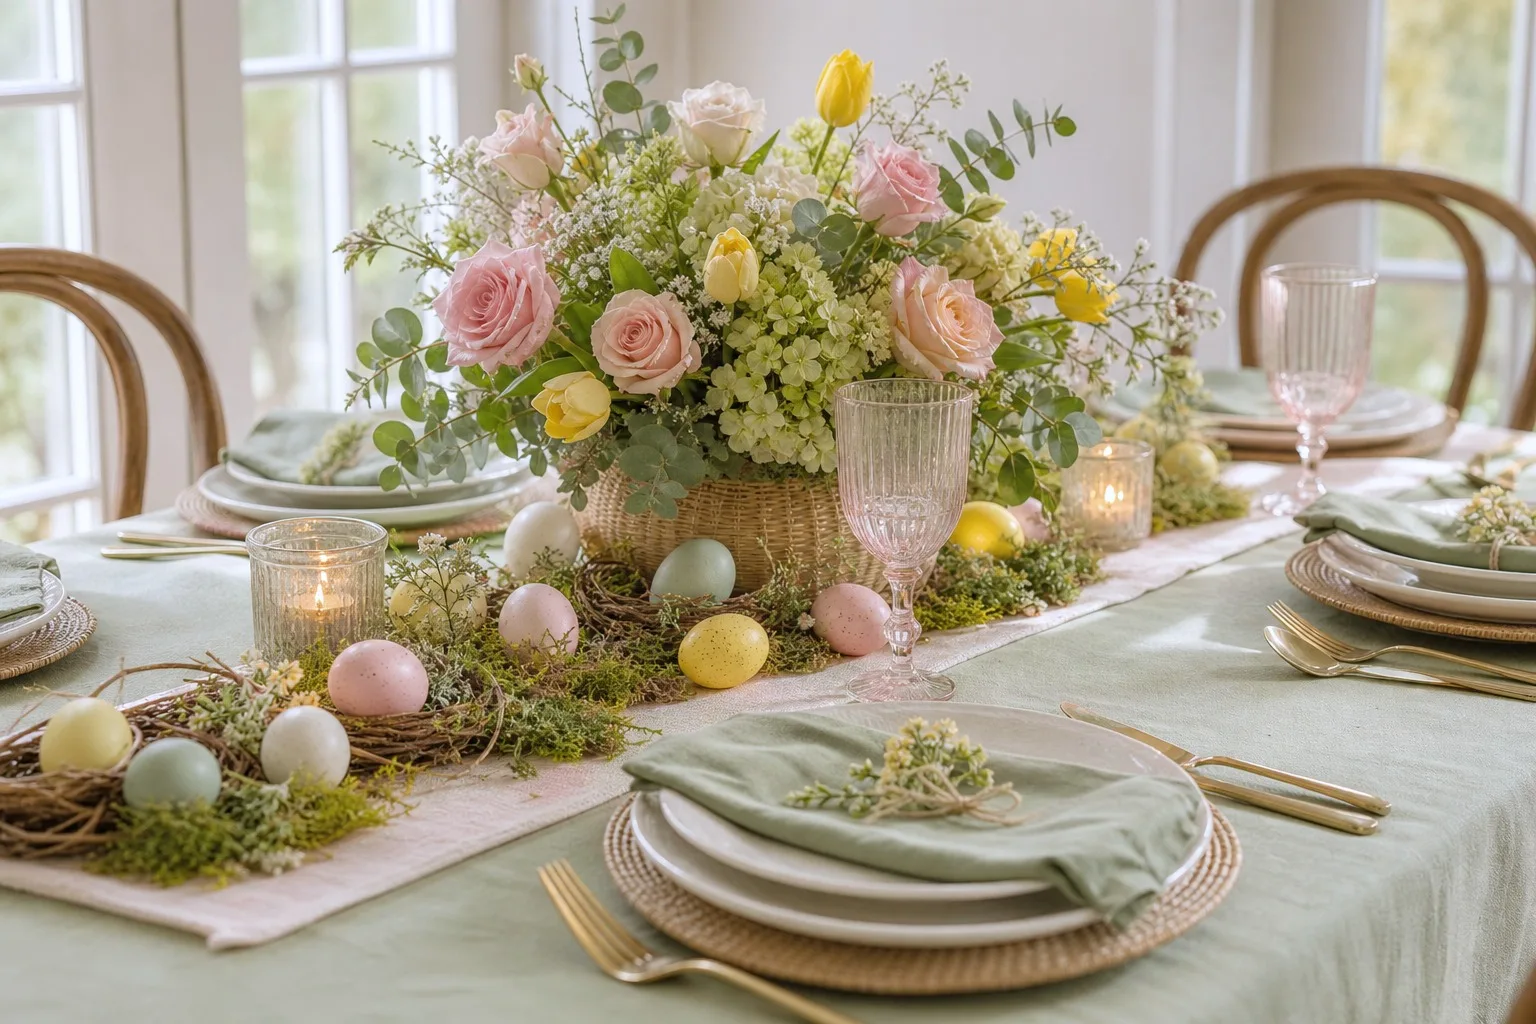
Easter decor ideas for the mantel, coffee table, kitchen, front door and beyond: soft pastels, fresh
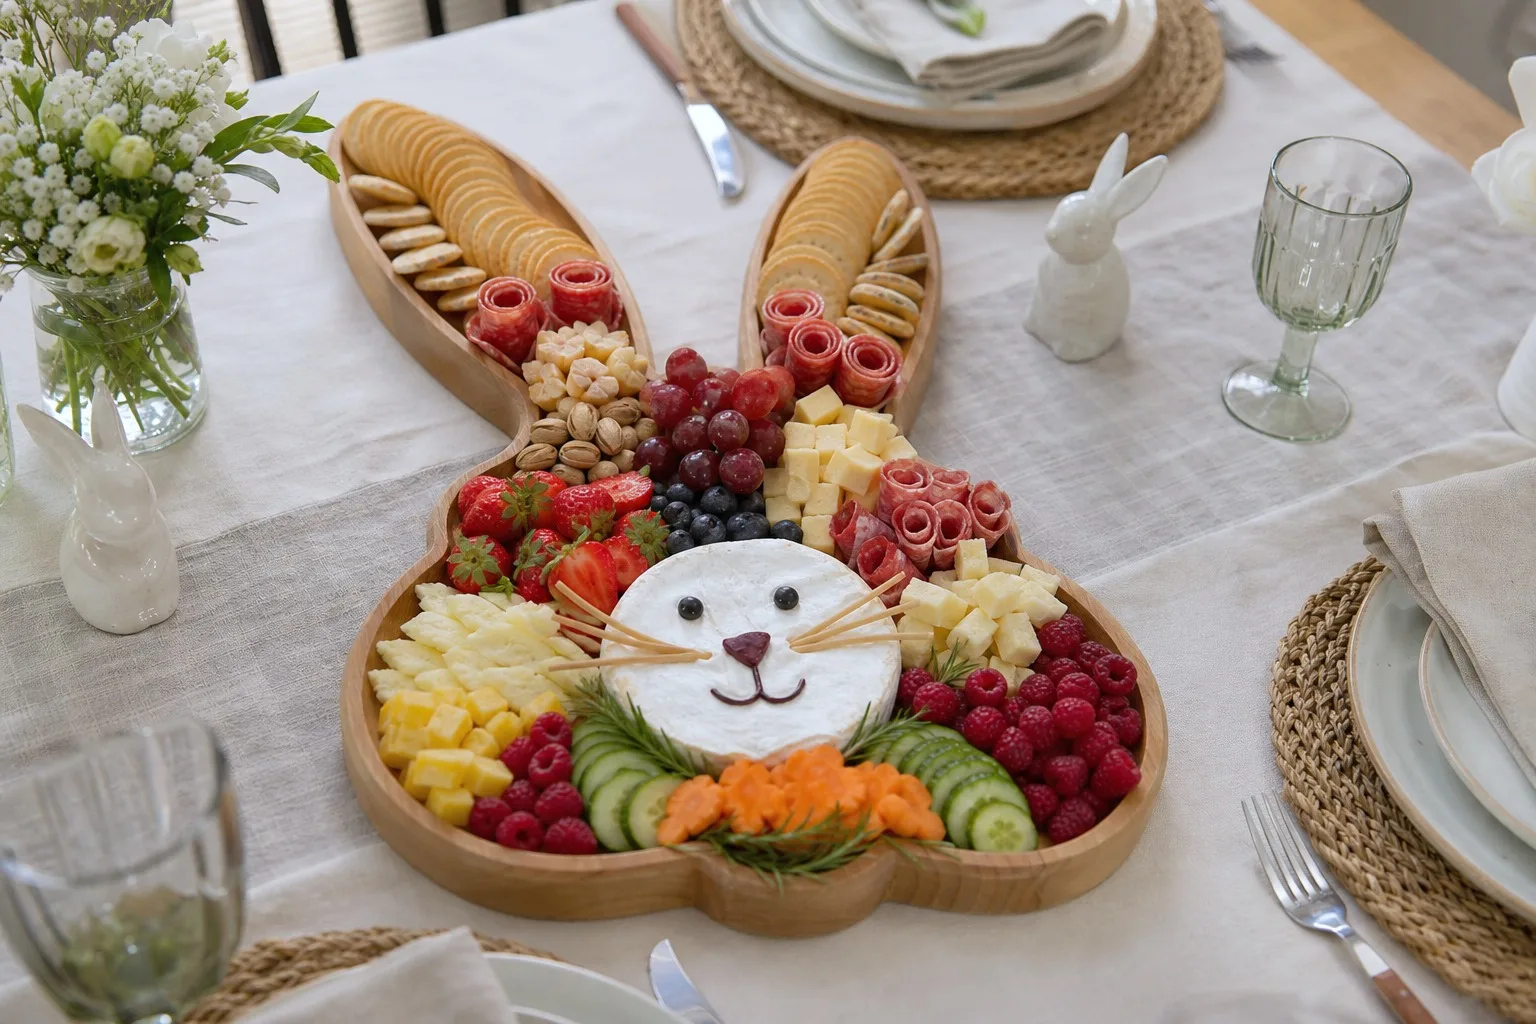
17 Easter charcuterie board ideas, from a bunny shaped board to a candy table, for a pastel, abundan

Discover 18 fun Easter games for adults perfect for brunch, backyard gatherings, and lightly competi
Leave a Reply