

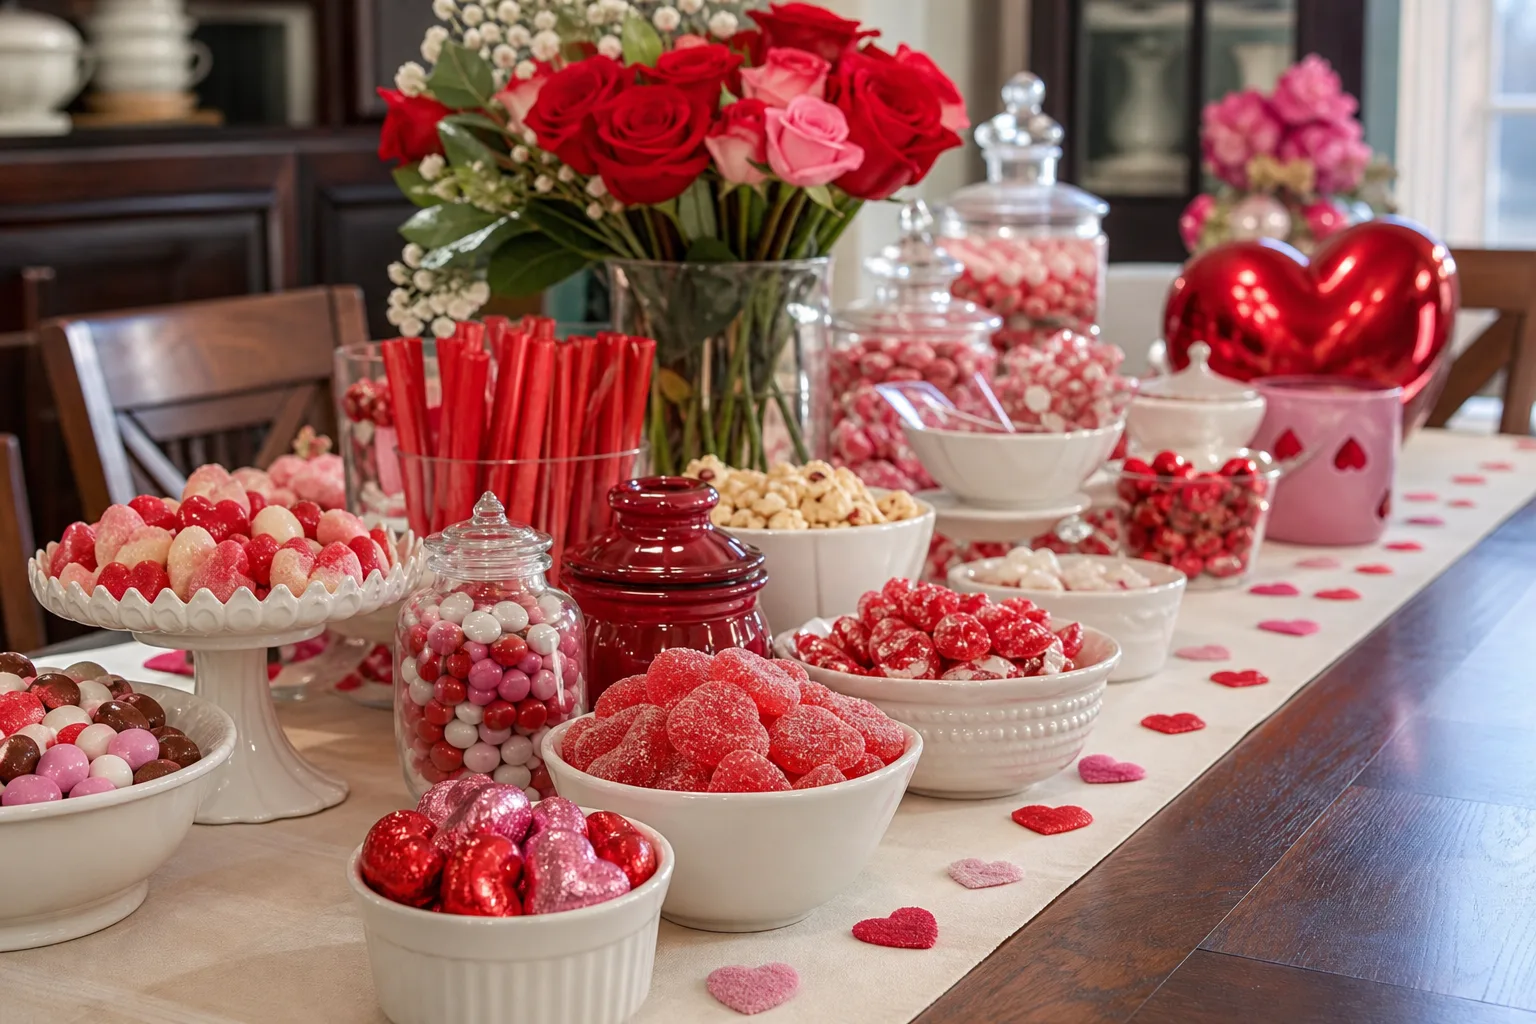
Nobody needs a blowtorch and a piping tip collection for Valentine’s Day. Most of what wins at a kids party is a bowl of something sticky and pink that sets in the fridge while you do literally anything else.
The nineteen treats below lean almost entirely on a microwave, a stovetop and a cookie cutter, so a seven year old can do most of the work and an adult can still eat three before the guests arrive.
A few run on butter, cream cheese and egg, several lean on pretzels and cookies for gluten, and two use peanut butter, with a sunflower seed swap noted where it matters. Everything here is non-alcoholic by design, since this is a mixed table of kids and grown-ups, not a cocktail hour.
If you want something for the adults to do once the plates are out, 15 Fun Valentine’s Day Games That Require Zero Prep (Perfect for Couples & Kids) asks nothing of you but a deck of cards.
Treat it like a buffet, not a menu: pick five or six, not nineteen, and let the rest wait for next year. If the table talk runs dry once the sugar kicks in, 19 Questions for Valentine’s Gatherings keeps both age groups at the table a little longer.
This post contains affiliate links. If you buy through them, I may earn a small commission at no extra cost to you.
Table of Contents
- Heart Rice Krispie Treats
- Strawberry Yogurt Bark
- Conversation Heart Popcorn
- Chocolate Pretzel Hearts
- Cupid Crunch Snack Mix
- Heart Cake Pops
- Chocolate Dipped Strawberries
- No-Bake Valentine Oreo Truffles
- Valentine Puppy Chow
- Pretzel Rod Valentine Wands
- Strawberry Shortcake Kabobs
- Valentine Fruit Pizza
- Chocolate Peanut Butter Valentine Cups
- Valentine Marshmallow Pops
- Heart-Shaped Sugar Cookies
- Strawberry Nutella Hand Pies
- Valentine Popcorn Balls
- Pink Velvet Whoopie Pies
- Strawberry Banana Valentine Smoothie
- Frequently Asked Questions
Heart Rice Krispie Treats
Everyone already knows the taste, which is exactly the point: a familiar square cut into a heart reads as effort without costing you any. The marshmallow stays soft for days if you do not press it too hard into the pan, and the dipped bottom turns a plain square into something worth photographing for Pinterest.
Make the slab a day ahead and leave the cutting and dipping for the morning of, since cereal treats firm up and cut cleaner once they rest overnight wrapped tightly on the counter.
Ingredients
- 6 cups crisp rice cereal
- 10 oz mini marshmallows
- 3 tbsp unsalted butter
- 1/2 tsp vanilla extract
- 6 oz pink or red candy melts
- 2 tbsp valentine sprinkles
Instructions
- Butter a 9×13 inch pan generously, including the sides, so the sticky mixture releases cleanly once it sets.
- Melt the butter in a large pot over low heat, swirling until fully liquid, about 2 minutes.
- Add the marshmallows and stir constantly over low heat until completely melted and smooth, 3 to 4 minutes; the mixture should look glossy with no lumps.
- Remove from the heat, stir in the vanilla, then fold in the rice cereal until every piece is coated.
- Press the mixture evenly into the prepared pan with buttered hands or the back of a spoon; do not pack it too hard or the treats turn dense instead of light.
- Let cool at room temperature, uncovered, 20 to 30 minutes, until firm enough to hold its shape when touched.
- Press a 2.5 inch heart cookie cutter straight down through the cooled slab to cut 12 hearts, wiggling gently to release; save the scraps for snacking.
- Melt the candy melts in the microwave in 20 second bursts, stirring between each, until smooth and pourable, about 1 minute total.
- Dip the bottom half of each heart into the melted candy, scatter sprinkles over it within about a minute before it sets, then rest on parchment until fully hard, 10 minutes.

🛍 Shopping guide
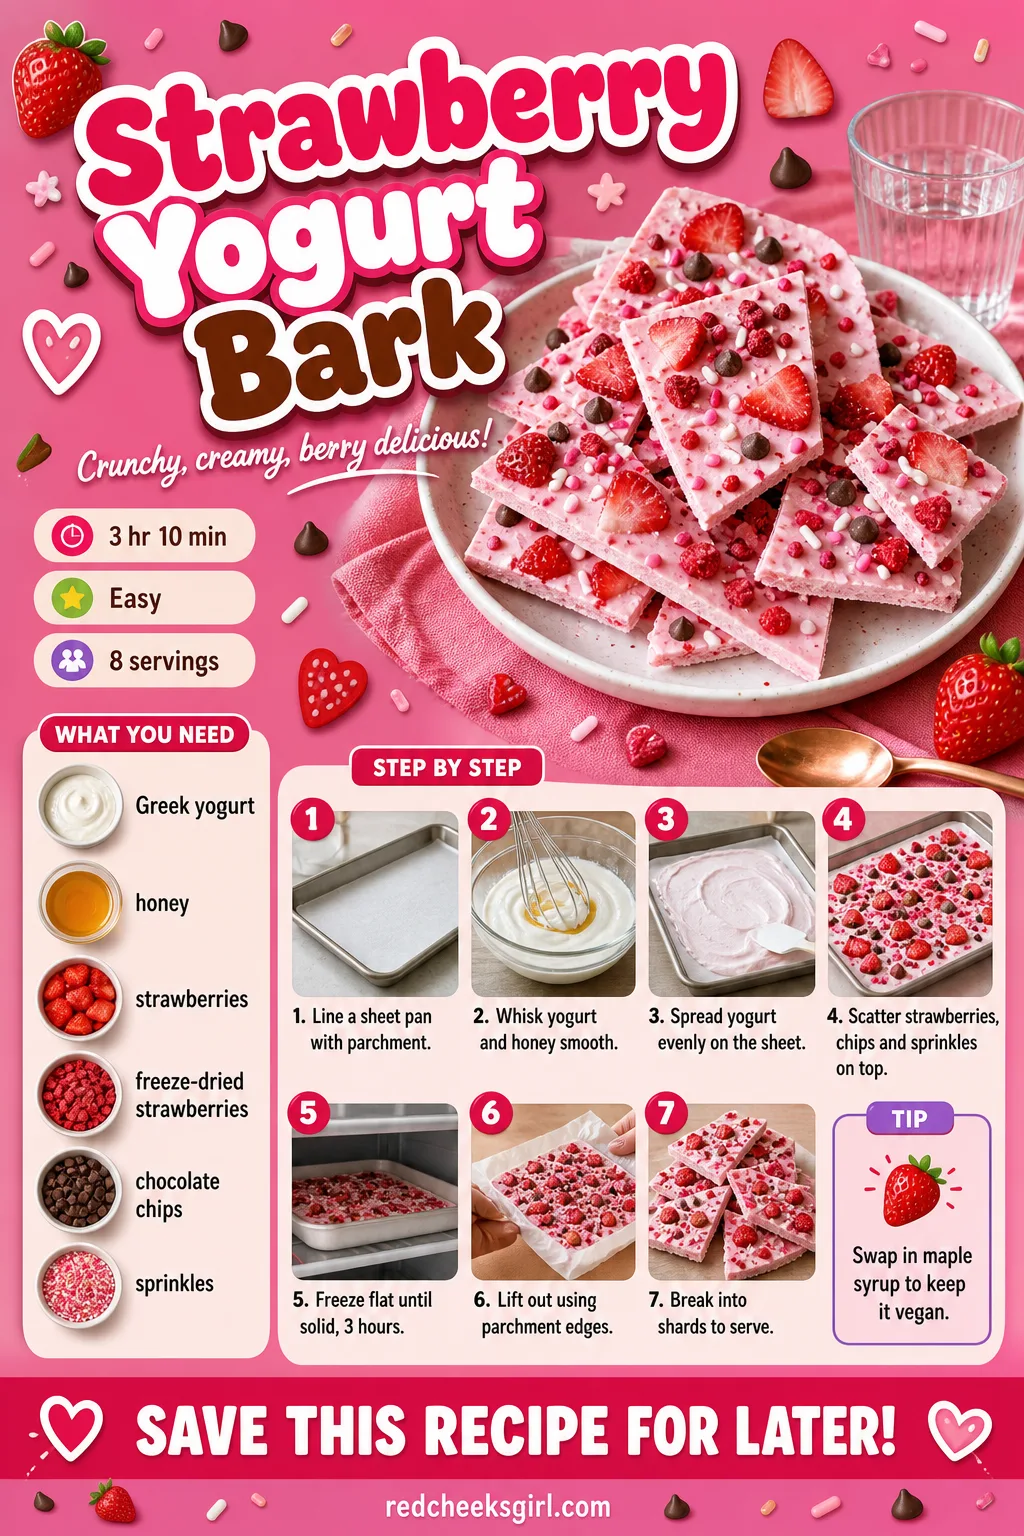
Strawberry Yogurt Bark
This is the one you can hand to the parent who keeps asking if there is anything that is not pure sugar. It still tastes like dessert, cold and snappy straight from the freezer, but the base is just yogurt and fruit doing all the work.
Freeze it flat overnight and it keeps for two weeks in the freezer, so it is the easiest thing on this list to make well before the party and forget about.
Ingredients
- 2 cups vanilla Greek yogurt
- 2 tbsp honey
- 1 cup diced fresh strawberries
- 1/4 cup crushed freeze-dried strawberries
- 2 tbsp mini chocolate chips
- 1 tbsp valentine sprinkles
Instructions
- Line a baking sheet with parchment paper, leaving overhang on two sides to lift the bark out later.
- Whisk the yogurt and honey together in a bowl until smooth with no streaks remaining.
- Pour the yogurt mixture onto the lined sheet and spread with an offset spatula into an even layer about 1/4 inch thick, reaching every corner.
- Scatter the diced strawberries, crushed freeze-dried strawberries, chocolate chips and sprinkles over the top, pressing lightly so they stick.
- Slide the sheet into the freezer flat, uncovered, and freeze until completely solid, at least 3 hours or overnight.
- Lift the frozen slab out using the parchment overhang and set it on a cutting board.
- Break or cut into irregular shards with a sharp knife; it should snap cleanly when it is ready.
- Serve straight from the freezer, or store pieces layered with parchment in an airtight container for up to 2 weeks.
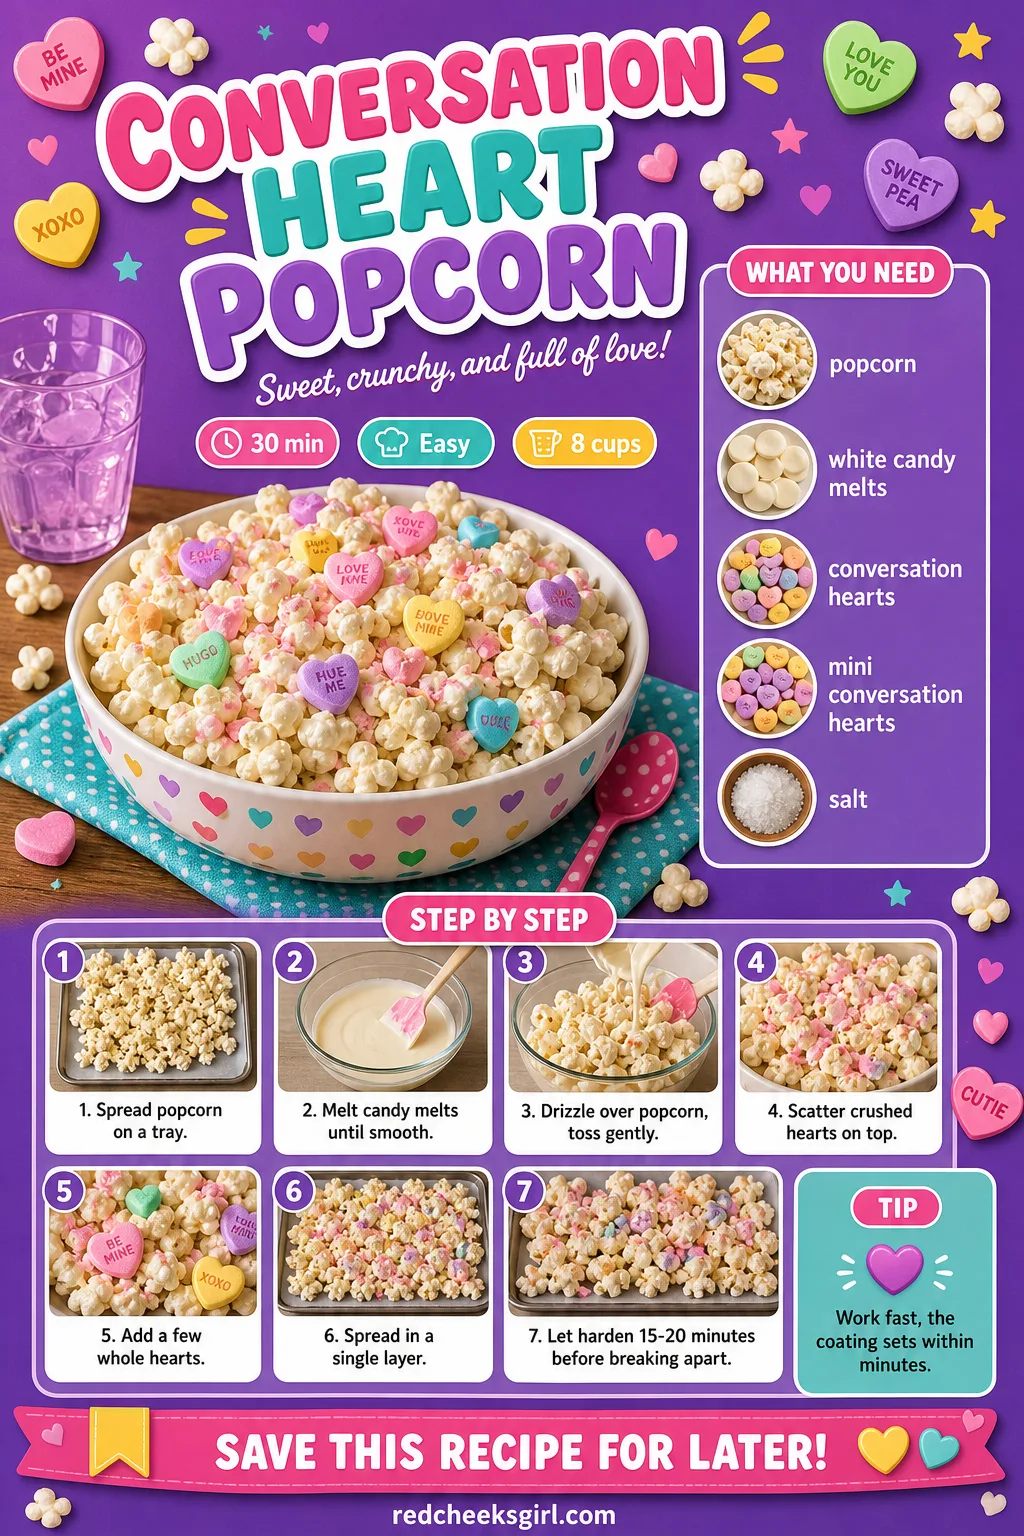
Conversation Heart Popcorn
Conversation hearts are divisive as a candy on their own, chalky and a little sad by March. Melted into a coating over warm popcorn they turn into something closer to candy floss, and the crushed bits read as confetti rather than as the candy nobody finishes.
Work quickly once the coating is drizzled, since it sets within minutes and you want every piece covered before it hardens in the bowl.
Ingredients
- 8 cups popped popcorn, unsalted
- 1 cup white candy melts
- 1 cup conversation hearts, crushed
- 1/4 cup mini conversation hearts, whole
- 1/4 tsp salt
Instructions
- Pick through the popped popcorn and discard any unpopped kernels, then spread it on a large parchment lined tray.
- Melt the white candy melts in a microwave safe bowl in 20 second bursts, stirring between each, until smooth and pourable, about 90 seconds total.
- Drizzle the melted candy over the popcorn in thin ribbons, then toss gently with two spoons until every piece is lightly coated, not drowned.
- Scatter the crushed conversation hearts and salt over the warm coated popcorn while the candy is still tacky, so they stick.
- Tuck a few whole mini conversation hearts in here and there for colour and crunch.
- Spread the popcorn back out in a single layer on the tray so the pieces do not clump as they cool.
- Let it sit at room temperature until the coating hardens completely, 15 to 20 minutes; the popcorn should sound crisp, not sticky, when you pick a piece up.
- Break apart any large clusters by hand and store airtight at room temperature for up to 5 days.
Chocolate Pretzel Hearts
Salty and sweet is the only flavour combination that never gets an argument at a mixed-age table, and heart pretzels deliver it without a single step that requires skill. Half go dark with a candy centre, half go white with sprinkles, and both finish in under twenty minutes of actual hands-on time.
If you cannot find heart-shaped pretzels, ordinary mini twists work fine; the chocolate is doing the decorating, not the pretzel.
Ingredients
- 16 mini pretzel twists or heart pretzels
- 1 cup milk chocolate chips
- 1 cup white chocolate chips
- 2 tbsp valentine sprinkles
- 16 mini M&M’s
Instructions
- Line a baking sheet with parchment and lay the pretzels in rows, leaving space between each.
- Melt the milk chocolate chips in a microwave safe bowl in 20 second bursts, stirring each time, until smooth, about 1 minute; repeat separately for the white chocolate.
- Spoon melted milk chocolate over half the pretzels, letting it pool slightly in the gaps so each sets as one solid piece.
- Press a mini M&M into the centre of each warm chocolate pretzel while the coating is still soft.
- Spoon melted white chocolate over the remaining pretzels and scatter sprinkles over them while still wet, so nothing rolls off once set.
- Let the tray rest at room temperature or in the fridge until the chocolate hardens completely and feels firm to the touch, 15 to 20 minutes.
- Peel the pretzels off the parchment gently; if any stick, slide a thin spatula underneath rather than pulling.
- Store in a single layer in an airtight container at cool room temperature for up to a week.

🛍 Shopping guide
Cupid Crunch Snack Mix
Trail mix never gets a seat at a party table until you dip half of it in pink chocolate and call it something else. This one holds cereal squares, pretzels and candy in one bowl, which means it covers salty, sweet and crunchy in a single scoop.
Split the coated mix between two trays before it cools; crowd it onto one and the middle never sets properly.
Ingredients
- 4 cups square rice cereal
- 2 cups pretzel sticks, broken
- 1 cup mini heart pretzels
- 1 cup white chocolate chips
- 1 cup pink candy melts
- 1/2 cup conversation hearts
- 1/2 cup valentine M&M’s
Instructions
- Combine the cereal squares, broken pretzel sticks and mini pretzel hearts in a very large bowl.
- Melt the white chocolate chips and pink candy melts together in a microwave safe bowl in 30 second bursts, stirring each time, until completely smooth and pourable, about 2 minutes total.
- Pour the melted mixture over the dry ingredients and fold gently with a rubber spatula until every piece is lightly glossed, not clumped.
- Spread the coated mix onto two parchment lined trays in a thin, even layer so it cools quickly and separately rather than in one solid slab.
- Let cool at room temperature until the coating is matte and snaps rather than bends, 15 to 20 minutes.
- Break any large clusters apart with your hands into bite sized pieces.
- Toss the cooled mix with the conversation hearts and valentine M&M’s so the colour is spread evenly.
- Store in an airtight container or clipped bags at room temperature for up to a week.

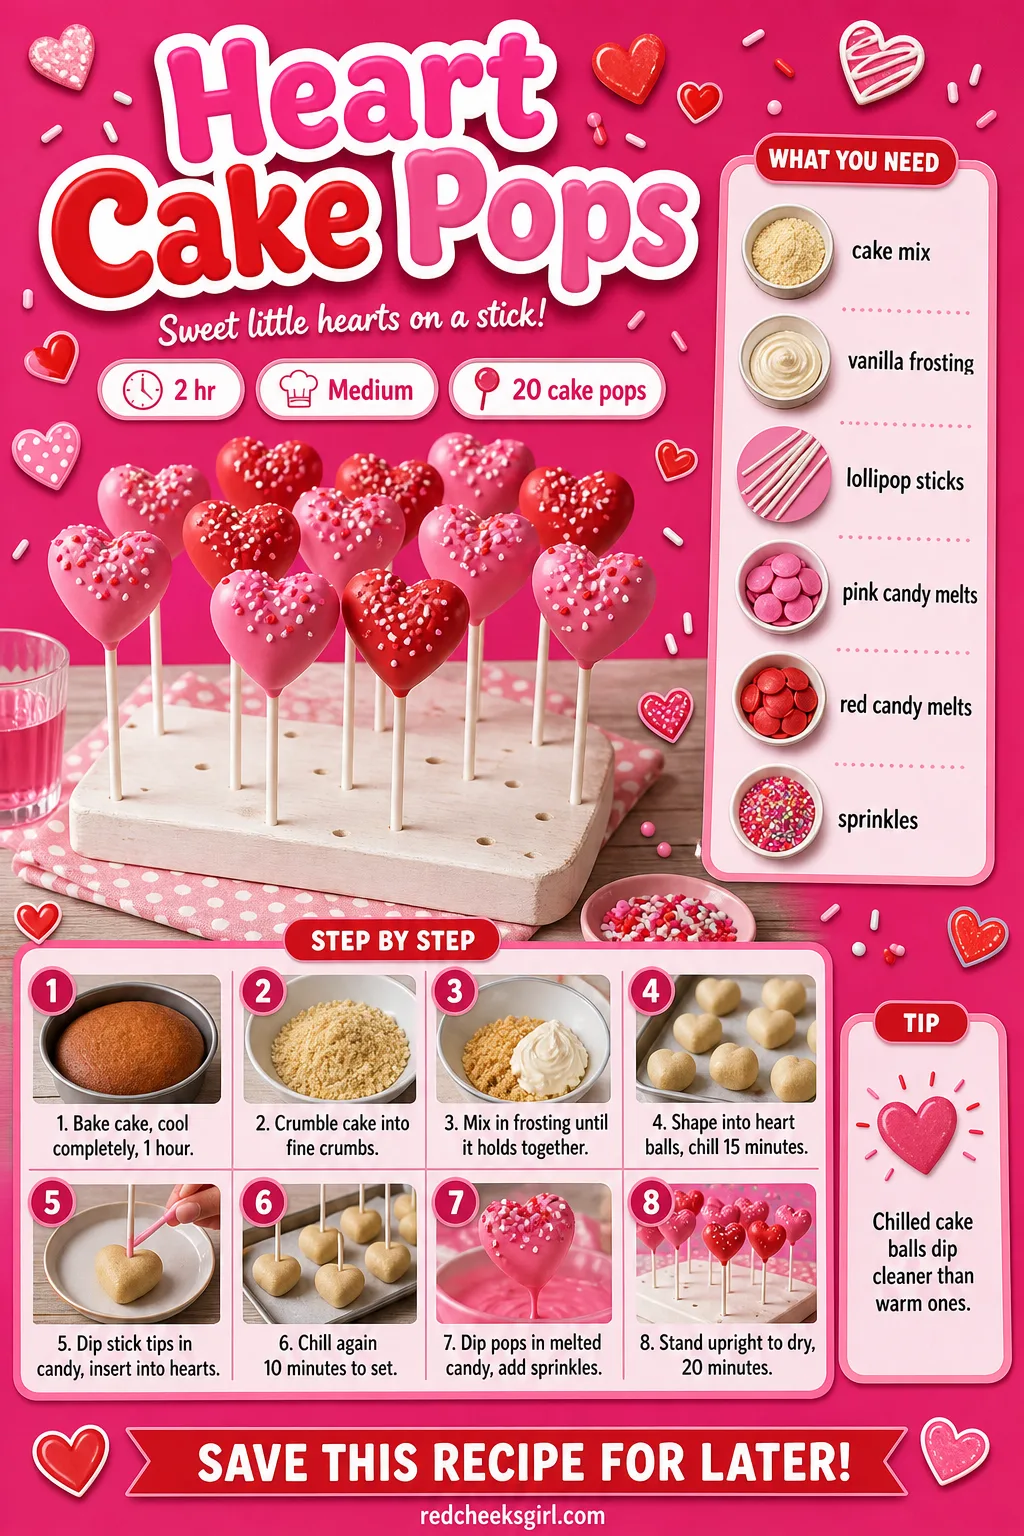
Heart Cake Pops
Cake pops get a reputation for being fussy, but the only genuinely tricky part is dipping, and even that forgives you once you know to chill the centres first. A heart shape instead of a round ball is the easiest upgrade on this whole list, since you are already shaping dough with your hands anyway.
Spread the work over two days if the party is the only deadline that matters: bake and shape the hearts one day, dip and decorate the next.
Ingredients
- 1 box (15.25 oz) vanilla or red velvet cake mix, plus ingredients it calls for
- 1/2 cup vanilla frosting
- 20 lollipop sticks
- 12 oz pink candy melts
- 12 oz red candy melts
- valentine sprinkles
Instructions
- Bake the cake according to the package directions in a 9×13 inch pan, checking at the lower end of the time range; it is done when a toothpick comes out clean and the top springs back when touched.
- Let the cake cool completely in the pan on a wire rack, at least 1 hour; a warm cake turns the pop mixture gluey.
- Crumble the cooled cake into fine crumbs in a large bowl using your hands or a fork, leaving no large chunks.
- Add the frosting a spoonful at a time, mixing until the crumbs hold together when pressed but are not wet or shiny; you may not need all of it.
- Scoop level portions and roll into balls, then shape each into a rough heart by pinching a point at the bottom and pressing a dip into the top with your thumb.
- Lay the shaped hearts on a parchment lined tray and chill in the freezer for 15 minutes, just until firm, not frozen solid.
- Dip the tip of each lollipop stick into a little melted candy, then insert it halfway into each heart; this glues the stick in place so the pops do not slide off.
- Return the sticks to the tray and chill again for 10 minutes to set the glue.
- Melt the remaining pink and red candy melts separately in microwave safe bowls in 30 second bursts, stirring between each, until smooth and thin enough to coat a spoon.
- Dip each heart straight down into the melted candy, turning gently to coat all sides, then lift and tap the stick against the rim to shake off the excess.
- Scatter sprinkles over the wet coating immediately, before it sets, working one pop at a time.
- Stand the finished pops upright in a cake pop stand or a block of florist foam to dry, about 20 minutes, until the coating is fully hard.
🛍 Shopping guide
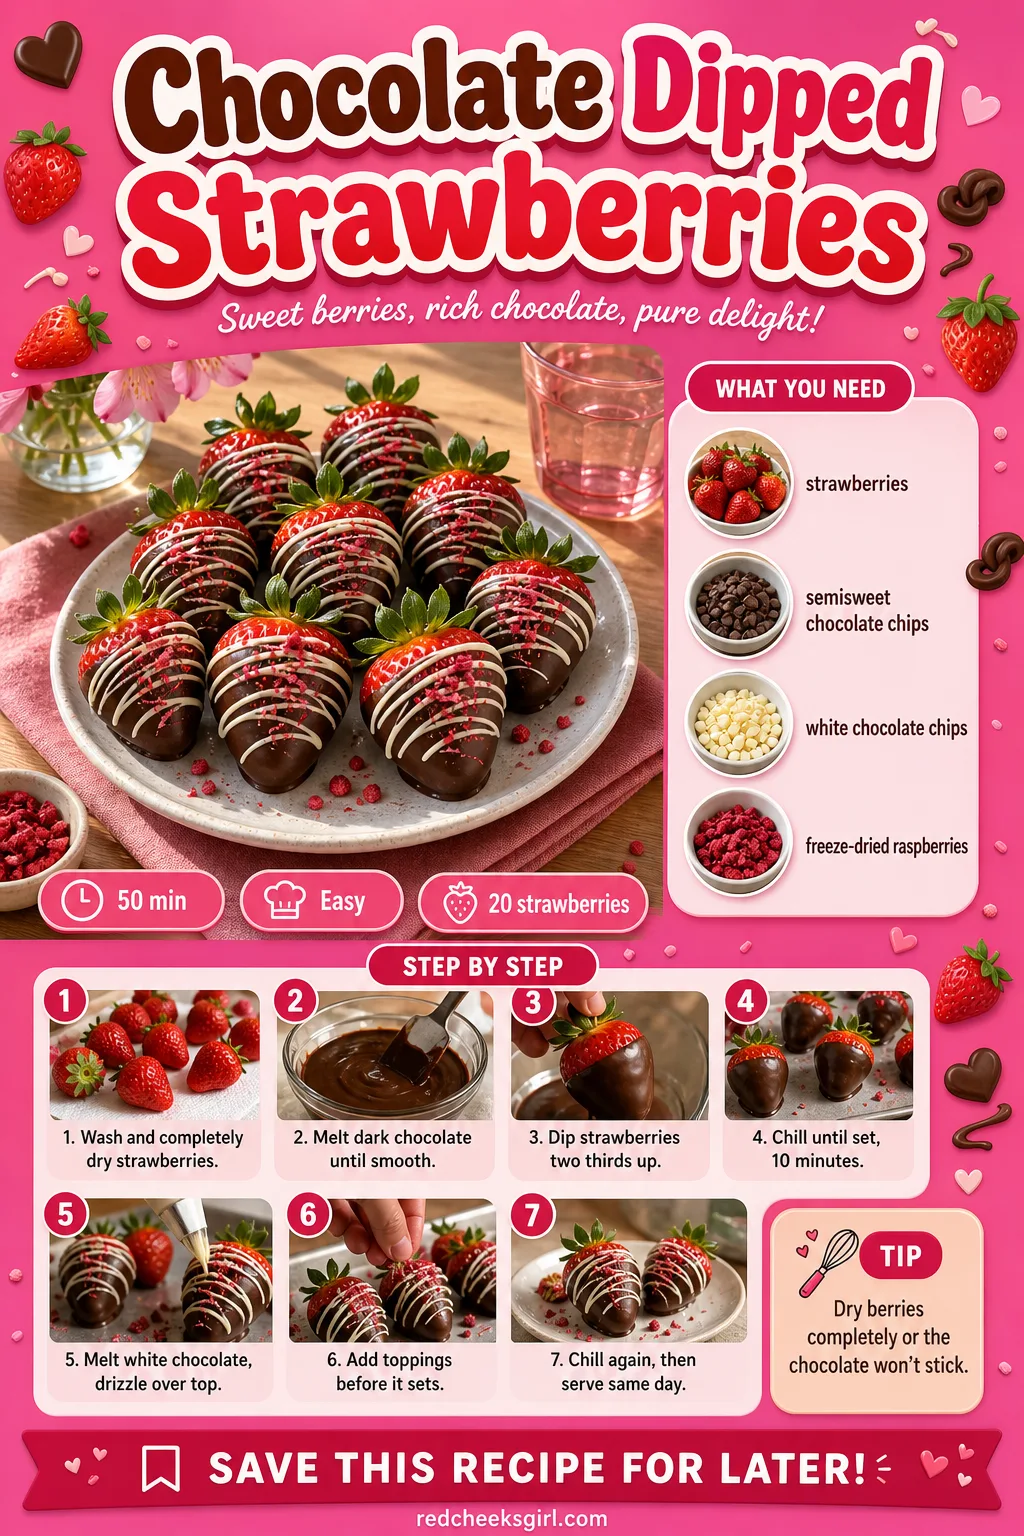
Chocolate Dipped Strawberries
There is no Valentine’s table without at least one of these, and the trick is entirely in the drying: a damp strawberry makes chocolate seize and slide right off. Give them twenty minutes with a towel and they hold a coat beautifully.
They are the one treat on this list that does not keep: eat them the same day, since the fruit starts weeping under the chocolate by the next morning.
Ingredients
- 20 large strawberries
- 8 oz semisweet chocolate chips
- 4 oz white chocolate chips
- 2 tbsp crushed freeze-dried raspberries
Instructions
- Wash the strawberries and pat them completely dry with paper towels; any water left on the skin makes the chocolate seize or slide off.
- Line a tray with parchment paper and set aside.
- Melt the semisweet chocolate chips in a microwave safe bowl in 20 second bursts, stirring each time, until smooth, about 1 to 2 minutes.
- Hold each strawberry by the green top and dip two thirds of the way into the melted chocolate, twisting gently to coat, then let the excess drip off for a few seconds.
- Set the dipped strawberries on the parchment and chill in the fridge 10 minutes until the dark chocolate feels set when touched lightly.
- Melt the white chocolate chips the same way, then drizzle in thin lines back and forth over the dark chocolate using a spoon or a piping bag with a tiny corner snipped off.
- Scatter crushed freeze-dried raspberries over the wet white chocolate before it sets.
- Chill 15 to 20 minutes more until fully set, then serve within a few hours for the best texture against the fruit.
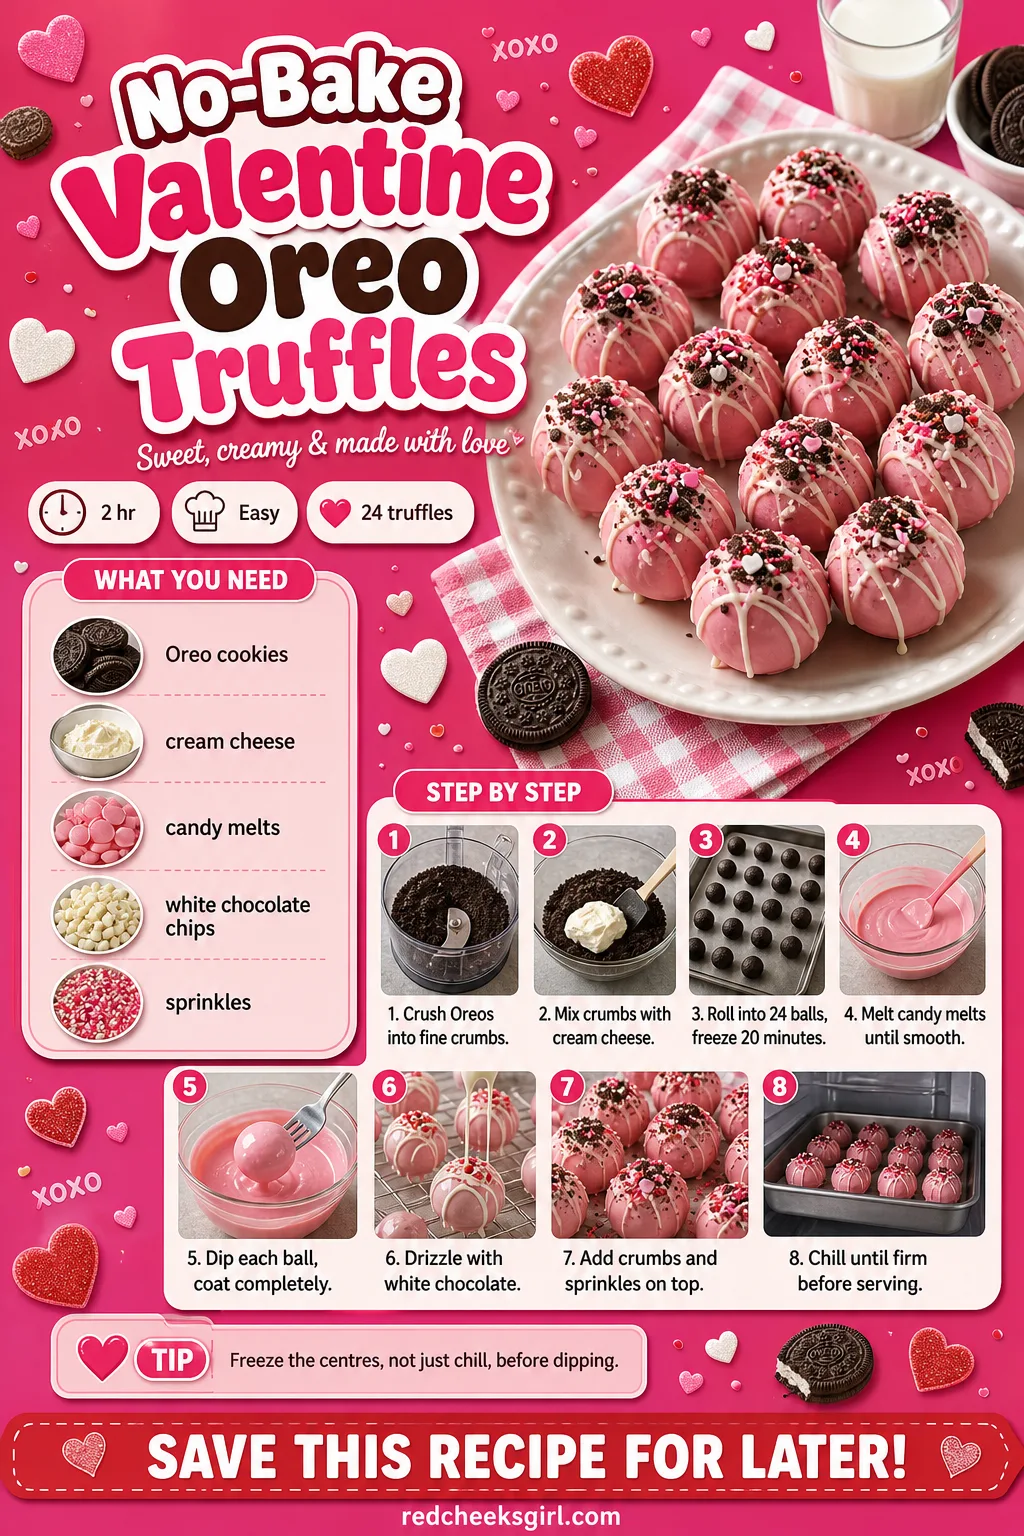
No-Bake Valentine Oreo Truffles
Cream cheese and crushed Oreos turn into a dough that tastes richer than either ingredient alone, and the pink shell is just the costume. These freeze well, which makes them one of the better things to have stashed away if you are not sure how many people are actually showing up.
Freeze the rolled centres, not just chill them, or they slide right off the dipping fork halfway through.
Ingredients
- 36 Oreo cookies
- 8 oz cream cheese, softened
- 12 oz pink or red candy melts
- 4 oz white chocolate chips
- valentine sprinkles
Instructions
- Crush the Oreo cookies, filling included, into fine crumbs using a food processor, or seal in a bag and crush with a rolling pin until almost powder.
- Reserve 2 tablespoons of crumbs for topping, then mix the rest with the softened cream cheese in a large bowl until it forms a thick, uniform dough.
- Roll the dough into 24 balls, about 1 tablespoon each, and lay them on a parchment lined tray.
- Freeze the balls for 20 minutes until firm; this stops them falling apart in the melted coating.
- Melt the candy melts in a microwave safe bowl in 30 second bursts, stirring between each, until smooth and pourable.
- Drop one chilled ball at a time into the melted candy, turn with a fork to coat completely, then lift and tap the fork against the bowl to shed the excess.
- Slide each coated truffle off the fork onto parchment using a toothpick to help release it cleanly.
- Melt the white chocolate chips and drizzle over the truffles in thin lines while the base coating is still wet.
- Sprinkle the reserved Oreo crumbs and valentine sprinkles over the top before everything sets.
- Chill the truffles until fully firm, about 30 minutes, then store in the fridge in an airtight container for up to a week.
Valentine Puppy Chow
Muddy buddies by any other name, shaken in a bag until every piece is dusted white, this is the treat kids beg to help shake. It also happens to be the easiest one on this whole list to make nut-free: sunflower seed butter swaps in without changing the texture at all.
For a classroom party where allergies are a real concern, make this one with sunflower seed butter as the default, not the exception.
Ingredients
- 9 cups rice or corn square cereal
- 1 cup semisweet chocolate chips
- 1/2 cup peanut butter or sunflower seed butter
- 1/4 cup unsalted butter
- 2 cups powdered sugar
- 1/2 cup valentine sprinkles
Instructions
- Pour the cereal into a very large bowl and set aside near the stove.
- Melt the chocolate chips, peanut butter and butter together in a microwave safe bowl in 30 second bursts, stirring between each, until completely smooth, about 90 seconds.
- Pour the melted mixture over the cereal and fold gently with a rubber spatula until every piece looks evenly coated and glossy, taking care not to crush the cereal.
- Tip the coated cereal into a large resealable bag, add the powdered sugar, seal and shake until every piece is fully dusted white.
- Spread the coated mix onto a parchment lined tray in a single layer so the pieces separate as they cool.
- Let it sit at room temperature until the chocolate coating sets firm, about 15 minutes; a piece should feel dry, not tacky, when touched.
- Toss the cooled puppy chow with sprinkles in a bowl.
- Store in an airtight container at room temperature for up to 10 days.

Pretzel Rod Valentine Wands
Hand one of these to a kid on the way out the door and you have solved the goodbye-gift problem without wrapping a single box. The pretzel does the structural work, so all you are doing is dipping, scattering and tying a ribbon.
If the rods will not lie flat while drying, stand them upright in a tall glass instead; the coating sets just as well either way.
Ingredients
- 12 pretzel rods
- 1 cup pink candy melts
- 1/2 cup white chocolate chips
- 1/4 cup crushed freeze-dried strawberries
- 2 tbsp valentine sprinkles
Instructions
- Line a tray with parchment paper and lay the pretzel rods flat.
- Melt the pink candy melts in a tall narrow glass or microwave safe bowl in 20 second bursts, stirring between each, until smooth enough to dip a rod cleanly.
- Dip each pretzel rod two thirds of the way into the melted candy, turning to coat all sides, then let the excess drip back into the bowl for a few seconds.
- Lay the dipped rods on parchment and immediately scatter crushed freeze-dried strawberries and sprinkles over the wet coating before it sets.
- Melt the white chocolate chips separately and drizzle in thin zigzag lines over a few rods for contrast.
- Let the rods rest flat at room temperature until the coating hardens completely and no longer feels tacky, about 20 minutes.
- Slide each finished rod into a cellophane bag and tie with ribbon just below the candy coating if gifting them.

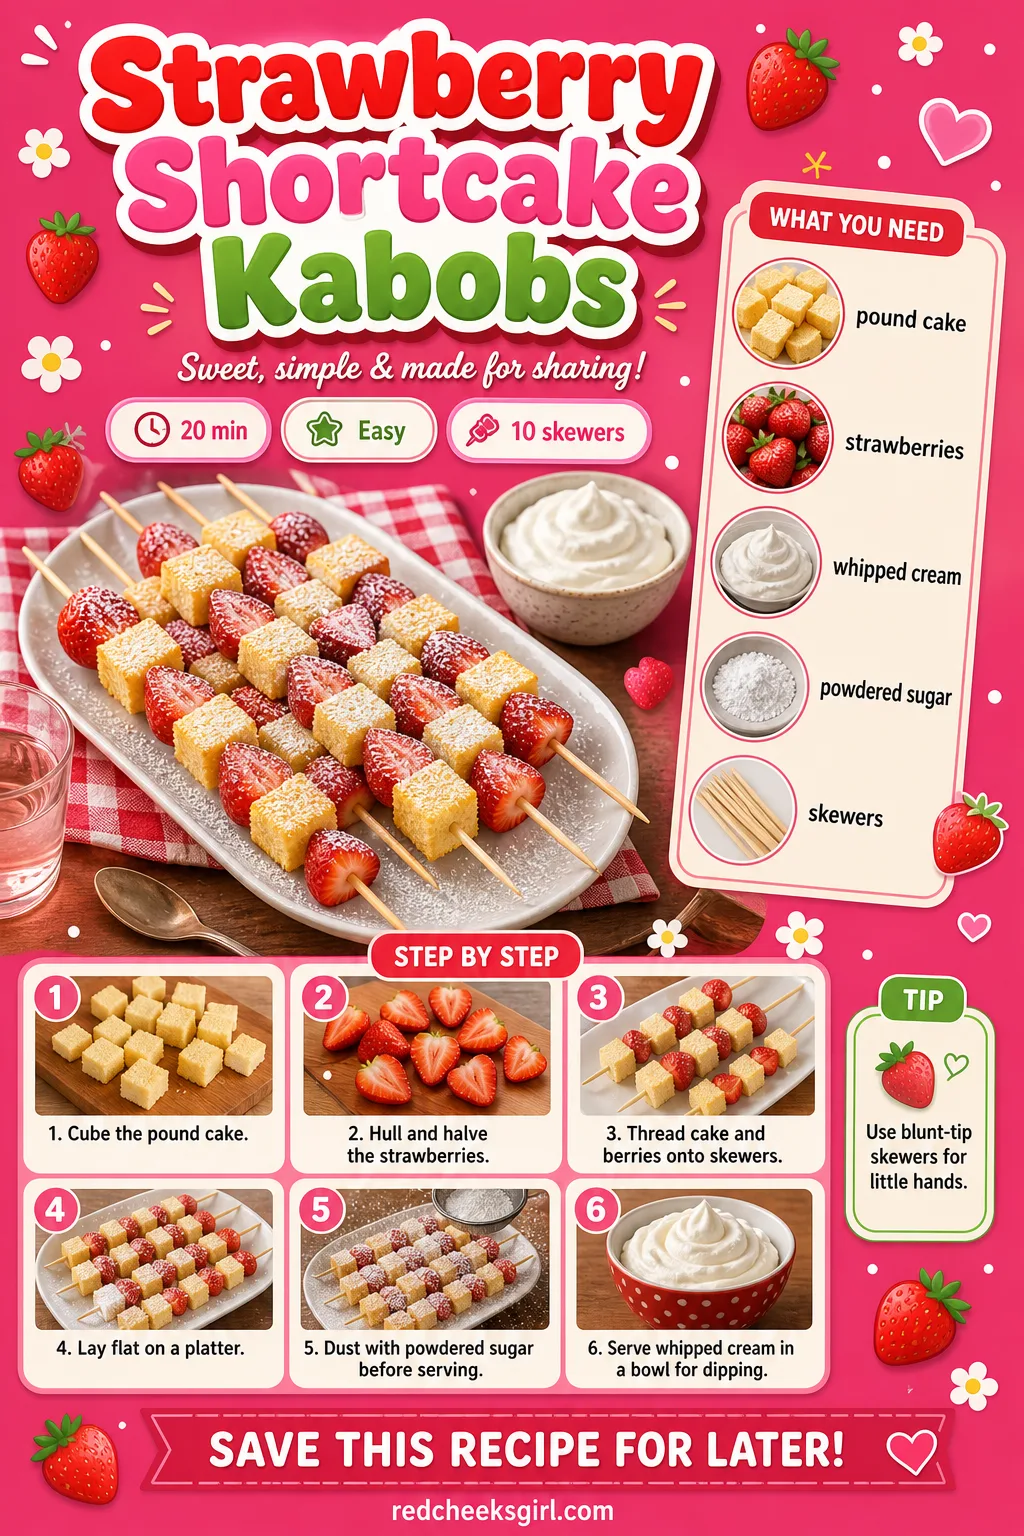
Strawberry Shortcake Kabobs
A skewer makes anything feel more like a party and less like a plate of leftovers, and this one needs nothing more than a store-bought pound cake and a knife. It also happens to count as the one item on the table with actual fruit in it.
Keep the whipped cream in a bowl for dipping rather than piping it on ahead of time, or the skewers go soggy while they wait on the table.
Ingredients
- 1 store-bought pound cake (10.75 oz), cubed
- 20 large strawberries, hulled and halved
- 1 cup whipped cream
- 2 tbsp powdered sugar
- 10 wooden skewers, blunt tip
Instructions
- Cut the pound cake into roughly 1-inch cubes, trimming any very dry or browned edges.
- Hull the strawberries and halve each one so the cut side sits flush against the cake.
- Thread the pieces onto skewers alternating cake, strawberry, cake, strawberry, finishing with a strawberry half cut-side out so it looks neat from the front.
- Lay the finished skewers on a platter in one layer, not stacked, so the cake does not get crushed.
- Dust the whole platter lightly with powdered sugar just before serving.
- Serve whipped cream alongside in a small bowl for dipping rather than piped on ahead, so the skewers do not go soggy while waiting.
- If making more than 30 minutes ahead, keep the assembled skewers chilled and covered, then dust with sugar right before guests arrive.
Valentine Fruit Pizza
A cream cheese layer over a cookie base dressed up with strawberry petals looks like far more work than it is, and it covers the table’s need for something that is not entirely chocolate. Cut it into wedges and it travels well to a classroom too.
Chill the finished pizza before slicing: a cold cream cheese layer holds its shape under the knife, where a warm one just smears.
Ingredients
- 1 roll (16.5 oz) refrigerated sugar cookie dough
- 8 oz cream cheese, softened
- 1/3 cup powdered sugar
- 1/2 tsp vanilla extract
- 1 cup sliced strawberries
- 1/2 cup raspberries
- 1/4 cup pomegranate seeds
Instructions
- Preheat the oven to 350°F (175°C) and line a round pizza pan or a 12-inch baking sheet with parchment.
- Press the cookie dough evenly into a large heart shape or circle about 1/4 inch thick, patching any thin spots with extra dough.
- Bake on the middle rack for 12 to 15 minutes, until the edges turn light golden while the centre still looks slightly soft; it firms up as it cools.
- Cool the cookie base completely on the pan, at least 30 minutes, before adding any topping or it will slide right off.
- Beat the cream cheese, powdered sugar and vanilla together in a bowl until smooth, light and completely free of lumps.
- Spread the cream cheese mixture evenly over the cooled base, leaving a small border bare at the edge.
- Arrange strawberry slices around the outer edge, overlapping like petals, working inward.
- Fill the centre with raspberries and pomegranate seeds, grouping colours so the pattern reads clearly from a distance.
- Chill the finished pizza for at least 20 minutes so the cream cheese layer firms up and slices cleanly.
- Slice into wedges with a sharp knife, wiping the blade between cuts to keep the topping neat.

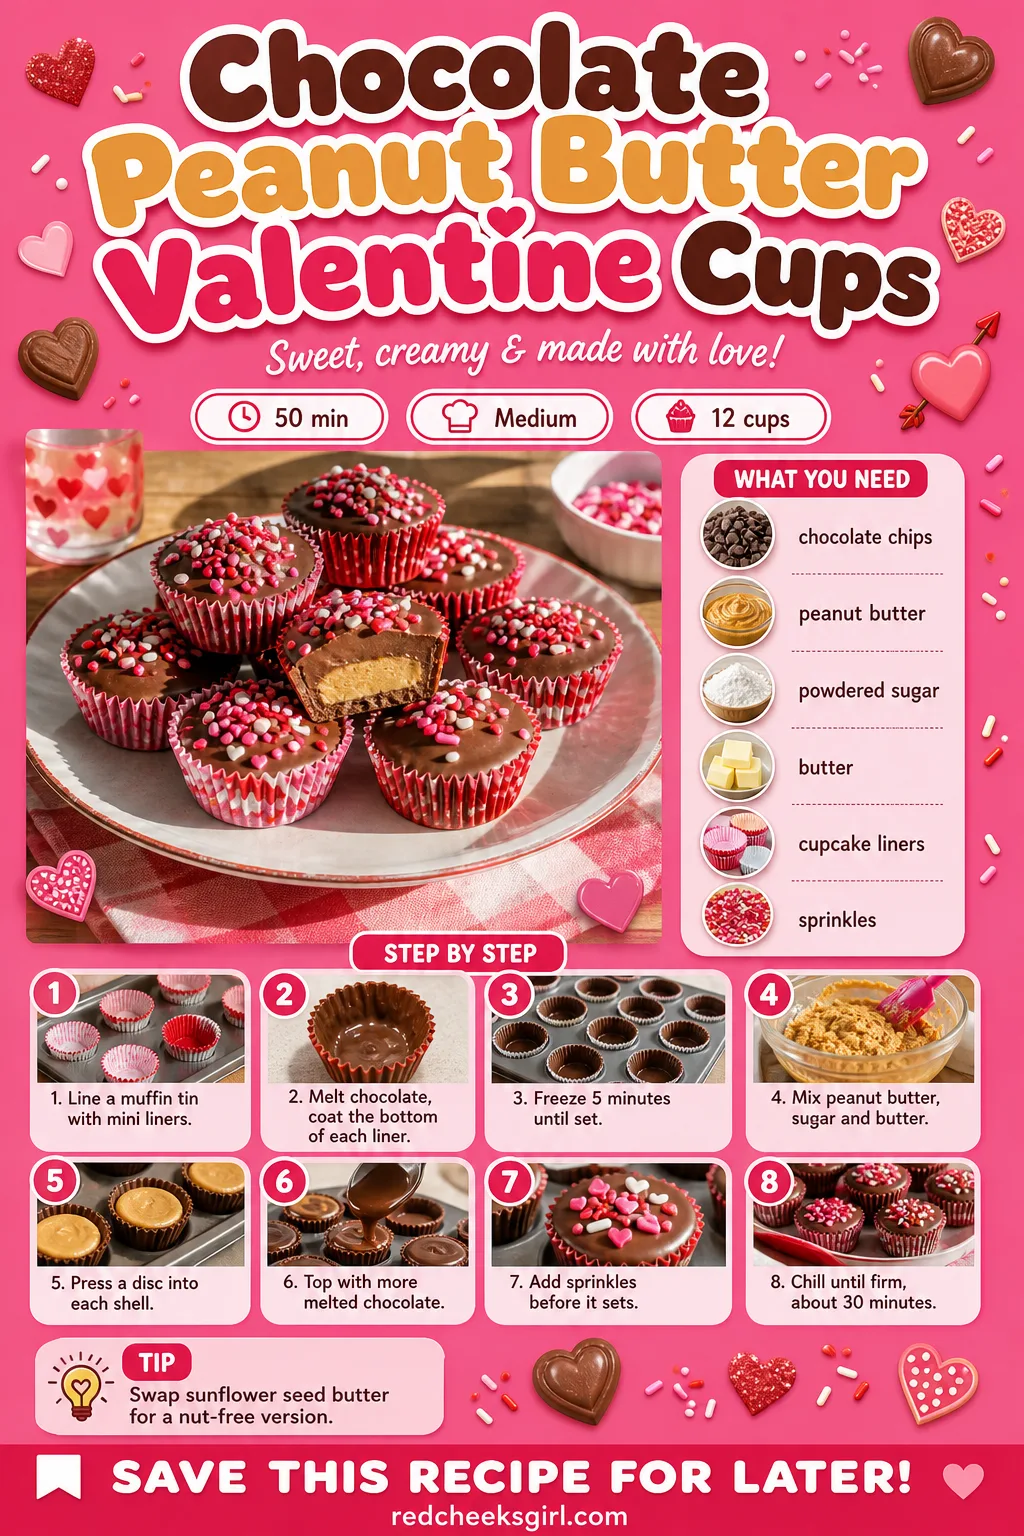
Chocolate Peanut Butter Valentine Cups
A homemade peanut butter cup tastes noticeably better than the drugstore version, mostly because you can make the filling thick instead of waxy. These sit in mini liners so they look intentional rather than melted, and nobody has to know how little effort the shell actually took.
Swap in sunflower seed butter for a nut-free version of the exact same cup, same texture, same shine.
Ingredients
- 1 1/2 cups milk chocolate chips
- 1/2 cup creamy peanut butter
- 2 tbsp powdered sugar
- 1 tbsp unsalted butter, softened
- 12 mini cupcake liners
- 2 tbsp valentine sprinkles
Instructions
- Set 12 mini cupcake liners into a muffin tin so they hold their shape while filling.
- Melt the chocolate chips in a microwave safe bowl in 20 second bursts, stirring between each, until completely smooth.
- Spoon about a teaspoon of melted chocolate into each liner and tilt or brush it up the sides with a small spoon to coat the bottom and edges.
- Freeze the lined cups for 5 minutes until the chocolate shell feels set and no longer wet to the touch.
- Mix the peanut butter, powdered sugar and softened butter together in a bowl until smooth and thick enough to hold a shape.
- Spoon a small disc of the peanut butter mixture into each chocolate shell, pressing gently to flatten, leaving a border of chocolate visible around the edge.
- Top each cup with another spoonful of melted chocolate, spreading to the edges so the peanut butter filling is fully sealed in.
- Scatter sprinkles over the wet chocolate top before it sets.
- Chill in the fridge until completely firm, about 30 minutes, then peel the liners away before serving.
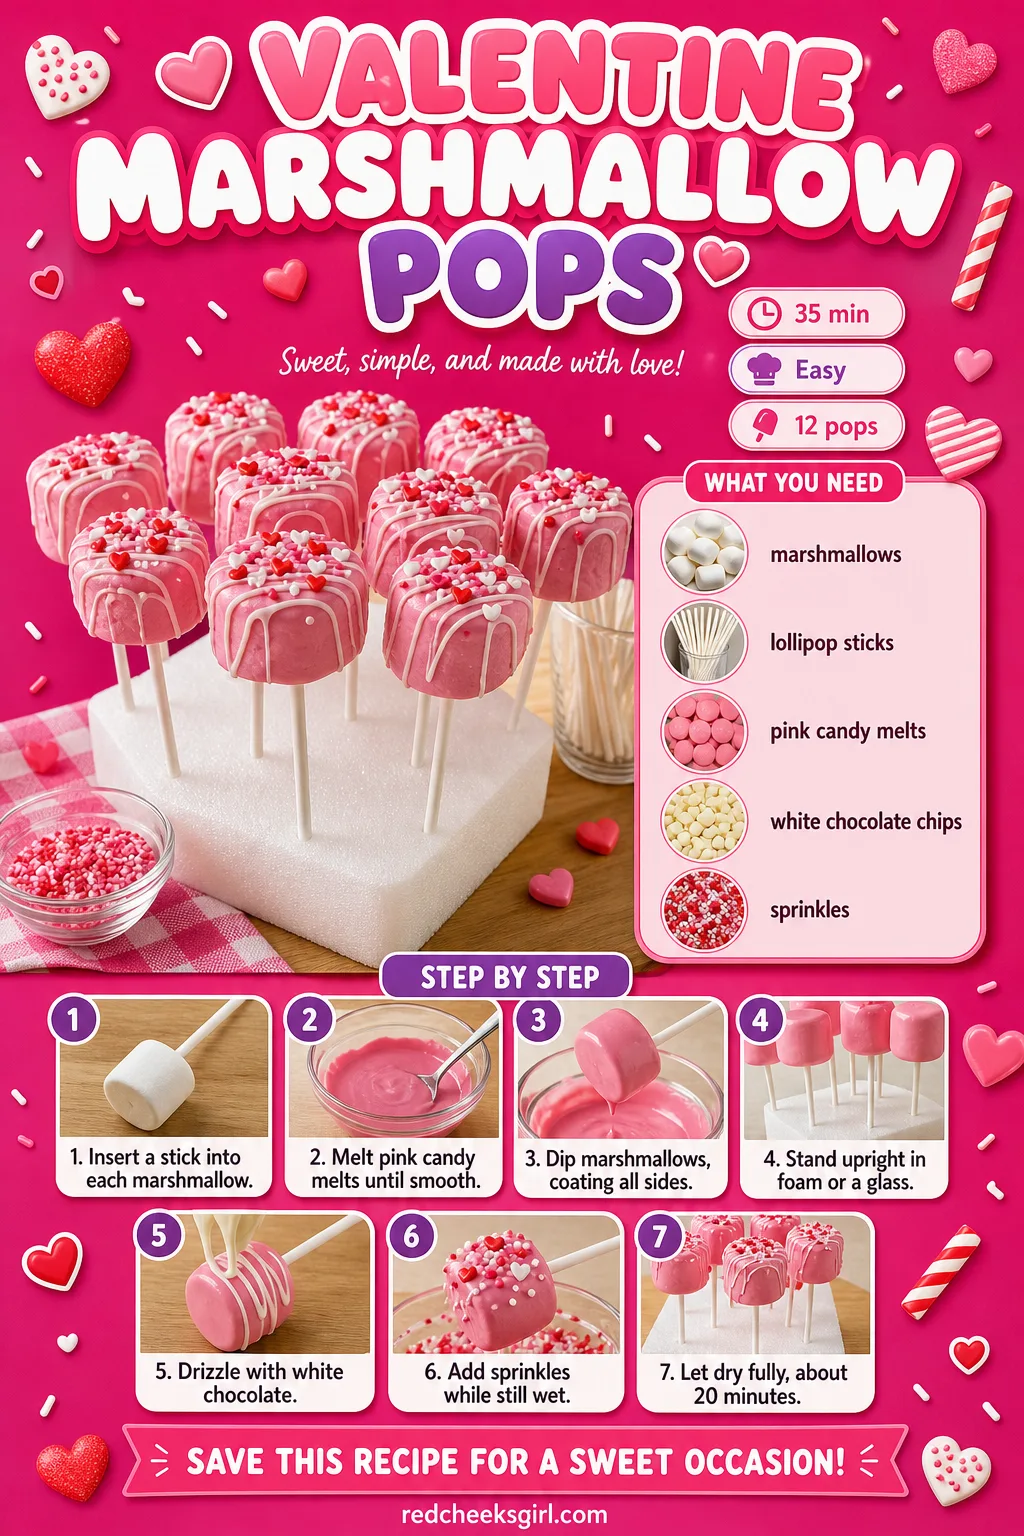
Valentine Marshmallow Pops
A marshmallow on a stick is already most of the way to a lollipop, so dipping it in pink candy and standing it up to dry is the smallest possible amount of work for the biggest visual payoff. These are the treat to hand a kid who cannot have a knife near the pretzel hearts yet.
If you do not own florist foam, a tall glass with a layer of sugar in the bottom holds the sticks upright just as well.
Ingredients
- 12 large marshmallows
- 12 lollipop sticks
- 1 cup pink candy melts
- 1/2 cup white chocolate chips
- 1/4 cup valentine sprinkles
Instructions
- Push a lollipop stick halfway into the flat end of each marshmallow, twisting gently so it does not tear through the other side.
- Melt the pink candy melts in a microwave safe bowl in 20 second bursts, stirring between each, until smooth and thin enough to coat evenly.
- Dip each marshmallow straight down into the melted candy, turning to cover all sides, then lift and let the excess drip off for a few seconds.
- Stand the dipped pops upright in a block of florist foam or a tall glass so they dry without flattening on one side.
- Melt the white chocolate chips and drizzle thin lines over the pink coating while it is still slightly tacky.
- Scatter sprinkles over the wet drizzle immediately so they stick.
- Let the pops dry fully upright at room temperature, about 20 minutes, until the coating no longer feels soft anywhere.
Heart-Shaped Sugar Cookies
This is the one that actually requires an oven and a chilled dough, and it earns its place anyway because nothing else on the table looks quite as deliberately Valentine as a hand-iced heart. Let the kids pipe the icing; crooked hearts photograph just as sweetly as perfect ones.
Chill the dough properly before rolling, or the hearts spread into soft blobs in the oven instead of holding their points.
Ingredients
- 2 3/4 cups all-purpose flour
- 1 tsp baking powder
- 1/2 tsp salt
- 1 cup unsalted butter, softened
- 1 1/2 cups granulated sugar
- 1 egg
- 1 tsp vanilla extract
- 2 cups cookie icing, tinted pink and red
Instructions
- Whisk the flour, baking powder and salt together in a bowl and set aside.
- Beat the softened butter and sugar together in a large bowl until pale and fluffy, about 3 minutes; the mixture should look lightened in colour, not grainy.
- Beat in the egg and vanilla until fully combined, scraping down the bowl once.
- Add the dry ingredients gradually, mixing on low just until the dough comes together and pulls away from the side of the bowl.
- Divide the dough in half, flatten each into a disc, wrap in plastic and chill for at least 1 hour, or until firm enough to roll without sticking.
- Preheat the oven to 350°F (175°C) and line two baking sheets with parchment.
- Roll the chilled dough on a lightly floured surface to 1/4 inch thickness, then cut hearts with a cookie cutter, re-rolling scraps once.
- Space the cookies 1.5 inches apart on the prepared sheets and bake, one sheet at a time on the middle rack, for 9 to 11 minutes, until the edges are just set but the centres still look pale and slightly soft.
- Cool the cookies on the sheet for 5 minutes before transferring to a wire rack to cool completely, about 30 minutes; icing on a warm cookie slides right off.
- Pipe or spread the tinted icing onto the fully cooled cookies, outlining the edge first, then flooding the centre.
- Let the iced cookies sit uncovered at room temperature until the icing sets hard, 1 to 2 hours, before stacking or packaging.

🛍 Shopping guide
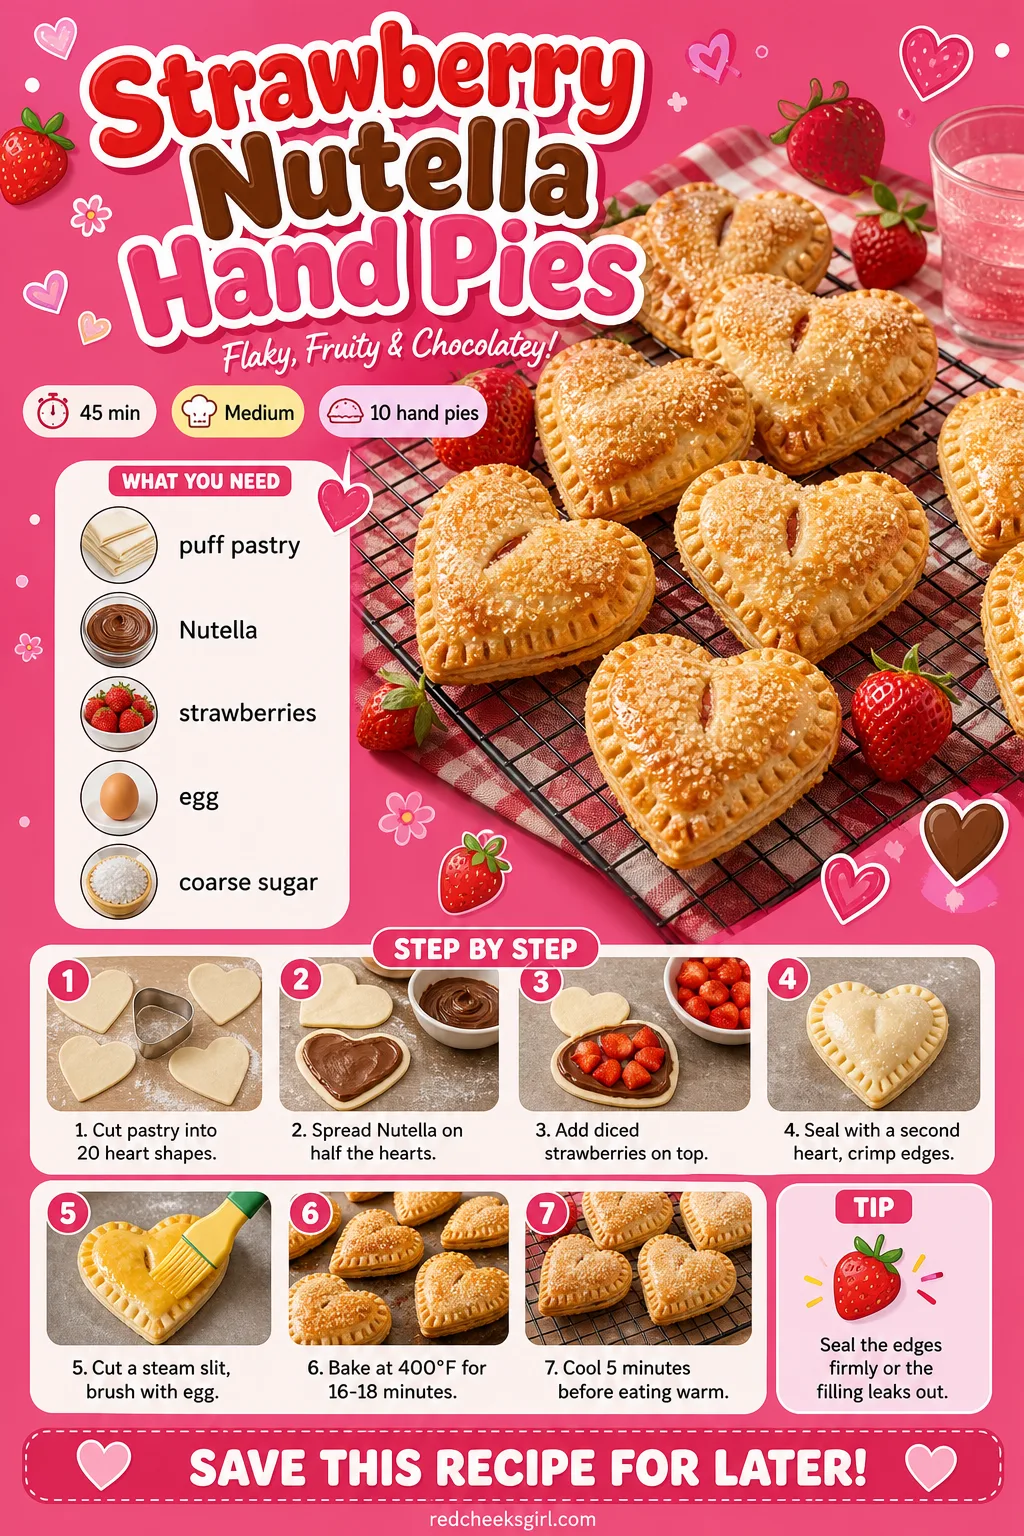
Strawberry Nutella Hand Pies
Puff pastry does most of the impressive-looking work here, so the only real skill is crimping the edges tightly enough that the filling stays inside the oven instead of leaking onto the tray. Warm from the oven, these taste like a bakery pastry rather than a kid’s craft project.
Seal the edges firmly with a fork; a loose seam is the one mistake that actually ruins these.
Ingredients
- 1 sheet puff pastry, thawed
- 1/2 cup Nutella
- 1/2 cup finely diced strawberries
- 1 egg, beaten
- 2 tbsp coarse sugar
Instructions
- Preheat the oven to 400°F (200°C) and line a baking sheet with parchment.
- Roll the thawed puff pastry out slightly on a floured surface, then cut into 20 heart shapes using a 3-inch heart cutter, re-rolling scraps once.
- Spread a teaspoon of Nutella onto 10 of the hearts, leaving a half-inch border bare around the edge.
- Scatter a few diced strawberries over the Nutella on each.
- Brush the bare border with beaten egg, then top with a second heart, pressing the edges firmly with a fork to seal all the way around.
- Cut a tiny slit in the top of each pie to let steam escape while baking.
- Brush the tops with the remaining egg wash and sprinkle with coarse sugar.
- Bake on the middle rack for 16 to 18 minutes, until puffed and deep golden brown; the pastry should sound hollow when you tap the top lightly.
- Cool on the pan for 5 minutes; the filling stays scorching hot longer than the pastry suggests.
- Transfer to a rack to cool slightly more before serving warm or at room temperature.
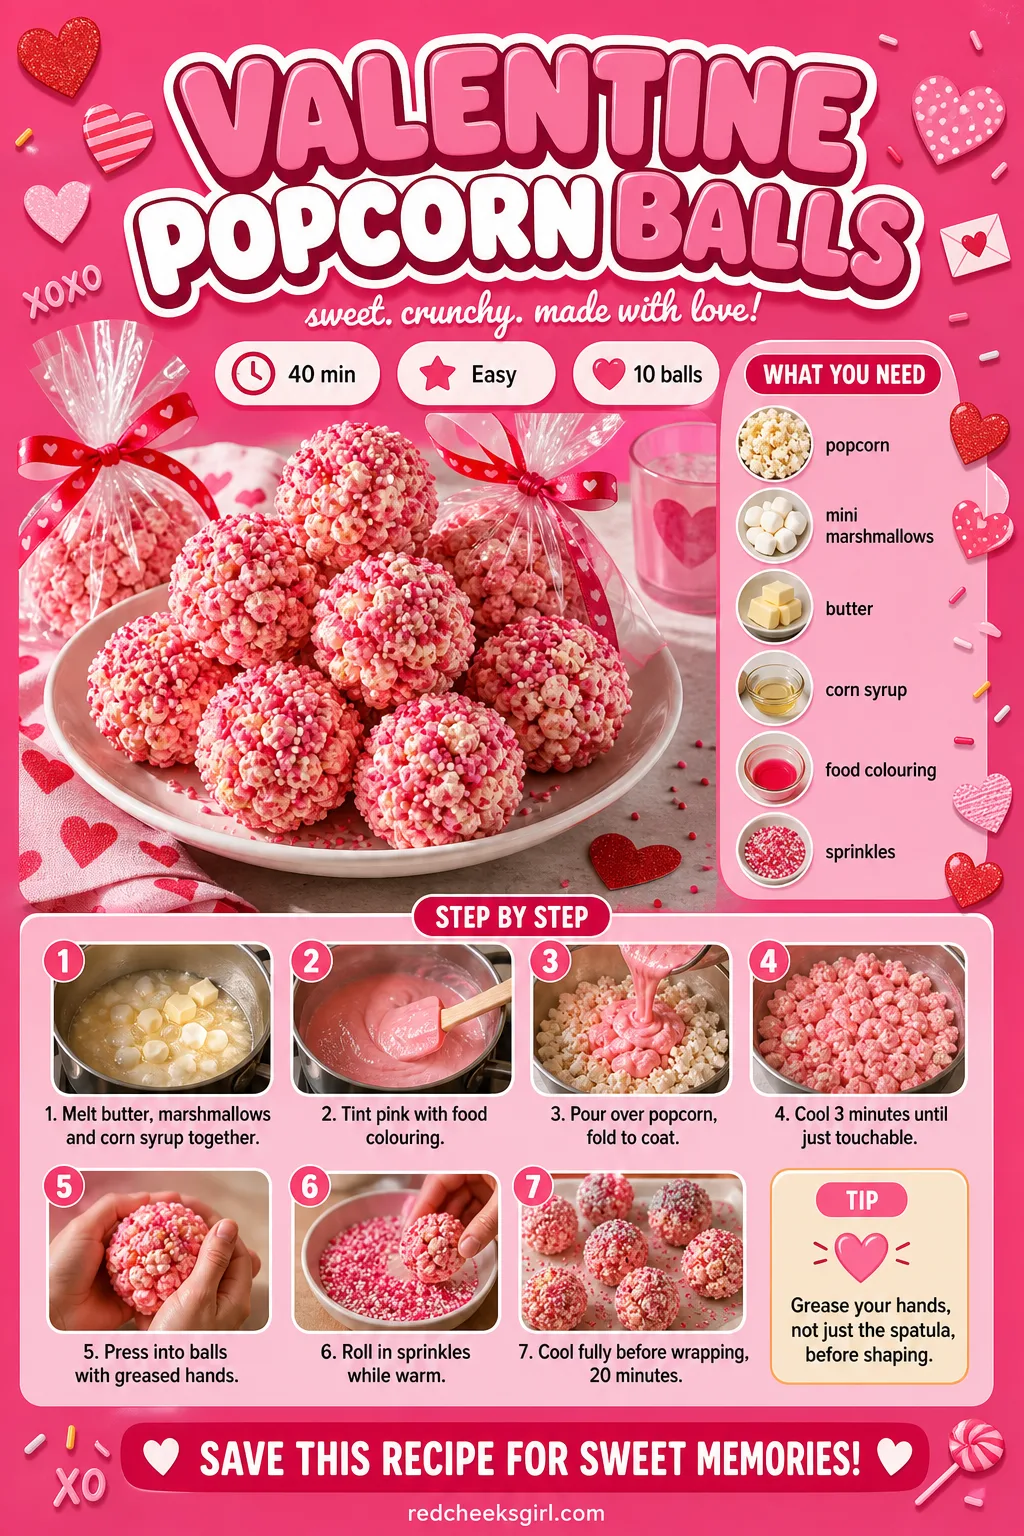
Valentine Popcorn Balls
Sticky, pink and genuinely fun to shape, these are the treat to hand the kid who wants to get their hands into the mixing bowl without being anywhere near a stove. Greasing your own hands matters as much as greasing the spatula, since warm marshmallow sticks to skin faster than you expect.
Wrap each ball individually in cellophane once fully cool and they travel well in a lunchbox or a classroom bag.
Ingredients
- 10 cups popped popcorn
- 1 cup mini marshmallows
- 3 tbsp unsalted butter
- 1/4 cup light corn syrup
- red food colouring
- 1/2 cup valentine sprinkles
Instructions
- Spread the popcorn in a very large bowl, picking out any unpopped kernels so no one bites down on one.
- Melt the butter in a saucepan over medium-low heat, then add the marshmallows and corn syrup, stirring constantly until completely smooth, about 4 minutes.
- Stir in a few drops of red food colouring until the mixture turns a soft pink; add more a drop at a time for a deeper shade.
- Pour the hot marshmallow mixture over the popcorn immediately and fold with a greased spatula until every piece is coated.
- Let the mixture cool just until safe to touch, about 3 minutes; it should still be warm and pliable, not hot.
- Grease your hands lightly with butter, then scoop and press the popcorn into tight balls, about the size of a tennis ball.
- Roll the warm balls in sprinkles immediately so they stick to the tacky surface.
- Set the finished balls on parchment to cool and firm up completely, about 20 minutes, before wrapping individually in cellophane.
Pink Velvet Whoopie Pies
Softer than a cookie and far less fuss than a layer cake, whoopie pies are the one baked item here that genuinely feels like dessert rather than a snack. The marshmallow fluff filling is forgiving: pipe it messily and it still looks like exactly what it is meant to look like.
Match cakes into pairs of similar size before filling, since a big top and a small bottom never sandwich evenly.
Ingredients
- 1 1/2 cups all-purpose flour
- 2 tbsp unsweetened cocoa powder
- 1/2 tsp baking soda
- 1/4 tsp salt
- 1/2 cup unsalted butter, softened
- 3/4 cup granulated sugar
- 1 egg
- 1/2 cup buttermilk
- 1 tsp vanilla extract
- red or pink gel food colouring
- 1 cup marshmallow fluff
- 4 oz cream cheese, softened
- 1 cup powdered sugar
Instructions
- Preheat the oven to 350°F (175°C) and line two baking sheets with parchment.
- Whisk the flour, cocoa powder, baking soda and salt together in a bowl.
- Beat the butter and sugar together until light and fluffy, about 2 minutes, then beat in the egg until combined.
- Add the buttermilk and vanilla, mixing until smooth, then tint with gel food colouring until deep pink.
- Fold the dry ingredients into the wet ingredients just until no streaks of flour remain; the batter should be thick and scoopable, not pourable.
- Drop the batter by rounded tablespoons onto the prepared sheets, spacing 2 inches apart, aiming for 24 even mounds.
- Bake on the middle rack for 10 to 12 minutes, until the tops spring back lightly when pressed and no longer look wet.
- Cool the cakes on the sheet for 5 minutes, then move to a wire rack to cool completely, about 20 minutes, before filling.
- Beat the cream cheese and marshmallow fluff together until smooth, then gradually beat in the powdered sugar until the filling holds a soft peak.
- Match the cooled cakes into pairs of similar size.
- Spread or pipe filling onto the flat side of one cake in each pair, then sandwich with its matching half, pressing gently until the filling reaches the edge.
- Chill the assembled whoopie pies for 15 minutes to firm the filling before serving, or stack in an airtight container for up to 3 days.

Strawberry Banana Valentine Smoothie
Not every treat has to be solid: a thick pink smoothie covers the one adult at the table who claims not to want dessert, and it keeps a sugar-saturated afternoon from being entirely sugar.
If you want the grown-up table to have its own moment first, 21 Valentine’s Games That Work for Any Crowd fills the gap while the blender runs.
Freeze the banana ahead of time, sliced, and the smoothie comes out thick rather than watery straight from the blender.
Ingredients
- 1 cup frozen strawberries
- 1 banana, sliced and frozen
- 1 cup milk
- 1/2 cup vanilla yogurt
- 1 tbsp honey
- valentine sprinkles, for the rim
Instructions
- Add the frozen strawberries, frozen banana, milk and yogurt to a blender in that order so the blades catch the liquid first.
- Blend on high until completely smooth and no chunks of fruit remain, about 45 seconds, stopping once to scrape down the sides if needed.
- Taste and blend in honey if the smoothie needs more sweetness; the mixture should be thick enough to coat the back of a spoon but still pourable.
- Wet the rim of two glasses and dip into sprinkles for a festive edge, if using.
- Pour the smoothie into the prepared glasses immediately and serve with a straw while still cold and thick.

🛍 Shopping guide
Frequently Asked Questions
What are good no-bake Valentine treats for kids?
No-bake Valentine treats for kids include rice krispie hearts, yogurt bark, chocolate dipped pretzels and puppy chow, all made with just a stovetop or microwave. They come together fast enough for little hands to help from start to finish.
How do you make heart-shaped treats without a cookie cutter?
Press the mixture into a pan, chill until firm, then cut a heart by hand with a small knife and a paper template, or pinch the rim of a round shape into a point at one end. A sharp paring knife traces a cleaner line than you’d expect.
What are good nut-free options for a classroom Valentine’s party?
Nut-free classroom treats include conversation heart popcorn, puppy chow made with sunflower seed butter, yogurt bark and most chocolate-dipped fruit, since none rely on nuts for flavour or texture. Always double check labels on store-bought chocolate and sprinkles too.
How far in advance can you make Valentine treats?
Most no-bake Valentine treats keep 3 to 7 days stored airtight at room temperature or in the fridge, and bark, truffles and puppy chow freeze for up to a month. Chocolate dipped strawberries are the exception and taste best eaten the same day.
How do you keep rice krispie treats soft?
Rice krispie treats stay soft when the mixture isn’t packed down too firmly and they’re sealed airtight as soon as they cool completely. Tucking a spare marshmallow into the container also helps keep them from drying out over a few days.
What is the best way to melt candy melts for dipping?
Melt candy melts in a microwave safe bowl in 20 to 30 second bursts, stirring well between each, until smooth and pourable with no lumps. Overheating is the main cause of seized or grainy coating, so patience matters more than speed.

22 Valentine cocktails: cherry espresso martini, pomegranate margarita, rose spritz, raspberry Frenc
19 galentines brunch ideas in blush, cherry red, cream and rose gold, from the long table to the fav

Browse 19 valentines day ideas for couples, kids, classrooms, friend groups and solo nights, sorted
Leave a Reply