

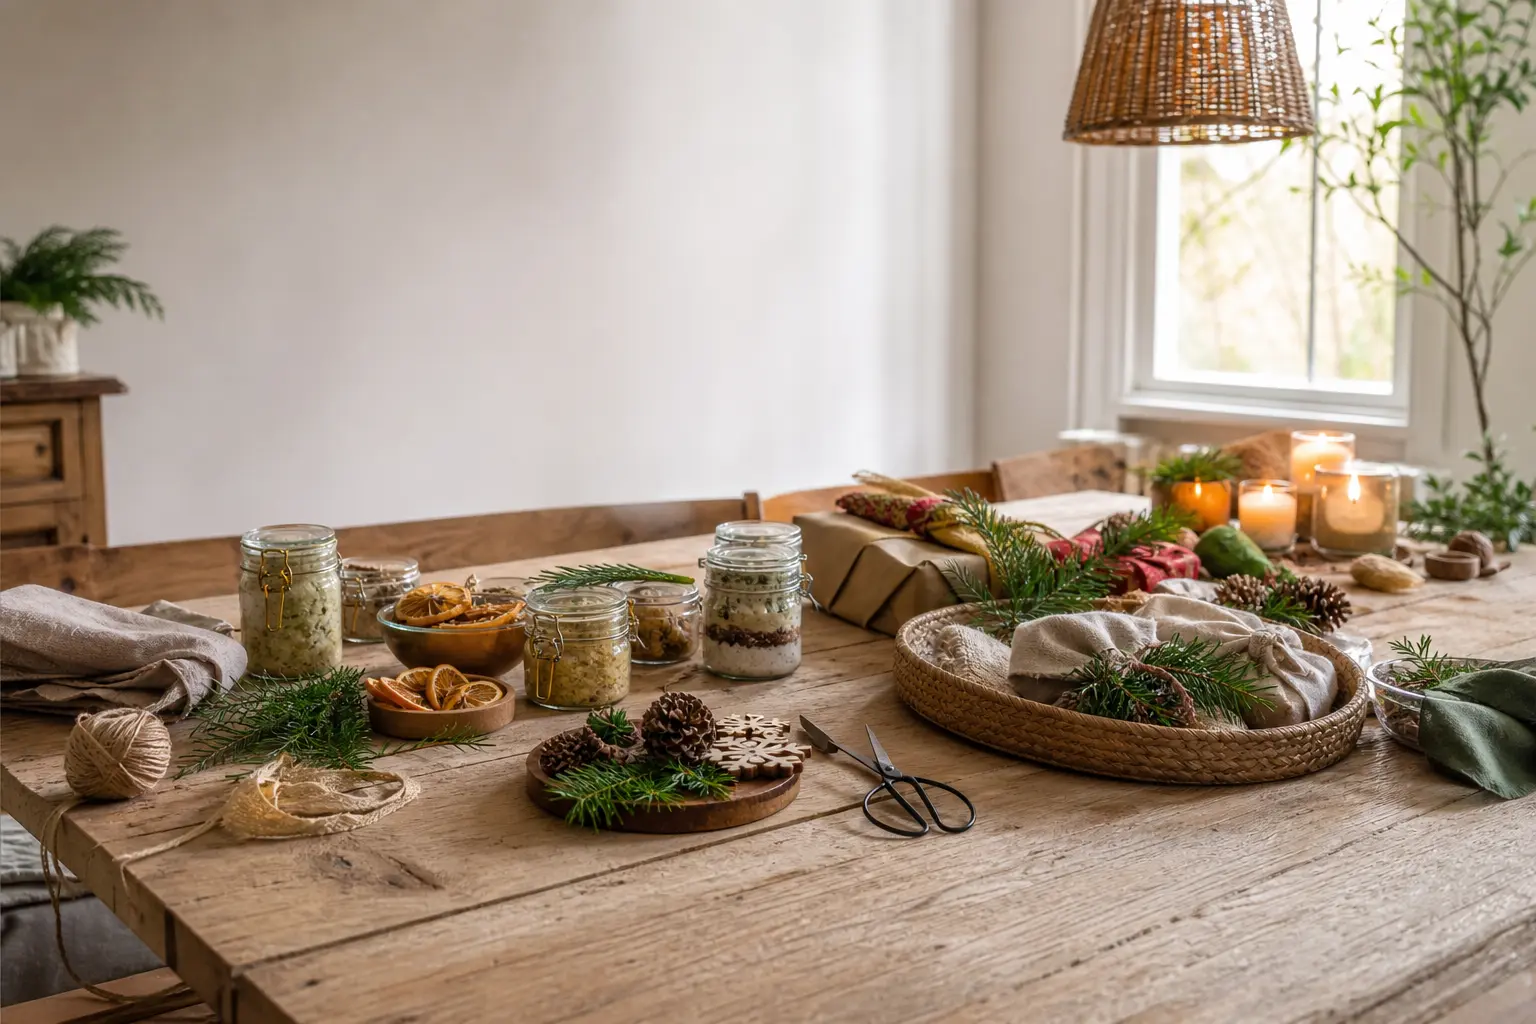
The test for any diy christmas gifts worth making is simple: will the person reach for it in January, or will it sit on a shelf until they quietly donate it in March?
The handmade things people genuinely keep are the ones they use up, wear out, or rely on every day. Not the ones they have to find a spot for and dust.
This list skips decorative entirely. Every craft here falls into one of four categories: consumable (it gets finished and remembered fondly), wearable (it goes on the body or in a pocket), useful (it solves something), or recorded (it holds something the recipient values).
A few take an afternoon, a few take ten minutes, and several can be made in batches so one good session covers multiple people. The skills range from absolute beginner to quietly competent, but nothing here requires a course.
For more ideas in a similar spirit, browse 15 DIY Christmas Games You Can Make from Dollar Store Finds if you are also making something for a gathering, or read the 20 Christmas Party Games for All Ages to Play Together guide for the day itself.
This post contains affiliate links. If you buy through them, I may earn a small commission at no extra cost to you.
- Infused Salt in a Small Tin
- Beeswax Food Wraps in Three Sizes
- A Hand Bound Notebook
- A Leather Cable Tidy
- A Block Printed Tea Towel
- A Dipped Taper Set
- A Knitted Wash Cloth Set
- A Wooden Spoon Oiled and Stamped
- A Bath Oil Blend
- A Stamped Luggage Tag
- A Jar of Preserved Lemons
- A Hand Thrown Ring Dish
- A Woven Bookmark
- A Linen Bread Bag
- A Hand Painted Plant Pot with a Cutting
- A Recipe Card Set in Your Own Handwriting
- A Photograph Printed and Framed Simply
- A Shoe Shine Kit Assembled Around a Made Cloth
- A Scented Drawer Sachet with a Sewn Cover
- A Pair of Embroidered Handkerchiefs
- A Rolled Beeswax Candle Bundle
- A Small Hand Carved Butter Knife
- Frequently Asked Questions
Infused Salt in a Small Tin
A good infused salt disappears fast. Rosemary and lemon zest, chilli and garlic, or smoked paprika with sea salt flakes all transform a weeknight meal, and the tin is small enough that no one feels guilty about keeping it on the counter. This is a gift that gets used within the first fortnight.
The tin should be airtight and hold between 100 g and 200 g. A round slip-lid tin from a stationery or craft supplier works well. Write the blend name and a brief use note on a kraft label pressed to the lid.
What You Need
- 200 g coarse sea salt flakes
- 2 tbsp dried rosemary, crumbled (or your chosen flavouring)
- Zest of 2 unwaxed lemons (for the lemon-herb version)
- 1 small airtight slip-lid tin, 100-200 ml capacity
- Kraft adhesive labels, at least 5 cm diameter
- A baking sheet lined with baking paper
How to Make It
- Combine the salt, crumbled rosemary and lemon zest in a bowl and toss until the zest is evenly distributed through the salt. The mixture will look slightly damp from the zest oils, and that is fine.
- Spread the blend in a thin, even layer on the lined baking sheet. Leave it uncovered at room temperature for at least 12 hours, or overnight, until completely dry and no longer clumping. Stir it once halfway through.
- Once dry, tip the salt into the tin and press the lid on firmly. If any zest is still slightly tacky, spread the salt on a fresh sheet and give it another 4 hours.
- Write the blend name and a suggested use (“finish roast chicken, eggs, or pasta water”) on a kraft label in permanent marker, and press it to the lid. Press firmly and rub out any air bubbles so the label stays put through months of kitchen use.

Beeswax Food Wraps in Three Sizes
Beeswax wraps have survived the novelty phase because they actually work: they keep a half-cut avocado or a wedge of cheese better than cling film does.
Making them in a set of three (sandwich, bowl-cover and snack size) means the recipient has one for every job. The fabric clings with the warmth of the hand, and the whole set fits in a small cotton bag.
Choose 100% cotton fabric with a tight weave. Muslin is too loose. A fat quarter gives you enough for all three sizes with a little to spare.
What You Need
- 1 fat quarter (50 x 55 cm) 100% cotton fabric, washed and ironed
- 90 g pure beeswax pellets
- 1 tbsp pine resin powder (increases cling, optional but recommended)
- 1 tbsp jojoba oil
- An old baking tray lined with baking paper
- A pastry brush kept for craft use
- Pinking shears or scissors
How to Make It
- Cut the fabric into three rectangles: 35 x 35 cm (bowl cover), 30 x 33 cm (sandwich), and 20 x 20 cm (snack). Pink the edges if you have pinking shears, which slows fraying without hemming.
- Preheat the oven to 80 C (175 F). Lay the smallest piece of fabric flat on the lined baking tray.
- Scatter a thin, even layer of beeswax pellets across the fabric, about 1 tsp per piece. Add a pinch of pine resin if using, and a few drops of jojoba oil. Slide the tray into the oven for 3-4 minutes, until the wax has melted completely and the fabric looks wet all over.
- An adult must handle the tray. Remove it from the oven and quickly use the pastry brush to spread the wax evenly to every edge, working fast before it sets. The fabric should look uniformly glossy, with no dry patches.
- Lift the wrap immediately with clean fingers or tongs and wave it gently in the air for 30-60 seconds until it stiffens. Hang it over a rack or the back of a chair to finish cooling. Repeat for each size.
- Once cool, stack the three wraps and tie them loosely with a length of kitchen twine. Store flat. To clean, the recipient should rinse with cool water only and a little washing-up liquid; hot water melts the wax.

🛍 Shopping guide
A Hand Bound Notebook
A notebook the recipient actually likes using is one of the most practical gifts going, and a hand-bound one, with paper chosen for the way they write (fountain pen, brush pen, ballpoint), beats anything from a shop. Coptic stitch binding lets the pages lie completely flat when open. Sixty-four pages is enough to be useful, small enough to carry.
What You Need
- 16 sheets A4 cartridge paper, 100 gsm (folds to A5, 64 pages)
- 2 sheets A4 card, 300 gsm, for covers
- Bookbinding needle and waxed thread, or linen thread waxed with a beeswax block
- Bone folder
- Binder clips, at least 4
- A ruler and pencil
- A craft knife and cutting mat (adult step)
- A small beeswax block or candle stub for waxing thread
How to Make It
- Fold each sheet of cartridge paper in half along the long axis, creasing firmly with the bone folder. Stack them into 4 groups of 4 folded sheets (called signatures). Fold the two cover sheets the same way.
- Nest each group of 4 inside the fold to make four signatures. Clip each signature closed with a binder clip and press under a heavy book for 20 minutes so the folds hold.
- An adult should mark and pierce the holes. Open each signature and, using the ruler and pencil, mark 5 evenly spaced holes along the spine fold, starting and ending 1 cm from the top and bottom. Pierce through all layers with the bookbinding needle. Do the same on each cover sheet.
- Cut a length of waxed thread four times the height of the book. Thread the needle and begin Coptic stitch: sew through the first hole of the first signature from the outside, loop through the corresponding cover hole, and work down the spine, linking each signature to the previous one with a small linking stitch at each hole. There are clear diagrams available by searching “Coptic stitch bookbinding diagram” if this is your first time; the stitch is more intuitive than it sounds once you see the pattern.
- When all signatures are attached, knot the thread securely at the final hole and trim to 1 cm. The finished spine should show a neat row of chain stitches, and the book should open flat with no resistance.

A Leather Cable Tidy
Anyone with a laptop bag knows the specific misery of a tangled charger cable. A small leather wrap with a press stud keeps one cable contained and looks good doing it. Natural vegetable-tanned leather ages well and costs less per piece than most craft materials when bought as offcuts.
What You Need
- One leather offcut, vegetable-tanned, approx 18 x 8 cm, 1.5-2 mm thick
- 1 press stud (also called a snap fastener), 10-12 mm
- A leather hole punch or drive punch and mallet
- A press stud setting tool (usually included with press studs)
- Leather edge dye or beeswax block for finishing edges
- A ruler and silver or chalk pencil
How to Make It
- Cut the leather to 18 x 8 cm if it is not already that size. An adult should make this cut with a metal ruler and craft knife on a cutting mat, using firm, single-direction strokes for a clean edge. Round two corners at one short end using scissors: this is the flap.
- Mark the centre of the flap end with the chalk pencil, 1.5 cm from the edge. Punch one hole there using the leather hole punch. Punch a corresponding hole on the body of the strap, 4 cm from the straight end.
- Set the press stud: push the socket half through the flap hole from the grain (smooth) side, place the cap over it on the rough side, and strike firmly with the setting tool and mallet until the cap is flush and the stud swings freely. Attach the stud half at the body hole the same way.
- Run the edge of a beeswax block along all cut edges, then rub briskly with a folded cloth to burnish them smooth. The edges darken slightly and feel sealed, not raw.
- Wrap the strap around a coiled cable, thread the flap through the loop, and snap it closed to check the fit. The finished piece should hold a standard phone charger cable snugly without stretching the leather.

🛍 Shopping guide
A Block Printed Tea Towel
A block printed tea towel in a single clean repeat is something a person actually hangs in their kitchen rather than burying in a drawer. The trick is one colour, one block, and linen rather than cotton-polyester blends, which barely take ink. A simple geometric or leaf print works better than something too pictorial: it reads from across the room.
What You Need
- 1 pre-washed linen tea towel, approx 50 x 70 cm
- 1 foam printing block or carved rubber printing block
- Fabric ink, 1 colour, 30 ml minimum
- A flat inking plate (an old ceramic tile works)
- A small foam roller, 10 cm
- Masking tape
- An iron
How to Make It
- Tape the tea towel flat to a table protected with a folded sheet. Smooth it completely: any wrinkles print into the design.
- Roll a thin, even layer of fabric ink onto the inking tile, then roll it onto the block until the surface looks uniformly coated but not overloaded. Too much ink causes the print to bleed at the edges.
- Press the block firmly and squarely onto the fabric, hold for 3 seconds without rocking it, then lift straight up. Print your first impression on a scrap of similar fabric before the towel, to check coverage.
- Work across the towel in a simple repeat, reloading the block after each stamp. Leave at least 2 cm between prints. The pattern need not be perfectly even: a slight hand-printed quality is part of the appeal.
- Leave flat to dry completely, at least 1 hour. Once dry, heat-set by pressing on the reverse with a hot dry iron for 30 seconds per section, following the fabric ink manufacturer’s instructions. This makes the print washable.

A Dipped Taper Set
Dip-dyed taper candles in a muted, contemporary palette, tied in a bundle of six or eight, are the consumable gift that feels genuinely considered rather than generic. The dye work takes under an hour, and the result is a set of candles that looks expensive. Avoid anything fluorescent: soft terracotta, sage, dusty blue or warm grey all feel grown-up.
What You Need
- 8 plain white taper candles, 25 cm
- Candle dye blocks, 1-2 colours
- A tall narrow heatproof jug or dipping vessel, at least 25 cm deep
- Old saucepan for melting dye wax
- Kitchen thermometer
- Newspaper or baking paper to protect work surface
- A length of thin twine for bundling
How to Make It
- Melt a small amount of the candle dye block into enough clear candle wax or old paraffin wax to fill the tall jug to 20 cm depth. An adult must handle all melting: heat to no more than 80 C and maintain it with the thermometer. Hot wax above 100 C can ignite.
- Hold a candle by its wick and dip the bottom third into the dye wax for 3 seconds, then remove and hold it straight while it sets, about 30 seconds. The dipped section should look smooth and evenly coloured.
- For a gradient effect, dip once to the full depth for the deepest colour, then twice more at half depth and once at a quarter depth, allowing 30 seconds to set between each dip. The result is a darker tip fading to the original white.
- Lay finished candles flat on baking paper to cool fully, at least 1 hour. Do not touch the dipped section while it is still tacky.
- Bundle 6-8 candles together, taper ends aligned, and tie with a simple knot of thin twine. A card looped through the twine telling the recipient the approximate burn time (roughly 8-10 hours per 25 cm taper) is a useful touch.

A Knitted Wash Cloth Set
A set of three cotton wash cloths knitted in a simple basket-weave or seed stitch pattern is the knitted gift that genuinely earns its keep.
Cotton knits launder well, the squares work as face cloths, dishcloths or bath cloths, and they are fast: each cloth takes about two evenings on 4 mm needles. Cast on with undyed or lightly coloured cotton for something that does not bleed in the wash.
What You Need
- 150 g 100% cotton DK yarn (enough for 3 cloths)
- 4 mm knitting needles
- Tapestry needle for weaving ends
- Scissors
How to Make It
- Cast on 32 stitches. Work 4 rows of garter stitch (knit every row) to form a firm border.
- For the body: Row 1 (RS): K4, then work [K4, P4] across to last 4 sts, K4. Row 2: K4, [P4, K4] across to last 4 sts, K4. Repeat these 2 rows 3 more times (8 rows of first block). Row 9: K4, then work [P4, K4] across to last 4 sts, K4. Row 10: K4, [K4, P4] across to last 4 sts, K4. Repeat rows 9-10 three more times. This alternating block is basket weave. Continue until the cloth measures 20 cm from cast-on.
- Work 4 rows of garter stitch, then cast off loosely. Weave in all ends with the tapestry needle.
- Wash and block each cloth flat, pinning lightly to a towel until dry: this sets the stitch pattern and evens the size. Three cloths pinned to the same dimensions will match.
- Stack the three cloths and tie with a strip of the remaining yarn or a length of linen twine. A small card with washing instructions (30 C, machine wash) is practical and considerate.

A Wooden Spoon Oiled and Stamped
A proper wooden spoon, conditioned with food-safe oil so the wood is almost glowing, with a small rubber stamp impression on the handle, is the kitchen gift a cook actually notices.
The stamping only works on raw, unfinished wood, which is why this is a making project rather than decoration. Olive oil does not work: it goes rancid. Mineral oil or pure linseed oil keeps indefinitely.
What You Need
- 1 unfinished wooden spoon, beech or maple
- Food-safe mineral oil, enough to submerge or saturate
- Permanent ink pad (black or dark brown), pigment ink rated for wood
- 1 small rubber stamp (a simple botanical, star or word)
- Fine sandpaper, 220 grit
- A clean cloth
How to Make It
- Sand the spoon all over with the 220-grit paper, moving with the grain, until the surface feels smooth under your palm and any roughness is gone. Wipe off all dust with a barely damp cloth and leave to dry completely.
- Press the rubber stamp firmly onto the ink pad, then onto the flat part of the spoon handle. Hold the stamp still for 3-4 seconds without rocking it. Lift straight up. If the impression is uneven, blot the handle clean with a damp cloth, let it dry, and try again.
- Let the ink dry and cure for at least 4 hours before oiling. If you oil too soon, the ink spreads.
- Submerge the spoon in mineral oil in a deep dish, or apply oil generously with a cloth and leave it to soak in. After 30 minutes, turn the spoon and apply more oil. Repeat 3-4 times over 24 hours. The wood changes colour noticeably: it deepens and the grain becomes visible. Leave on a rack over a sheet of baking paper for a further 24 hours to finish absorbing.
- Buff with a clean dry cloth. The surface should feel smooth and slightly satin, not sticky. If it feels tacky, leave it another 12 hours.

🛍 Shopping guide
A Bath Oil Blend
A bath oil, decanted into a small dark glass bottle with a dropper cap and a typed label, looks precise and considered. It also costs very little to make when you buy carrier oils in even small quantities.
The blend here is calming: sweet almond oil, a little squalane for skin feel, and a measured amount of pure essential oil. Precise measurements matter: too much essential oil in a bath is a skin irritant, not a treat.
What You Need
- 80 ml sweet almond oil
- 20 ml squalane oil
- 30 drops lavender essential oil (no more)
- 15 drops frankincense essential oil
- 1 dark glass bottle, 100 ml, with dropper cap or screw lid
- A small funnel
- A typed or printed adhesive label
- A measuring jug or pipettes
How to Make It
- Measure the sweet almond oil and squalane into a clean measuring jug. Add the lavender and frankincense drops, counting carefully. The essential oil limit of 45 drops per 100 ml is a safe dilution for bath use, not a suggestion to add more.
- Stir gently with a clean chopstick or glass rod, then pour through the small funnel into the dark glass bottle. Cap it tightly and tip the bottle a few times to blend.
- Print or type a label: the oil name, the blend (“lavender and frankincense”), the volume, and clear use instructions: “Add 2-3 capfuls to a warm bath. Not for direct skin application.” Press the label on squarely. A dark bottle with a white typed label looks clean and professional.
- Store upright. The blend keeps for up to 6 months; write the made date on the base of the bottle with a permanent marker so the recipient knows when to use it by.

🛍 Shopping guide
A Stamped Luggage Tag
A leather luggage tag with a clean stamped address panel, a brass grommet, and a length of thick waxed cord is the practical gift for anyone who travels and currently uses a paper tag from a check-in desk. It takes less than 30 minutes and costs almost nothing if you already bought leather for the cable tidy.
What You Need
- One leather offcut, 11 x 6 cm, 1.5-2 mm thick
- 1 brass grommet, 5 mm internal diameter, with setting tool
- Alphabet stamp set, metal
- Permanent ink pad for leather or black solvent ink pad
- Leather hole punch
- 30 cm waxed cord, 2 mm thick
- A ruler and chalk pencil
How to Make It
- Cut the leather to 11 x 6 cm. Round all four corners with scissors for a finished look. Mark a window on one face: a rectangle 7 x 3 cm centred on the piece, leaving room for a 1 cm border on all sides.
- Ink each letter stamp on the ink pad and press it firmly within the marked window to form the recipient’s address or initials. Work slowly: there is no correcting a mis-stamped leather letter. Do a practice run on a scrap piece first.
- Punch a 5 mm hole 1 cm from one short end, centred. Set the brass grommet through the hole using the setting tool and a firm strike of a mallet. The grommet should sit flush on both sides.
- Thread the waxed cord through the grommet and knot the two ends together to form a loop long enough to go around a bag handle. A flat overhand knot or a reef knot sits neatly against the brass.

A Jar of Preserved Lemons
Preserved lemons sit at the edge of the “just putting things in a jar” rule, but the making is the point: salt-packing, pressing, layering spices, and then the month of slow fermentation that turns raw lemons into the deeply savoury, jammy condiment that no North African or Middle Eastern cook is without.
You are making the thing, not assembling it. Give with a small card suggesting uses: stirred into hummus, tucked into a roast chicken, blended into a dressing.
What You Need
- 6-8 unwaxed lemons, small to medium (Meyer lemons are excellent if available)
- 120 g fine sea salt (not iodised)
- Juice of 4 extra lemons
- 1 tsp black peppercorns
- 2 bay leaves
- 1 sterilised glass jar with a tight lid, 1 litre capacity
How to Make It
- Sterilise the jar by washing in hot soapy water, rinsing well, and placing upright in a 120 C oven for 15 minutes. Leave to cool before filling.
- Quarter each lemon from the top to within 1 cm of the base, so the four quarters hold together at the base. Pack a generous pinch of salt into the cut sections of each lemon.
- Pack the salt-filled lemons into the jar as tightly as possible, pressing down firmly as you go. Add the peppercorns and bay leaves between the layers.
- Pour in the juice of the extra 4 lemons. Press the fruit down firmly: the lemons should be fully submerged. If the juice does not cover them, squeeze more fresh lemon over the top.
- Seal the jar tightly and leave at room temperature for 4 weeks, turning it upside down every few days. At 4 weeks the rinds should be soft and translucent, and the brine will be thick, salty and deeply aromatic. Refrigerate once opened; the preserved lemons keep for up to a year in the fridge.

🛍 Shopping guide
A Hand Thrown Ring Dish
A pinch-pot ring dish in air-dry clay, painted with a single colour of ceramic-look paint and sealed, is one of those objects that earns a permanent spot by the bathroom sink. The appeal is in its slight imperfection: this is not trying to look factory-made.
Keep it small, 8-10 cm across, and paint the inside a different colour from the outside for the small touch that elevates it from craft to gift.
What You Need
- 200 g air-dry clay (white or grey)
- A rolling pin
- A small bowl, 8-10 cm diameter, as a mould
- Acrylic paint, 2 colours (e.g. matte terracotta and white)
- Satin varnish, water-based, 15 ml
- Fine sandpaper, 400 grit
- A small paintbrush
How to Make It
- Work the clay in your hands until it is warm and pliable. Roll it out to about 5 mm thickness and cut or pinch a rough circle roughly 12 cm in diameter.
- Press the clay gently over the outside of the upturned bowl, smoothing it with damp fingers to conform to the shape. Trim any rough edges with a blunt knife. Leave on the mould for 2 hours, then carefully lift the clay dish off and set it right-side up on a flat surface to dry fully, at least 48 hours. Drying on the mould prevents warping in the first stage.
- Once bone dry, sand any rough patches lightly with the 400-grit paper. The clay should feel hard and slightly chalky.
- Paint the outside of the dish in the first colour (terracotta, for example), let it dry for 1 hour, then paint the inside in the contrasting colour. Let dry for 1 hour more. Two thin coats give better coverage than one thick one.
- Seal all surfaces with a thin coat of satin water-based varnish. Leave to dry overnight. This makes the dish water-resistant enough to sit on a damp bathroom surface, but it should not be submerged or put in a dishwasher.

A Woven Bookmark
A hand-woven bookmark, finished with a tassel, uses a cardboard loom and takes about 40 minutes. It works in any colour combination and holds its shape well because woven fabric has no stretch.
Cotton embroidery thread in two or three colours gives the best result: the twist in the thread keeps the weave tight and the bookmark lies flat in a book rather than curling.
What You Need
- Embroidery thread (floss), 3 colours, 1 skein each
- A piece of stiff card, 22 x 6 cm
- A ruler and pencil
- Scissors
- A wide-eye tapestry needle
How to Make It
- Cut the card to 22 x 6 cm. Along each short end, mark 7 notches spaced 0.7 cm apart, centred across the width. Cut each notch about 5 mm deep with scissors.
- Warp the loom: cut 7 lengths of your background colour, each 50 cm long. Hook each length into the top notch, bring it down the back of the card, and hook it into the corresponding bottom notch. The threads should sit parallel and taut on the front of the card.
- Cut a long length of your weft colour and thread the tapestry needle. Weave over-under-over-under across all 7 warp threads. On the next row, reverse: under-over. Continue, pressing each row of weft down gently with your fingernail to keep the weave even. Change colour by tying a new thread at the selvedge and continuing.
- When the bookmark length is filled, cut the warp threads off the notches one at a time and tie pairs in firm overhand knots at each end to secure the weave.
- For the tassel: cut 12 lengths of thread, 12 cm each, in your accent colour. Fold in half and loop through the end warp knots, pulling the tails through the fold and tightening. Trim all tassel ends to a uniform length.

🛍 Shopping guide
A Linen Bread Bag
A drawstring bread bag in heavyweight linen keeps a loaf fresh longer than plastic and gets better with washing. The making is essentially a flat seam and a casing: if you can thread a machine, you can make this. At 38 x 45 cm it fits a standard sourdough. The recipient will use it every week.
What You Need
- One piece heavyweight natural linen, 42 x 100 cm, pre-washed
- 1 m natural cotton drawstring cord, 5 mm thick
- Sewing machine and matching thread
- Iron and ironing board
- Scissors or rotary cutter
- A safety pin for threading cord
How to Make It
- Fold the linen in half with right sides together so you have a piece 42 x 50 cm. Press the fold. Open it out flat again: this fold line marks the base of the bag.
- Fold down 1 cm along each short end (these become the top of the bag), press, then fold down another 3 cm and press again. Stitch this casing hem close to the inner fold on each piece. Leave the side seams of the casing open.
- With right sides together, fold the fabric in half again along the base fold. Stitch down each long side with a 1 cm seam allowance, starting below the casing and ending at the base fold. Reverse-stitch at the start and end of each seam for strength.
- Clip the bottom corners, turn right side out and press the seams flat. The bag should look clean and square at the base.
- Attach a safety pin to one end of the drawstring cord and thread it through the casing around the bag, entering and exiting through the open side seams. Knot the cord ends together. Pull the knot inside the casing so it does not show.

🛍 Shopping guide
A Hand Painted Plant Pot with a Cutting
A terracotta pot painted in one or two carefully chosen colours, housing a rooted cutting from a plant you already own, is a living gift that costs almost nothing.
The cutting must be fully rooted before it is gifted: a wilting stem in painted pot is not a gift, it is homework. Tradescantia, pothos, and begonias all root in water within 2-3 weeks.
What You Need
- 1 terracotta pot, 8-10 cm diameter
- Exterior-grade acrylic paint or terracotta-specific paint, 1-2 colours
- A small paintbrush
- Exterior varnish or terracotta sealant spray
- A rooted cutting in potting mix
- Potting compost
How to Make It
- Take your cutting at least 4 weeks before Christmas: snip a 10-15 cm stem just below a leaf node and place in a glass of water in bright indirect light. Change the water every 3 days. Roots should appear within 2 weeks.
- Once the pot is clean and dry, paint the outside in your base colour and let it dry completely, at least 2 hours. Add any second colour as a band, a dipped lower half, or a simple geometric. Two thin coats look better than one heavy coat.
- Seal the outside of the pot with a coat of exterior varnish or terracotta sealant once the paint is fully dry (allow 24 hours), so the paint does not flake when watered. Leave the inside unvarnished.
- Once the cutting has visible, firm roots at least 3 cm long, pot it into the painted pot with fresh potting compost. Water lightly until the compost is just moist, not soaked.
- Write a small care card: the plant name, watering frequency and light preference. Tuck the card between the pot and the compost or tie it to the pot with a piece of twine.
🛍 Shopping guide
A Recipe Card Set in Your Own Handwriting
A set of ten recipe cards written in your own hand, with the recipes the recipient has asked you for over the years, is the recorded gift that cannot be replicated by any shop.
The cards should be A6 (postcard size), 300 gsm card stock, written in archival ink so they last, and stored in a small linen envelope or tied with a ribbon.
Pick recipes the person has eaten at your table and loved: not your aspirational cooking, their favourite actual meals.
What You Need
- 10 blank A6 cards, 300 gsm, uncoated
- A fine-tipped archival ink pen (pigment ink, waterproof)
- A ruler and pencil for guidelines (erase after writing)
- A linen or paper envelope to hold the set, or a thin ribbon
- Optional: a printed header card with the recipient’s name
How to Make It
- Decide on your 10 recipes. List ingredients and method for each in rough first, to check everything fits legibly on one card. A recipe that needs both sides of the card needs to be edited down or split.
- Lightly rule guidelines on each card in pencil: a title line at the top, a dividing line between ingredients and method, and baseline guides across the method section. Writing on ruled lines, even light pencil ones, looks neater than freehand.
- Write each recipe in ink, leaving the pencil lines to dry before erasing them. Write the title in a slightly larger hand or underline it. Ingredient quantities go on the left; the method goes below. Leave a small margin on all sides.
- Once all cards are written and the ink is fully dry, erase any remaining pencil marks very lightly to avoid smudging the ink. Lay the cards flat under a heavy book for 10 minutes if any have curled during writing.
- Stack the cards in an order that makes sense (perhaps starters to puddings, or the recipient’s favourites first), add a header card if you made one, and slip them into the envelope or tie them with ribbon. The set is ready.

A Photograph Printed and Framed Simply
A photograph the recipient will hang is one of the most lasting recorded gifts.
The key decisions are: which photograph (one they have not seen before, or one they know but have never had printed), which print size (20 x 25 cm fits most standard frames and looks considered, not accidental), and which frame (simple, matching the room you know they have).
A natural wood frame or a black metal frame rarely goes wrong.
What You Need
- 1 digital photograph, minimum 2400 x 3000 pixels for a 20 x 25 cm print
- A professional print ordered from an online or high-street print service
- 1 simple frame, 20 x 25 cm internal, with mount if the service does not print with one
- Soft cloth for cleaning the glass
How to Make It
- Choose the photograph with care. A candid moment, a particular place, or a group shot from a day the recipient often mentions is worth far more than a formal portrait. Check the pixel count before ordering: below 2400 x 3000 pixels prints with visible grain at 20 x 25 cm.
- Order from a proper photographic print service, not a consumer home printer. A C-type print on lustre paper at 20 x 25 cm costs very little and the colour accuracy and archival stability are incomparable to home printing. Allow 3-5 days for delivery.
- Clean the glass of the frame with a soft cloth before assembly. Place the print face down, add the mount if you are using one, replace the backing, and bend the clips or turn the tabs to secure it. Clean the front of the glass again after closing.
- If the frame has hanging hardware, check it is secure. If you are giving this without a nail, include one (taped to the back of the frame in a small envelope) and note the wall type: a plasterboard note and the appropriate anchor type saves the recipient a trip to a hardware shop.

🛍 Shopping guide
A Shoe Shine Kit Assembled Around a Made Cloth
The shoe shine cloth is the made part. The rest of the kit is assembled: a tin of good polish, a horsehair brush, and the cloth you made from heavyweight cotton canvas, hemmed and split into one buffing cloth and one application cloth.
Housed in a small wooden box or a cotton draw-string bag, it is the useful gift for anyone who wears leather shoes and always has to search for something to polish them with.
What You Need
- 50 x 30 cm heavyweight cotton canvas or old cotton T-shirt fabric, washed
- Matching thread and sewing machine, or needle and thread for hand hemming
- 1 tin quality shoe polish (neutral or a colour if you know their shoes)
- 1 horsehair shoe brush
- A small wooden box or cotton drawstring bag for assembly
How to Make It
- Cut the fabric into two pieces: one 25 x 30 cm (buffing cloth) and one 25 x 30 cm (application cloth). Fold each edge 1 cm over and press, then fold again 1 cm and press. Stitch around all four edges of each cloth. The finished cloths should be neat, flat and strongly hemmed so they last years of use.
- If you have access to a sewing machine, straight stitch is enough. If hemming by hand, a neat running stitch 5 mm from the edge holds well in canvas. Secure the thread ends with a few backstitches.
- Mark one cloth with a simple X in permanent marker on one corner: this is the application cloth (it will discolour with polish). The other is the buffer.
- Place both cloths, the polish tin, and the horsehair brush in the wooden box or drawstring bag. If using a bag, tuck a small card inside: “Application cloth (marked), buffer cloth, polish and brush. Apply polish with the marked cloth in small circles, leave 5 minutes, brush briskly, then buff with the unmarked cloth.” Clear instructions make the gift actually get used.

A Scented Drawer Sachet with a Sewn Cover
A drawer sachet smells generous and disappears quietly when it has done its job. The sewn linen cover, closed with a simple whip stitch and finished with a small ribbon loop, is what makes this a gift rather than a bag of lavender.
Fill it with dried lavender from a garden supplier, not the decorative kind sold in gift shops, which barely scents anything.
What You Need
- Two pieces linen or cotton, 14 x 10 cm each (natural or white)
- Dried lavender, 3-4 tbsp per sachet
- Matching thread, needle
- 15 cm narrow ribbon, 5-7 mm wide, per sachet
- Pinking shears (optional but they prevent fraying without hemming)
How to Make It
- Place the two fabric pieces with right sides together. Fold the ribbon in half and tuck the loop inside the seam at one short edge, with the loop pointing inward and the raw ends aligned with the fabric edge.
- Stitch around three sides with a 1 cm seam allowance, catching the ribbon ends securely in the short-edge seam. Leave one short side open for filling. If using pinking shears, trim the seam allowances of the stitched sides before turning.
- Turn right side out through the open end. Use a blunt pencil to push the corners out squarely. Press flat with an iron.
- Spoon the dried lavender into the open end. Pack firmly: a well-filled sachet keeps its shape and scents for longer. Do not overfill to the point of straining the seam.
- Turn under the raw edges of the open end by 1 cm and close with a neat whip stitch or slip stitch. The ribbon loop should now be at one end, ready to hang or tuck into a drawer hinge. The finished sachet should feel plump and hold its shape.

🛍 Shopping guide
A Pair of Embroidered Handkerchiefs
A pair of cotton handkerchiefs with a small embroidered motif in one corner is the wearable gift that never ages. The embroidery should be modest: a single flower, a sprig, or a set of initials in satin stitch.
Overworking the design makes it stiff in the pocket. Two hankies with the same motif is more considered than one; the recipient always has a clean one.
What You Need
- 2 plain white cotton handkerchiefs, hemmed (buy or make from 100% cotton lawn, 30 x 30 cm per square)
- Cotton embroidery floss, 2-3 colours, 1 skein each
- An embroidery hoop, 10-12 cm
- An embroidery needle
- Transfer paper or a water-soluble pen for tracing the design
How to Make It
- Trace or draw your chosen motif in one corner of the handkerchief using a water-soluble pen. Keep the design no larger than 4 x 4 cm: it should be a detail, not a centrepiece. Mount the corner in the embroidery hoop, pulling the fabric taut but not distorted.
- Separate the embroidery floss into 2 strands (from a 6-strand thread) for fine detailing, or 3 strands for filled satin stitch areas. Use a single strand for any outline work.
- Work the outline first if your design has one, using stem stitch or back stitch. Fill any solid areas with satin stitch, keeping the stitches close together and parallel so no fabric shows through the fill. The filled area should look smooth and slightly raised.
- When the embroidery is complete, bring all thread tails to the back of the fabric and knot them off or weave them under existing stitches. Do not leave any thread tails long enough to catch on washing-machine agitators.
- Rinse any water-soluble pen marks out under cold running water, then press the embroidery from the reverse side over a folded towel (which cushions the stitches) until dry. Fold the pair together and wrap in tissue.

🛍 Shopping guide
A Rolled Beeswax Candle Bundle
Rolling beeswax sheet candles is the fastest candle method there is, it involves no heat, and the result smells of honey and warm wax in a way that no paraffin candle does.
A bundle of four in a natural kraft box with a ribbon is a gift that works for almost anyone. Roll them tightly and evenly for a clean, professional finish: a loose roll burns unevenly and drips.
What You Need
- 4 beeswax honeycomb sheets, 20 x 40 cm each (natural or dyed)
- 4 lengths cotton wicking, 22 cm each
- A craft knife or scissors
- A hair dryer (helps soften the wax in cold weather)
- A kraft gift box or small tissue-lined box
- Ribbon for the bundle
How to Make It
- Lay one beeswax sheet on a clean flat surface. If the sheet feels stiff, warm it for 5-10 seconds with a hair dryer on low heat until it is just pliable but not tacky.
- Lay the wick along one short edge of the sheet, leaving 1 cm of wick extending above the top edge. Press the wick lightly into the wax to anchor it.
- Roll the sheet tightly around the wick, keeping the bottom edge perfectly straight and the roll even in diameter. Press the outside edge of the wax sheet firmly to the roll to seal it: the warmth of your hand is enough. If it does not stick, warm that edge with the hair dryer for 3 seconds.
- Trim the base wick flush with the bottom of the candle and trim the top wick to 1 cm. The finished candle should be straight, smooth-sided, and feel firm when you press it lightly. A soft roll means you need to re-roll it tighter.
- Make all four candles, then group them together and tie with ribbon. Lay them in the kraft box with a small card giving the burn time (roughly 1 hour per 5 cm of candle) and the note that beeswax candles should always be burned on a heatproof dish.

🛍 Shopping guide
A Small Hand Carved Butter Knife
A hand carved butter knife in basswood or lime wood is the craft that looks as though it took skill, and with the right tools and a little patience, it does not take much more than that.
The knife has no sharp edge: the blade is rounded and smooth, used only to spread. That means this is a safer carving project than it sounds, though adults must handle all wood carving.
A butter knife carved in the morning can be oiled and ready by afternoon.
What You Need
- 1 piece basswood or lime wood, 20 x 4 x 1.5 cm
- A carving knife (e.g. a Mora 120 or similar whittling knife)
- A small gouge or chip carving knife (optional, for a shaped handle)
- Sandpaper: 120 grit and 220 grit
- Food-safe finishing oil (walnut oil or mineral oil)
- A pencil for drawing the knife outline
How to Make It
- An adult must do all carving steps. Draw the knife outline on the wood blank: the blade is roughly 9 cm long and tapers to a rounded point, the handle is 11 cm with a slight flare at the end. The blade should be no more than 6 mm thick at the spine.
- Carve away the waste wood from outside the outline using the carving knife, working in short push cuts or pull cuts with the grain. Never cut toward the hand holding the wood: brace the piece against a table edge or use a clamp. Remove wood gradually: it is easier to take more off than to put it back.
- Once the overall shape is achieved, refine the blade: thin it gradually from the spine toward the edge, which should curve smoothly downward and be completely blunt. There is no sharpening step for a butter knife, only thinning. The blade should flex very slightly when you press it.
- Shape the handle to feel comfortable in the hand. A slight oval cross-section grips better than a perfect circle.
- Sand all surfaces first with 120-grit paper, then 220-grit, moving with the grain. The wood should feel satin-smooth after the 220-grit pass with no visible scratch marks.
- Apply food-safe oil liberally with a cloth, leave to absorb for 30 minutes, wipe off the excess, and leave on a rack for 2 hours. A second coat deepens the colour and completes the finish.

🛍 Shopping guide
Frequently Asked Questions
What homemade gifts do people actually want?
The handmade gifts people keep are the ones they use up, wear out, or rely on daily. Consumables like infused salts, bath oils, preserved lemons and beeswax candles disappear pleasantly and are remembered well.
Useful objects like a leather cable tidy, a linen bread bag or a hand-bound notebook earn a permanent spot in the recipient’s routine.
The common failure is a decorative object that has to be displayed: without a daily function, it tends to migrate to a drawer within months.
What DIY Christmas gifts are not tacky?
Handmade gifts feel considered rather than cheap when the materials are good, the finish is careful, and the object solves something or gets used.
A block-printed tea towel in a single clean colour is not tacky; a tea towel covered in Christmas-themed clip art often is.
Embroidered handkerchiefs, a properly oiled wooden spoon, a hand-bound notebook or a set of preserved lemons all sit comfortably alongside bought gifts because they are genuinely functional and made with attention.
Avoid novelty, avoid personalised names on items the recipient has to display, and avoid anything that only works as a decoration.
How far ahead should I make Christmas gifts?
Most of the crafts on this list can be made in December without pressure. The exceptions need an early start: preserved lemons require 4 weeks of fermentation, so begin in early November. A plant pot with a cutting needs 3-4 weeks for rooting before potting.
Knitted wash cloths take several evenings spread over 2-3 weeks. Everything else, including the beeswax wraps, leather goods, embroidered handkerchiefs, notebook, candles and salt, can be completed in a focused weekend session in the first or second week of December.
What handmade gift works for someone who has everything?
The gifts that work for someone who has everything are the ones that replace something they already use rather than adding to what they own.
A hand-carved butter knife, a set of beeswax food wraps, a good photograph printed and framed, or a notebook in paper weight chosen for their pen: these displace existing objects rather than competing with them for shelf space.
Consumables are the safest choice: preserved lemons, an infused salt, a bath oil blend or a rolled beeswax candle set all get used and do not accumulate.
22 christmas crafts for adults where finish is everything: marbled baubles, wax-dipped amaryllis, ha

15 Christmas staircase decor ideas covering ribbon-wrapped rails, hung stockings and lantern-lit ste
13 christmas crafts for babies that use paint, clay, fabric and more so every keepsake looks differe
Leave a Reply