

20 Easy Kids Christmas Ornaments That Look Like the Grown Up Version of a Kid Craft
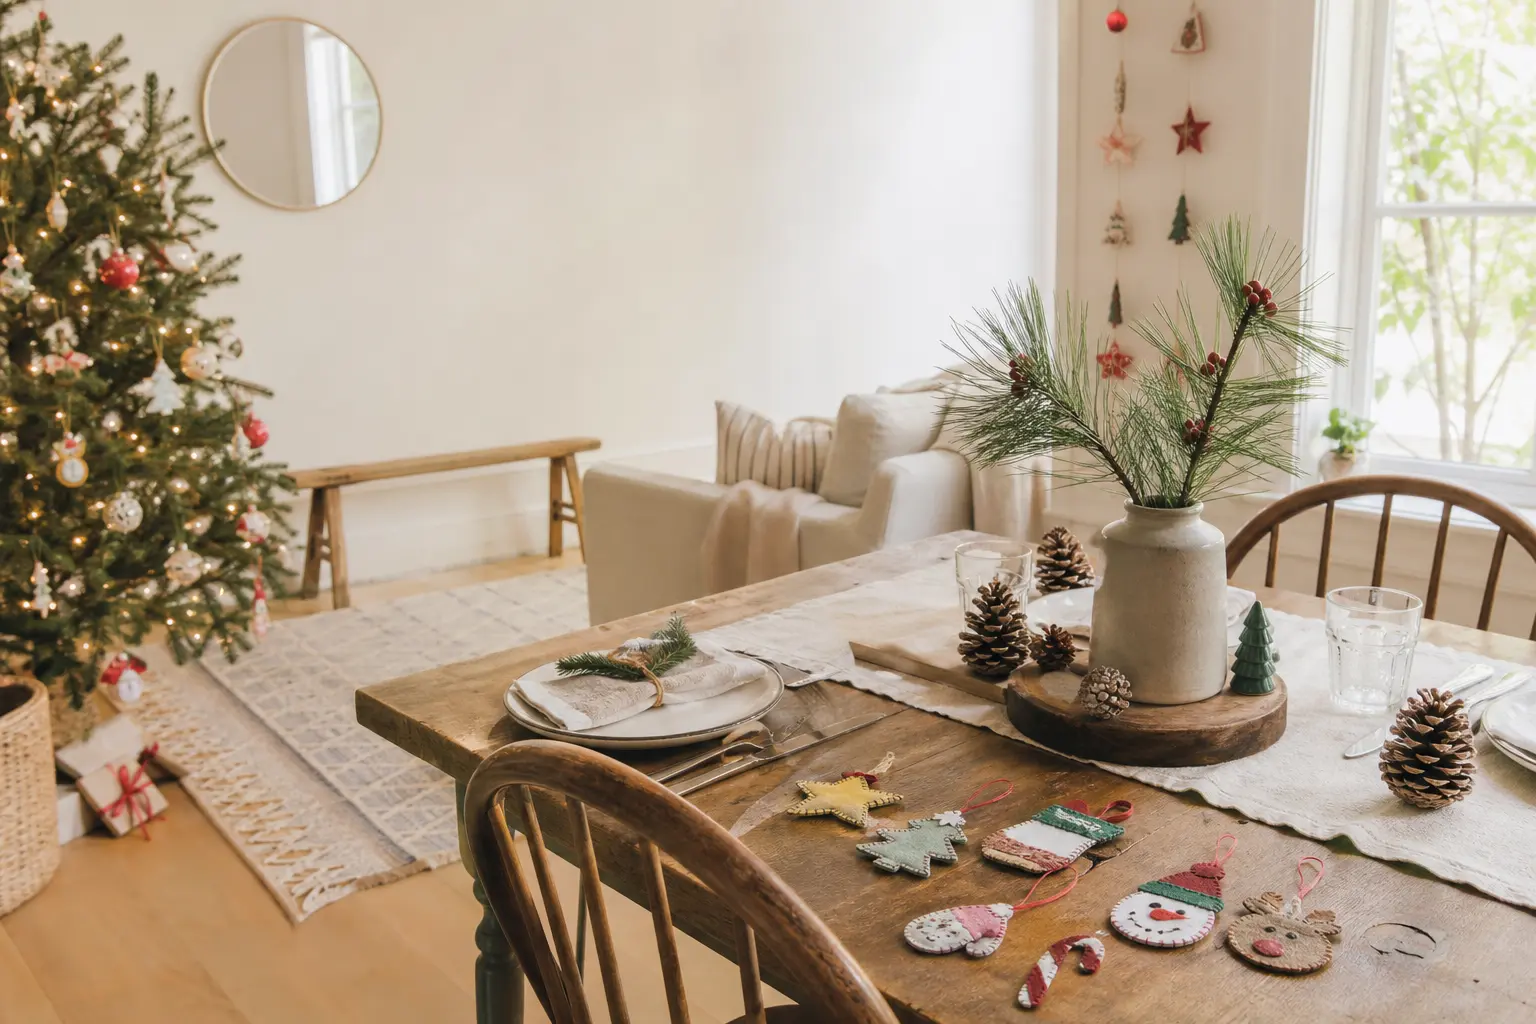
Easy kids Christmas ornaments have a reputation problem. The crayon-heavy, glitter-shedding, tape-holding kind ends up in a box of its own because it cannot live on the same branch as the heirlooms. Every ornament here fixes that.
Each one takes something a child can genuinely do, then adds one finishing move that tips it from craft-table into considered. The marbled bauble looks like something you ordered. The salt dough star catches the light like cast metal.
The leaf clay disc belongs on a Scandinavian tree.
Pair these with an afternoon of Christmas activities for kids and you have a whole December session that ends with something real to hang. None of these need a special room or a specialist supply haul.
Most of the materials are already in the house, or one stop away. The twenty crafts below cover ages three to twelve, a range of techniques, and a range of looks, so the tree gets variety rather than twenty versions of the same thing.
This post contains affiliate links. If you buy through them, I may earn a small commission at no extra cost to you.
- Marbled Bauble
- Gold-Rubbed Salt Dough Star
- Wood Slice Handprint Ornament
- Running Stitch Felt Shape
- Snow-Dipped Pinecone
- Leaf-Pressed Clay Disc
- One-Colour Button Stack Tree
- Photo Bauble
- Yarn Wrapped Star
- Blank-Face Wooden Peg Angel
- Matte Painted Bottle Cap
- Fabric Scrap Ball
- Spiral Pipe Cleaner Tree
- Cinnamon Dough Heart
- Laminated Drawing Ornament
- Single-Stripe Painted Cork
- Shell Snowflake Ornament
- Burnished Foil Star
- Stitched Felt Pocket with Paper Note
- Swirled Paint Bauble
- Frequently Asked Questions
Marbled Bauble
This is the ornament that makes adults ask where you bought it. A plain plastic ball rolls through acrylic paint floated on water, picking up colour in swirling veins that no brush could replicate.
The whole process is a child’s job from start to finish, and the result is genuinely different every time. Hang it near a window where the light can move across the surface.
What You Need
- 1 plain clear plastic bauble, 80 mm
- Acrylic craft paint in 2 to 3 colours (choose shades from one family: all warm, or all cool)
- A shallow tray or roasting dish, at least 30 cm wide
- Water to fill the tray 5 cm deep
- A wooden skewer for swirling
- A length of thin ribbon or twine, 20 cm, for hanging
How to Make It
- Fill the tray with cold water and set it on a surface that can get messy. Remove the metal cap from the bauble and set it aside.
- Drop 4 to 6 small drops of each paint colour onto the surface of the water. The paint should spread into thin discs. If it sinks, the paint is too thick: add a few drops of water to the paint and try again.
- Drag the skewer once or twice across the surface to connect the colours into loose swirls. Do not over-stir or the colours will muddy.
- Hold the bauble by its neck and roll it slowly across the paint surface in one smooth pass. Lift it straight up. The paint clings to the plastic immediately.
- Rest the bauble neck-down on the rim of a cup so nothing touches the painted surface. Leave it for at least 2 hours until completely dry.
- Press the metal cap back onto the neck. Thread ribbon through the loop and knot it. The finished bauble should look like the paint is inside the glass, not sitting on top of it.

🛍 Shopping guide
Gold-Rubbed Salt Dough Star
Salt dough gets dismissed as a rustic craft, but the finish here changes everything. Once the star is baked and cooled, a fingertip of gold wax rub catches every surface ridge and makes the ornament look like hammered metal.
Keep it plain: no paint underneath, no stamps, no glitter. The natural dough colour beneath the gold gives depth. These store flat in a box between layers of tissue and come out next year looking exactly the same.
What You Need
- 1 cup plain flour
- 1/2 cup table salt
- 1/2 cup cold water
- A rolling pin
- A star-shaped cookie cutter, 8 to 10 cm
- A drinking straw for making the hanging hole
- Gold gilding wax or gold furniture wax (a tin the size of a lip balm covers dozens of stars)
- Twine or thin ribbon for hanging, 25 cm per star
How to Make It
- Mix flour and salt in a bowl, then add water a little at a time, mixing until the dough comes together. It should feel like stiff playdough. If it sticks to your hands, add a pinch more flour.
- Roll the dough on a lightly floured surface to about 6 mm thick. An adult should check this thickness: too thin and the star cracks in the oven.
- Press the cutter down firmly and lift it cleanly. Lay the star on a baking sheet lined with parchment.
- Use the straw to press a hole near one point, twisting slightly to remove a clean plug of dough. The hole must be at least 5 mm from the edge or it will crack.
- An adult bakes the stars at 120 C (250 F) for 2.5 to 3 hours, until completely hard. They should sound hollow when tapped. Leave to cool fully on a wire rack.
- Dip a fingertip or a scrap of cloth into the gold wax and rub it across the surface in small circles. Less is more: the dough colour showing through is what makes it look like metal rather than painted cardboard.
- Thread twine through the hole and knot it. The finished star should feel solid and heavy for its size.

🛍 Shopping guide
Wood Slice Handprint Ornament
Wood slices are everywhere, and the handprint is the most over-used motif in children’s crafts. The version here works because the print goes down in one clean colour with no outline, no added details, and no name written across it in marker.
The wood grain shows through the paint and the result looks like a woodblock print. One colour, one print, one ribbon. That restraint is what lifts it.
What You Need
- 1 pre-drilled wood slice, 8 to 10 cm diameter (the hole at the top should be pre-drilled, or an adult drills it)
- Foam roller or wide flat brush, 4 to 5 cm
- Acrylic paint in one colour (deep red, forest green or warm ivory work well)
- A piece of scrap card to roll paint onto
- Matte varnish spray or brush-on sealer
- Satin ribbon, 1 cm wide, 30 cm long
How to Make It
- An adult pre-drills or checks the hanging hole before you start. Lay the wood slice flat on scrap paper.
- Pour a small puddle of paint onto the scrap card. Roll the foam roller through it until the roller is evenly coated but not dripping.
- Roll paint across the child’s palm and fingers in one smooth pass. The palm should look evenly coated, not patchy and not pooling at the edges.
- Press the hand firmly onto the centre of the wood slice. Hold for five seconds, then lift straight up without sliding. Do not press a second time: one print only.
- Leave flat for at least 90 minutes. The print should look crisp at the edges. If it smeared, it dried too fast to fix, but a single smear often reads as texture rather than mistake.
- An adult applies a coat of matte sealer once the paint is dry. This step protects the print during storage.
- Thread ribbon through the pre-drilled hole and tie a knot at the back to hold it. Trim the ends level.

🛍 Shopping guide
Running Stitch Felt Shape
The trick with this ornament is that the stitching is not hidden. It is the whole point.
A child’s uneven running stitch in a contrasting thread around the edge of a simple felt shape, a star, a tree, a circle, looks exactly like the kind of deliberate hand-stitching on a Scandinavian textile ornament.
Cut two identical shapes, stitch them together with the stuffing inside, and hang it from a loop of the same thread. No glue anywhere.
What You Need
- Wool felt, 2 mm thick, in one colour, 2 sheets of A4 (or enough to cut 2 matching shapes per ornament)
- Embroidery thread in a contrasting colour, 1 skein
- A blunt tapestry needle, size 18 or 20
- A simple shape template (star, tree or circle), 8 to 10 cm across, cut from card
- A small amount of toy stuffing or wool roving, about a golf ball’s worth per ornament
- Sharp scissors (adult only)
How to Make It
- An adult traces the template onto the felt twice and cuts both shapes. The edges should be smooth: jagged cutting shows more on felt than on paper.
- Thread the needle with a length of embroidery thread about 40 cm long. Knot one end.
- Place the two felt shapes together, wrong sides facing (felt has no wrong side, so just stack them neatly). Push the needle through both layers from the back, about 5 mm from the edge.
- Sew a running stitch all the way around the shape, keeping the stitches roughly 5 to 7 mm long. The stitches do not have to be perfectly even. In fact, slight variation is what makes this look handmade in the good sense.
- Stop about 3 cm before you reach the start. Push a small pinch of stuffing through the gap until the shape feels plump but flat. Add a loop of thread through the top point before closing up.
- Stitch the gap closed and knot the thread on the back. Trim the tail. The shape should feel firm and sit flat rather than drooping.

Snow-Dipped Pinecone
A pinecone dipped halfway into white paint and left to dry on its tip looks like it was set down in fresh snow. The line where paint meets bare cone is the detail that sells it.
Keep that line clean and level, and the ornament looks like something from a high-end nature shop. Collect cones in autumn and keep them in a warm dry spot for a few weeks first so any insects or moisture leave before you paint.
What You Need
- 1 dry pinecone, medium to large (at least 8 cm tall)
- White acrylic paint, slightly thickened (add a small squeeze of PVA to a tablespoon of paint for body)
- A shallow cup or ramekin for dipping
- Fine florist wire, 30 cm, for the hanging loop
- Wire cutters (adult only)
- A piece of card or foil to rest the cone on while it dries
How to Make It
- Check the cone is fully dry and closed. If it is open and fanned, it is ready. If it is still sticky with resin, leave it in a warm place for another few days.
- Mix a tablespoon of white acrylic with a small squeeze of PVA. The mixture should be thick enough to coat the back of a spoon without running off immediately.
- Hold the cone by its pointed tip and lower the base end into the paint mixture until it reaches the halfway point. Hold it there for three seconds, then lift it straight out without twisting.
- Rest the cone tip-down on a piece of card. The paint will settle into the scales. It should look like a clean waterline rather than a drip. If it drips, the paint is too thin: let it run off, then mix in more PVA and dip again once dry.
- Leave for at least 2.5 hours. Do not touch. The surface will feel dry before the paint inside the scales has fully set.
- An adult loops a length of florist wire around the top scales of the cone and twists it closed, then bends the tail into a loop for hanging. Trim any sharp wire ends.

🛍 Shopping guide
Leaf-Pressed Clay Disc
Air-dry clay pressed with a real leaf and left completely unpainted is the ornament that needs nothing else. The leaf print captures every vein and the clay cures to a warm stone colour that looks intentional rather than unfinished.
Use a leaf with strong veining: oak, maple and fern all work well. Avoid very smooth leaves. No paint, no glitter, no wax: the clay does all the work.
What You Need
- Air-dry clay, about 50 g per disc
- A rolling pin or smooth bottle
- A fresh leaf with strong veining, 6 to 8 cm long
- A round cutter or upturned glass, 7 to 8 cm diameter
- A drinking straw for the hanging hole
- Fine twine, 25 cm, natural colour
How to Make It
- Roll the clay on a clean, smooth surface to about 5 mm thick. Lift and rotate it as you roll to prevent sticking.
- Lay the leaf vein-side down onto the clay. Press it firmly and evenly with your palm: start from the centre and work outward. The pressure needs to be even, not just central, or only part of the leaf will print.
- Press the cutter down over the leaf print and cut a clean circle. Lift the cutter and remove the excess clay around it.
- Peel the leaf off slowly, pulling from the stem end. The vein impression should be clear and detailed. If any clay pulled up with the leaf, the clay was too wet: smooth the surface gently and try a firmer press next time.
- Push the straw through the top of the disc to make the hanging hole. Twist gently to remove a clean plug.
- Leave the disc flat on a smooth surface for 24 hours. Do not move it. Once dry, thread fine twine through the hole and knot it. The disc should feel firm and light, with no flex.

🛍 Shopping guide
One-Colour Button Stack Tree
A triangle of buttons stacked from large at the base to small at the tip, all in the same colour family, reads as a graphic print rather than a jumble-sale collage.
The colour discipline is the rule: every button is green, or every button is cream, or every button is dusty pink. Mix textures and sizes freely within that one family.
The ornament hangs from a loop of wire at the top and lies flat against the tree, which means it photographs well.
What You Need
- Assorted buttons in one colour family, roughly 20 to 25 per ornament, ranging from 10 mm to 30 mm
- A piece of thick card or foam board, 10 x 8 cm, as the backing
- A hot glue gun and glue sticks (adult only)
- Fine florist wire or a small screw eye for hanging
- Acrylic paint to match button colour, for painting the backing card
How to Make It
- Draw a simple triangle on the card, about 10 cm tall and 8 cm wide at the base. Paint the card the same colour as your buttons and leave to dry for 20 minutes. This stops any card colour showing between buttons.
- Sort the buttons by size: largest at the bottom of the triangle, smallest at the top. Lay them out in rows on the card first, without gluing, to check the arrangement fills the shape.
- An adult applies a small dot of hot glue to the card and presses each button into place, starting at the bottom row. Work row by row upward. Each button should sit flat and touch its neighbours without gaps.
- Leave the glue to set for at least 1 hour before handling. The buttons should feel completely firm.
- An adult pushes a piece of florist wire through the card at the top point of the triangle, bends it into a loop, and twists the ends together at the back. Trim any sharp wire ends close to the twist.

🛍 Shopping guide
Photo Bauble
A clear fillable bauble with a photo inside it is the most sentimental ornament on the tree, and the version that looks good is the one where the photo is cut to a perfect circle and you cannot see where the picture ends.
A circle punch does this in one click. No white border, no folded edge, no tape. The photo sits inside the bauble as if the bauble was made around it.
What You Need
- 1 clear plastic fillable bauble, 80 to 100 mm
- A printed photo, matt finish, sized so a face fills the centre
- A circle punch, 60 mm (or the largest circle punch you own that fits inside the bauble opening)
- A thin wooden skewer for guiding the photo inside
- A ribbon or cord, 25 cm, for hanging
How to Make It
- Print the photo on matt paper (glossy paper catches the light inside the bauble and can look washed out). Crop the photo so the face fills the frame before printing.
- An adult positions the circle punch over the face of the photo and punches a clean circle. The cut should go through in one firm press.
- Open the bauble by separating the two halves. Drop the photo circle in and use the skewer to guide it flat against the inside of the front half. No glue needed: the curve of the bauble holds it in place.
- Snap the two halves back together. Check from the front that the photo sits level and the face is centred. If it is not, open and reposition.
- Thread ribbon through the metal loop at the top and tie a knot. The finished bauble should look as if the photo is framed rather than stuffed inside.

🛍 Shopping guide
Yarn Wrapped Star
Five sticks wrapped in yarn make a star that looks like something from a Scandinavian craft shop, and the single wooden bead at the centre is what stops it reading as a school project.
The technique is a simple figure-of-eight wrap, the same one used in traditional God’s eye weaving. One yarn colour, one bead, one metre of ribbon to hang it. Done.
What You Need
- 5 wooden craft sticks or lollipop sticks, 15 cm long
- Yarn in one colour, about 10 m (chunky weight wraps faster and looks better)
- 1 wooden bead, 15 to 20 mm, with a hole through the centre
- PVA glue to anchor the yarn ends
- Thin ribbon, 30 cm, for hanging
- Strong thread or thin wire to tie sticks into a star formation (adult only)
How to Make It
- An adult arranges 5 sticks into a five-pointed star shape (like an asterisk) and binds the centre crossing tightly with thread or thin wire. This must be very firm or the star will sag under the weight of yarn.
- Tie the end of the yarn at the centre, dabbing a small drop of PVA on the knot to hold it.
- Thread the yarn through the wooden bead and push the bead to the centre of the star. The bead will sit over the binding and cover it.
- Wrap the yarn outward along each arm of the star using a figure-of-eight motion: over the top of one arm, under, then across to the next arm. Keep the wraps tight and even.
- Continue until each arm is wrapped to about 2 cm from the tip. Leave the tip bare: it gives the star a clean pointed end.
- Tie off the yarn at the back of one arm and add a dot of PVA. Leave to dry for 10 minutes. Thread ribbon through the top arm and knot it.

Blank-Face Wooden Peg Angel
The face is the thing that sinks a peg doll. Children draw a face and it comes out lopsided, and the whole ornament tips into caricature.
Leave the face completely blank: a plain round wooden head above a painted body reads as a sweet abstraction rather than a failed portrait. Paint the body in one or two colours, add a strip of tissue paper as wings, and hang it.
The blankness is the charm.
What You Need
- 1 large round-head wooden peg, 9 to 10 cm tall
- Acrylic paint in cream and one accent colour (gold, deep red or dusty blue)
- A fine brush for the body details, and a wider brush for the base coat
- White or cream tissue paper, 8 x 4 cm, for wings
- Hot glue gun and sticks (adult only)
- Fine gold thread or thin ribbon, 20 cm, for hanging
How to Make It
- Paint the top third of the peg (the round head) in the same base colour as the body or leave it natural wood. Do not paint a face. Set on a piece of card and leave to dry for 20 minutes.
- Paint the lower two thirds (the body) in the accent colour. Two thin coats dry faster and look smoother than one thick one. Leave 20 minutes between coats.
- Once fully dry, add a tiny detail if you like: a thin stripe of gold at the waist line, or a small painted halo at the top. Keep it to one detail only.
- Fold the tissue paper strip like a fan (accordion folds, about 1 cm wide) and pinch it in the middle to form a bow. This is the wing shape.
- An adult applies a dot of hot glue to the back of the peg at shoulder height and presses the pinched centre of the tissue paper into it. Hold for 10 seconds. The wings should fan out symmetrically.
- Tie a loop of gold thread around the neck or through the top of the head (use a needle to thread it if needed) and knot it at the front. Trim the tail.

🛍 Shopping guide
Matte Painted Bottle Cap
A bottle cap painted in a flat matte colour with a simple pattern scratched through it does not look like a lid. It looks like a tiny enamel disc.
The scratching step, done with a toothpick while the paint is still slightly tacky, reveals the silver metal underneath and adds a line that looks deliberate. Two or three strokes of a pattern, nothing more.
What You Need
- 1 metal bottle cap, clean and flat
- Matte acrylic paint in one colour (deep navy, forest green or terracotta all work)
- A small brush, about 5 mm wide
- A toothpick for scratching the pattern
- A hammer and a small nail (adult only) for the hanging hole
- Fine cord or thin ribbon, 20 cm, for hanging
How to Make It
- An adult uses a hammer and small nail to punch a hole at the very top edge of the bottle cap. Place the cap on a block of scrap wood, not a table, for this step.
- Apply one thin coat of matte paint to the outside face of the cap. Use smooth strokes in one direction. Leave for 30 minutes.
- Apply a second thin coat. The surface should look flat and opaque. If any metal shows through, apply a third coat once dry.
- While the final coat is still slightly tacky (test by touching the very edge), use a toothpick to scratch a simple pattern into the paint: two crossed lines, a small snowflake shape made of six short lines, or a single zigzag. The silver metal shows through the scratched lines.
- Leave the cap flat for 1.5 hours to cure fully. Once dry, thread fine cord through the punched hole and knot it at the back.

🛍 Shopping guide
Fabric Scrap Ball
A polystyrene ball wrapped so tightly in fabric scraps that no base shows looks upholstered rather than bundled. The key is cutting the fabric into precise strips and tucking each edge under with a butter knife so no raw edges show. Choose two fabrics that share one colour. No glue on the surface: the tucking holds everything.
What You Need
- 1 polystyrene ball, 6 to 7 cm diameter
- 2 coordinating fabric scraps, each about 20 x 20 cm (cotton quilting fabric holds a crease well)
- A blunt butter knife or bone folder for tucking
- Pins (adult only) to hold fabric in place
- A length of narrow ribbon, 25 cm, for the hanging loop
- Scissors (adult only for cutting fabric)
How to Make It
- An adult cuts the fabric into strips about 2 cm wide and 20 cm long. Cut some strips in each fabric so you can alternate them.
- Push one end of a ribbon into the top of the polystyrene ball until 1 cm is embedded. This becomes the hanging loop: tie the free ends together so the loop sits about 6 cm above the ball.
- Lay one fabric strip across the ball and tuck both short ends into the ball using the butter knife, pressing them in about 3 mm. The strip should lie flat with no puckering.
- Add the next strip parallel to the first, butting the long edges together so no polystyrene shows between them. Tuck both ends. Alternate fabrics as you go.
- When you reach the ribbon at the top, tuck the final strip ends neatly around it. The ball should be fully covered with no white showing through.
- Add a pin at the top and bottom to hold any loose edges. The finished ball should feel firm and look panelled, like a tiny tufted cushion.

🛍 Shopping guide
Spiral Pipe Cleaner Tree
One green pipe cleaner bent into a single tightening spiral makes a tree that looks architectural rather than wiggly. No extra branches, no decorations added to the pipe cleaner. The shape alone is enough.
A tiny gold bead at the tip and a loop of gold thread at the top finish it. The whole thing is 6 cm tall and hangs flat against the tree.
What You Need
- 1 green pipe cleaner, standard length (30 cm)
- 1 small gold bead, 4 to 5 mm
- Fine gold thread or thin wire, 20 cm
- Small round-nose pliers (helpful but not essential)
How to Make It
- Hold the pipe cleaner at one end and bend that end into a tiny flat circle about 1 cm across. This will become the base of the tree.
- Continue coiling the pipe cleaner above the base circle, each coil slightly smaller than the one below, angling inward as you go. Think of a coil spring that tapers: wide at the bottom, tight at the top.
- After 5 to 6 coils, stop. You should have about 3 to 4 cm of pipe cleaner left. Bend that into a single straight upright to form the trunk.
- Thread the gold bead onto the top of the straight trunk section. Bend the tip of the pipe cleaner into a tiny hook to hold the bead in place.
- Tie a loop of gold thread around the top coil, just below the bead. Knot it twice so it does not slip. The tree should hang level: if it tips, adjust which part of the top coil the thread is tied to.

🛍 Shopping guide
Cinnamon Dough Heart
Cinnamon dough smells like Christmas and cures firm without an oven. The version that looks grown-up is the one with one pressed impression in the centre and nothing else: no paint, no ribbon beyond the hanger, no second stamp. The spice colour is the finish.
These work beautifully hung in a cluster on a small branch rather than on the main tree.
What You Need
- 1 cup ground cinnamon
- 1/4 cup PVA glue (not watered down)
- 2 to 3 tablespoons water, added gradually
- A rolling pin
- A heart-shaped cutter, 7 to 8 cm
- A small textured stamp or the back of a spoon for the single impression
- A drinking straw for the hanging hole
- Narrow ribbon or natural twine, 25 cm
How to Make It
- Mix cinnamon and PVA in a bowl until it forms a paste, then add water a teaspoon at a time until the dough comes together. It should feel like soft clay, not sticky. Cinnamon dough dries your hands out: short mixing sessions work better than one long one.
- Roll the dough on a clean surface to about 6 mm thick. It tends to crack at the edges: if it does, smooth the cracks with a damp fingertip.
- Press the heart cutter firmly down and lift it cleanly. Lay the heart on a sheet of parchment.
- Press your stamp or the back of the spoon once into the centre of the heart. One clean impression. Do not re-press to fix it: a second press blurs the first.
- Use the drinking straw to punch a clean hole near the top of the heart, twisting as you push.
- Leave the hearts flat on parchment for 48 hours. Turn them once after 24 hours so both sides dry evenly. Thread ribbon through the hole and knot it. The finished heart should feel solid and smell strongly of cinnamon.

Laminated Drawing Ornament
A child’s drawing laminated and trimmed close to the line, with no white border visible, looks like a printed enamel charm rather than a piece of paper. The laminate gives it a rigid surface and a slight sheen.
The trimming is the entire skill: get within 1 to 2 mm of the drawn line on all sides. An adult handles the trimmer and the laminator; the child draws the picture and chooses the shape.
What You Need
- A child’s drawing on white card, kept to a simple shape (star, tree, bauble, bird), about 8 to 10 cm across
- Felt tip pens or coloured pencils in bold colours
- An A4 laminating pouch, standard 80 micron
- A laminator (adult only)
- Sharp scissors or craft scissors (adult only for trimming)
- A hole punch for the hanging hole
- Narrow ribbon, 20 cm
How to Make It
- The child draws a simple, bold shape on white card. Encourage thick outlines and solid colour fills: fine lines can look faint after laminating. The drawing should fill about 8 x 10 cm.
- An adult feeds the drawing into a laminating pouch and through the laminator following the machine instructions. Leave the laminated sheet to cool flat for 3 minutes.
- An adult cuts around the drawing with sharp scissors, staying 1 to 2 mm outside the drawn outline all the way around. No white border should be visible from the front.
- An adult uses a hole punch to make a clean hole at the top of the shape, at least 5 mm from the edge.
- Thread narrow ribbon through the hole and tie a knot. The finished ornament should feel rigid and sit flat, with clean edges on all sides.

🛍 Shopping guide
Single-Stripe Painted Cork
A natural wine cork painted in one flat colour with a single thin stripe of a second colour across the middle looks like a tiny piece of striped ceramic. No face, no glitter, no stacked corks. One cork, one colour, one stripe.
The restraint is the whole point. Collect corks throughout the year, or buy a bag of them. These are quick enough to make in a production line for a whole class.
What You Need
- 1 natural wine cork per ornament
- Acrylic paint in one base colour and one stripe colour (try warm white with a thin gold stripe, or deep red with a thin cream stripe)
- A fine brush, about 2 mm wide, for the stripe
- A wider brush for the base coat
- A thin piece of wire or a pin for hanging, pushed into the top of the cork
- Fine thread or thin ribbon, 20 cm
How to Make It
- Paint the entire surface of the cork in the base colour. Three thin coats work better than one thick one: cork is porous and soaks up paint. Leave 15 minutes between coats.
- Once the base coat is completely dry (at least 20 minutes after the final coat), load the fine brush with the stripe colour. Rotate the cork slowly and paint a single stripe around the middle, keeping the brush still and moving the cork rather than the brush.
- The stripe should be about 3 mm wide and level all the way around. If it wobbles, leave it to dry and add one smooth coat over the wobble. Do not try to fix a wet stripe.
- Leave the cork flat for 30 minutes to cure. Push a pin or a short length of wire into the top of the cork, leaving a loop exposed. Thread fine thread through the loop and knot it.

🛍 Shopping guide
Shell Snowflake Ornament
A flat shell painted with a simple white snowflake looks like a piece of coastal pottery rather than a beach-bag craft. The snowflake has six arms and nothing else: no dots, no fill, no glitter.
Use a shell that is already fairly flat and pale, so the paint shows clearly. Collect shells from a beach trip or buy a bag of craft shells.
What You Need
- 1 flat pale shell, 5 to 8 cm across (scallop shells and clam shells work best)
- White acrylic paint
- A fine brush, 1 to 2 mm wide
- A small drill or heated pin (adult only) for the hanging hole
- Thin cord or ribbon, 20 cm
How to Make It
- An adult drills or uses a heated pin to make a small hole near the top edge of the shell. The hole must go through cleanly: a cracked shell is hard to fix.
- Lay the shell flat on scrap paper. Load the fine brush with white paint and paint one vertical line down the centre of the shell, about 4 to 5 cm long.
- Add one horizontal line crossing the first at the centre. Then add two diagonal lines through the same crossing point. You now have six arms radiating from the centre.
- Add a small notch or tick at the end of each arm if you like: two small lines angling outward from the tip of each arm, like a simple snowflake. Keep these small: the negative space of the shell colour between the arms is as important as the lines.
- Leave completely flat for 30 to 40 minutes until the paint is fully dry. Thread cord through the hole and knot it.

🛍 Shopping guide
Burnished Foil Star
Kitchen foil pressed into a star shape and burnished smooth with the back of a spoon looks like hammered metal. The burnishing step is what transforms it from crinkled foil into something that catches light evenly. Use two layers of foil for rigidity, press the shape firmly against a raised star template, and smooth every surface before hanging.
What You Need
- Heavyweight kitchen foil (not the thinnest supermarket kind), 2 sheets of 15 x 15 cm
- A star-shaped cookie cutter, 8 to 10 cm, as the forming template
- The back of a smooth metal spoon for burnishing
- Scissors (adult only)
- A pin or blunt needle for the hanging hole
- Thin ribbon or fine cord, 20 cm
How to Make It
- Stack the two squares of foil together, shiny sides out. Lay the stack flat on a smooth surface.
- Place the star cutter on top and press it firmly to create an indent around the shape. This guides the cutting.
- An adult cuts around the star shape with sharp scissors, following the indent. Cut both layers at once.
- Place the foil star on a smooth hard surface and use the back of the spoon to burnish the surface firmly. Work from the centre out to the points, using short overlapping strokes. The foil should flatten and become evenly reflective, with no crinkle lines visible.
- Flip the star and burnish the reverse side. Once both sides are smooth, press a pin through one tip to make the hanging hole.
- Thread ribbon through the hole and knot it. The star should be rigid enough to hold its shape when hung.

🛍 Shopping guide
Stitched Felt Pocket with Paper Note
A small felt pocket stitched shut with a tiny folded note inside it is the ornament someone opens on Christmas morning. The pocket looks like a miniature envelope or a tiny book.
The note stays hidden, the stitching closes it completely, and the whole thing hangs on the tree with a cord loop at the top. Use the same running stitch as the stuffed felt shape, but this time the stitching seals it rather than decorates it.
What You Need
- Wool felt, 2 mm thick, 2 pieces each 8 x 6 cm, in the same or contrasting colours
- Embroidery thread, 1 skein
- A blunt tapestry needle, size 18 or 20
- A small piece of white paper, 5 x 3 cm, for the note
- A fine pen for writing on the note
- Sharp scissors (adult only)
How to Make It
- An adult cuts two rectangles of felt, each 8 x 6 cm. They can match or contrast: if contrasting, choose colours that share a tone (both muted, or both saturated).
- The child writes a short note on the paper, folds it once, and slips it between the two felt pieces. The note sits at the centre of the stack.
- Thread the needle with about 50 cm of embroidery thread and knot one end. Push the needle through both layers at one corner, about 5 mm from the edge.
- Running stitch all the way around all four sides. This seals the pocket completely. Knot off the thread at the back and trim the tail.
- Push the needle back through the stitching at the top centre to create a small loop of thread for hanging, and knot it on the back to secure it. The loop needs to be about 3 to 4 cm long to hang easily.
- The finished pocket should feel flat and firm, with the note completely enclosed. The stitching is visible and should look neat but not mechanical.

🛍 Shopping guide
Swirled Paint Bauble
Pour two colours of paint into a clear bauble, swirl once, and leave it upside down to set. The paint runs and spreads inside the ball while it dries, creating a pattern that looks like stained glass from the outside.
The rule is: swirl once, then leave it entirely undisturbed. Every extra swirl muddies the colours. This works because the child does it, puts it down, and walks away.
What You Need
- 1 clear plastic fillable bauble, 80 to 100 mm
- Acrylic paint in 2 colours from the same family, about 1 teaspoon of each
- A wooden skewer for one swirl
- A small cup or egg cup to rest the open bauble in
- A sheet of parchment to set the filled bauble on
- Ribbon or cord, 25 cm, for hanging
How to Make It
- Open the bauble and remove the metal cap. Rest the open bauble in the cup so it sits steady.
- Pour in one colour of paint. Tip the bauble gently so the paint coats about a third of the inside. Then pour in the second colour on the opposite side.
- Insert the skewer and swirl it once, one slow rotation through both colours. Remove the skewer.
- Replace the metal cap loosely and turn the bauble so it rests on its cap (upside down) on the parchment. The paint will run slowly toward the cap end and begin to set there.
- Leave completely untouched for 24 hours. Do not pick it up to check: even one movement disrupts the paint while it is still wet.
- After 24 hours the paint will have set against the inside of the bauble. Turn it right side up, press the cap on firmly, and thread ribbon through the loop. The inside should show clear swirls with colour pooling in places, like blown glass.

🛍 Shopping guide
Frequently Asked Questions
What easy kids Christmas ornaments survive storage?
Salt dough stars, cinnamon dough hearts, laminated drawing ornaments, burnished foil stars and stitched felt shapes all store well. Pack them flat in a box between layers of tissue paper, away from moisture.
Avoid stacking heavy items on top of cinnamon dough or clay disc ornaments. Salt dough and air-dry clay pieces sealed with a matte varnish hold up for many years. Fabric and felt ornaments can be tucked into a small zip bag.
The marbled and swirled baubles should be stored in their original bauble box or in individual cups of tissue.
How do I seal easy kids Christmas ornaments so they last?
A coat of matte acrylic sealer spray or brush-on PVA varnish protects most painted surfaces, including salt dough, wood slice handprints, painted corks and bottle caps. Apply one thin coat once the paint is fully dry, at least 24 hours after the final colour coat.
For clay disc ornaments, one coat of matte sealer is enough to prevent the surface from chalking. Felt and fabric ornaments do not need sealing. Photo baubles and laminated ornaments are already sealed by their materials.
What easy kids Christmas ornaments work for a class of thirty?
The marbled bauble, spiral pipe cleaner tree, laminated drawing ornament, cinnamon dough heart and photo bauble all scale to thirty children with minimal setup. The marbled bauble needs one tray per four children working in rotation.
For the laminated drawing, run all thirty drawings through the laminator in a single session once children have finished. Cinnamon dough can be made in bulk the night before and kept sealed in a bag.
The pipe cleaner tree needs no drying time and no oven, making it the fastest single-session option for a large group.
Can easy kids Christmas ornaments be made without baking?
Yes. The majority of ornaments in this collection need no oven at all. Air-dry clay disc ornaments, cinnamon dough hearts and salt dough stars are the only ones that traditionally use heat, and the cinnamon dough version here air-dries completely over 48 hours without baking.
Air-dry clay cures at room temperature in 24 hours. Salt dough does need an oven to cure hard enough to last, but the oven step is handled entirely by an adult at a low temperature.
Every other ornament here, including the marbled bauble, felt shapes, yarn star, fabric ball, foil star and swirled paint bauble, needs no heat source at all.
15 Christian Christmas party games tied to the nativity story — perfect for church groups and fami
These 15 diy christmas candy gifts set in the fridge or at room temperature, with no thermometer nee
Eleven full tree looks built around the topper first, real and artificial, with the exact baubles, p
Leave a Reply