

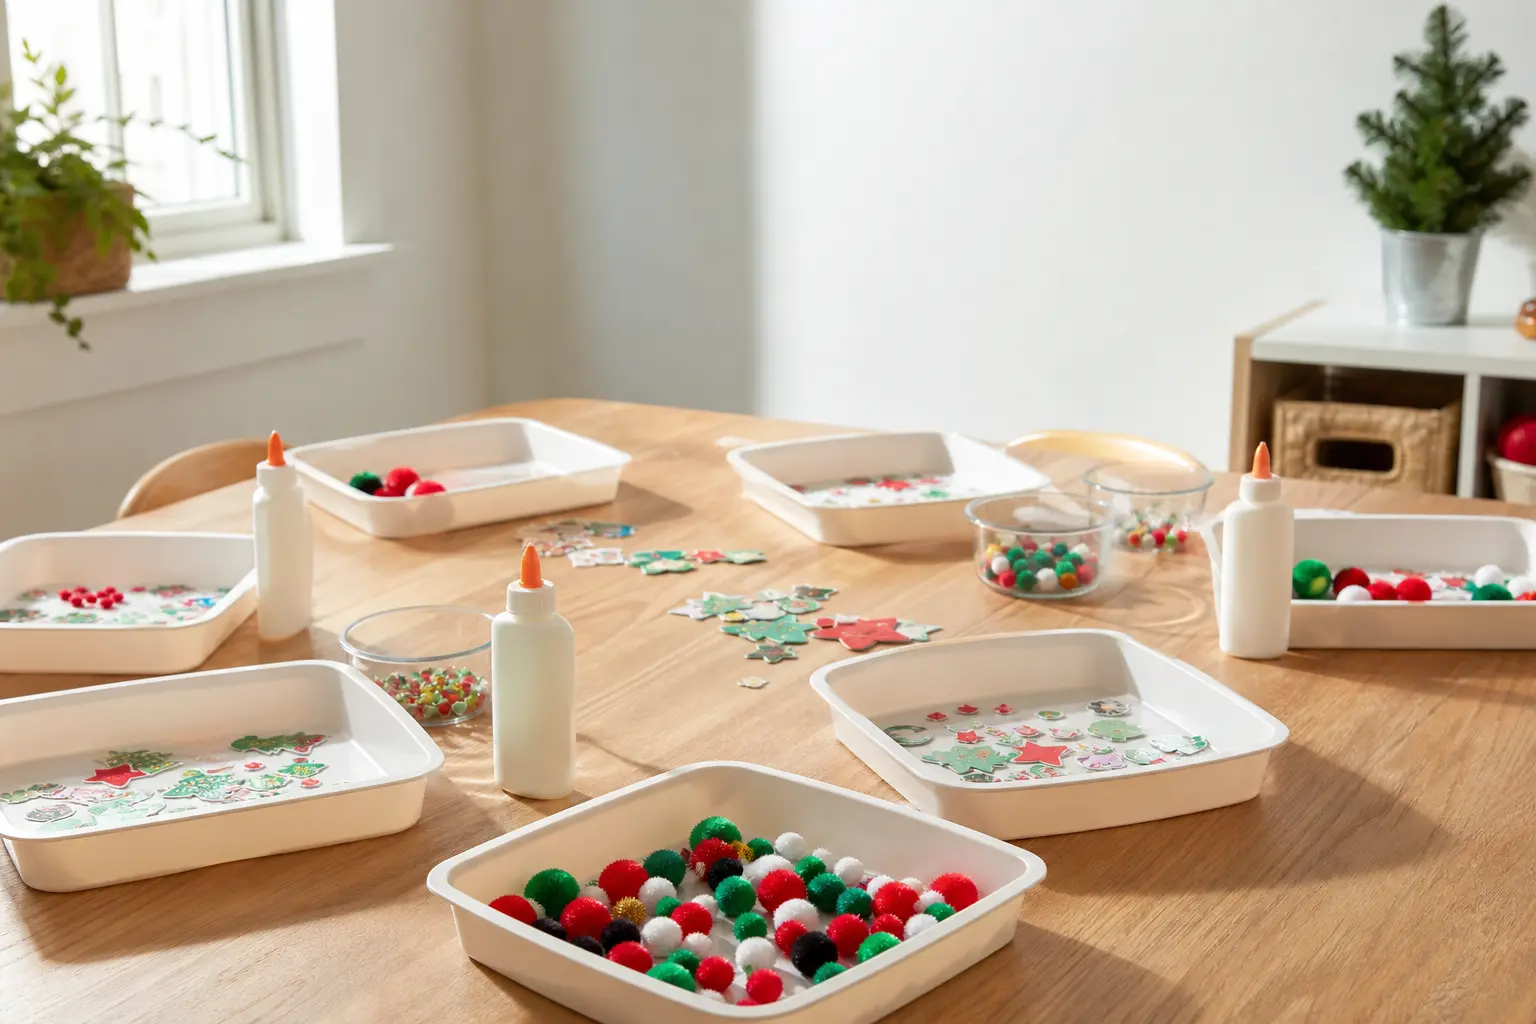
Every single one of these christmas crafts preschool teachers can tray up the night before and walk away from. The child sits down, finds everything in front of her, and makes something real. No adult standing by with scissors. No child waiting while you cut. No unfinished pieces going home in a bag because you ran out of time.
The rule for this list: one tray, everything on it, nothing an adult must do while the group runs. That means pre-cut shapes, pre-torn tissue, pre-poured paint. The prep is yours and it happens before they arrive. The making is entirely theirs. You will find 22 Christmas Games for Kids to Play All December useful for the gaps between crafts, and 15 Preschool Christmas Party Games for Little Elves for when the glue is drying and the room needs a reset.
Twenty-three crafts follow. Each one uses a different technique so you can run several stations at once without the room feeling like a production line. Mix a fine-motor threading craft with a gross-motor sponge stamp, add a quiet sensory tray, and you have a full morning covered.
This post contains affiliate links. If you buy through them, I may earn a small commission at no extra cost to you.
- Paper Shape Gingerbread House
- Sticker Jumper Decorating
- Fingerprint Canvas Keepsake
- Pom Pom Drop Tree
- Cotton Ball Snowman Gluing
- Torn Tissue Tree
- Dot Marker Baubles
- Sponge Stamped Trees
- Pasta Threading Garland
- Paper Plate Rudolph
- Ribbon Weaving Card
- Foam Sticker Stockings
- Glued Cereal Garland
- Playdough Press Ornaments
- Felt Board Tree Scene
- Cupcake Liner Flowers
- Straw Printed Snowflakes
- Contact Paper Window Tree
- Shredded Paper Snow Scene
- Potato Masher Snowmen
- Bingo Dabber Lights
- Sponge Dipped Stars
- Rice Tray Letter Tracing
- Frequently Asked Questions
Paper Shape Gingerbread House
Pre-cut brown card rectangles and triangles sit on the tray alongside small foam stickers, dot stickers, and a glue stick. The child assembles walls and a roof, then decorates freely. Finished houses look cheerful propped along a windowsill, and they survive the journey home flat in a folder.
What You Need
- 1 sheet A4 brown card (200 gsm) per child, pre-cut into 1 rectangle (14 x 10 cm) and 1 triangle (14 cm base)
- 1 sheet A4 white card (200 gsm) per child as backing
- 1 glue stick per child
- Small foam stickers: circles, squares, stars (30 per child)
- Dot stickers in red, green, white (20 per child)
- Red and white tissue paper squares, 3 cm, pre-torn (a small handful per child)
How to Make It
- Place the white card flat in front of the child as the base. This is the canvas everything sticks to.
- Run the glue stick over the back of the brown rectangle and press it onto the lower half of the white card. Hold for five seconds until it grips.
- Glue the triangle on top of the rectangle with the point facing up. Line up the base of the triangle with the top edge of the rectangle so it reads as a roof. The joined shape now looks like a simple house outline.
- Dot stickers become windows and doors: press them wherever the child wants them. There is no wrong answer here.
- Foam stickers go on as decorations, tiles, or snow on the roof. Crumpled white tissue squares pressed along the roof edge make a convincing snow drift.
- Set aside flat to dry for five minutes, then it is ready to carry home.

Sticker Jumper Decorating
A jumper outline printed on white A4 card becomes a tiny knitted masterpiece when a child covers it in stickers. Gem stickers, star stickers, and sequin stickers all work. The finished card makes a perfect gift tag or greeting card insert, and it needs nothing from you after the tray is set.
What You Need
- 1 jumper outline printed on A4 white card (200 gsm) per child: a thick simple silhouette, no detail inside
- Self-adhesive gem stickers, mixed colours (30 per child)
- Star stickers, 1 cm diameter (20 per child)
- Round dot stickers, 1 cm, in red and green (20 per child)
- Optional: a few strips of washi tape cut to 5 cm lengths for stripe effects
How to Make It
- Place the jumper card in front of the child. Point out the outline and explain the whole inside is theirs to fill.
- Peel gem stickers and press them anywhere inside the jumper shape. Chunky stickers are easier for small fingers than tiny ones, so keep those at the front of the tray.
- Star and dot stickers fill gaps and build patterns, or just land wherever the child wants them.
- Washi tape strips pressed across the jumper read as coloured stripes. The child can press them down with a flat palm.
- When the whole jumper is covered to the child’s satisfaction, the card is done. No drying needed.

🛍 Shopping guide
Fingerprint Canvas Keepsake
A small stretched canvas comes home with a child’s actual fingerprints turned into a Christmas tree or a string of baubles. Parents keep these for years. Set out stamp pads rather than runny paint: they give a clean print, dry in under two minutes, and leave the tray tidy enough to reuse.
What You Need
- 1 mini stretched canvas, 15 x 15 cm, per child
- Green washable ink stamp pad (1 per table of four)
- Red washable ink stamp pad (1 per table of four)
- Fine black marker, pre-drawn triangle outline on each canvas (the adult draws this before the session)
- Yellow dot stickers, 1 cm (3 per child, for a star topper)
- Brown washable ink pad or pre-stamped brown trunk on each canvas
How to Make It
- The adult pre-draws a simple triangle outline on each canvas with a fine black marker before the session starts.
- The child presses one finger lightly onto the green stamp pad, then presses it inside the triangle outline. Lift cleanly. The fingerprint should show whorls clearly: if it looks smeared, the finger had too much ink, so blot it lightly on a spare sheet first.
- Fill the triangle with overlapping green fingerprints, working from the bottom row up so hands don’t smudge wet prints. This takes a little patience and the tray can include a small reminder card showing the bottom-to-top order.
- Red fingerprints go on top of the dried green ones as baubles. The ink dries in about two minutes.
- Press three yellow dot stickers at the tip of the triangle for the star.
- Leave flat for five minutes before putting in a carrier bag.

Pom Pom Drop Tree
A green card cone sits on the tray with a pot of small pom poms and a craft stick for pushing them into the gaps. The child presses pom poms into a colander or a cone with pre-punched holes and builds a fluffy tree. It lives on the mantelpiece and shakes apart into the pot afterwards with zero mess.
What You Need
- 1 green card cone per child: roll A4 green card (200 gsm) into a cone shape and secure with a strip of tape before the session
- 20 pre-punched holes (hole punch) spaced across the cone surface, punched by the adult before the session
- 30 small pom poms, 2 cm diameter, per child (mixed Christmas colours)
- 1 shallow tray or pot lid to hold pom poms
- 1 craft stick per child for guiding pom poms
How to Make It
- Stand the cone on the tray with the pointed end up. The punched holes should be visible all the way around.
- Pick up a pom pom and press it into a hole. It should sit snugly and stay without glue because the card grips the fibres. If the holes are a little large, the adult can make them smaller before the session by taping a small square behind each one and re-punching at a slight offset.
- Fill all the holes, working from the bottom up so the tree grows as the child works. The finished cone should be polka-dotted with colour from base to tip.
- A single pom pom balanced at the very tip is the star. Press it firmly; it will stay if the tip hole is small.
- To store: shake the pom poms back into the pot and flatten the cone. Both parts go in a zip-top bag.

Cotton Ball Snowman Gluing
A pre-drawn snowman outline on blue card, a pot of cotton balls, and a glue stick are all this station needs. The child fills the circles with fluffy white balls and adds dot stickers for eyes and buttons. It dries quickly, travels flat, and looks genuinely sweet.
What You Need
- 1 sheet A4 blue card (200 gsm) per child with a simple two-circle snowman outline pre-drawn in thick black marker
- 20 cotton balls per child
- PVA glue in a shallow pot (1 pot per two children)
- 1 flat craft brush or cotton bud per child for spreading glue
- Black dot stickers, 1 cm (5 per child, for eyes and buttons)
- Orange foam triangle, 2 cm, per child (pre-cut by adult, for the nose)
How to Make It
- Use the brush or cotton bud to spread a thin layer of PVA inside one of the outline circles. Too much glue makes the cotton balls go flat and grey; a thin, even coat is what works.
- Press cotton balls into the glued area and hold each one for three seconds. They should sit fluffy and white, not sunken.
- Repeat for the second circle. The body circle takes more cotton balls than the head, so spread them generously at the bottom.
- Press black dot stickers on for two eyes and three buttons without adding extra glue. The sticker adhesive is enough.
- Dot a small amount of PVA on the face circle and press the orange foam triangle on as the nose, point outward.
- Leave flat for ten minutes so the PVA sets. The cotton balls should feel firm, not wobbly, when the card is lifted.

Torn Tissue Tree
Tearing paper is a satisfying fine-motor workout and it produces a surprisingly beautiful result. Green tissue paper torn into rough pieces and layered onto a pre-drawn tree outline in PVA glue creates a textured, dimensional tree that catches the light. The tray needs no scissors at all.
What You Need
- 1 sheet A4 white card (200 gsm) per child with a large triangle tree outline pre-drawn in pencil
- Green tissue paper, pre-cut by adult into A5 sheets (1 per child) for the child to tear
- PVA glue in a shallow pot per two children
- 1 flat craft brush per child
- Brown tissue paper, one A6 strip per child, pre-cut by adult, for the trunk
- Yellow star foam sticker or star sticker (1 per child)
How to Make It
- Tear the green tissue into rough pieces, each about the size of a fifty-pence coin. Uneven edges are part of the charm: tell the child there is no wrong shape.
- Brush PVA inside the triangle outline. Work in small sections so the glue does not dry before the tissue goes on.
- Press tissue pieces onto the wet PVA, overlapping them. The pieces should cover the white card completely so no pencil line shows through when you hold it to the light.
- Tear the brown tissue strip into smaller rough pieces and glue them below the triangle base for the trunk.
- When the tree and trunk are covered, press the star sticker at the very tip of the triangle.
- Leave flat for fifteen minutes. The PVA dries clear, so the green tissue glows when it is held up to a window.

🛍 Shopping guide
Dot Marker Baubles
Dot markers (also called bingo daubers) make perfect circles with zero fine-motor struggle. Pre-draw three overlapping bauble circles on white card, let the child fill them with spots of colour, and the result looks like something from a Christmas market stall. Dot markers wash off tables and hands in seconds.
What You Need
- 1 sheet A4 white card (200 gsm) per child with three large bauble outlines pre-drawn (each circle 8 cm diameter)
- Dot markers in red, green, gold, blue, purple (2-3 markers per child at the tray)
- Gold or silver dot stickers (3 per child, for bauble tops)
How to Make It
- Place the card with the three bauble circles in front of the child. Each circle is already outlined so the child knows where to dot.
- Press the dot marker onto the card inside one of the circles. Lift cleanly. The dot should be a solid circle of colour with clean edges. If the child presses hard and drags, remind them to stamp, not slide.
- Fill each bauble with overlapping or spaced dots in any colour combination. Some children will make each bauble one colour; others will mix everything. Both look great.
- Press one gold or silver dot sticker at the top of each bauble circle as the metal cap.
- Leave flat for ten minutes. The ink dries to a slightly waxy, bright finish.

🛍 Shopping guide
Sponge Stamped Trees
Cut a kitchen sponge into a triangle and you have a tree stamp that even a two-year-old can manage. The child presses it into green paint and stamps a row of trees across white card. Add a brown fingerprint trunk under each and it looks like a snowy forest. This is loud, joyful, and done in minutes.
What You Need
- 1 sheet A4 white card (200 gsm) per child
- 1 kitchen sponge pre-cut by adult into a triangle shape, 6 cm tall (1 per two children)
- Green washable tempera paint in a shallow tray (1 tray per four children)
- Brown washable tempera paint in a second shallow tray
- White washable tempera paint in a third shallow tray (for snow dabs)
- Paper plate or foam tray as a palette (1 per child)
How to Make It
- Dip the triangle sponge lightly into the green paint. The sponge should pick up a thin, even coat: too much paint makes a blob, not a tree. Dab the sponge on the palette once to remove excess.
- Press the sponge firmly onto the card and lift straight up. The print should show a clean triangle with visible texture from the sponge surface.
- Stamp two or three more trees across the card, re-dipping as needed. Space them so each one has a base at the bottom of the card.
- Dip one fingertip into the brown paint and press a short fingerprint below each tree as the trunk. Lift cleanly.
- Dip a fingertip into white paint and dab a few spots across the top of each tree and across the background for falling snow.
- Leave flat for fifteen minutes. The tempera dries quickly and the texture of the sponge stays visible in the print.

Pasta Threading Garland
Rigatoni or penne, dyed red and green the night before, threads onto a length of yarn with a stiff tape end. The child makes a pasta garland that loops around the Christmas tree or along a window. Threading builds fine motor skills and the garland looks genuinely festive dyed in holiday colours.
What You Need
- 40 pieces of rigatoni per child, dyed red and green by adult (soak in food colouring and water overnight, then air dry on a tray)
- 60 cm length of thick yarn per child, pre-cut by adult
- Tape wrapped tightly around one end of each yarn length to make a stiff needle (adult does this before the session)
- A small piece of tape tied around the opposite end of the yarn so pasta cannot slide off
How to Make It
- Hold the yarn with the taped needle end at the top. The knotted end hangs below and acts as a stopper.
- Push the taped end through the hole in a piece of rigatoni. Hold the pasta in one hand and thread with the other. The stiff tape tip makes this possible without a real needle.
- Slide the pasta down to the knotted end. Continue threading, alternating red and green pieces or mixing them freely. The garland looks best with a pattern, but a random arrangement is equally pretty.
- Keep threading until about 5 cm of yarn remain above the last piece of pasta. Tie a firm knot at the top to secure everything.
- Loop the finished garland into a circle or leave it as a drape. It stores in a zip-top bag and will last years if kept dry.

Paper Plate Rudolph
A standard paper plate becomes Rudolph’s face with a few pre-cut brown card ears, antler shapes, and a red foam nose sticker. The child arranges and glues. The antlers are the fiddly part, but they are already cut, so the child just places and presses. Finished plates make a sweet display strung along a wall.
What You Need
- 1 plain white paper plate per child
- 2 brown card antler shapes per child, pre-cut by adult from brown card (200 gsm), each about 12 cm tall
- 2 brown card ear ovals per child, pre-cut by adult, each about 5 x 3 cm
- 1 large red foam circle sticker, 3 cm diameter, per child
- 2 black dot stickers, 1.5 cm, per child (eyes)
- PVA glue in a shallow pot
- 1 flat craft brush per child
How to Make It
- Turn the plate face-up. Brush PVA along the top back edge of the plate, then slide one antler behind the plate on each side so the antler sticks up above the rim. Hold each one for ten seconds. The antlers should stand up above the plate like a crown when you look from the front.
- Brush PVA on the back of each ear oval and press one to each side of the plate at the three o’clock and nine o’clock positions. Hold for five seconds.
- Press two black dot stickers onto the front of the plate as eyes, roughly in the upper third.
- Press the red foam circle in the centre-lower area of the plate as the nose. It is self-adhesive so no extra glue is needed.
- Leave flat for ten minutes while the PVA sets. The antlers will feel secure when you can lift the plate without them drooping.

Ribbon Weaving Card
A rectangle of card with slits cut into it by the adult becomes a simple loom. The child weaves short lengths of Christmas ribbon over and under the strips. The resulting card is tactile, colourful, and genuinely hard to stop doing. It builds weaving skills with zero frustration because the card holds the warp steady.
What You Need
- 1 piece of red or green card, 15 x 20 cm (200 gsm), per child with 8 parallel horizontal slits cut by adult (each slit 10 cm long, spaced 1.5 cm apart, leaving 2.5 cm borders on all sides)
- 5 lengths of ribbon per child, each 15 cm long, pre-cut by adult (mix red, green, gold, and tartan)
- Small piece of tape per ribbon end (adult wraps these to stiffen the ends before the session)
How to Make It
- Hold the card in front of you with the slits running left to right like lines on a page. The card strips between the slits are the warp.
- Poke the stiffened end of one ribbon under the first card strip from the left, then over the second strip, then under the third, and so on across the card. This is the over-under weaving motion: slow it down and show the child on a spare piece if needed.
- Push the ribbon so equal lengths hang out of both sides, or tuck the ends under the last strip to hide them. Either looks finished.
- Weave the next ribbon through the next pair of slits in the opposite over-under order so the pattern interlocks. If the first ribbon went over-under-over, the next one goes under-over-under.
- Continue until all five ribbons are woven. The card should feel slightly stiff and the colours should alternate neatly across the surface.
- No glue needed. The card holds the ribbons by tension.

🛍 Shopping guide
Foam Sticker Stockings
A stocking shape cut from red foam sheet by the adult gives the child a background that does not buckle under sticker weight. The child covers it with foam sticker shapes: snowflakes, stars, trees. The finished stocking can be hung on a door handle with a loop of ribbon attached before the session. Fully independent, fully satisfying.
What You Need
- 1 stocking shape per child, pre-cut by adult from red EVA foam sheet (about 15 x 20 cm finished size)
- 30 foam sticker shapes per child: snowflakes, stars, Christmas trees (mixed pack)
- 1 length of red ribbon, 15 cm, per child with ends looped and taped to the top back of the stocking by the adult (for hanging)
How to Make It
- Place the foam stocking on the tray, front side up. The hanging ribbon loop is already attached at the back.
- Peel a foam sticker and press it firmly onto the stocking surface. Foam sticks beautifully to foam, but the child should press and hold for three seconds for a lasting bond.
- Cover the stocking with stickers in whatever arrangement the child chooses. There is no wrong layout. Some children will tile them neatly; others will cluster them. Both look festive.
- When the stocking is covered to the child’s satisfaction, it is done. Hang it from the ribbon loop immediately.

Glued Cereal Garland
Looped cereal threaded on yarn is a classic, but threading is fiddly at three. This version skips threading: the child glues loops of cereal onto a long strip of card with a glue stick, alternating colours. The result is a flat cereal garland strip that can be looped and stuck to a window or a wall. No small parts get lost, no yarn tangles.
What You Need
- 1 strip of white card, 5 x 40 cm, per child
- 30 pieces of loop-shaped cereal per child, mixed colours (e.g. Froot Loops or similar ring cereal), in a small cup
- 1 glue stick per child
How to Make It
- Run the glue stick along the full length of the card strip. A generous, even coat works better here than a thin one because cereal is light and round, so it rolls off dry glue.
- Pick up a cereal loop and press it flat onto the glued strip. The ring should lie on its side, not stand up. Press firmly for three seconds.
- Continue adding cereal loops along the strip, pressing each one down. They can touch or have small gaps; both look intentional.
- When the strip is full, leave flat for five minutes while the glue sets. Do not lift the strip until the cereal feels firmly attached.
- Curl the finished strip into a loop, overlap the ends by 2 cm, and secure with a dot of glue stick. The garland is ready to hang.

🛍 Shopping guide
Playdough Press Ornaments
Air-dry clay or homemade salt dough rolled to 1 cm thick becomes a bauble or star when the child presses a cookie cutter in and lifts it out. Texture stamps, buttons pressed in and removed, and toothpick-drawn lines all work on the surface. The adult pre-rolls the dough and cuts it with a straw hole at the top before the session so the ornament can hang when dry.
What You Need
- Air-dry clay, one golf-ball-sized portion per child, rolled to 1 cm thick slabs by adult before the session
- Christmas cookie cutters: star, tree, bauble (1 set per two children)
- Textured objects for pressing: a fork, a button, a piece of lace (kept on the tray)
- A drinking straw (1 per child), used by child to punch a hanging hole
- 30 cm length of thin ribbon per child, threaded through the hole after drying by whoever takes the ornament home
How to Make It
- Press a cookie cutter into the flat clay slab firmly, then lift straight up. The shape stays in the slab. Press the cut-out shape free with one finger from underneath.
- Press a fork tine or button into the surface of the shape and lift it away cleanly to leave a textured impression. This is the decorating step and it can be repeated anywhere on the surface.
- Push the straw straight down through the shape near the top edge, about 1 cm from the rim, to make a round hanging hole. Twist the straw slightly as you push for a cleaner edge. Remove the straw.
- Place the ornament on a flat tray to take home. It needs 24 hours to air-dry fully. The surface will feel firm and cool when it is dry.
- Thread ribbon through the hole once dry and tie a knot for hanging. This step can happen at home.

🛍 Shopping guide
Felt Board Tree Scene
A square of felt glued to a piece of card makes a background board. A tray of pre-cut felt shapes (tree, star, gifts, snowflakes) lets the child build and rebuild a Christmas scene as many times as she wants. Felt grips felt without glue, so the activity is endlessly reusable and nothing gets stuck permanently to anything.
What You Need
- 1 piece of blue or white felt, A4 size, glued to A4 card backing by adult (PVA, left to dry overnight)
- Pre-cut felt shapes by adult: 1 green tree (15 cm tall), 1 yellow star (5 cm), 4 small gift shapes in red and gold, 5 white snowflake shapes, 2 small brown trunk rectangles
- A shallow tray to hold the loose shapes
How to Make It
- Place the felt board flat on the table or prop it against a box so it stands upright. The blue or white felt is the sky and ground.
- Press the green tree shape onto the board. Felt grips felt with light pressure. No glue needed at any point.
- Press the brown trunk rectangle at the base of the tree so it lines up with the bottom edge of the green shape.
- Press the yellow star at the very top of the tree.
- Arrange the gift shapes at the base of the tree and scatter snowflake shapes across the background.
- Move, rearrange, and start over as many times as wanted. To pack away, peel all the shapes off and store in a zip-top bag with the board.

🛍 Shopping guide
Cupcake Liner Flowers
This craft earns its place on a Christmas table because red and white cupcake liners layered together and stuck onto green card look exactly like poinsettias. The child flattens, layers, and glues, and the result is something a grandmother will keep. Liners are cheap, the tray is tiny, and the technique takes thirty seconds to explain.
What You Need
- 3 red cupcake liners per child
- 3 white cupcake liners per child
- 1 sheet A4 green card (200 gsm) per child as backing
- PVA glue in a shallow pot (1 per two children)
- 1 flat craft brush per child
- Yellow dot stickers, 1 cm (5 per child, for the flower centre)
How to Make It
- Flatten one red liner with a palm so it is a flat circle, then press the pleats open to make a flower shape with a frilled edge. Repeat with the two remaining red liners.
- Do the same with the white liners. Flatten and open them into frilled circles.
- Layer one white liner on top of one red liner and press flat. Brush a thin coat of PVA on the back of the layered pair and press them onto the green card. Hold for ten seconds.
- Repeat with the remaining pairs, spacing them so the card looks like a poinsettia cluster or a simple floral arrangement.
- Press five yellow dot stickers into the centre of each flower. They cover the centre dip left by the original liner base and finish the flower convincingly.
- Leave flat for ten minutes while the PVA sets.

🛍 Shopping guide
Straw Printed Snowflakes
Dip the end of a drinking straw into white paint, press it onto blue card, and it makes a perfect small circle. Line up six of those circles from a central point and you have a snowflake. The child gets the satisfying rhythm of dip, press, lift, rotate, and the result looks deliberate and beautiful even when it is not perfectly symmetrical.
What You Need
- 1 sheet A4 dark blue card (200 gsm) per child
- White washable tempera paint in a shallow tray (1 tray per four children)
- 2 drinking straws per child (one wide, one narrow for varied circle sizes)
- A pencil dot pre-marked at the centre of each card by adult
How to Make It
- Dip the end of the wide straw lightly into the white paint. Tap once on the edge of the tray to remove excess. Too much paint fills in the circle and looks like a blob rather than a snowflake dot.
- Press the straw end onto the pencil dot at the centre of the card. Lift straight up. You should see a circle with a slightly hollow centre from the straw’s opening.
- Dip again and press another circle just touching the first, pointing in a new direction. Think of a clock: press circles at twelve, two, four, six, eight, and ten o’clock from the centre to build the snowflake arms.
- Add smaller circles using the narrow straw at the tip of each arm for added detail.
- Repeat to make two or three snowflakes across the card, overlapping slightly if the child wants a pattern.
- Leave flat for fifteen minutes. White paint on dark blue is very striking when it dries.

🛍 Shopping guide
Contact Paper Window Tree
Stick a large triangle of clear contact paper to a window, sticky side facing into the room, and the child presses tissue paper squares onto it to build a tree. Light shines through from outside and the finished tree glows. No glue, no mess on the table. Peel the whole thing off in January and it leaves no mark.
What You Need
- Clear contact paper, pre-cut by adult into a large triangle (30 cm tall, 25 cm wide at the base)
- Green tissue paper squares, 4 x 4 cm, pre-torn or pre-cut by adult (about 40 per child)
- Yellow tissue paper squares, 4 x 4 cm (5 per child, for the star at the top)
- Brown tissue paper strips, 4 x 10 cm (3 per child, for the trunk)
- Masking tape (for the adult to stick the contact paper to the window before the child arrives)
How to Make It
- The adult sticks the contact paper triangle to the window with masking tape around all edges before the session. The sticky side faces into the room.
- The child picks up a green tissue square and presses it onto the sticky surface anywhere inside the triangle outline. It grips immediately. No smoothing needed.
- Continue pressing green squares to fill the triangle completely. Overlapping squares add depth and the tree looks fuller for it.
- Press yellow squares at the very top of the triangle, overlapping to form a star shape.
- Press brown strips below the base of the triangle as the trunk.
- Step back. The tree glows with the light behind it and is ready immediately, no drying required.

Shredded Paper Snow Scene
A shoebox lid becomes a snowy diorama when the child glues shredded white paper as snow, then presses pre-cut card figures into it. The shredded paper is tactile and looks genuinely like snow drifts. Nothing here involves scissors, hot glue, or small parts small enough to swallow.
What You Need
- 1 shoebox lid per child
- White shredded paper (about two large handfuls per child)
- PVA glue in a shallow pot (1 per two children)
- 1 flat craft brush per child
- Pre-cut card figures by adult: 1 snowman (8 cm tall), 2 small trees (6 cm tall), 1 house (6 cm tall), each with a small fold tab at the base so they can stand
How to Make It
- Brush a generous coat of PVA all over the inside of the shoebox lid. Work quickly because PVA skins over in about three minutes.
- Drop handfuls of shredded paper into the lid and press down with a flat palm. The paper should cover the bottom and build up in drifts at the edges. Bald patches can have more PVA brushed on and more paper pressed in.
- While the paper is still wet, press the fold tabs of each card figure into the soft paper layer so each one stands upright. The snowman goes in the centre, trees to the sides, house at the back corner.
- Leave completely flat for fifteen minutes until the PVA sets. Do not tip the box during this time or the figures fall over.
- When set, the shredded paper feels firm and the figures stand without help. The scene is ready to display on a shelf.

🛍 Shopping guide
Potato Masher Snowmen
Press a potato masher into white paint and onto dark blue card and it leaves a perfect round grid circle. Two overlapping circles side by side form a snowman body. Add a fingerprint hat, dot sticker eyes, and the snowman looks like he has a cheerful quilted body. The potato masher is the only tool and it does all the heavy work.
What You Need
- 1 sheet A4 dark blue card (200 gsm) per child
- White washable tempera paint in a shallow tray (1 per four children)
- 1 clean plastic potato masher (1 per two children)
- Black washable tempera paint in a small pot (1 per four children)
- Orange dot stickers, 1 cm (1 per child, for the nose)
- Black dot stickers, 1 cm (3 per child, for eyes and buttons)
How to Make It
- Press the potato masher flat into the white paint. It should coat the grid surface evenly: if it pools in the centre, dab the masher on a paper towel first.
- Press the masher onto the lower half of the card and lift straight up. The print should show the grid clearly on a clean round shape. This is the snowman’s body.
- Dip again and print a second, slightly overlapping circle directly above the first for the head.
- Dip one fingertip into black paint and press three fingerprints in a vertical line on the body circle for buttons.
- Press black dot stickers on the head circle for two eyes and the orange dot sticker between them for the nose.
- Leave flat for fifteen minutes. The grid texture on the white circles is the most charming part and stays crisp when the paint dries.

Bingo Dabber Lights
A string of Christmas lights drawn in black marker on white card by the adult becomes a masterpiece when the child fills each bulb shape with a dot marker. The dots stay neatly within the bulb outlines and the finished card looks like a proper print. This is one of those crafts where adults stand back impressed and children feel genuinely competent.
What You Need
- 1 sheet A4 white card (200 gsm) per child with a string of 8 lightbulb shapes pre-drawn by adult in black marker (each bulb about 3 cm tall, connected by a wavy line)
- Dot markers in red, blue, green, yellow, orange, purple (2-3 per tray)
How to Make It
- Look at the lightbulb string card. Each bulb has a small cap outline at the top (the adult draws this as a small rectangle above each bulb).
- Choose a colour and press the dot marker into the centre of the first bulb. Lift cleanly. The dot should fill most of the bulb interior without touching the black outline.
- Choose a new colour for the next bulb. Alternate colours along the string so the lights look like a real mixed-colour garland.
- Fill every bulb along the string. Some children will be very precise; others will let dots overlap the outline. Both look festive.
- Leave flat for ten minutes. The ink dries quickly and the colours stay bright.

🛍 Shopping guide
Sponge Dipped Stars
Cut a bath sponge into a star shape and it stamps a bold, textured star print every time. The child dips and stamps onto black card and the result looks like a gold and silver sky. Three to five stars across the card and it is finished. Simple, fast, and striking.
What You Need
- 1 sheet A4 black card (200 gsm) per child
- 1 sponge pre-cut into a star shape by adult (about 6 cm point to point; 1 sponge per two children)
- Gold washable tempera paint in a shallow tray
- Silver washable tempera paint in a second shallow tray
How to Make It
- Dip the star sponge lightly into the gold paint and dab it once on the edge of the tray to remove excess paint. Too much paint closes in the star points and makes a solid blob.
- Press the sponge firmly onto the black card and lift straight up without sliding. The star print should show clear points and visible sponge texture inside the shape.
- Dip into silver paint and stamp another star nearby. The two colours together look intentional and very effective against the black card.
- Continue stamping until the card has three to five stars. They can overlap slightly or stay separate.
- Leave flat for fifteen minutes. Gold and silver tempera on black looks spectacular once dry.

🛍 Shopping guide
Rice Tray Letter Tracing
A shallow tray filled with white rice and a finger is all this station needs. The child traces letters, shapes, and Christmas drawings in the rice surface, then shakes the tray to clear it and starts again. It is not a take-home craft, but it is the most calming station in the room and can run alongside every other craft without prep beyond filling the tray.
What You Need
- 1 shallow tray or baking dish per station (at least 30 x 20 cm, with sides at least 3 cm deep so rice stays in)
- 500 g white long-grain rice per tray
- Optional: a laminated A5 card inside the tray showing Christmas letter outlines (J, O, Y) or shape outlines (star, tree) for the child to trace over
How to Make It
- Fill the tray with rice to a depth of about 1.5 cm. Spread it level with a flat hand.
- Place the laminated letter card under the rice layer if using, so the outlines show faintly through: this gives the child something to trace without any risk of paper getting wet or torn.
- Draw one finger slowly through the rice from left to right to make a line. The rice parts and a furrow appears. This is the tracing action.
- Trace letters, shapes, or free drawings. When the tray is full of lines, tilt it gently from side to side and the rice levels itself. Clean slate, ready to go again.
- To pack away, pour the rice back into a storage container. It reuses indefinitely as long as it stays dry.

Frequently Asked Questions
What Christmas crafts preschool children can do alone?
The best christmas crafts preschool children can manage independently are ones where every material is already on the tray: sticker-based crafts (foam sticker stockings, dot marker baubles, sticker jumper decorating), sensory play (rice tray letter tracing, felt board tree scene), and simple press-and-stick activities (pom pom drop tree, contact paper window tree). Remove any step that needs scissors, hot glue, or a tool with a sharp edge, and pre-cut or pre-tear everything the night before. A three-year-old can complete all of those from start to finish without adult help once the tray is set.
How do I set up Christmas crafts preschool groups quickly?
Tray-based setup is the fastest system for christmas crafts preschool groups. Prep one shallow tray per craft the night before: pre-cut all card shapes, pre-tear tissue paper, pre-portion glue into small pots, and pre-wrap yarn ends with tape. Cover each tray with a cloth or a sheet of card overnight and remove it just before the children arrive. Each child picks a tray, works independently, and you only need to circulate rather than assist. Set wet-craft stations near a sink or put a plastic tablecloth underneath, and keep dry-craft trays as walk-up options for children waiting for a wet station to clear.
Are scissors safe for Christmas crafts preschool age?
Scissors are not recommended for unsupervised christmas crafts preschool stations. Children aged three to four are still developing the hand strength and bilateral coordination that scissors require, and a group setting means no adult can supervise every child’s cutting at once. Every craft in this list removes scissors entirely by having the adult pre-cut all shapes the night before. If your group includes fours and fives who use round-tipped safety scissors confidently, scissors can be introduced as a separate supervised station with a clear adult assigned to it, but they should never sit unattended on a tray.
What Christmas crafts preschool teachers can prep the night before?
Almost all of the christmas crafts preschool stations in this list are fully preppable the night before. Cut brown card gingerbread house shapes and bag them per child. Roll playdough or air-dry clay and wrap in cling film. Draw triangle outlines on canvases and cards. Dye pasta in food colouring and leave to air dry on a sheet. Cut foam stocking shapes. Pre-tear tissue paper into piles. Wrap yarn ends with tape. Pour PVA into small pots with lids. Fill rice trays and cover with a cloth. The only station that needs a same-morning step is the contact paper window tree, where the adult tapes the contact paper to the window just before children arrive.

15 christmas party trivia games for every age — movies, carols, ads & more. Play tonight!
15 wholesome church Christmas party games for all ages — faith-filled, low-cost, and perfect for f

24 Hallmark Christmas aesthetic ideas in cherry red, cream, pine green and brass, room by room, for
Leave a Reply