

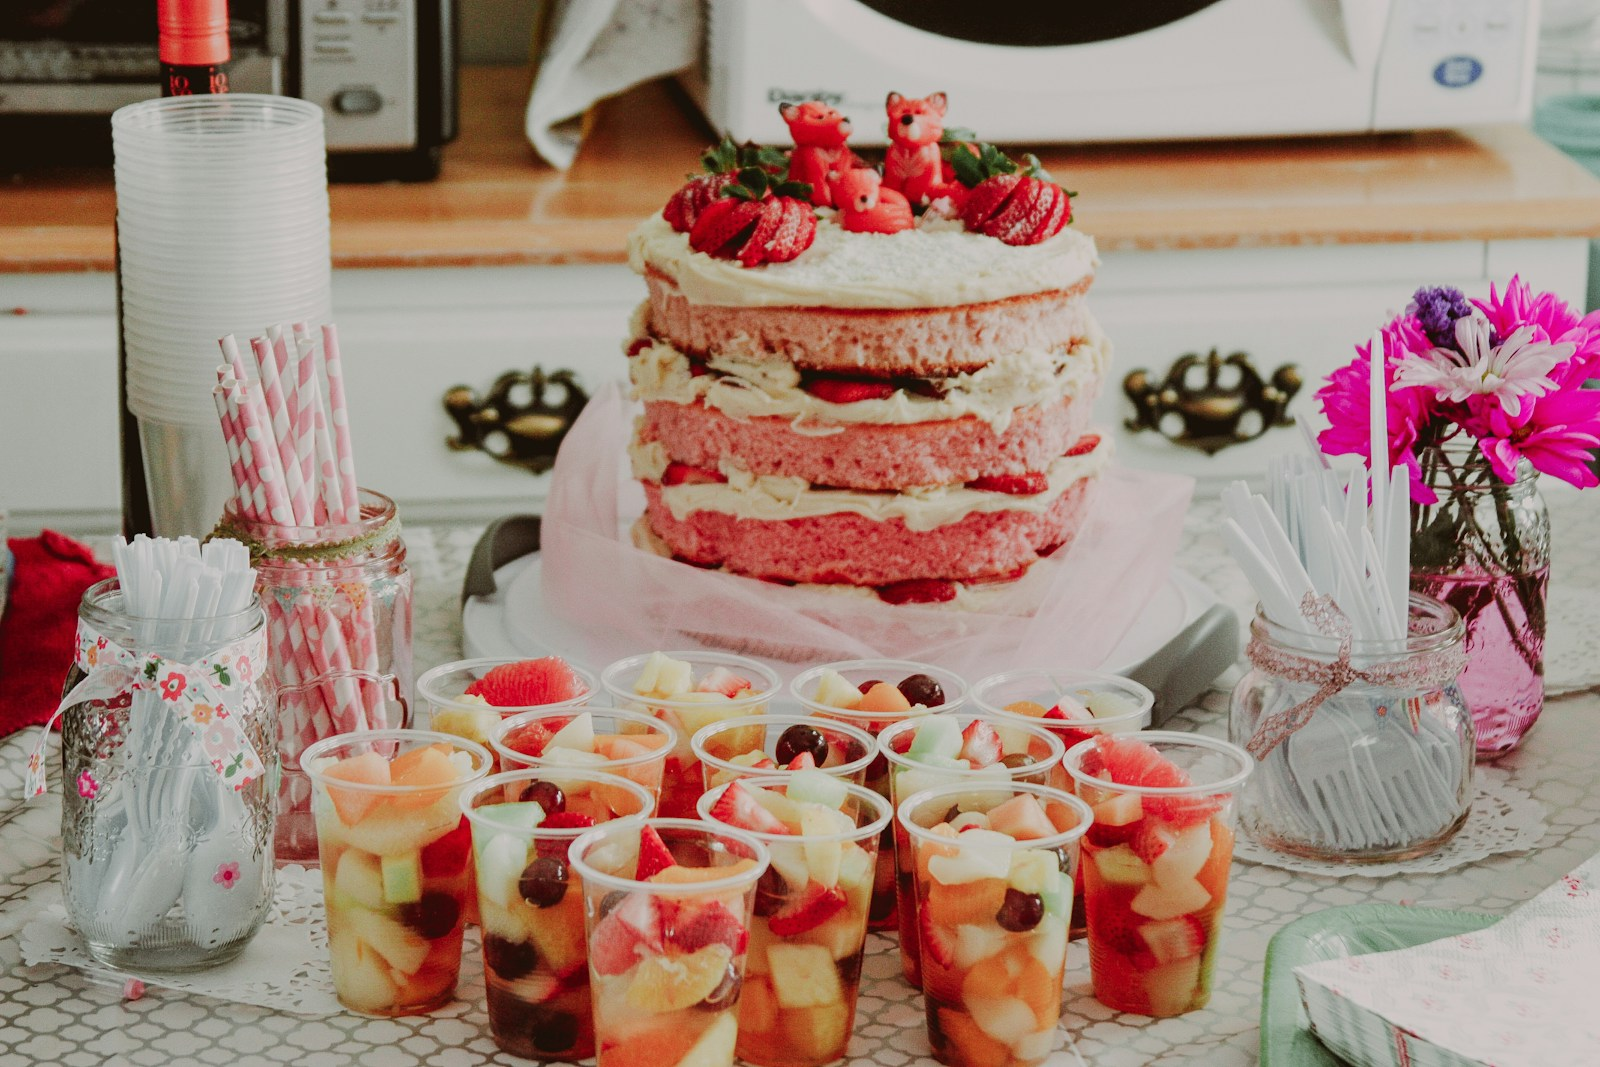
All 14 of these birthday party food ideas are assembled, not baked, so the oven stays free for the cake. The spread works for mixed crowds: children and adults, picky eaters and the ones who photograph everything before they touch it. Nothing here contains alcohol. Common allergens vary by recipe and are noted in each intro so you can swap quickly. Build the table with varying heights: cones standing tall, skewers upright in a cup, layered glasses at eye level, and flat boards running the length of the cloth. The result photographs as a whole even before the first guest arrives.
This post contains affiliate links. If you buy through them, I may earn a small commission at no extra cost to you.
- Sandwich Pinwheels Sliced Into Rounds
- The Grazing Board Built Along the Table
- Skewers Threaded With Cheese and Tomato
- Fruit Platter Cut as a Centrepiece
- Dips in Small Pots With Vegetable Sticks Standing Up
- Pizza Faces Assembled on Muffin Halves
- Layered Salad in a Glass Bowl
- Popcorn Cones Tied With Ribbon
- Berry and Cream Layer Glasses
- Chocolate Bark Broken Into Shards
- Wraps Rolled and Cut Into Rounds
- Jelly Cups Set in Clear Glasses
- Cheese and Grape Stacks in Paper Cases
- Iced Drinks in a Tub Rather Than a Jug
- Frequently Asked Questions
Sandwich Pinwheels Sliced Into Rounds
The visual hook here is the spiral cross-section: a pinwheel of pale cream cheese, vivid red pepper and green herb that shows the moment you slice. Cut the rolls thin, about 1.5 cm each, and stand them cut-side up on a board so every guest can see the pattern. They travel well and hold their shape for several hours once chilled.
Make these the night before, wrap the uncut rolls tightly in cling film and refrigerate overnight. Slice just before serving. Contains gluten and dairy; swap cream cheese for a dairy-free alternative if needed.
Ingredients
- 4 large flour tortillas (25 cm each)
- 200 g full-fat cream cheese, softened
- 2 tablespoons finely chopped chives
- 1 teaspoon garlic powder
- 1/2 teaspoon fine sea salt
- 1 large roasted red pepper from a jar (about 80 g), patted dry and sliced into thin strips
- 60 g baby spinach leaves
- 80 g wafer-thin ham or smoked turkey slices
Instructions
- Beat the cream cheese with the chives, garlic powder and salt until smooth and easy to spread.
- Lay a tortilla flat and spread a quarter of the cream cheese mixture evenly to the edges, leaving a 1 cm border at the far end.
- Arrange a layer of spinach leaves over the cream cheese, then lay a quarter of the ham or turkey across the centre and add a few strips of roasted red pepper.
- Roll the tortilla tightly away from you, pressing firmly as you go, then wrap it in cling film and twist the ends closed.
- Repeat with the remaining three tortillas. Refrigerate all four rolls for at least 30 minutes.
- Unwrap and slice each roll into rounds about 1.5 cm thick using a sharp serrated knife. Arrange cut-side up on a board or platter.

The Grazing Board Built Along the Table
A grazing board works because it fills horizontal space and invites people to graze across it rather than crowd a single bowl. The visual hook is contrast: pale brie against dark grapes, orange cheddar against green olives, the honey pooling amber in its small pot. Run it along the length of a trestle table and anchor the tallest items, the breadsticks, at one end.
Contains gluten, dairy and tree nuts (if included); label clearly at the party. Assemble up to two hours ahead; cover loosely with cling film and refrigerate, then bring to room temperature 20 minutes before guests arrive.
Ingredients
- 200 g brie or camembert, whole
- 150 g mature cheddar, cut into rough cubes
- 150 g red seedless grapes, in small clusters
- 100 g green olives, drained
- 100 g mixed nuts (cashews, almonds, pecans)
- 80 g honey in a small jar or pot
- 150 g water crackers or seeded crackers
- 8 to 10 long breadsticks
- 80 g dried apricots or dates
Instructions
- Place the whole brie at one end of the board and the honey pot about a third of the way along to anchor two visual focal points.
- Tuck small clusters of grapes next to the brie and scatter the cheddar cubes in a loose line toward the centre.
- Pour the olives into a small bowl and nestle it into the board; spoon the nuts into another small bowl nearby.
- Fan the crackers in overlapping arcs between the cheese sections, then stand the breadsticks upright in a tall glass at one end of the board.
- Fill any gaps with the dried fruit. Step back, look for bare patches and fill them with any leftover crackers or nuts.

Skewers Threaded With Cheese and Tomato
Stand these in a deep cup or a block of florist’s foam wrapped in foil and they become the tallest element on the table, a cluster of colour at eye level. The hook is the alternating red, white and green: cherry tomato, mozzarella ball, fresh basil leaf, repeated twice per skewer. Drizzle with pesto just before serving so the green glistens.
Contains dairy and tree nuts if the pesto includes pine nuts; use a nut-free pesto if the guest list includes nut allergies. Make the skewers up to four hours ahead without the pesto; drizzle at the last minute.
Ingredients
- 300 g mini mozzarella balls (bocconcini), drained
- 300 g cherry tomatoes
- 40 large fresh basil leaves
- 3 tablespoons good-quality green pesto
- 1 tablespoon extra virgin olive oil
- 1/4 teaspoon flaky sea salt
- 1/4 teaspoon cracked black pepper
- 20 wooden cocktail skewers (15 cm)
Instructions
- Pat the mozzarella balls dry with kitchen paper so the oil sits on the surface rather than pooling at the bottom of the cup.
- Thread each skewer in this order: one basil leaf folded in half, one mozzarella ball, one cherry tomato, one folded basil leaf, one mozzarella ball, one cherry tomato.
- Stand the finished skewers upright in a deep cup or pot as you work, packing them closely so they support each other.
- Stir the pesto together with the olive oil to loosen it slightly.
- Just before serving, drizzle the loosened pesto over the skewers and finish with flaky salt and black pepper.

🛍 Shopping guide
Fruit Platter Cut as a Centrepiece
This is the item that earns its place by sheer scale and colour: a full platter of fruit cut into deliberate shapes and arranged in a pattern so it photographs as a whole. The visual hook is the rainbow gradient, starting with strawberries at one end, running through orange segments, pineapple spears, green kiwi slices and finishing with blueberries at the other.
Prepare up to three hours ahead; cover with cling film and refrigerate. Squeeze a little lemon juice over cut apple or banana if you include either, to prevent browning. This recipe is naturally gluten-free and dairy-free.
Ingredients
- 300 g strawberries, hulled and halved
- 3 mandarin oranges or 2 large navel oranges, peeled and separated into segments
- 1/2 small pineapple (about 300 g flesh), cut into long spears
- 4 kiwi fruits, peeled and sliced into 5 mm rounds
- 200 g green seedless grapes, in small clusters
- 150 g blueberries
- 1 tablespoon fresh lemon juice
- Small fresh mint sprigs, to finish
Instructions
- Arrange the strawberries in a dense row at one short end of a large rectangular platter or board.
- Lay the orange segments in a band next to the strawberries, overlapping them slightly in a neat line.
- Place the pineapple spears diagonally across the centre of the platter to add height and a different angle.
- Fan the kiwi rounds in a curved row, then tuck the grape clusters beside them.
- Fill the remaining end with the blueberries, pressing them gently together so they form a solid mass of deep blue.
- Drizzle the lemon juice lightly over any cut surfaces that might discolour, then tuck small mint sprigs between sections as a fresh green accent.

Dips in Small Pots With Vegetable Sticks Standing Up
Pack vegetable sticks upright into the dip itself rather than lying them flat, and this item suddenly has height and looks considered. The visual hook is the contrast between the vivid orange carrot, the deep purple of red cabbage strips and the pale green of cucumber, all rising out of bright hummus and vibrant beet dip.
Contains sesame (in hummus); check your guest list for allergies and use a tahini-free hummus if needed. Cut the vegetables the night before and store in cold water in the fridge; they stay crisp and are ready to arrange in minutes. Contains gluten if pitta chips are served alongside.
Ingredients
- 300 g shop-bought hummus (or homemade)
- 200 g shop-bought beetroot dip or roasted red pepper dip
- 4 large carrots, peeled and cut into sticks 10 cm long
- 1 large cucumber, cut into sticks 10 cm long
- 150 g red cabbage, cut into thin strips
- 2 large celery stalks, cut into sticks 10 cm long
- 1 yellow bell pepper, deseeded and cut into strips
- 1 teaspoon extra virgin olive oil, to finish the hummus
- Sweet paprika, for dusting the hummus
Instructions
- Spoon the hummus into one medium pot or bowl and the beetroot dip into a second, making the surface of each slightly concave to hold the vegetable sticks steady.
- Dust the hummus with a pinch of sweet paprika and drizzle the olive oil over the top.
- Group the vegetable sticks by colour and push each colour group upright into one of the dips so they fan out slightly.
- Arrange any remaining sticks that do not fit upright flat around the base of the pots.
- Set the pots on a small board or tray to unify them on the table.

🛍 Shopping guide
Pizza Faces Assembled on Muffin Halves
These are the one item that needs the oven: a short blast at high heat to melt the mozzarella and warm the sauce. Keep the oven work to ten minutes and the assembly completely child-friendly. The visual hook is the faces themselves: olive eyes, red pepper mouth, mushroom nose, each one slightly different and unmistakably intentional.
Contains gluten and dairy. Assemble the faces raw up to two hours ahead, cover and refrigerate, then bake in a single batch just before the party starts. Makes 12 individual pieces, enough for a sharing platter.
Ingredients
- 6 white or wholemeal English muffins, split in half
- 6 tablespoons tomato pizza sauce or passata
- 150 g grated mozzarella
- 24 black olive slices (for eyes)
- 12 small strips of red bell pepper (for mouths)
- 12 small mushroom slices (for noses)
- 12 small fresh basil leaves (optional, for hair or decoration)
- 1/2 teaspoon dried oregano
Instructions
- Preheat the oven to 200 C (fan 180 C / gas 6) and line two baking trays with baking paper.
- Place the muffin halves cut-side up on the trays. Spread one tablespoon of pizza sauce over each half, taking it almost to the edge.
- Scatter the grated mozzarella evenly over each sauced muffin and sprinkle a pinch of dried oregano over the top.
- Press two olive slices into the cheese for eyes, one mushroom slice for the nose and one red pepper strip curved into a smile for the mouth on each face.
- Bake for 8 to 10 minutes until the cheese is melted and bubbling and the muffin edges are golden.
- Cool for 2 minutes before transferring to a platter, then tuck basil leaves in as hair if using.

Layered Salad in a Glass Bowl
A straight-sided glass bowl turns a salad into a showpiece: every layer is visible from the outside, so presentation costs nothing extra. The visual hook is the sequence of colours: white feta, dark red tomato, pale green cos lettuce, yellow corn, purple-red red onion. Serve it with dressing on the side and let guests dig through all the layers themselves.
Contains dairy. This keeps unserved in the fridge for up to four hours with cling film pressed directly onto the top layer. Do not toss it until serving or the layers collapse. This recipe is gluten-free.
Ingredients
- 1 large cos (romaine) lettuce, leaves torn into pieces
- 200 g cherry tomatoes, halved
- 200 g tinned or frozen sweetcorn kernels, drained and patted dry
- 1/2 red onion, very thinly sliced
- 1 large cucumber, diced into 1 cm cubes
- 150 g feta cheese, crumbled
- 80 g pitted black olives, halved
- 4 tablespoons olive oil
- 2 tablespoons red wine vinegar
- 1/2 teaspoon fine sea salt and a few grinds of black pepper
Instructions
- Whisk the olive oil, red wine vinegar, salt and pepper together in a small jug and set aside.
- Spread the torn lettuce in an even layer across the base of a large, straight-sided glass bowl.
- Add the cherry tomatoes as the next layer, arranging them against the glass as much as possible so the colour shows.
- Spoon the sweetcorn over the tomatoes in a flat layer, then scatter the red onion rings on top.
- Add the cucumber, then crumble the feta over the whole surface in an even white layer.
- Finish with the black olives scattered on top. Cover with cling film and refrigerate until needed. Bring the dressing jug to the table and let guests dress and toss their own portions.

🛍 Shopping guide
Popcorn Cones Tied With Ribbon
Individual cones of popcorn give the table instant height and a fairground energy without a single complicated step. The visual hook is the paper cone itself: choose bright solid colours or kraft paper, tie the ribbon tight so the cone holds its shape, and stand them point-down in a glass or small vase. Each guest takes one and walks away with it.
This recipe is naturally gluten-free and dairy-free if made with coconut oil. Pop the corn the day before and store in an airtight container; assemble cones on the morning of the party.
Ingredients
- 120 g popping corn kernels
- 2 tablespoons coconut oil or sunflower oil
- 3 tablespoons caster sugar
- 1 teaspoon fine sea salt
- 1/4 teaspoon cinnamon (optional)
- 12 squares of coloured card or kraft paper (30 cm x 30 cm each)
- Adhesive tape
- 12 lengths of ribbon (40 cm each)
Instructions
- Heat the oil in a large, lidded saucepan over medium-high heat. Add three kernels, cover and wait until they pop, then add the rest of the kernels in a single layer.
- Cover the pan and shake it gently every 30 seconds. When the popping slows to one pop every two seconds, remove the pan from the heat.
- While the corn is still warm, sprinkle the sugar, salt and cinnamon (if using) over it and toss well to coat evenly.
- Curl each paper square into a cone shape with a small opening at the tip and a wide opening at the top, and secure with tape down the seam.
- Fill each cone to about two-thirds full with the seasoned popcorn, fold the top edge down once and tie the ribbon tightly around the fold to close it.
- Stand the finished cones point-down in a tall glass or vase on the table.

Berry and Cream Layer Glasses
These are the dessert column on the table: a row of clear glasses each showing distinct white, red and pale pink layers. The visual hook is the strict separation between the cream and the berries; keep the layers clean and the glasses clear. Use individual tumbler-style glasses so everyone gets their own.
Contains dairy. Assemble up to three hours ahead and refrigerate; the cream holds its shape and the berry juices do not bleed into the layer above if you build the layers correctly (cream first, fruit on top). This recipe is gluten-free.
Ingredients
- 400 ml double cream
- 3 tablespoons icing sugar, sifted
- 1 teaspoon vanilla extract
- 250 g strawberries, hulled and quartered
- 150 g raspberries
- 150 g blueberries
- 2 tablespoons seedless strawberry jam
- 1 tablespoon water
Instructions
- Pour the cream into a large bowl, add the icing sugar and vanilla extract and whip with an electric whisk until it holds soft peaks. Do not over-whip.
- Warm the strawberry jam with the tablespoon of water in a small saucepan over low heat, stirring until it becomes a loose sauce. Remove from heat and cool for 5 minutes.
- Toss the strawberries, raspberries and blueberries gently in the cooled jam sauce so they are lightly glazed.
- Spoon a generous layer of whipped cream into the base of each glass, filling it to about one-third full.
- Spoon the glazed berries over the cream to fill the glass to two-thirds, then finish with a small rosette of whipped cream on top and a single berry to garnish.
- Refrigerate uncovered for up to 3 hours; cover loosely with cling film only if chilling for more than 1 hour.

🛍 Shopping guide
Chocolate Bark Broken Into Shards
Chocolate bark earns its place on the table because the jagged shards create an irregular silhouette that no other item on the spread has. The visual hook is the toppings scattered across a dark chocolate base: freeze-dried strawberry pieces the colour of lipstick, pistachios a sharp green, and gold or white sprinkles if you want the festive hit.
Contains tree nuts (pistachios) and may contain traces of dairy depending on the chocolate used; check the label. Make this the night before; it stores at room temperature in an airtight tin for up to five days. This is the only item that genuinely improves with advance preparation.
Ingredients
- 300 g good-quality dark or milk chocolate (at least 50% cocoa), roughly chopped
- 30 g shelled pistachios, roughly chopped
- 20 g freeze-dried strawberry pieces
- 15 g white chocolate chips or white sprinkles
- 1/4 teaspoon flaky sea salt
- Gold or rainbow sprinkles, 1 tablespoon (optional)
Instructions
- Line a large baking tray with baking paper.
- Melt the dark or milk chocolate in a heatproof bowl set over a pan of barely simmering water, stirring gently until smooth. Remove from the heat and cool for 2 minutes.
- Pour the melted chocolate onto the lined tray and spread it with a palette knife or the back of a spoon into a rough rectangle about 5 mm thick.
- Scatter the pistachios, freeze-dried strawberry pieces and white chocolate chips over the surface immediately, pressing them very lightly so they adhere.
- Finish with the flaky salt and the gold sprinkles if using.
- Leave to set at room temperature for at least 1 hour, or refrigerate for 20 minutes. Once fully set, lift the bark off the paper and break it into uneven shards by hand.

Wraps Rolled and Cut Into Rounds
These are the sandwich pinwheel’s more substantial sibling: a full-size wrap with a heartier filling, cut into thick rounds and stacked in a tower or laid flat in overlapping rows. The visual hook is the cross-section again, here richer in colour because the filling is a deeper golden, green and red combination of egg, avocado and tomato.
Contains gluten and eggs. Make ahead rule: fill and roll the morning of the party; slice just before serving. Swap the egg for mashed chickpeas with a pinch of turmeric and black salt for an egg-free version that holds its colour.
Ingredients
- 4 large flour wraps (30 cm each)
- 4 large eggs, hard-boiled, peeled and sliced
- 2 ripe avocados, mashed with a fork
- 1 tablespoon fresh lemon juice
- 1/2 teaspoon fine sea salt
- 1/4 teaspoon cracked black pepper
- 2 large ripe tomatoes, thinly sliced and patted dry
- 60 g rocket or baby spinach
- 2 teaspoons Dijon mustard
Instructions
- Mix the mashed avocado with the lemon juice, salt and pepper until smooth.
- Spread a thin layer of Dijon mustard along the centre of each wrap, then spread a quarter of the avocado mixture evenly over the whole surface, leaving a 1 cm border at one end.
- Lay a single layer of egg slices across the avocado, then arrange the tomato slices on top and scatter the rocket or spinach leaves over everything.
- Roll the wrap tightly from the filled end toward the plain border, pressing firmly as you go to keep the roll compact.
- Wrap each roll in cling film and refrigerate until needed, for up to four hours.
- Slice each roll into rounds 2 cm thick using a sharp knife and arrange cut-side up on a platter or stack them in overlapping rows.

Jelly Cups Set in Clear Glasses
Jelly cups earn their place by adding colour and wobble to the table, and by being essentially effort-free once they are in the fridge. The visual hook is fruit suspended inside translucent coloured jelly: strawberry halves caught mid-fall in scarlet, mandarin segments in orange. Use small clear glasses so every layer is on show.
This recipe is gluten-free and dairy-free. Make these the night before: they need at least four hours to set fully. Vegetarian guests should note that standard jelly contains gelatine; use a vegetarian agar-based jelly alternative instead.
Ingredients
- 2 x 135 g packets strawberry jelly (or agar jelly for vegetarians)
- 600 ml boiling water
- 400 ml cold water
- 200 g strawberries, hulled and halved
- 1 x 298 g tin mandarin segments in juice, drained
- 8 small fresh mint leaves, to garnish
Instructions
- Break the jelly cubes into a large heatproof jug, pour over the boiling water and stir for 2 minutes until completely dissolved.
- Add the cold water and stir to combine, then set the jug aside to cool to room temperature for 15 minutes. The liquid should feel only slightly warm to the touch.
- Arrange a few strawberry halves and a few mandarin segments in the base of each clear glass.
- Pour the cooled jelly liquid over the fruit slowly, filling each glass to about 2 cm below the rim.
- Transfer the glasses carefully to the fridge and leave to set for at least 4 hours or overnight.
- Just before serving, add a mint leaf on top of each glass.

Cheese and Grape Stacks in Paper Cases
Each paper case holds one small tower: a cube of cheddar, a grape, another cube, another grape, held together with a short cocktail pick. The visual hook is the repetition of these neat, identical stacks lined up across the table. Use red and green grapes together for colour contrast, and mix aged cheddar with a milder white cheese for variety.
Contains dairy. Assemble up to two hours ahead and cover loosely. These work brilliantly as a portable element that guests can pick up and move; no serving utensils needed.
Ingredients
- 200 g mature cheddar, cut into 1.5 cm cubes
- 200 g mild white cheese such as Gouda or Emmental, cut into 1.5 cm cubes
- 150 g red seedless grapes
- 150 g green seedless grapes
- 24 short cocktail picks (7 cm)
- 24 small paper baking cases (size 5 cm diameter)
Instructions
- Cut both cheeses into neat 1.5 cm cubes, keeping them separate so you can alternate colours on the stack.
- Thread each cocktail pick with one cube of cheddar, one red grape, one cube of white cheese and one green grape, pressing them together firmly.
- Stand each finished stack upright in a paper case.
- Line the filled paper cases in rows on a flat tray or platter, alternating the colour order of each row if you like for a pattern effect.

Iced Drinks in a Tub Rather Than a Jug
A deep galvanised tub or large bucket packed with ice and filled with individual drinks bottles turns a drink station into a prop. The visual hook is height and abundance: necks of bottles poking above the ice at different angles, the labels vivid against the white. Make a simple fruit cordial and bottle it in clip-top bottles for a homemade touch, or use a mix of shop-bought juices and sparkling water.
This recipe is alcohol-free and suitable for all ages. Serve with paper straws in a separate small pot beside the tub. One batch makes enough for 10 to 12 generous glasses.
Ingredients
- 300 g frozen or fresh mixed berries (strawberry, raspberry, blueberry)
- 150 g caster sugar
- 250 ml cold water, plus extra for diluting
- 2 tablespoons fresh lemon juice
- 1.5 litres sparkling water or still water, to serve
- Ice, to fill the tub
- Lemon slices and fresh mint, to float in the glasses
Instructions
- Combine the berries, sugar and 250 ml cold water in a medium saucepan. Bring to a gentle simmer over medium heat, stirring until the sugar dissolves, about 3 minutes.
- Simmer for a further 5 minutes, pressing the berries gently with the back of a spoon to release their juice, then remove from heat.
- Strain the mixture through a fine-mesh sieve into a jug or bowl, pressing the pulp to extract as much liquid as possible. Discard the pulp.
- Stir in the lemon juice and allow the cordial to cool to room temperature, then refrigerate until cold.
- To serve, add 3 to 4 tablespoons of cordial to each glass over ice, top up with sparkling or still water to taste, and finish with a lemon slice and a mint sprig.
- For the tub display: fill the tub with ice, then nestle individual bottles of the pre-made cordial mixture or a mix of juice bottles and sparkling water bottles into the ice so the labels and necks show above the surface.

🛍 Shopping guide
Frequently Asked Questions
Which of these birthday party food ideas can be made completely the night before?
The chocolate bark, jelly cups, berry cordial concentrate, popcorn (stored in an airtight tin) and the unsliced pinwheel and wrap rolls can all be prepared the night before. Slice the rolls on the morning of the party for the neatest edges.
Are any of these recipes suitable for guests with nut allergies?
Most recipes are nut-free. The grazing board includes mixed nuts (leave them off or label them clearly), the chocolate bark uses pistachios (swap for sunflower seeds), and standard pesto on the skewers may contain pine nuts (use a nut-free pesto). Always check shop-bought ingredients for may-contain warnings.
How do I keep vegetable sticks crisp all afternoon?
Cut the sticks the night before and submerge them in a bowl of cold water in the fridge. Drain and pat dry just before arranging them in the dip pots. They stay snappy for hours compared to sticks cut and left uncovered.
What is the best way to transport this food to a venue?
Pack the rolled pinwheels and wraps whole and unsliced, wrapped tightly in cling film. Carry the layered salad bowl with cling film pressed to the surface. Transport the jelly cups in a deep tray so they cannot tip. Slice, drizzle and garnish everything on site.
Can I scale these recipes up for a large crowd?
All of them scale directly. Double or triple the ingredient quantities and the methods stay identical. The grazing board is the easiest to scale: simply extend the length of the board and increase each element proportionally.
My doctor used the phrase “chronic low-grade inflammation” and I nodded like I understoo
I spent $11 on an acai bowl at a café last spring. It was literally frozen fruit in a bowl wi
Ten no-bake preschool birthday treats that are portioned, labelled and free from the most common all
Leave a Reply