

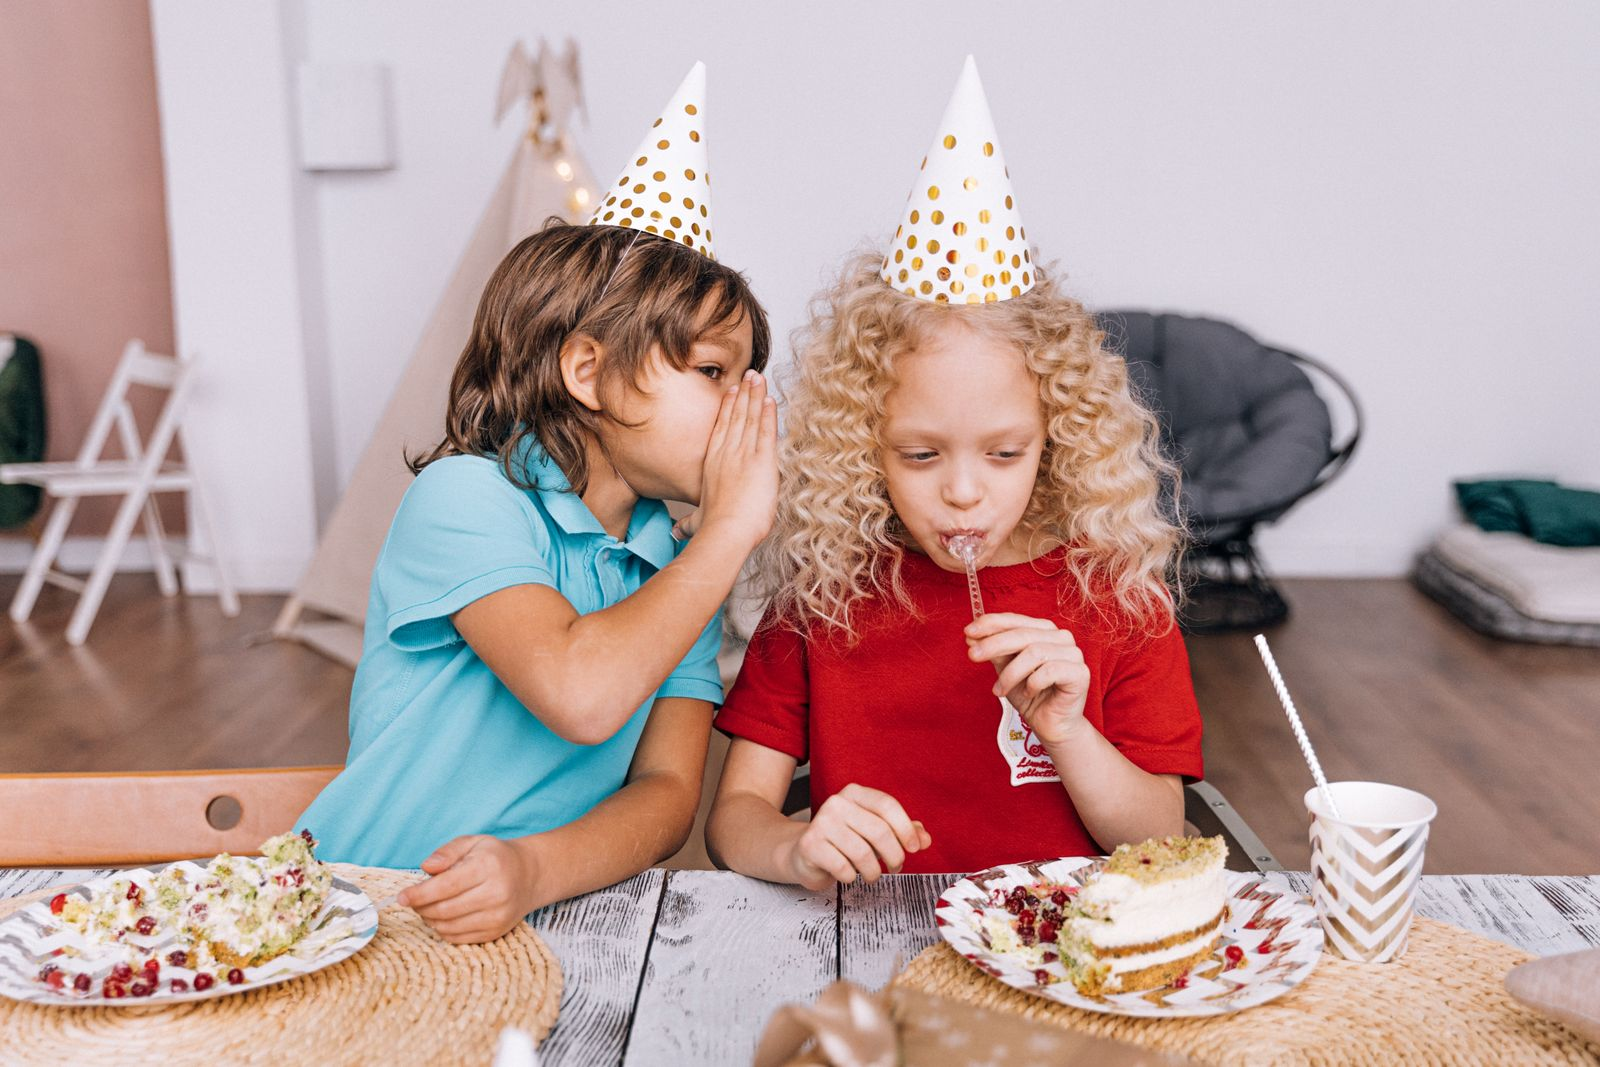
The nursery has sent home a list. No nuts, check the dairy, watch the eggs, keep everything bite-sized and individually wrapped. This collection of preschool birthday treats is built around exactly that list: ten recipes that are assembled rather than baked, portioned before they leave the house, and labelled with what each one is free from. No alcohol anywhere, because this is a mixed audience that includes three-year-olds. Allergen notes open each recipe so you can scan and skip the moment something does not work for your group. For more inspiration on feeding a crowd of small people, the park birthday party ideas guide has a whole section on picnic-friendly food, and if you need to fill the hour before the food comes out, 25 birthday party games for kids has you covered.
This post contains affiliate links. If you buy through them, I may earn a small commission at no extra cost to you.
- Fruit Kebabs on Blunt Paper Sticks
- Rice Cake Faces With Seed Butter and Fruit
- Yoghurt and Berry Cups With Lids
- Banana and Oat Bites Rolled by Hand
- Popcorn Bags Tied With Ribbon
- Apple Rings With Melted Chocolate Drizzle
- Cheese and Cracker Stacks in Paper Cases
- Frozen Fruit Lollies Made in Small Moulds
- Cereal and Dried Fruit Party Mix in Cones
- Melon Cut With a Star Cutter
- Frequently Asked Questions
Fruit Kebabs on Blunt Paper Sticks
Colour is the whole point here. Thread strawberries, green grapes, orange segments, blueberries and yellow mango in a repeating pattern and you get a striped kebab that reads as a rainbow from across the table. Paper sticks with blunt ends are the only safe choice for nursery use: metal skewers and pointed wooden sticks are both a hard no. Assemble the kebabs the morning of the party, lay them flat in a sealed container lined with a sheet of kitchen paper to absorb any juice, and refrigerate until you leave. Free from: gluten, dairy, eggs, nuts, soy.
Ingredients
- 20 blunt-ended paper craft sticks (15 cm)
- 200 g strawberries, hulled and halved if large
- 200 g green seedless grapes
- 2 large navel oranges, peeled and segmented
- 150 g blueberries
- 150 g ripe mango, cut into 2 cm cubes
- 100 g pineapple chunks (fresh or tinned in juice, drained)
- 1 lime, zest only, to scatter over before serving
Instructions
- Wash and dry all fruit thoroughly. Hull and halve any large strawberries so every piece sits neatly on the stick.
- Thread five to six pieces of fruit onto each paper stick, alternating colours: strawberry, grape, orange segment, mango, blueberry, pineapple.
- Lay the finished kebabs in a single layer in a lidded container lined with kitchen paper.
- Finely grate lime zest over the top, put the lid on and refrigerate for up to four hours.
- Transport flat and hand them out straight from the container so nothing rolls off.

🛍 Shopping guide
Rice Cake Faces With Seed Butter and Fruit
A plain rice cake is a blank canvas. Spread it with sunflower seed butter (nut-free, school-safe), then press on fruit pieces to make a face: two blueberry eyes, a raspberry smile, a triangle of mango for a nose. Every child gets a slightly different expression, which makes the hand-over more fun than a tray of identical squares. Sunflower seed butter can cause a green tinge if it sits too long, so assemble these no more than two hours ahead. Free from: gluten (use certified GF rice cakes), eggs, nuts. Contains: sunflower seeds. Check your specific brand for dairy cross-contamination.
Ingredients
- 12 plain round rice cakes (certified gluten-free if required)
- 120 g sunflower seed butter (no added sugar, no palm oil)
- 24 blueberries (for eyes)
- 12 raspberries (for smiles, halved lengthways)
- 1 small mango, cut into 12 small triangles (for noses)
- 12 thin rounds of banana (for ears, optional)
- 1 small punnet of redcurrants or pomegranate seeds (for freckles, optional)
- 1 teaspoon lemon juice, mixed into the seed butter to slow browning
Instructions
- Stir 1 teaspoon lemon juice into the sunflower seed butter to slow oxidation and keep the colour bright.
- Spread a generous tablespoon of seed butter across each rice cake, going nearly to the edge so there is a clean border.
- Press two blueberries into the upper half of each cake for eyes.
- Place a small mango triangle in the centre for a nose.
- Press a raspberry half, cut side down, into the lower half to make a curved smile.
- Add banana rounds for ears and a scatter of pomegranate seeds for freckles if using.
- Arrange in a single layer in a sealed container and refrigerate until needed, up to two hours ahead.

Yoghurt and Berry Cups With Lids
Layers do the visual work: white yoghurt, then a spoonful of ruby-red berry compote, then a scatter of fresh berries on top. Use small 150 ml plastic portion pots with snap-on lids (the kind sold for salad dressings or sauce) and the whole thing travels without a spoon touching it until it arrives. Dairy yoghurt works for most groups; for a dairy-free nursery, a thick coconut or oat yoghurt holds the layers just as well. The compote takes five minutes on the hob and keeps in the fridge for three days. Free from: gluten, eggs, nuts. Contains: dairy (or swap as noted).
Ingredients
- 750 g plain full-fat yoghurt (or thick coconut yoghurt for dairy-free)
- 200 g frozen mixed berries
- 2 tablespoons maple syrup
- 1 teaspoon vanilla extract
- 150 g fresh raspberries
- 100 g fresh blueberries
- 1 teaspoon lemon juice
- 12 x 150 ml portion pots with snap-on lids
Instructions
- Tip the frozen berries into a small saucepan with the maple syrup, vanilla and lemon juice. Cook over a medium heat for 5 minutes, stirring, until the berries collapse into a loose, glossy compote. Remove from the heat and cool completely.
- Spoon 50 g of yoghurt into the base of each portion pot.
- Add a heaped teaspoon of cooled compote over the yoghurt layer.
- Top with three or four fresh raspberries and four or five blueberries.
- Snap the lids on firmly. Label each pot and refrigerate for up to 24 hours before the party.

🛍 Shopping guide
Banana and Oat Bites Rolled by Hand
No oven, no eggs, no dairy, no nuts: these are the most permissive treat on this list. Mashed banana binds rolled oats into a sticky dough, and a roll in desiccated coconut or a few mini chocolate chips (dairy-free ones exist) gives each ball a different look. The texture is soft and a little chewy, which suits small children better than anything crispy. Make them the evening before, refrigerate overnight and they firm up beautifully. Free from: gluten (use certified GF oats), dairy, eggs, nuts, soy. Contains: oats (check if your nursery classes oats alongside gluten).
Ingredients
- 3 large ripe bananas (about 300 g peeled weight)
- 200 g rolled oats (certified gluten-free if required)
- 3 tablespoons maple syrup
- 1 teaspoon ground cinnamon
- 1 teaspoon vanilla extract
- 4 tablespoons desiccated coconut (for rolling)
- 4 tablespoons dairy-free mini chocolate chips (for rolling, optional)
- Pinch of fine salt
Instructions
- Mash the bananas in a large bowl until completely smooth with no large lumps.
- Add the oats, maple syrup, cinnamon, vanilla and salt. Stir well until the mixture comes together into a thick, sticky dough.
- Refrigerate the dough for 20 minutes so it firms enough to roll cleanly.
- Spread desiccated coconut on one small plate and chocolate chips (if using) on another.
- Scoop tablespoon-sized portions of dough and roll each into a ball between your palms.
- Roll half the balls in coconut and the other half in chocolate chips so there are two visual varieties.
- Arrange in a sealed container, separated by a sheet of baking paper, and refrigerate for at least 1 hour (or overnight) before packing.

Popcorn Bags Tied With Ribbon
Air-popped popcorn seasoned with a little coconut oil and fine salt looks completely plain until you bag it in a clear cellophane bag and tie it with a length of bright ribbon: now it is a party favour and a snack at the same time. Keep the flavouring simple because you are feeding a mixed group. A light dusting of icing sugar and cinnamon on half the batch gives parents a sweet option to hand to their child. Free from: gluten, dairy (with coconut oil), eggs, nuts, soy. Contains: corn.
Ingredients
- 120 g popcorn kernels
- 2 tablespoons refined coconut oil
- 1 teaspoon fine sea salt
- 2 teaspoons icing sugar (for the sweet version)
- 1 teaspoon ground cinnamon (for the sweet version)
- 20 small cellophane bags (approximately 10 x 15 cm)
- 1.5 m brightly coloured ribbon, cut into 20 equal lengths
- 20 small labels for allergen information
Instructions
- Heat the coconut oil in a large, deep saucepan over a medium-high heat. Add three kernels and wait for them to pop: that is your signal the oil is ready.
- Add all remaining kernels, put the lid on and shake the pan gently. Cook until the popping slows to one pop every two seconds, about 3 to 4 minutes.
- Tip the popcorn into a large bowl. Sprinkle over the fine salt and toss well.
- Divide the batch in half. Mix the icing sugar and cinnamon together in a small bowl and dust it over one half, tossing lightly.
- Leave both batches to cool completely, at least 10 minutes.
- Fill each cellophane bag with about 15 g of popcorn, gathering the top and tying it firmly with a ribbon. Attach an allergen label to each one.

🛍 Shopping guide
Apple Rings With Melted Chocolate Drizzle
Cross-sections of apple show the natural star of seeds in the centre, so the visual hook is already built in. A drizzle of dairy-free dark chocolate over the top adds a thin crackle that children find irresistible. Use a mandoline set to 1 cm to get even rings, or slice by hand and aim for consistency. The lemon juice bath stops any browning and adds a faint sharpness that balances the chocolate. Free from: gluten, eggs, nuts, dairy (with dairy-free chocolate), soy (check your chocolate label). Contains: may contain traces of dairy or soy depending on the chocolate brand chosen.
Ingredients
- 4 large crisp apples (any variety; a mix of red and green looks best)
- 500 ml cold water
- 2 tablespoons lemon juice
- 100 g dairy-free dark chocolate (at least 70% cocoa), finely chopped
- 1 teaspoon refined coconut oil
- 2 tablespoons freeze-dried raspberry powder or crushed freeze-dried strawberries, for scattering (optional)
- Pinch of flaky sea salt (optional)
Instructions
- Mix the cold water and lemon juice in a large bowl. Slice each apple across into 6 even rings, about 1 cm thick, discarding the top and bottom end pieces. Drop each ring straight into the lemon water as you cut.
- Lift the rings out, shake off excess water and pat them dry with kitchen paper. Lay flat on a baking sheet lined with baking paper.
- Melt the chocolate and coconut oil together in a heatproof bowl set over a small pan of barely simmering water, stirring gently until smooth. Remove from the heat.
- Transfer the melted chocolate to a small piping bag or a zip-lock bag with one corner snipped off. Drizzle back and forth across the apple rings in thin lines.
- Scatter freeze-dried raspberry powder and a pinch of flaky salt over the top if using.
- Leave at room temperature for 20 minutes, or refrigerate for 10 minutes, until the chocolate sets. Pack in a single layer with baking paper between any stacked rows.

Cheese and Cracker Stacks in Paper Cases
Cupcake cases do a very efficient job of making a plain cracker and a cube of cheese look intentional. Stack three crackers with two layers of cheese between them, set the whole thing in a tulip paper case and you have something that holds its shape on a tray and is easy for small hands to pick up without the crackers sliding. Use a mild Cheddar or Edam cut into thin squares, and choose plain rice crackers if the nursery is gluten-free. Free from: gluten (with rice crackers), eggs, nuts, soy. Contains: dairy (cheese). A dairy-free version works with a firm plant-based cheese block, but check the label for cashews.
Ingredients
- 60 plain crackers or rice crackers (3 per stack)
- 300 g mild Cheddar or Edam, cut into 40 thin squares sized to match the cracker
- 20 small cherry tomatoes (one per stack, for colour)
- 20 tulip paper baking cases
- 1 tablespoon fresh chives, finely snipped (optional garnish)
Instructions
- Cut the cheese into thin squares that match the size of your crackers as closely as possible.
- Place one cracker in the base of each paper case.
- Lay a square of cheese on the cracker, add a second cracker, add a second square of cheese, then top with a third cracker.
- Set one cherry tomato on top of each stack, pressing gently so it sits level.
- Scatter a few snipped chives over if using. Pack the cases into a rigid container in a single layer and refrigerate until needed, up to 4 hours ahead.

Frozen Fruit Lollies Made in Small Moulds
These need to be handed over in a cool bag with ice packs, and the nursery needs a freezer space or a willingness to serve them immediately. State that on the label. The visual hook is the layering: pour a mango layer, freeze it for 45 minutes until firm, pour a strawberry layer, freeze again, then top with a coconut milk layer that goes white. Three stripes in orange, pink and white. Small lolly moulds (50 ml capacity) mean each child gets a portion that is finished in three bites. Free from: gluten, dairy (with coconut milk), eggs, nuts, soy.
Ingredients
- 200 g ripe mango flesh (fresh or frozen, thawed)
- 1 tablespoon maple syrup, divided
- 200 g ripe strawberries, hulled
- 1 tablespoon lemon juice
- 150 ml full-fat coconut milk
- 1 teaspoon vanilla extract
- 12 x 50 ml lolly moulds with sticks
Instructions
- Blend the mango with half the maple syrup until completely smooth. Pour a thin layer (about 15 ml) into the base of each mould. Freeze for 45 minutes until solid.
- Blend the strawberries with the lemon juice and the remaining maple syrup until smooth. Pour a strawberry layer (about 15 ml) on top of the set mango layer. Insert the sticks now if your moulds require it at this stage. Freeze for another 45 minutes until solid.
- Stir the coconut milk and vanilla together in a small jug. Pour the coconut layer over the set strawberry layer to fill the mould. Freeze for at least 2 hours until completely solid.
- To unmould, run warm water over the outside of each mould for 10 seconds and pull gently on the stick.
- Wrap each lolly individually in a small square of baking paper and return to the freezer until you leave for the nursery. Transport in a cool bag with ice packs.

🛍 Shopping guide
Cereal and Dried Fruit Party Mix in Cones
An ice cream cone filled with a cheerful mix of puffed rice cereal, sunflower seeds, dried cranberries and yoghurt-covered raisins reads as a treat even though it is mostly fruit and grain. Stand the cones upright in a muffin tin to fill them, then transfer each one to a small cellophane bag twisted shut at the top. The crunch comes from the cone itself and the puffed rice; the colour comes from the cranberries and raisins. Free from: gluten (use certified GF puffed rice and GF cones), eggs, nuts, soy (check yoghurt raisin coating). Contains: oats if oat-based cereal is used. Contains: dairy if yoghurt-raisins are included. Note this on the label.
Ingredients
- 18 small flat-bottomed ice cream cones
- 100 g puffed rice cereal (plain, no added sugar)
- 80 g dried cranberries
- 80 g yoghurt-covered raisins (or plain raisins for dairy-free)
- 60 g sunflower seeds, lightly toasted
- 40 g pumpkin seeds
- 2 tablespoons maple syrup, drizzled over and tossed through the mix
- Pinch of cinnamon
Instructions
- Combine the puffed rice, cranberries, raisins, sunflower seeds and pumpkin seeds in a large bowl.
- Drizzle the maple syrup over the top, add the cinnamon and toss everything together until evenly coated.
- Stand the cones upright in the cups of a muffin tin so they do not tip.
- Spoon the mix into each cone, filling it to just above the rim and pressing gently so it mounds slightly.
- Twist a small piece of cling film over the top of each cone, or stand them in a small cellophane bag twisted and tied at the top. Label each one with the allergen information before serving.

Melon Cut With a Star Cutter
A star-shaped piece of watermelon on a blunt paper stick is the simplest treat on this entire list and, frequently, the most eaten. The red flesh against the green rind edge (leave a thin border of white and green when you cut) gives each star two clear colours. Cut the stars the morning of the party, arrange them in a single layer on a tray lined with kitchen paper, cover tightly with cling film and refrigerate. Use a 6 cm metal star cutter for the cleanest shape. Free from: gluten, dairy, eggs, nuts, soy. There is nothing in this recipe to worry about.
Ingredients
- 1 large seedless watermelon (about 3 kg)
- 1 ripe honeydew melon, halved and deseeded
- 1 small cantaloupe, halved and deseeded
- 20 blunt-ended paper craft sticks
- 1 lime, zest only (optional, for a faint citrus note)
Instructions
- Cut the watermelon into slabs about 2 cm thick. Lay each slab flat and press a 6 cm star cutter firmly down through the flesh.
- Repeat with the honeydew and cantaloupe, cutting slabs of the same thickness.
- Push a blunt paper stick into the base point of each star, sliding it in about 2 cm so it holds without splitting the flesh.
- Arrange the stars on a lined tray: red watermelon, pale green honeydew and orange cantaloupe next to each other for colour contrast.
- Grate a little lime zest over the top if using. Cover tightly with cling film and refrigerate for up to 6 hours before serving.

🛍 Shopping guide
Frequently Asked Questions
How far ahead can I make these preschool birthday treats?
Most of them keep well for 24 hours in the fridge. The banana oat bites actually improve overnight. The only ones that need more planning are the frozen fruit lollies, which need at least 4 hours in the freezer, so make those the day before. Popcorn bags can be made two days ahead if you keep the bags sealed airtight.
How do I label the treats for allergen information?
Use a strip of masking tape and a permanent marker on every container or bag. Write the name of the treat, the date it was made, and a short free-from note such as ‘gluten-free, nut-free, dairy-free’. Keep the wording simple so nursery staff can read it in a few seconds.
Which of these treats are completely nut-free?
All ten recipes are nut-free as written, provided you choose certified nut-free brands. The rice cake faces use sunflower seed butter rather than any nut butter. Always check the labels on chocolate, yoghurt-covered raisins and crackers, as these are sometimes made in facilities that also handle tree nuts.
Can I make these treats for a child with a dairy allergy?
Yes, with small adjustments. The yoghurt cups work with a thick coconut or oat yoghurt. The cracker stacks work with a firm plant-based cheese (check the label for cashews). The chocolate drizzle on the apple rings is already dairy-free if you choose a 70% dark chocolate with a dairy-free label. The remaining seven recipes contain no dairy at all.
What is the safest way to transport the frozen fruit lollies?
Wrap each lolly individually in baking paper as soon as it is unmoulded and return them to the freezer. On the day, pack them upright or flat in a cool bag with at least two ice packs. They should stay solid for two to three hours in a good cool bag. Tell the nursery they need to be served immediately on arrival.
12 cosy fall breakfast ideas your family will actually make — pumpkin, apple, pear, maple and warm
Classic Amish breakfast casserole with hash browns, sausage, eggs & cheese. Feeds 12. Make-ahead fri
It was 3 PM on a Tuesday. My stomach was making sounds. My next meeting was in 40 minutes. The vendi
Leave a Reply