

22 Trunk or Treat Setups for Crowds of 40-Plus Where Every Car Is a Station
When you are expecting 40 or more kids to move through a parking lot, the standard “open trunk, dump candy” approach breaks down fast.
Lines pile up at the popular cars, the quiet ones get skipped, and half the crowd ends up waiting while the other half is already done.
The fix is treating every single vehicle as its own station with its own personality, so children keep walking and parents keep moving.
These 22 ideas are organised in the order you will actually build the event: first the structural and lighting choices that make each car readable from 20 feet away, then the candy and prize setups that keep hands moving, then the interactive moments that slow kids down just long enough to enjoy the stop without creating a bottleneck, then the decoration builds that give each car its theme identity, and finally the traffic flow tools that hold the whole lot together.
Pick one idea per car, mix the categories, and your crowd will distribute itself without you having to push anyone along.
This post contains affiliate links — if you buy through them, I may earn a small commission at no extra cost to you.
Trunk Structure and Lighting
Before a single piece of candy appears, the physical shape of a trunk and how it is lit tells a child whether to stop or walk past. These five setups use structure and battery-powered light to make each car instantly distinct from across the lot.
1. Battery-Pack LED Strip Along the Roofline
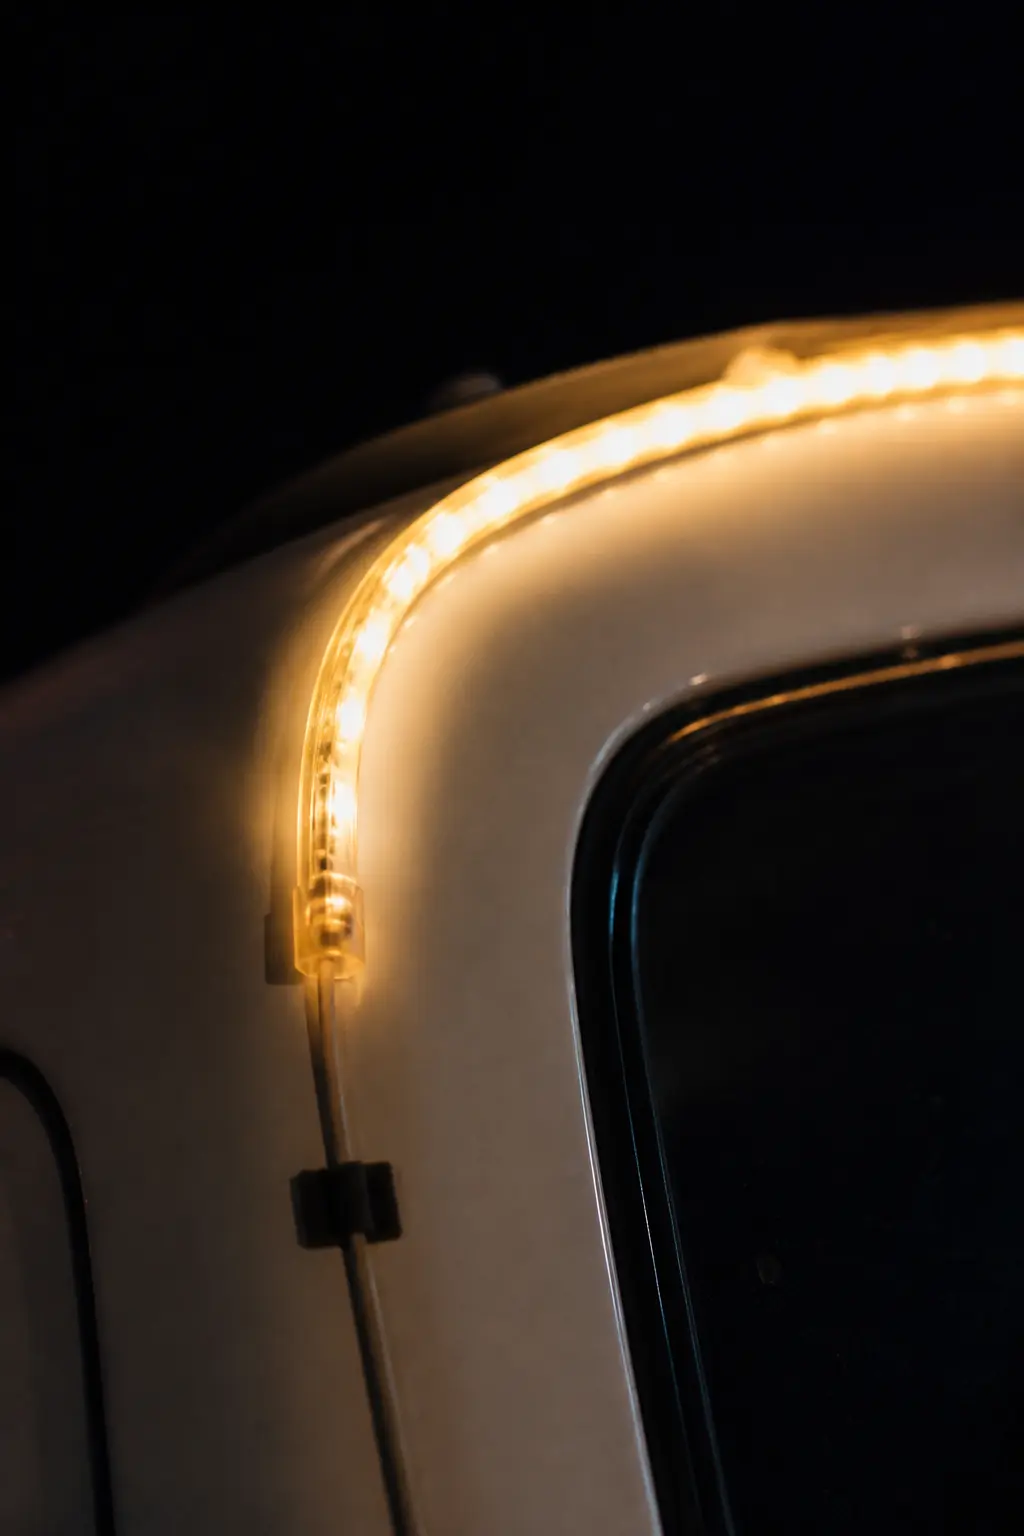
A 16-foot roll of warm-white or colour-changing LED strip tape, powered by a rechargeable USB battery pack tucked under a rear wiper, outlines the entire roofline of a sedan or hatchback and makes it visible from the far end of the lot.
No extension cord, no generator risk, no drain on the car’s own battery.
AutoZone notes that 12V LED strips can run off a rechargeable pack, which keeps the setup completely self-contained and safe on painted metal when you use the peel-and-stick tape version with a foam backing rather than the bare adhesive strips.
The practical tip here is to choose a colour that no other car in the lot is using. Agree on colours in your sign-up form: one car gets warm white, one gets red, one gets blue.
From 30 feet away, kids and parents will start saying “let’s go to the blue one” without any signage needed.
Run the strip all the way to the trunk opening so the light pools inside the cargo area and doubles as display lighting for your candy bowl.
Party planner’s notes
🎁 Send them home with
- Mini glow stick bracelets in the same colour as your LED strip
- Small card printed with the car’s colour and theme name as a souvenir
🛍 Shopping guide
2. Motion-Sensor Fog Machine on a Hatchback Lip
A compact plug-in fog machine (the kind sold for home haunted-house use, typically drawing around 400 watts) sits on the lowered hatchback door or on a small shelf inside the trunk opening, pointed outward so fog rolls along the ground rather than up into faces.
Fog machines add a big atmospheric impact for relatively little effort, and the motion-sensor version fires a burst automatically when a child walks up rather than running continuously, which conserves fluid and keeps the effect dramatic rather than smoggy.
Power it from a small inverter plugged into the car’s 12V outlet, or from a battery-powered inverter if the car does not have one.
Position the machine so the fog nozzle is at bumper height. At that height the cloud stays low, which means it stays visible against dark asphalt and does not drift into anyone’s eyes.
Keep a spare fog-fluid bottle in the trunk, because a busy event can empty a standard 8-oz bottle in under an hour. If the car next to yours also has a fog machine, space them at least three spots apart so the effects stay distinct.
Party planner’s notes
💝 Keep it forever
- Photograph the fog rolling across the lot just before the event opens, when the light is perfect and the asphalt is empty
- Save the machine and fluid for next year — store the machine upright with a tablespoon of distilled water run through it to clear the pump
🛍 Shopping guide
3. Cardboard Arch Frame Over the Trunk Opening
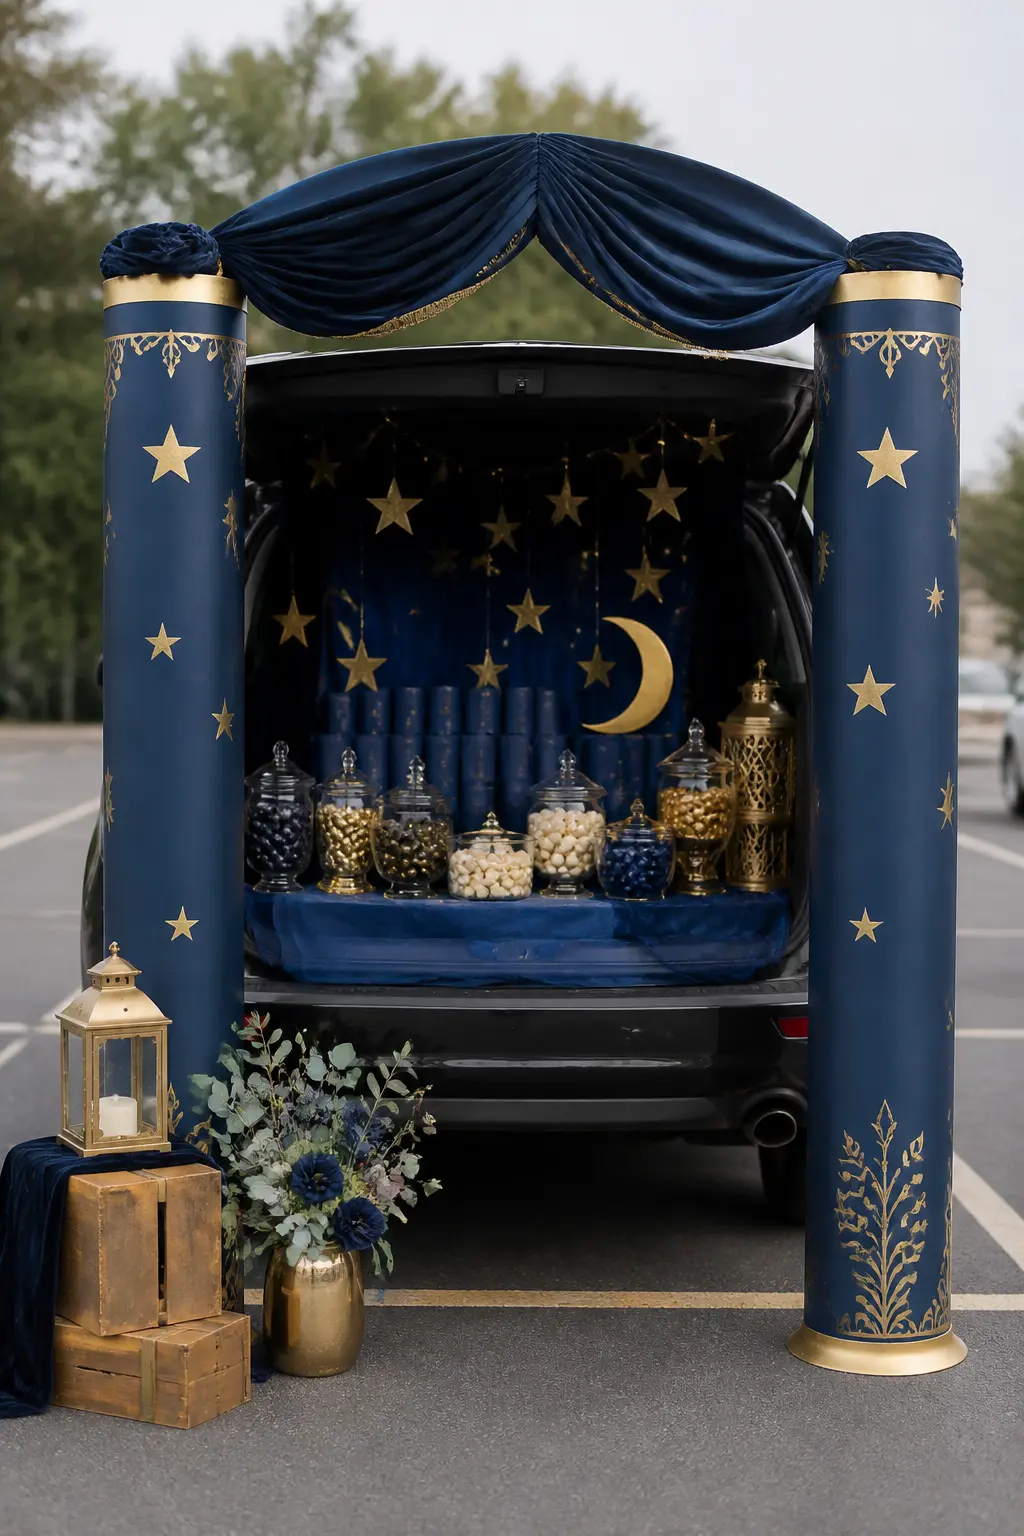
A freestanding arch made from two lengths of corrugated cardboard tubing (the kind sold as concrete form tubes, available at hardware stores in 3-inch and 4-inch diameters) slotted into weighted bases on either side of the bumper creates an instant proscenium around the trunk opening.
Paint the tubes to match your theme, hot-glue props along them, and suddenly a plain silver sedan reads as a portal, a castle gate, or a jungle entrance.
The trunk rim itself works as a natural stage frame, and an arch above it doubles the visual height without attaching anything to the car body.
The bases can be weighted plastic buckets filled with sand and painted to match, or commercial weighted base discs meant for photo booth backdrops. Cut the arch tubes to around 6 feet tall so they clear a child’s head comfortably.
Zip-tie a crosspiece at the top, drape fabric or streamers over it, and the whole structure goes up in about 15 minutes. It stores flat between events if you score the tube sides lightly before folding.
4. Car-Roof Lantern Row on a Magnetic Strip
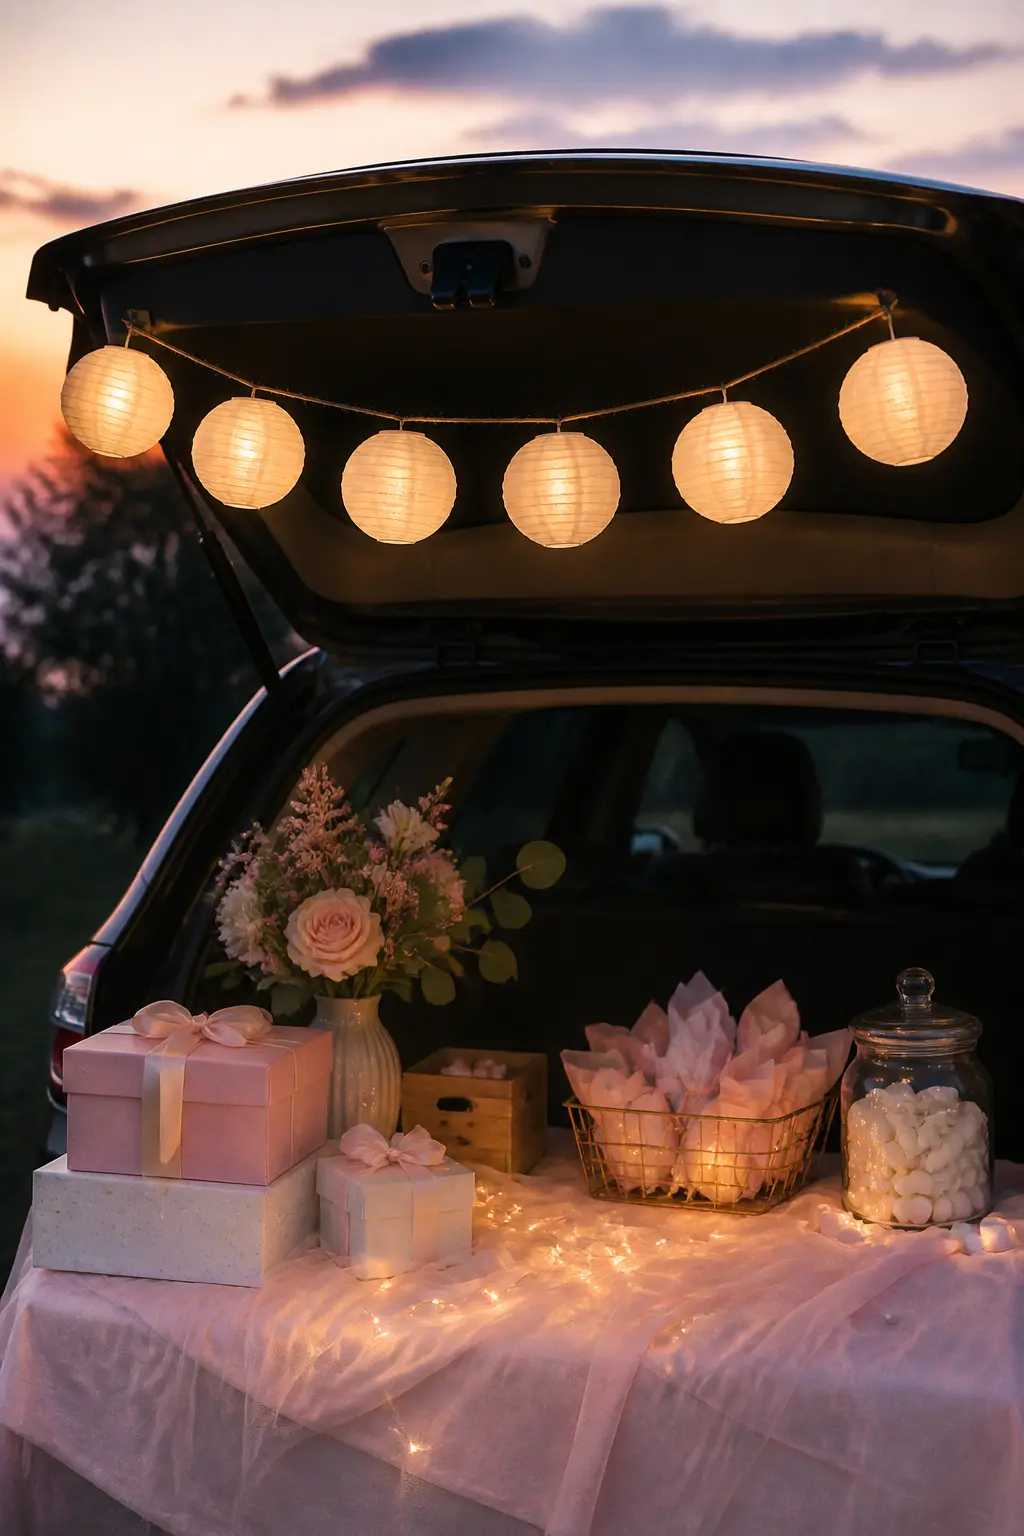
A row of five or six battery-powered paper lanterns — the kind with a wire frame and a small LED puck inside — hung from a length of jute twine stretched between two magnetic hooks on the car roof creates a lit, festive canopy above the trunk area that is visible from every angle.
The magnetic hooks hold without damaging paint when you use the rubber-footed variety, and the whole rig comes down in two minutes at the end of the night.
Use lanterns in a single colour for a clean look, or alternate two colours to signal your theme from a distance.
The key to making this work at a busy event is pre-stringing all the lanterns at home before you drive to the lot.
Fold the jute twine into a loose coil with the lanterns already attached, drive in, hook both ends to the roof, and uncoil. Total setup time is under five minutes once you are parked.
Twelve-inch lanterns are the right scale for a standard sedan roofline — anything larger catches wind badly and tips the hooks.
Party planner’s notes
🍰 On the table
- Lantern-shaped sugar cookies wrapped in cellophane at the candy bowl
- Round lollipops displayed in a jar to echo the lantern shapes
- Hot cider in a thermos for the adult supervisors stationed nearby
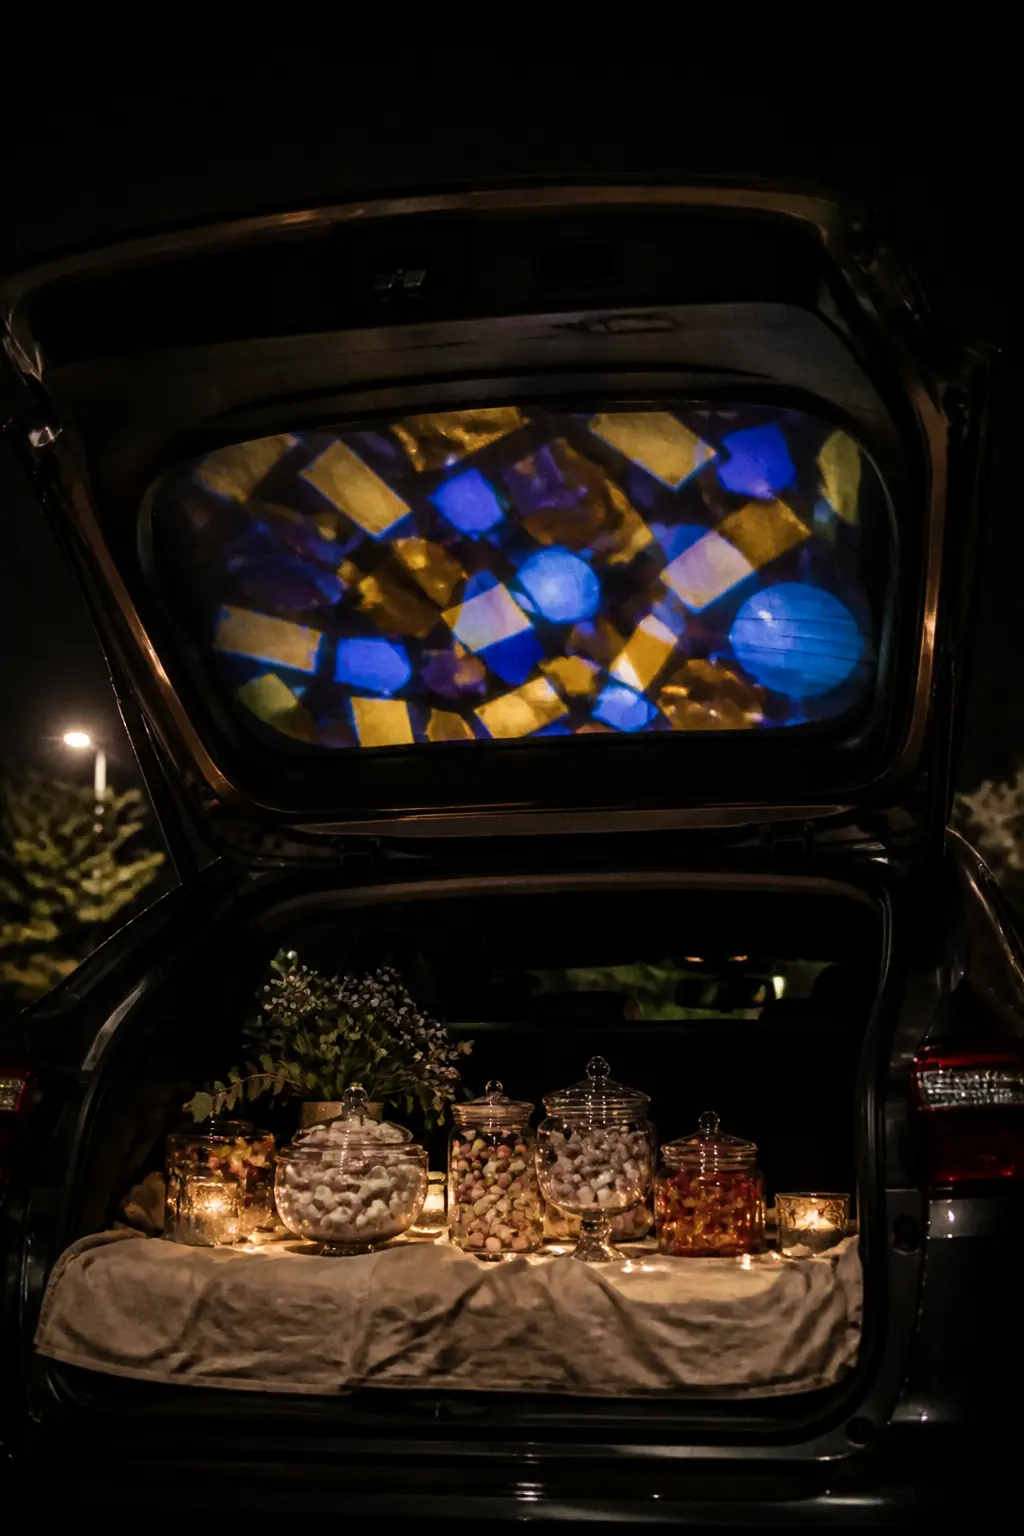
5. Rear-Window Projection Screen
A small battery-powered or USB mini projector aimed at the rear windshield from inside the car turns the glass into a moving display.
Loop a slow animation — shifting geometric shapes, moving stars, drifting clouds — and the car becomes an instantly recognisable beacon in a dark parking lot.
A small projector can display moving images on the trunk lid or a sheet backdrop, and the rear windshield is an even better surface because it is already mounted, angled perfectly, and requires no extra rigging.
For best results, park the car so the projected rear window faces the main pedestrian walkway rather than another car. Dim the interior dome light so the projection stays sharp.
Choose a looping video file that is at least 10 minutes long so it does not visibly repeat during the event.
The projector sits on the back seat aimed rearward, which also means it is completely out of the way of the trunk display and the candy handout area.
Candy and Prize Displays
A bowl on a bumper is fine for a neighbourhood porch. For a crowd of 40-plus moving through a parking lot, the way candy is displayed controls pace, reduces grabbing chaos, and makes every stop feel like its own moment. These four setups solve that.
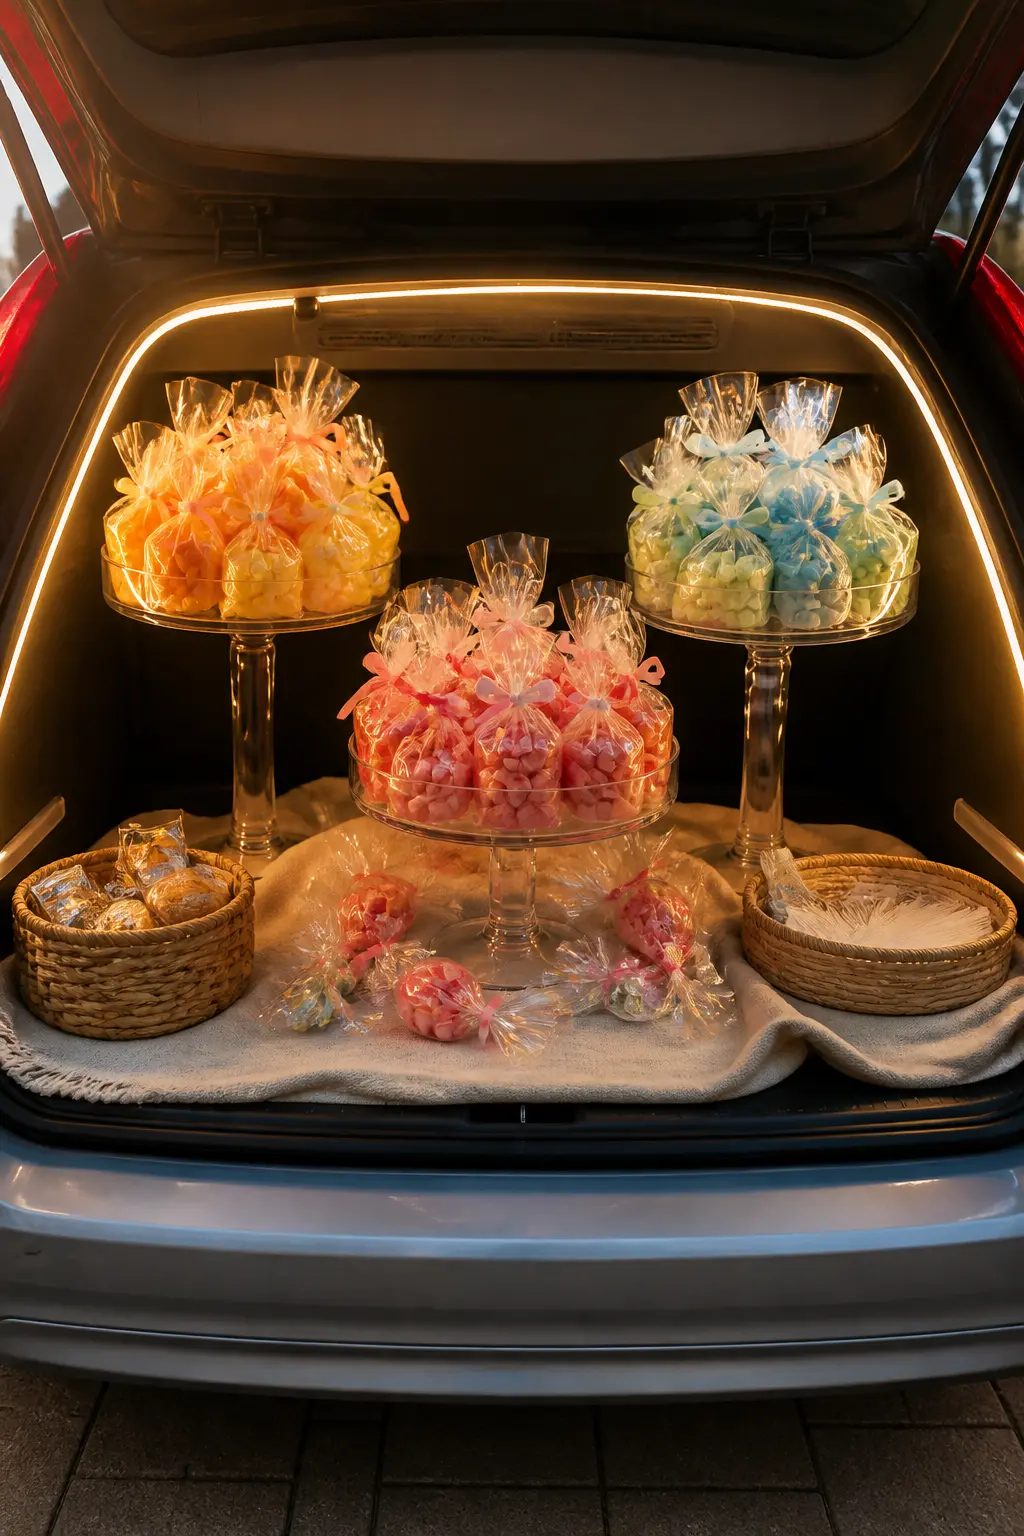
6. Tiered Cake-Stand Candy Tower
Three cake stands stacked at different heights inside the trunk — a tall pedestal at the back, a medium one in the middle, a low flat stand at the front near the bumper — turn the candy display into something a child notices from five cars away.
Fill each tier with individually wrapped candy in a single colour family: all warm tones on the top tier, all cool tones on the middle, a mix at grabbing height on the front stand.
The visual hierarchy draws eyes in and makes it easy for kids to reach the front tier without leaning into the trunk.
As a practical organising note from PTO Today’s trunk or treat planning guide, estimating candy quantities in advance keeps popular stations from running out mid-event.
Use plastic or acrylic cake stands rather than ceramic — they are light, won’t shatter on bumper-level surfaces, and can be zip-tied to the trunk liner if the car moves slightly.
Hot-glue a small ring of floral foam to the bottom of each stand so it does not slide. The whole setup comes apart in 90 seconds at the end of the night and fits into one tote bag for the ride home.
Party planner’s notes
🍰 On the table
- Colour-sorted wrapped candy on each tier matching the car’s LED colour scheme
- A small chalkboard sign on the front tier listing the flavours
- Candy scoops in a cup so kids serve themselves cleanly
7. Glow-Stick Necklace Distribution Bowl
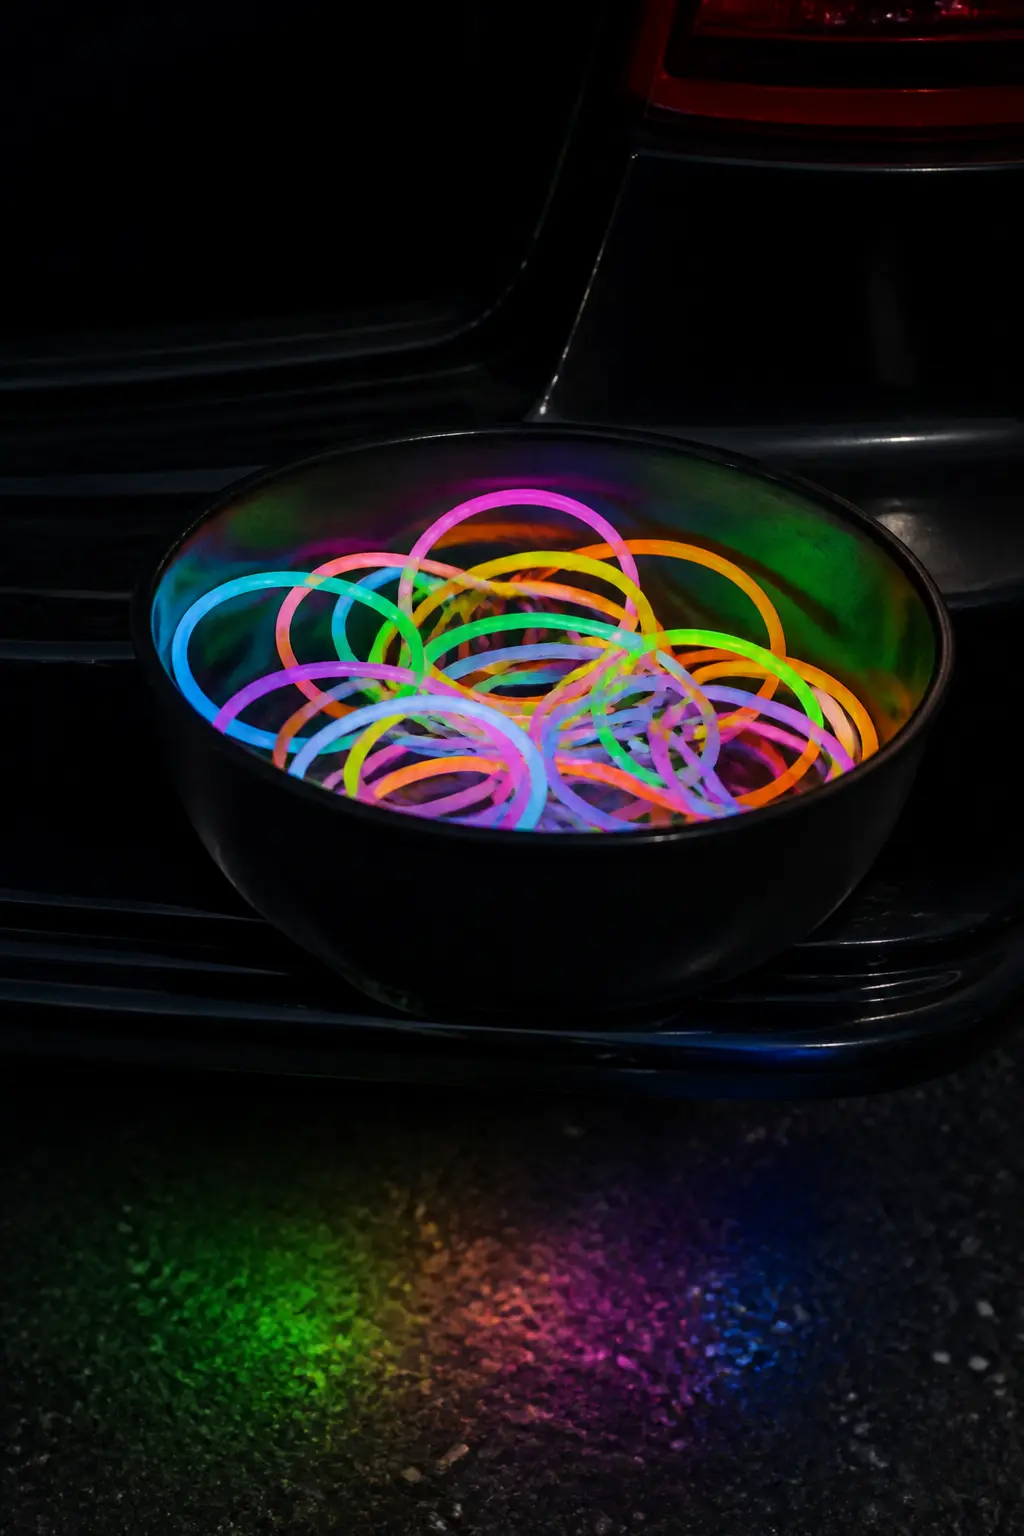
A deep black matte bowl filled with pre-activated glow-stick necklaces in four colours — green, pink, blue, orange — is one of the most crowd-pleasing non-candy distribution setups at a trunk or treat event.
Kids pick the colour they want rather than receiving a random grab, which cuts the “I don’t like that” moment that slows lines down.
The glowing bowl is also self-lit and self-advertising: you can see it from 15 cars away in a dark parking lot without any other decoration on the vehicle.
Activate the glow sticks in batches of 20 at a time at home, keeping unactivated stock in zip-lock bags inside the trunk. Each necklace lasts around 8 hours once activated, so preparing them two hours before the event starts is fine.
Budget roughly one necklace per child, and keep a bowl of wrapped backup candy alongside for children who already have one. The bowl itself should be at bumper height on a small folding table so kids reach it without anyone having to lean in.
Party planner’s notes
🎁 Send them home with
- The glow-stick necklace they chose from the bowl
- A small zip-lock of extra glow sticks in matching colours to extend the fun at home
🛍 Shopping guide
8. Spinning Prize Wheel Mounted to a Hitch or Bumper
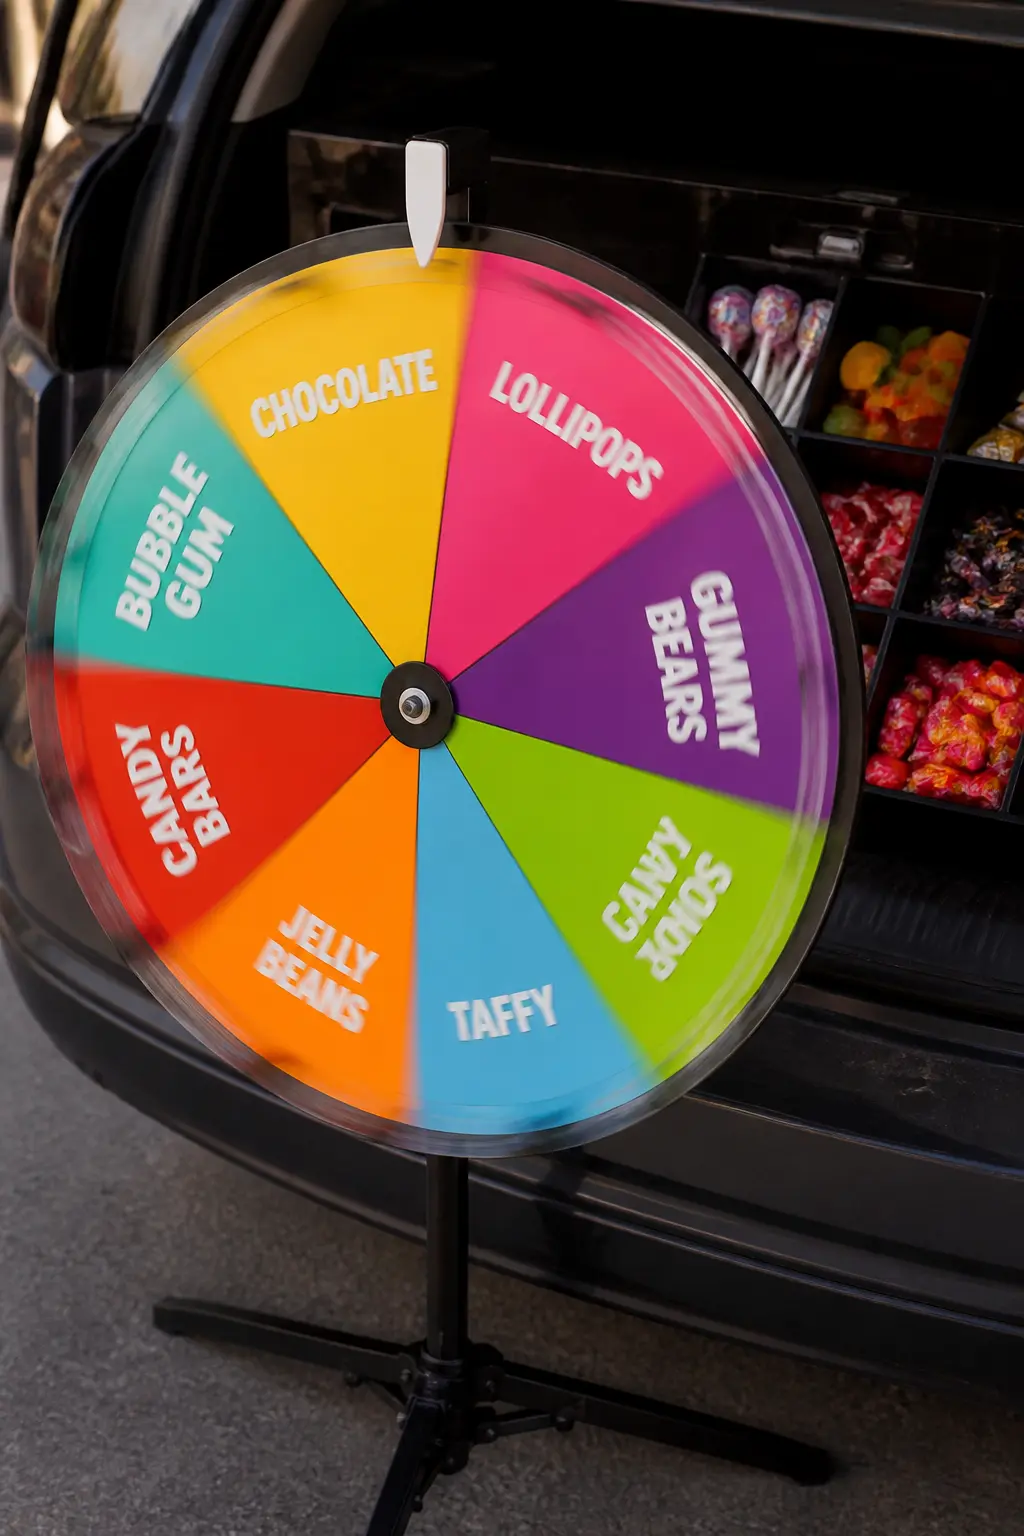
A 24-inch spinning prize wheel with eight labelled segments — mounted on a camera-tripod adapter or clamped to a trailer hitch arm — turns the candy handout into a 10-second game.
Each segment names a prize tier: one segment is a full-size candy bar, two segments are standard-size bars, four segments are fun-size, one segment is a sticker pack or temporary tattoo.
A prize wheel with themed treats as prizes is one of the most reliable crowd-draws at a trunk or treat because it gives kids a moment of suspense without requiring skill or a long game setup.
The wheel itself keeps the stop to about 15 seconds per child, which is fast enough for 40-plus guests but memorable enough that children talk about it. Laminate the segment labels so they survive an evening of outdoor humidity.
Keep all prize tiers stocked in a sorted bin inside the trunk so the host can hand the right item immediately without searching. A small magnetic number strip showing how many kids have spun is a fun running tally for the host.
Party planner’s notes
🍰 On the table
- Full-size candy bars for the jackpot segment
- Fun-size bars in a sorted bin for the standard segments
- Sticker sheets and temporary tattoos for the bonus segment
9. Treasure-Chest Candy Dig
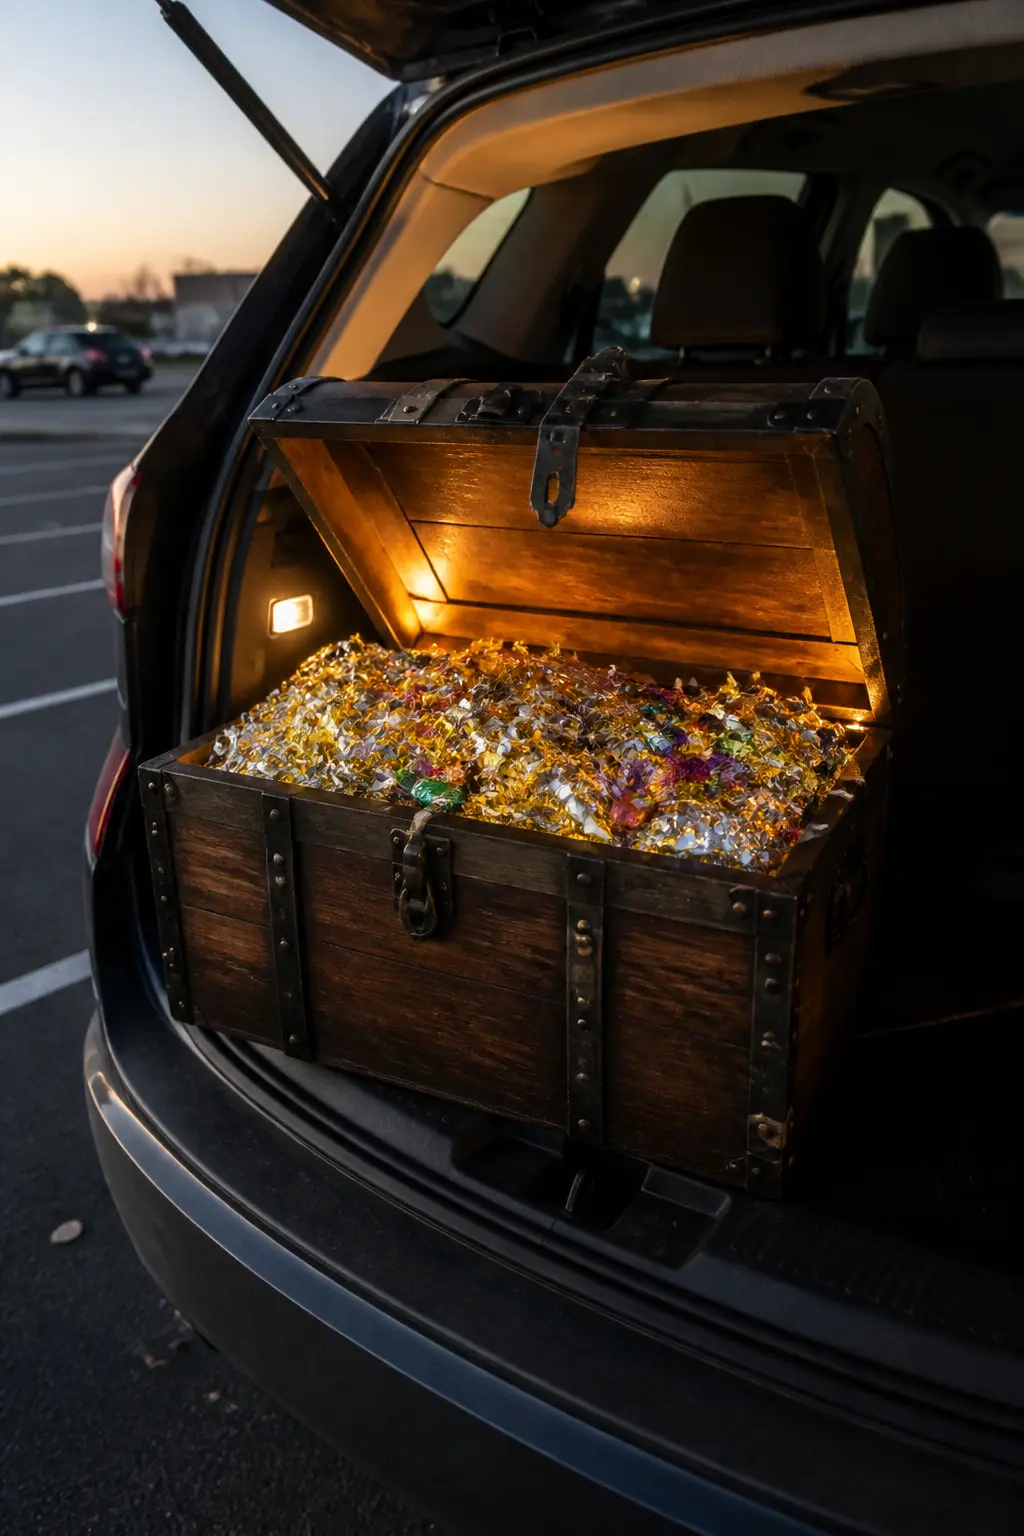
A hinged pirate-style treasure chest (the plastic or resin variety meant for outdoor decor, roughly 14 inches wide) sits open on the bumper, filled to the brim with shredded metallic tissue paper and individually wrapped candy buried inside it.
Kids reach in to find their treat rather than picking from a bowl, which transforms a two-second handout into a five-second discovery moment. The chest is visually arresting from a distance because the metallic tissue catches any light nearby and glitters.
Load the chest in layers: start with a 3-inch base of tissue, add a layer of candy, add more tissue, repeat. Use candy with firm wrappers — nothing that crumbles under repeated digging hands.
If you want to simplify restocking mid-event, keep a second pre-loaded chest inside the trunk and swap them when the first one runs low.
Use a small folding table to bring the chest up to bumper height so younger school-age children can reach the bottom of the chest without tiptoeing.
🛍 Shopping guide
Interactive Stations
Adding a short game to a trunk holds kids at that station for 30 to 60 seconds, which is just long enough to feel special without blocking the line behind them. These five stations are sized for a parking-space footprint and reset in seconds between kids.
10. Cardboard Tube Candy Slide from Trunk to Sidewalk
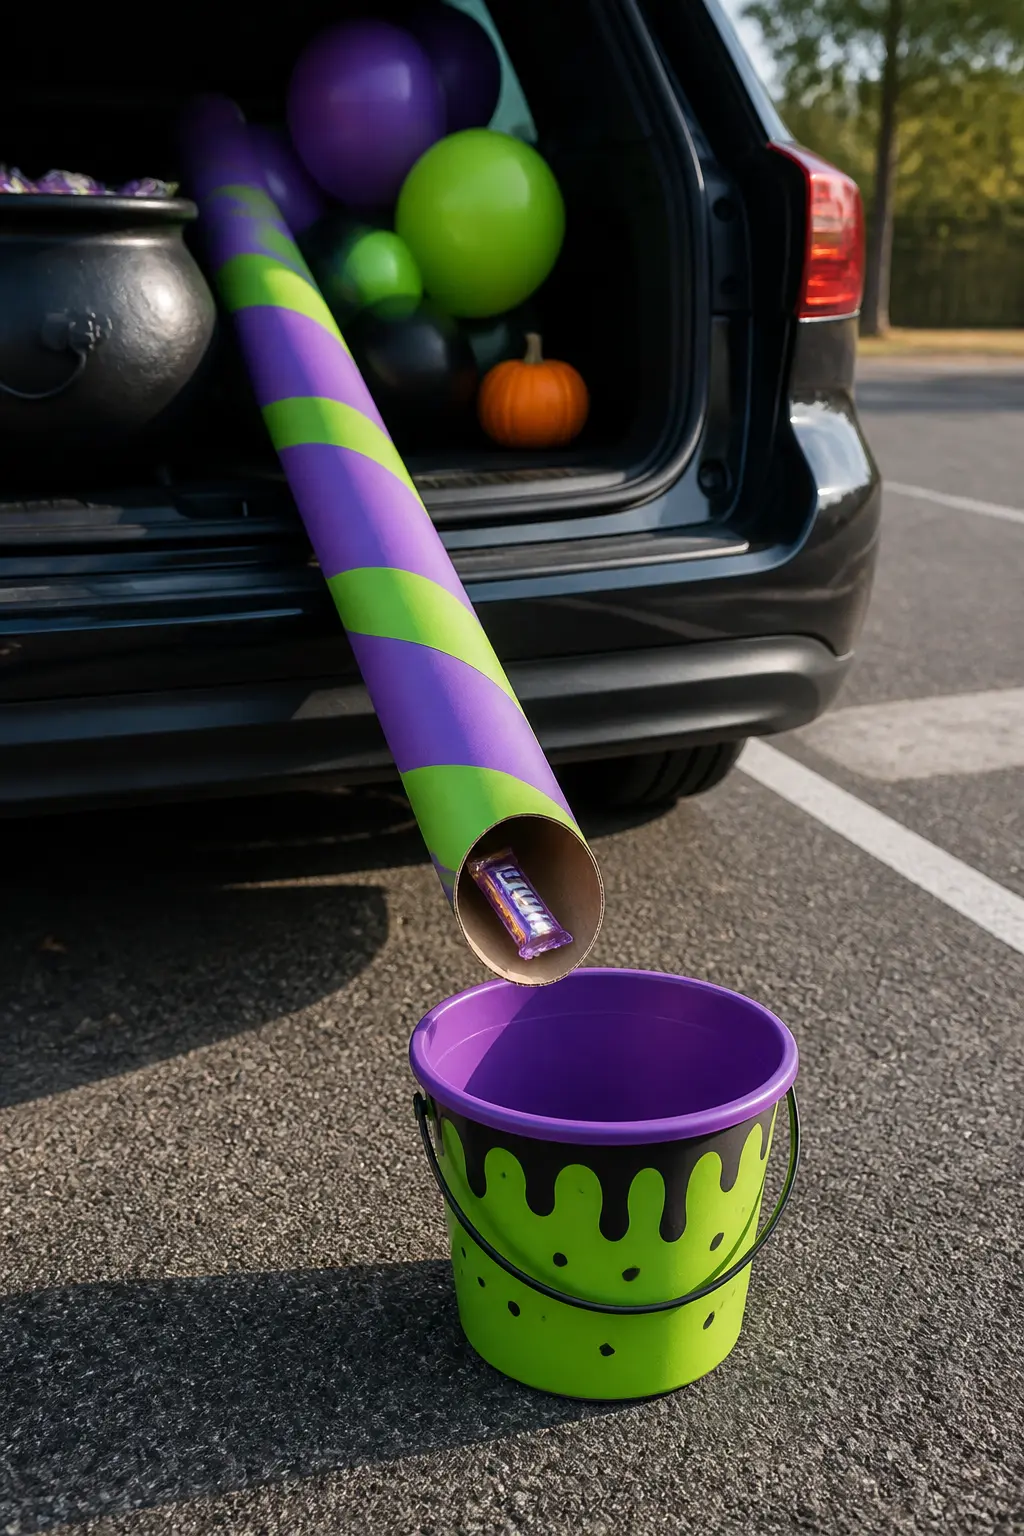
A length of 4-inch PVC or cardboard mailing tube, decorated to match the car’s theme and angled from the trunk floor down to a bucket on the ground, lets the host drop a candy bar into the top and have it slide out into the child’s bag at the bottom.
A PVC pipe slide wrapped in a theme skin so kids can catch candy at the bottom is a reliably crowd-pleasing interactive moment that resets instantly — there is no game to adjudicate, no winner or loser, just the delight of watching the candy arrive from an unexpected direction.
For a 4-foot tube at a 30-degree angle, fun-size candy bars slide reliably without getting stuck. Avoid round lollipops — they stop in the tube.
Decorate the outside of the tube with paint, craft foam, or contact paper to match your theme (wrapped in black and orange stripes, silver foil for a robot theme, or painted brick-red for a chimney).
The child holds their treat bag at the open bottom end; the host drops the candy in at the top. The whole exchange takes under 10 seconds.
Party planner’s notes
💝 Keep it forever
- Take a video of the first candy sliding down the tube before the crowd arrives — it makes a great short clip
- Store the tube flat under the rear seat for next year
🛍 Shopping guide
11. Ring-Toss Bottle Game in Front of the Bumper
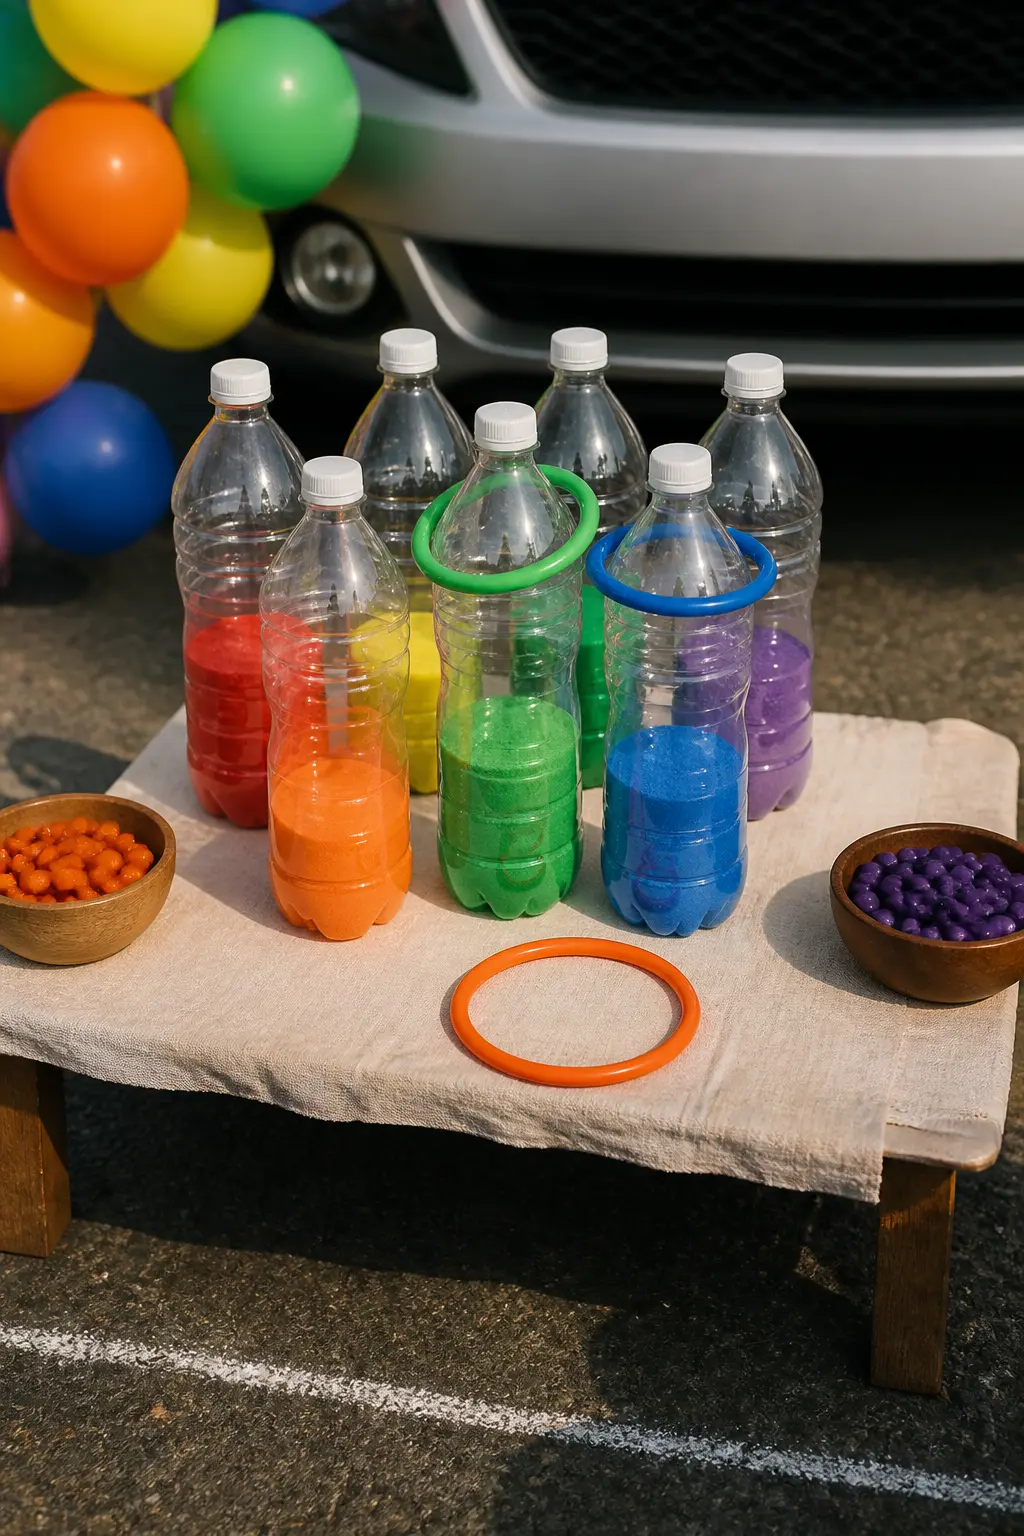
Six empty glass-style plastic bottles filled with coloured sand (to weight them) and arranged in a triangle on a low table or directly on the asphalt in front of the bumper, with a set of glow-ring tossers, is a quick carnival game that every school-age child already knows how to play.
Land a ring, pick a candy from the corresponding colour bowl. Miss all three throws, you still get a fun-size piece from the consolation bowl — no child leaves empty-handed. The whole game takes about 20 seconds per player and resets in under 5.
Use 12-inch rubber or plastic rings rather than small plastic curtain rings — they are easier for 6- to 10-year-old hands to toss accurately, and they glow under the LED setup of the car behind.
Arrange the bottles with about 4 inches of space between necks, which is the sweet spot for being achievable but not trivial. A chalk circle drawn on the asphalt about 5 feet from the bottles marks the toss line without any extra equipment.
🛍 Shopping guide
12. Magnetic Fishing Pond on a Tarp
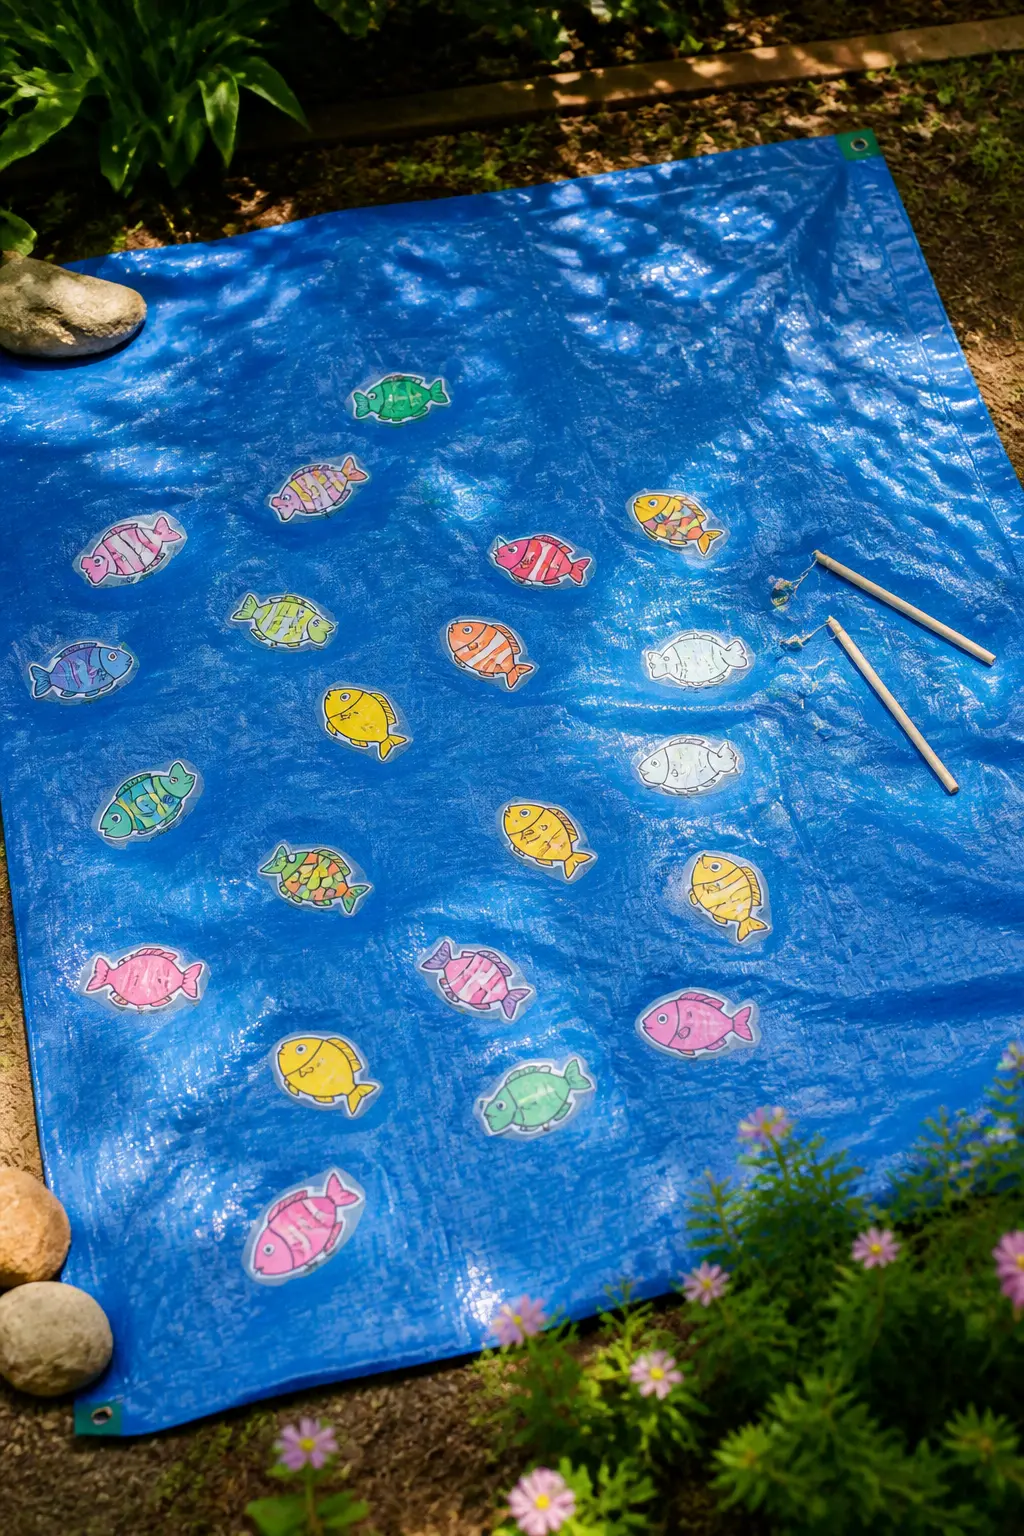
A blue tarp spread on the asphalt in front of the bumper, with 20 laminated fish cards clipped with small binder clips (each clip with a paper clip attached) and a pair of short fishing rods made from a dowel, string, and a small ring magnet at the end, is a self-contained fishing game that takes up exactly one parking-space-width footprint.
Each fish card has a candy tier written on the back: gold fish cards yield a full-size bar, blue cards a fun-size, green cards a sticker. The magnet lifts the paperclip, the card flips, the child collects their prize.
Laminate the fish cards so they survive the whole evening without tearing. Bring 40 to 50 fish so you can refresh the pond without hunting for spares during the event.
The rods can be as simple as a 24-inch wooden dowel, 18 inches of kitchen twine, and a 1-inch ring magnet from a hardware store — total cost for two rods is under three dollars in materials.
This station is particularly good for the 6-to-9-year-old age group, who find it genuinely absorbing for the full 30 seconds it takes to land a fish.
Party planner’s notes
🍰 On the table
- Gold, blue and green fish cards sorted into a bucket beside the tarp for quick restocking
- Full-size and fun-size candy bars in a sorted bin inside the trunk
- Sticker sheets in a flat tray for the green-card prizes
🛍 Shopping guide
13. Mystery Touch Box with Candy Reveal
A shoebox-sized lidded container with a hand-hole cut in one end, lined inside with craft foam and filled with a textured mystery object (smooth rubber balls, dried pasta, plastic spiders — all harmless, none sharp), asks a child to reach in and feel around before pulling out a piece of candy hidden under the objects.
The box resets in three seconds: lift the lid from the back, drop the candy back in, replace the lid.
PTO Today recommends stamped cards or short games to keep each stop feeling individual, and the mystery box does exactly that — it makes each child feel like they had their own small adventure.
Cover the outside of the box in black felt so the hole in the end looks mysterious. Put a cheerful sign above it with the instruction: “Reach in and find your treat.”
Choose the mystery filler to match your car’s theme — coiled rubber snakes for a jungle theme, smooth river stones for a cave theme, plastic gears for a robot theme.
The candy should be at the very bottom, resting on a small shelf made from a piece of cardboard glued 2 inches above the base, so the child has to dig through the mystery objects to reach it.
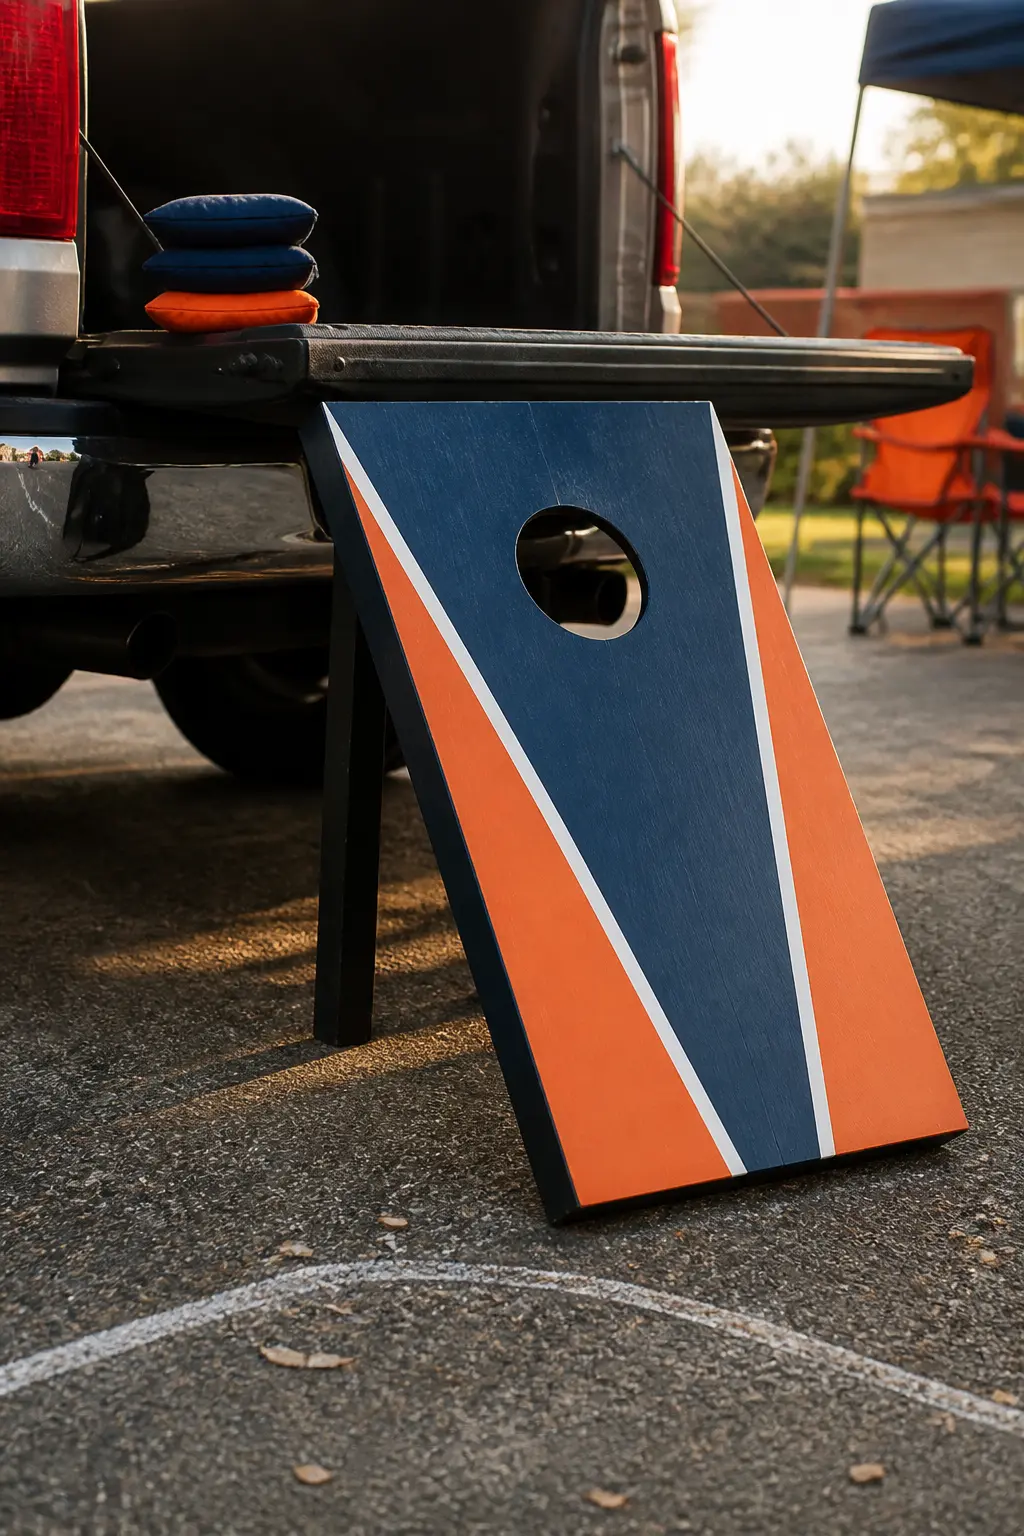
14. Corn Hole Board Angled from the Bumper
A single corn hole board propped at its standard angle against the inside of an open trunk bed or against the bumper of an SUV, with bean bags tossed from a chalk line 8 feet back, gives older school-age children a two-to-three-throw game that takes 25 seconds and produces a clear result.
Land a bag in the hole, choose from the top-prize bowl. Land it on the board, choose from the standard bowl. Miss all three, consolation candy anyway. The game requires zero explanation for kids over 7, which is exactly what a fast-moving event needs.
A standard corn hole board is 24 by 48 inches, which fits perfectly inside a pickup truck bed or rests against the open tailgate at the correct angle without any modification. Paint or vinyl-wrap the board face to match your theme.
Bring three bean bags rather than the standard eight — fewer bags means faster rounds and fewer lost bags rolling under adjacent cars.
A bright chalk line on the asphalt drawn before the event opens marks the toss distance and stays visible for hours in dry conditions.
Party planner’s notes
🎁 Send them home with
- A miniature corn hole set as a prize for a hole-in-one (keep two or three in the trunk)
- Theme-coloured mini bean bags as a take-home favour for all players
Decoration by Theme
A themed car is the reason children drag their parents to a specific spot and come back to tell their friends about it. These five decoration builds each use a clear visual concept that reads from a distance and fits inside or just behind a standard trunk opening.
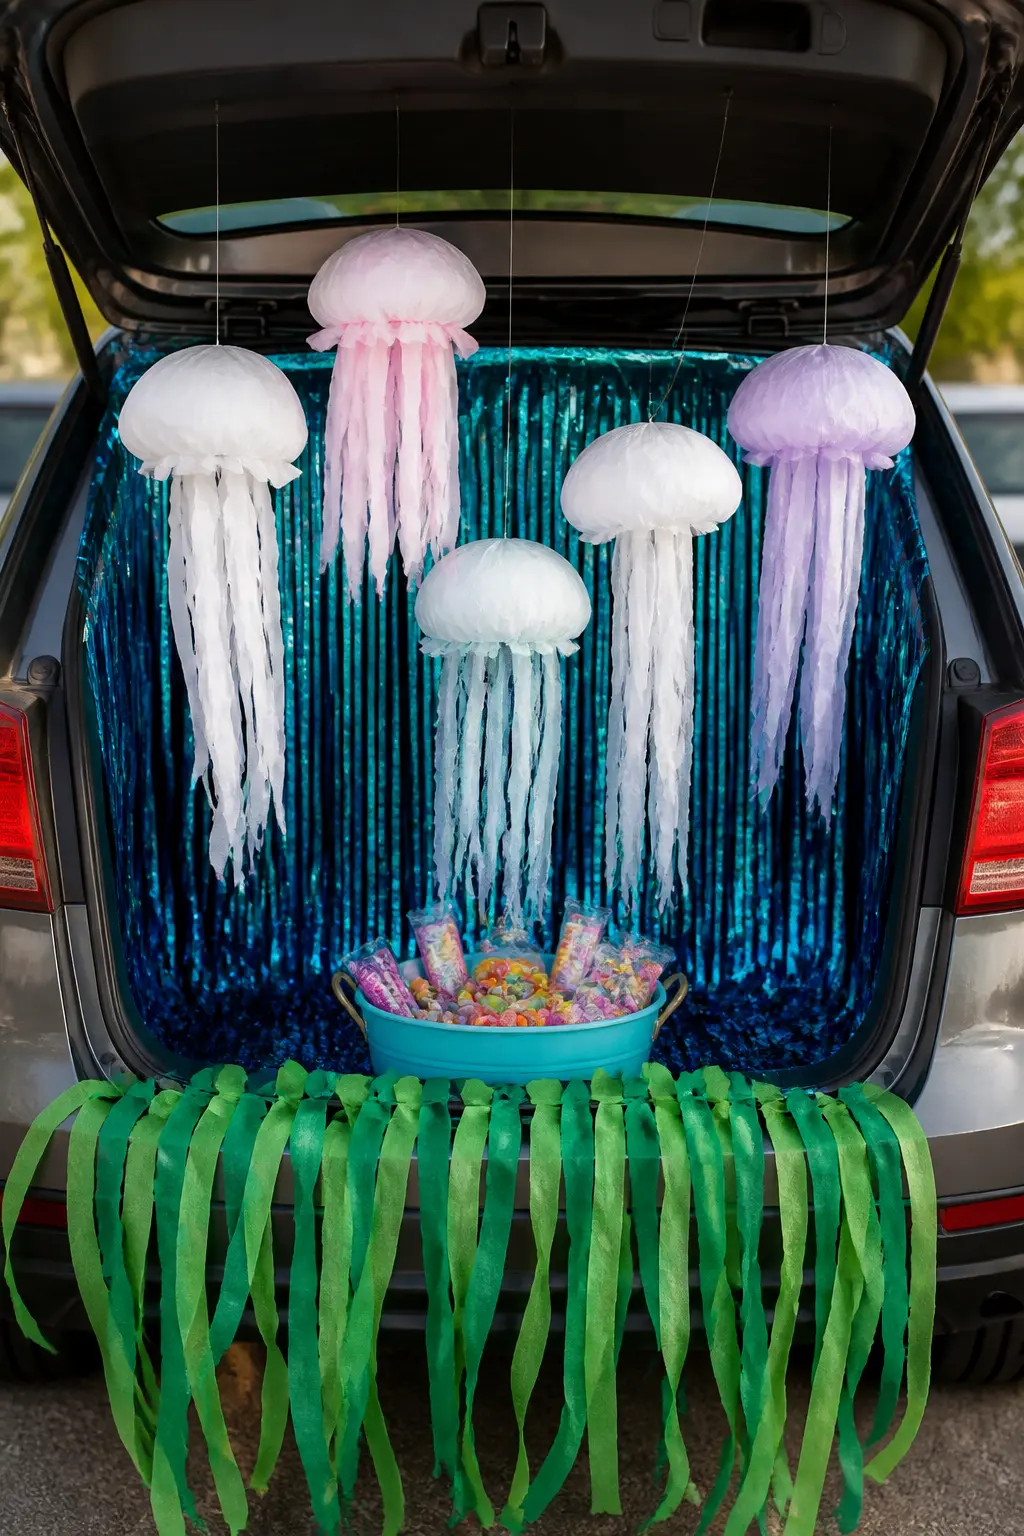
15. Deep-Sea Trunk with Blue Foil Walls and Hanging Jellyfish
Line the interior walls of the trunk with blue metallic foil curtain panels, weave lengths of green crepe-paper “seaweed” along the bumper edge, and hang a row of tissue-paper jellyfish from the raised hatch lid on fishing line at varying lengths — some almost touching the candy display, some floating up near the roof.
The result is an underwater scene that shimmers and sways with every light breeze, making it one of the most visually active displays in the lot without any powered effects.
Weaving green streamer seaweed along the bumper and hanging paper jellyfish from the top lid is a proven combination for exactly this look.
Make the jellyfish from white or pastel tissue paper: stack eight sheets, fold accordion-style, cinch the centre with fishing line, fan the layers out, then cut the bottom sheets into 12 long strips for the tentacles.
Glue two googly eyes near the top of each body for instant character. Make eight to ten jellyfish ahead of time at home and store them loosely in a large plastic bin so they do not crush.
The candy bowl can sit inside a prop coral-reef foam structure, or simply inside a blue galvanised bucket labelled with a fish sticker.
Party planner’s notes
🍰 On the table
- Blue rock candy sticks in a tall glass jar beside the candy bowl
- Goldfish crackers in individual snack bags as a savoury option for younger kids
- Gummy fish or sharks mixed into the candy bowl
🎁 Send them home with
- A tissue-paper jellyfish to take home (make extras)
- A small zip-lock bag of blue and white saltwater taffy
🛍 Shopping guide
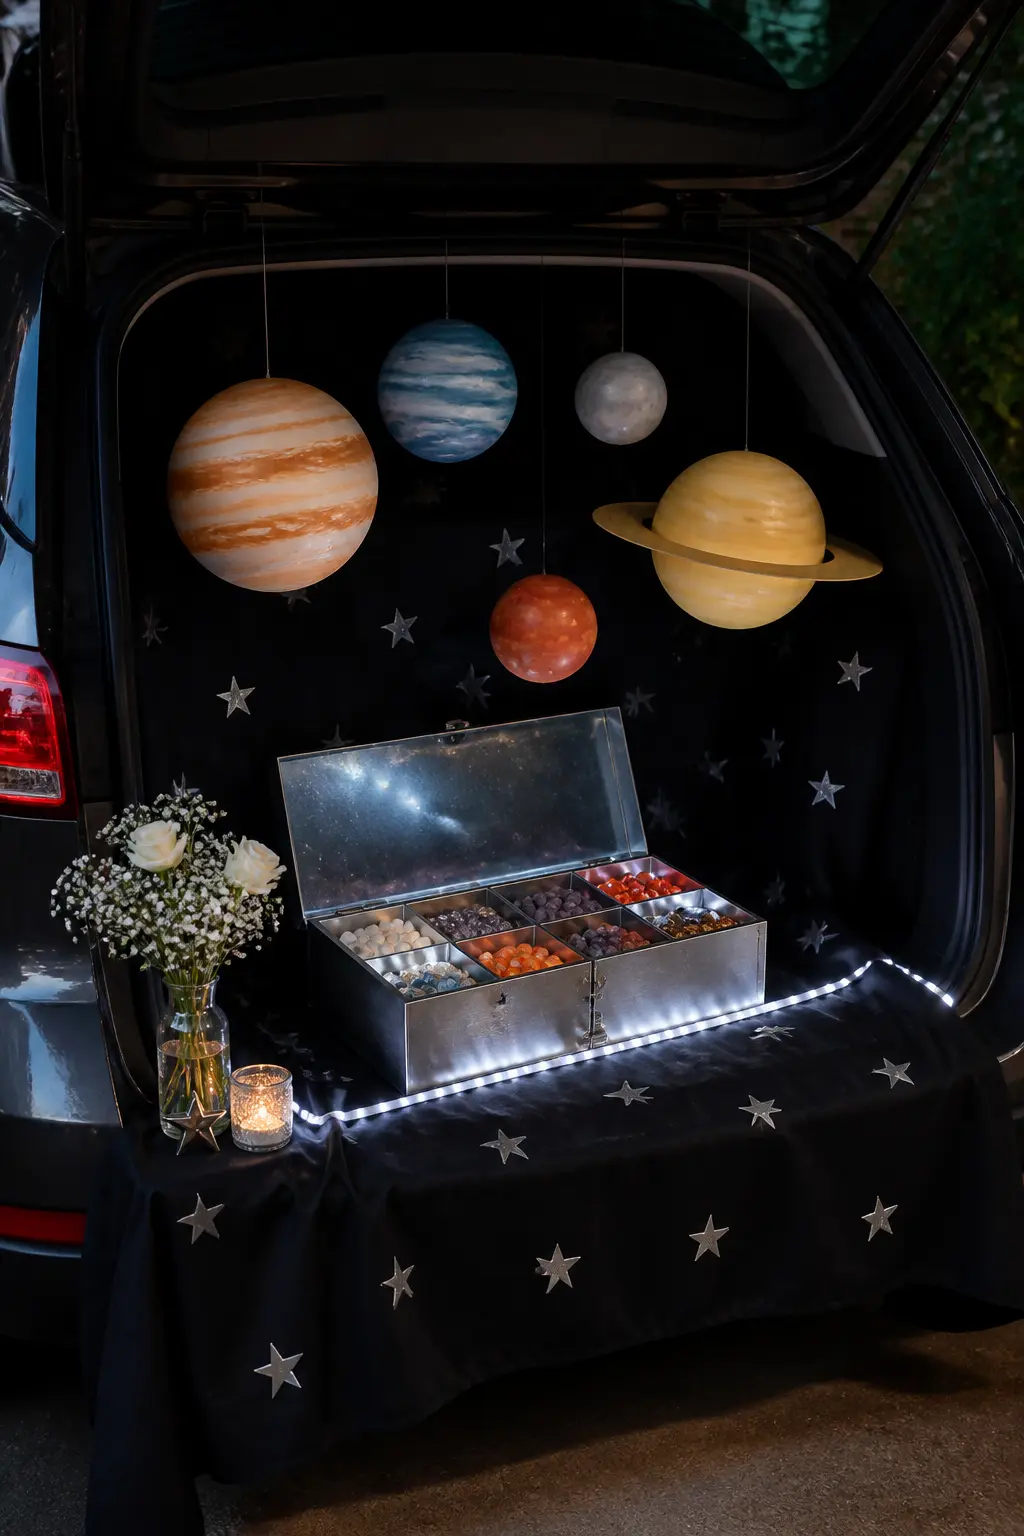
16. Space Mission Trunk with Black Cloth and Planet Mobiles
Drape the trunk interior with a black tablecloth, stick self-adhesive silver star stickers across it in constellation patterns, and hang five foam-ball planets painted in bold colours (red for Mars, blue for Neptune, ringed beige for Saturn) from the hatch lid on different lengths of clear fishing line.
Add a strip of cold-white LED light along the trunk floor to simulate a launch-pad glow, and the whole setup reads as outer space from 20 feet away even in a lit parking lot.
Black tablecloths, LED lights, and action figures make a car feel like a galaxy, and this build takes the same bones further with the planet mobiles and star mapping.
Paint the foam balls at home the night before the event. A 3-inch foam ball is the right scale for the hatch-lid height.
For Saturn’s rings, cut a ring from a plastic lid (a coffee-tin lid works well), paint it tan, and hot-glue it around the ball’s equator.
Space the planet strings at 6-inch intervals across the width of the hatch so they do not tangle when the lid moves.
The candy display can sit in a silver metallic box labelled “Space Station Supply Depot” — a label printed at home on cardstock is enough.
Party planner’s notes
💝 Keep it forever
- Save the painted planet mobiles — they make great bedroom ornaments
- Photograph the trunk from directly behind just before sunset so the LED floor strip glows against the dark cloth
🛍 Shopping guide
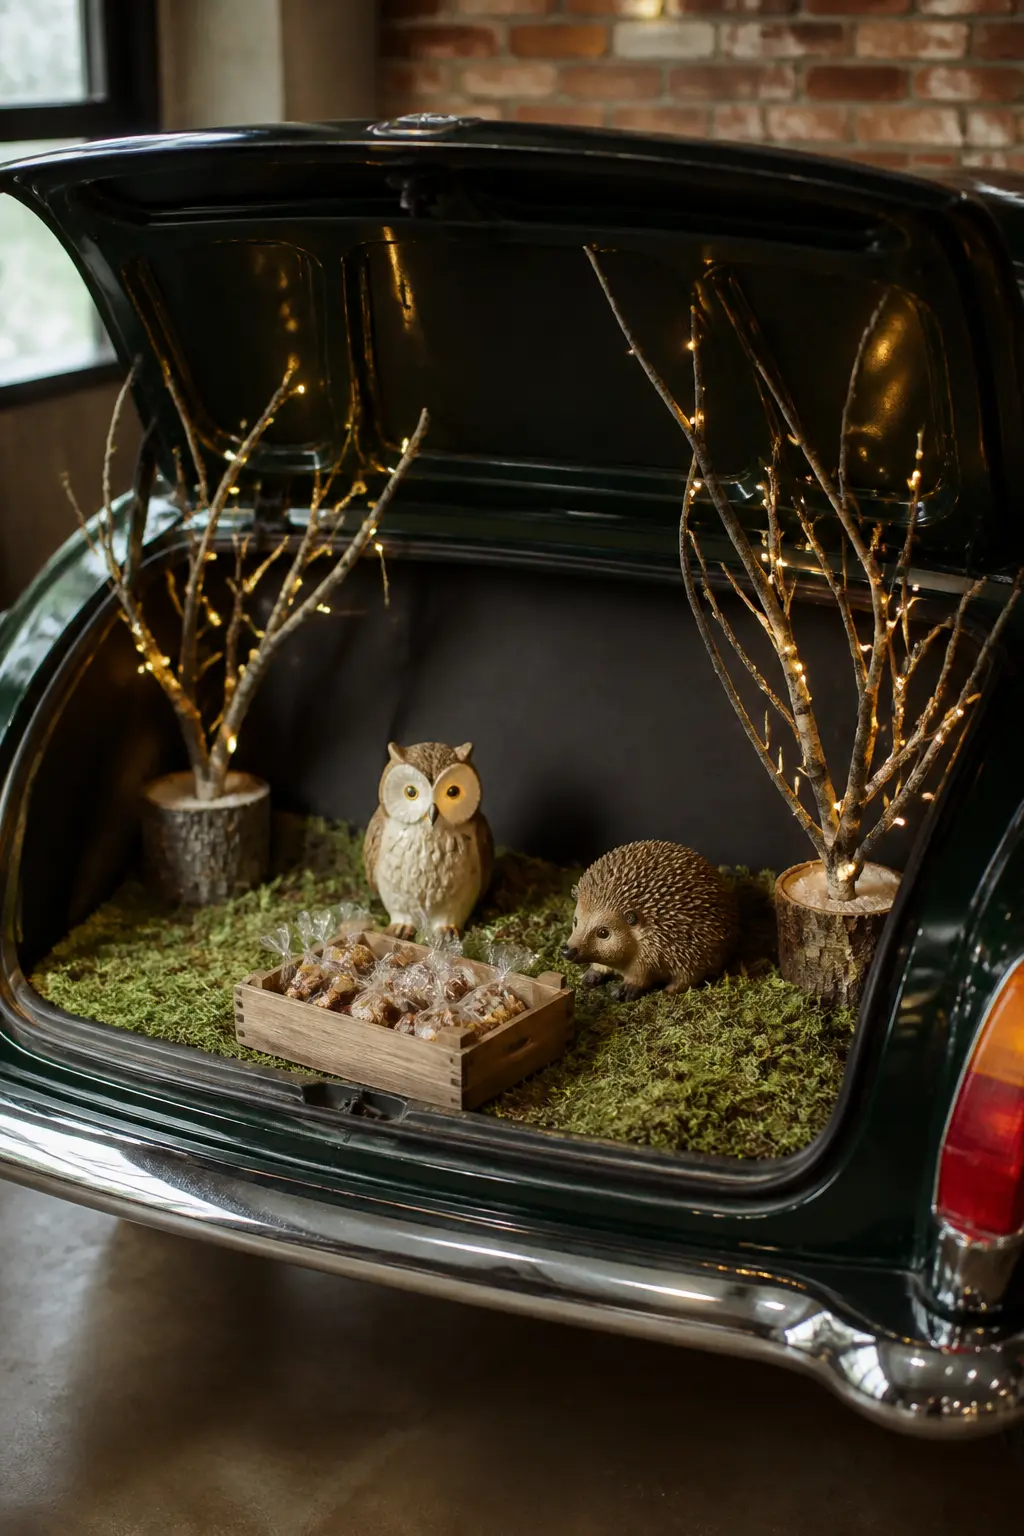
17. Woodland Creatures Trunk with Moss, Branches, and Fairy Lights
Lay a sheet of preserved flat moss across the trunk floor (the kind sold in craft stores for floral arrangements — no water, no mess), prop two or three small birch-bark branches upright in weighted pots at the back corners, weave warm-white battery fairy lights through the branches, and tuck a few small stuffed or ceramic animal figures (an owl, a hedgehog, a fox) into the moss.
The result is a forest floor scene that looks genuinely styled and three-dimensional. Use an acorn-shaped candy bowl or a small wooden crate for the treats to complete the woodland setting.
This theme works particularly well for a sedan or compact SUV because the low, flat trunk floor mimics a forest clearing.
Keep the branch pots weighted with floral foam tightly packed inside a terracotta pot — they need to be stable enough that a child leaning on the bumper does not topple them.
If your event is at dusk or after dark, the fairy lights through the branches will be the warmest, coziest display in the lot, which draws a crowd on its own.
Source preserved moss from a craft supply store rather than collecting it from outside, where it can dry out and crumble during a three-hour event.
Party planner’s notes
🍰 On the table
- Acorn-shaped chocolate candies in the wooden crate
- Honey sticks tied with twine as an alternative treat
- Trail mix packets in kraft-paper bags for the older kids
🎁 Send them home with
- A small pinecone tied with twine and a candy bar
- A seed packet from a garden store as a plant-it-yourself favour
🛍 Shopping guide
18. Carnival Booth Trunk with Red-and-White Striped Canopy
A red-and-white striped tablecloth draped over the open trunk lid and secured with binder clips acts as a canopy above the display area, instantly reading as a carnival booth from the walkway.
Add a small popcorn box holder at the corner, a string of round Edison-style LED bulbs along the bumper edge, and a handwritten chalkboard sign above the candy display, and the car looks like it belongs at a county fair rather than a parking lot.
The visual shorthand of the stripe is so strong that almost no other decoration is needed to communicate the theme.
Use a plastic or vinyl tablecloth rather than fabric — it holds the stripe pattern flat in a breeze without drooping, and it wipes clean after the event.
Secure the two far corners of the tablecloth inside the trunk with clips to the rear seat anchors so the canopy does not blow forward over the candy.
For the Edison bulbs, use the battery-operated string variety rather than plug-in: they hang from the bumper edge on removable Command strips and require no power source.
The chalkboard sign can be pre-written with a fun name for your booth — “The Candy Cart,” “The Lucky Booth” — which gives children something to read and remember.
🛍 Shopping guide
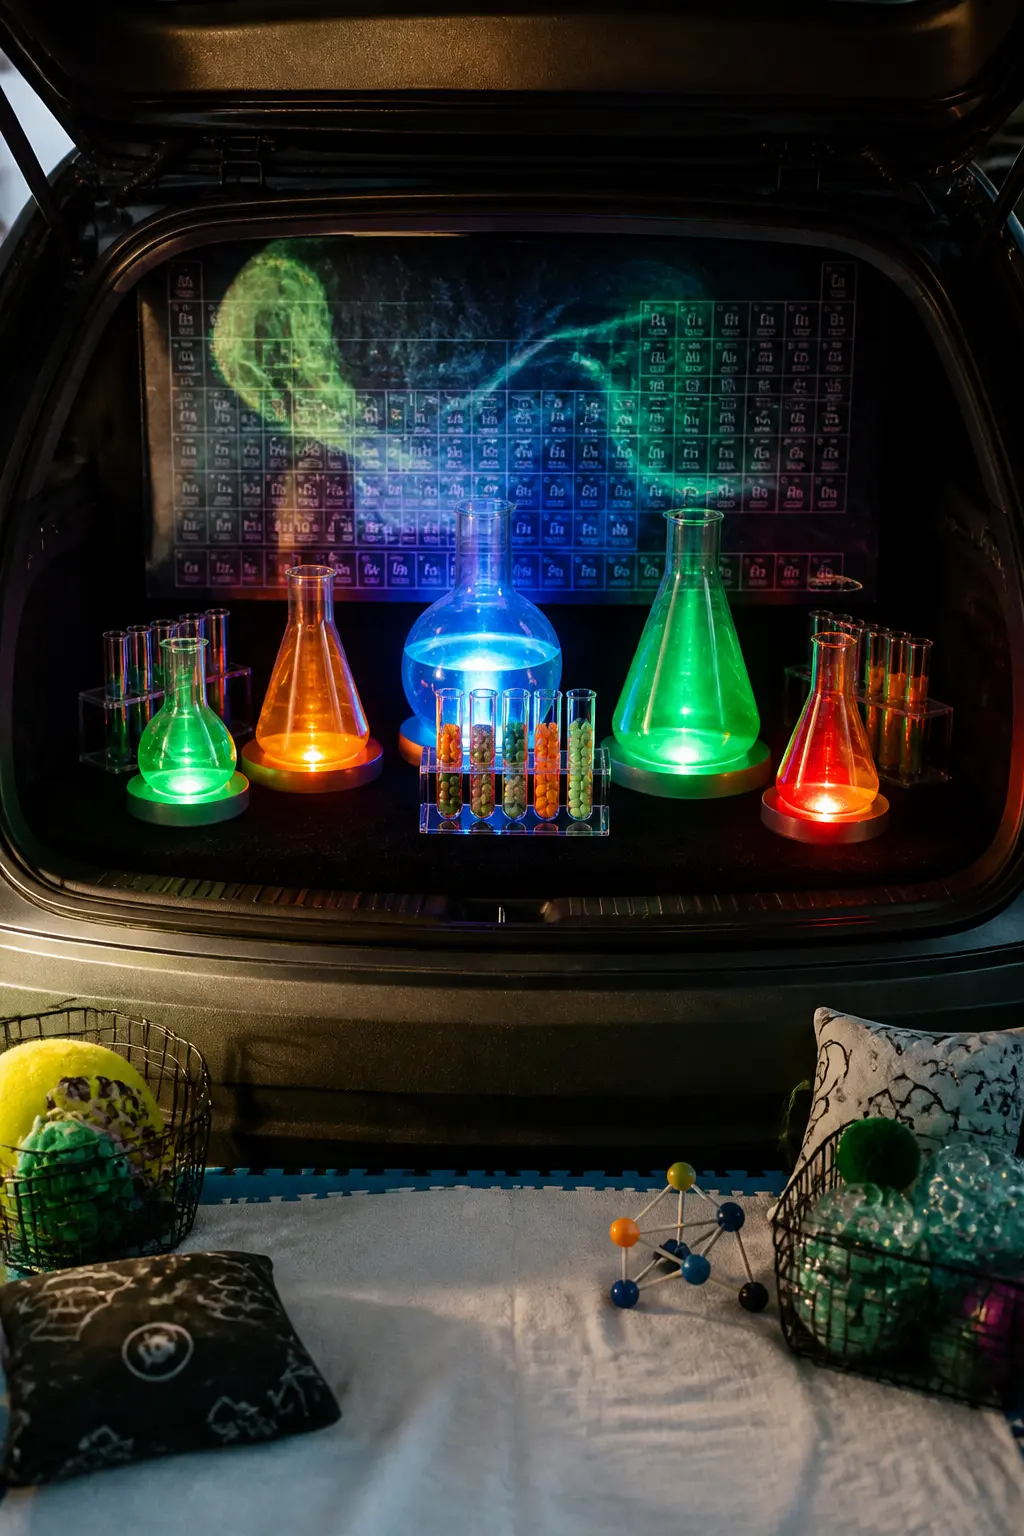
19. Mad Science Lab Trunk with Glowing Beakers
A row of clear plastic laboratory flasks and beakers in four sizes, each filled with water tinted with neon food colouring and illuminated from below by a battery-powered LED puck, sits along the back wall of the trunk on a black felt runner.
Add a set of oversized plastic test tubes filled with layered candy, a fake periodic-table backdrop printed on cardstock and taped to the rear window, and the car becomes a mad scientist’s lab in under an hour of setup.
Mad scientist lab setups with bubbling beakers and lab equipment are a perennial trunk favourite precisely because the glowing liquid is so photogenic and immediately recognisable as science.
Use neon green, orange, and blue food colouring for the strongest glow under the LED pucks. The pucks sit in a shallow bowl under each flask so they do not tip.
Keep the coloured-water flasks sealed with plastic wrap and a rubber band at the opening — this prevents any accidental spills during the event and means you can reuse the water display next time.
The candy test tubes are the handout: each child picks a tube from the rack, which also keeps the line moving because there is no scooping or pouring involved.
Party planner’s notes
🍰 On the table
- Layered candy in individual test tubes as the handout item
- Pop Rocks packets labelled as ‘reaction powder’
- Sour candy strips labelled ‘litmus strips’
🛍 Shopping guide
Traffic Flow Setup
The logistics layer is what separates a fun evening from a stressed-out scrum. These three setups are not decorations — they are the physical and organisational tools that keep 40-plus guests moving safely and evenly through the lot.
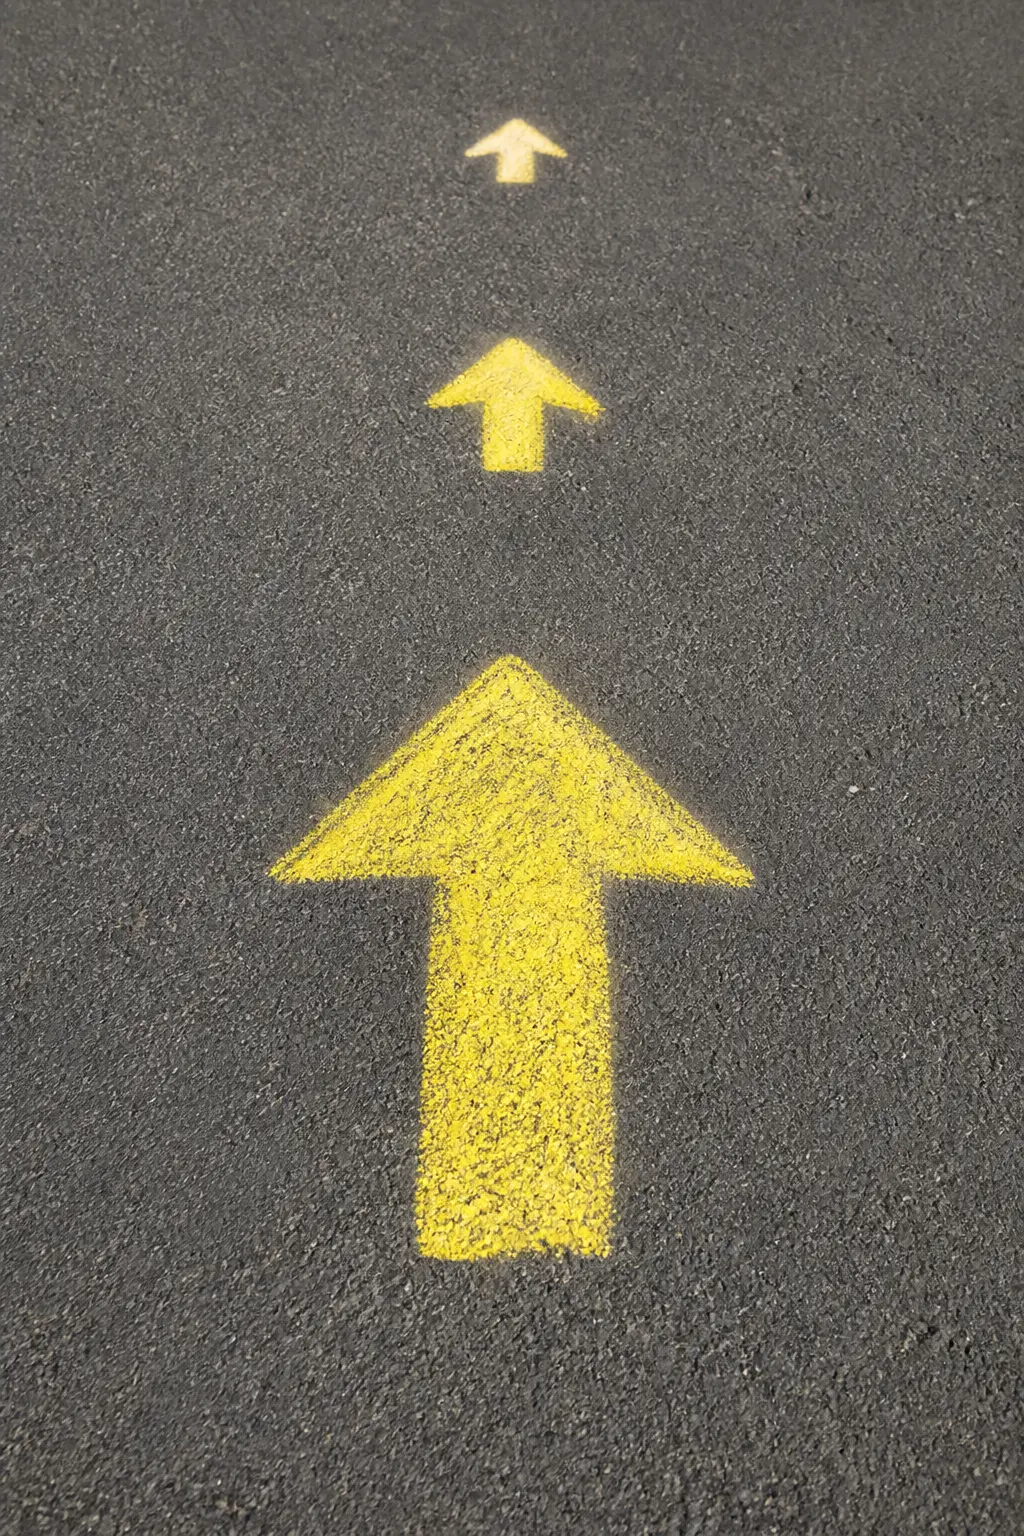
20. Chalk Arrow Path from Entry Gate to First Trunk
A series of chalk arrows drawn on the asphalt — one every 15 feet along the pedestrian route from the entry point to the first decorated trunk — tells arriving families exactly which way to walk without any verbal directing from volunteers.
Traffic cones or chalk arrows create a clear pathway to keep everyone safe and moving, and chalk is the fastest version to deploy because it requires no equipment beyond a fat chalk bar and two minutes per arrow.
Draw arrows in two colours: one colour for the main route, a second colour pointing toward the exit, so the circuit is self-explanatory.
Make each arrow large — at least 18 inches long — so it reads from standing height without anyone having to look down carefully. Draw them before cars arrive so the asphalt is clean.
If rain is possible, stencil the arrows in temporary spray paint (the kind marketed for sports field marking, which washes off in a few weeks) rather than chalk.
Place a larger “START HERE” arrow at the entry point and a “THANKS FOR COMING” arrow at the exit to frame the experience.
This single step is the one that most prevents families from doubling back, crossing the flow of other families, or standing still in confusion.
🛍 Shopping guide
21. Colour-Coded Station Number Signs on Cones
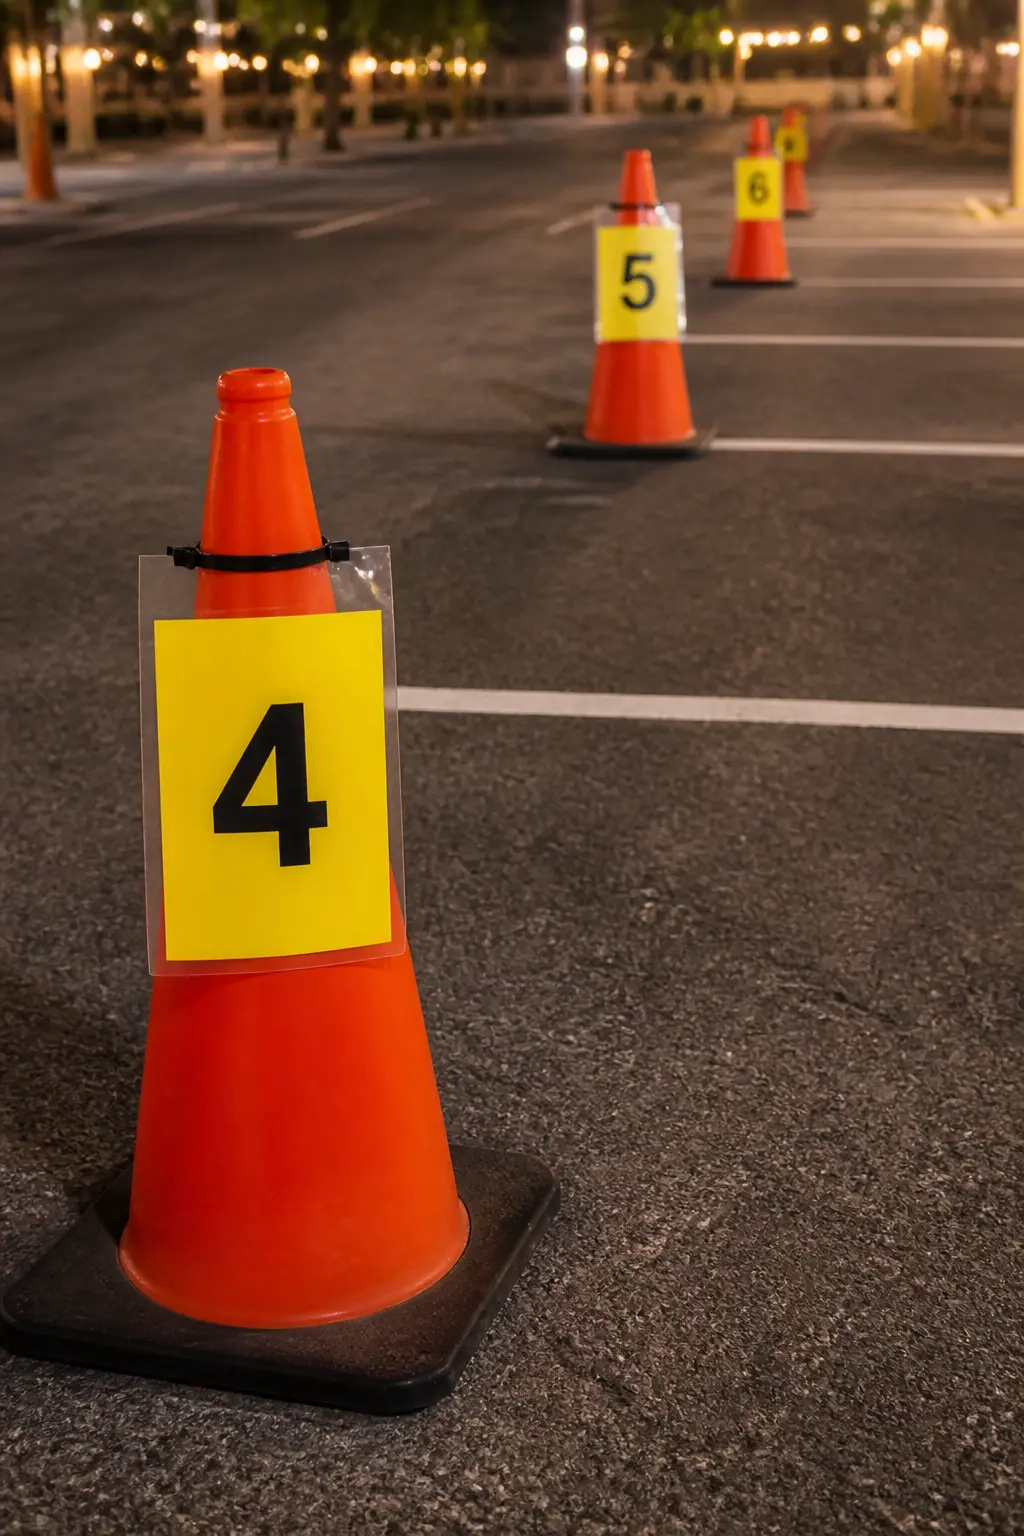
A laminated A4 number sign (bold black number on a bright coloured background, a different colour for each car) zip-tied to the top of an orange traffic cone in front of each vehicle gives the lot an instant numbered-route feel.
Children with a paper route card (a simple 10-box grid printed on cardstock and given at the entrance) can see which numbered stations they still need to visit.
Giving each child one ticket for each station and having them turn it in at each vehicle is one of the most reliable tools for managing a large crowd, and the numbered cone makes the system self-navigating without volunteers having to direct every family.
Print station signs on 200gsm card, laminate them for weather resistance, and punch a hole at the top for the zip tie.
Use a different background colour per sign — red for Station 1, blue for Station 2, yellow for Station 3 — so that children who cannot yet read numbers can still navigate by colour match.
The cones themselves also act as pedestrian barriers that naturally keep the walking lane open. After the event, the cones store flat in a stack in any garage, and the laminated signs reuse next year with fresh numbers added on top with a dry-erase marker.
Party planner’s notes
💝 Keep it forever
- Store laminated number signs in a labelled folder between events
- Photograph the whole numbered cone route from entry to exit before the crowd arrives as a reference for next year’s layout
22. Staggered Entry Ticket Wristbands
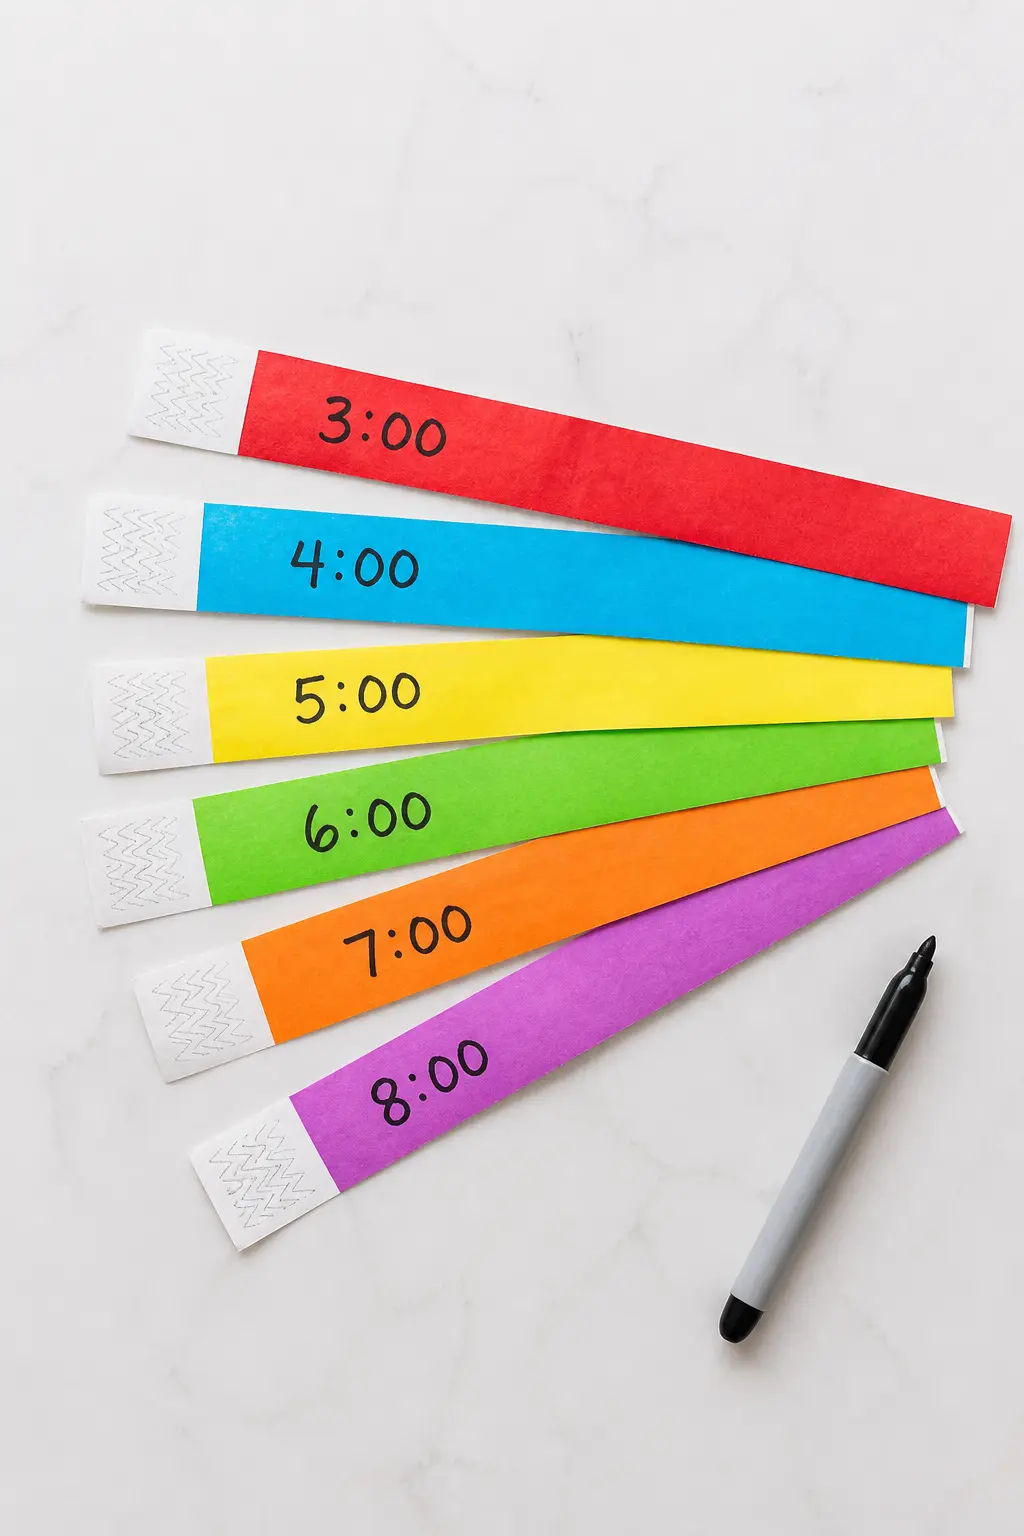
Printing the event into 15-minute entry windows — 5:00, 5:15, 5:30 — and handing each family a coloured Tyvek wristband at registration that matches their window is one of the most effective ways to prevent a wave of 60 people all arriving at the same three cars at once.
Assigning entry times by grade level or time slot distributes the crowd evenly across the lot, and the wristband makes the system work without a volunteer having to explain it at the gate for every family.
A greeter hands the wristband at check-in, points to the start arrow, and the family self-directs from there.
Tyvek wristbands cost very little per unit in bulk and come in 12 or more colours, which is enough for a dozen distinct time windows even at a large event.
Print the entry time directly on the wristband with a permanent marker at check-in rather than pre-printing, so you can flex the window if early arrivals taper off and you want to move up the next group.
Keep a printed master list at the entry table showing how many families are registered per window, so the greeter knows when to open the next group.
This one logistical piece is what separates a manageable 60-person event from a stressed-out scrum at the popular trunks.
Party planner’s notes
💝 Keep it forever
- Save the master entry-window spreadsheet as a template for next year
- Note which windows sold out first so you can weight future registration accordingly
🛍 Shopping guide
Frequently Asked Questions
How many cars do you need for a trunk or treat event with 40-plus guests?
A good working ratio is one decorated trunk for every eight to ten trick-or-treaters.
For 40 guests you need at least five trunks, but eight to ten cars is more comfortable because it spreads the crowd across more stops and means no single trunk has a line longer than three or four children at a time.
If your event is closer to 80 guests, aim for ten to twelve cars with at least one empty parking space between each vehicle to give kids room to gather without blocking foot traffic.
How much candy do you need per car at a trunk or treat?
Plan for each child to visit every car once, and budget two to three pieces of candy per child per trunk.
For 40 children visiting 10 trunks, that is roughly 80 to 120 pieces per trunk, or around 10 to 12 standard-size bags of fun-size candy.
Buy slightly more than you calculate and keep the surplus in the car — it is much easier to give away extra candy at the end than to run out with an hour left in the event.
Can you run a fog machine or LED lights off a car battery?
Yes, but with caution. A 400-watt fog machine draws enough current that running it for two to three hours on a standard car battery while the engine is off can drain the battery noticeably.
The safer option is a small power inverter plugged into the 12V outlet with the engine in accessory mode, or a dedicated outdoor rechargeable battery station.
LED strip lights draw very little current and are fine on a USB battery pack for a full evening without risk.
What is the best parking lot layout for a trunk or treat?
Park cars in a single long row or a U-shape with all trunks facing inward toward the pedestrian lane. This creates one clear walking direction and means children never have to cross between moving or parked cars to reach the next trunk.
Leave at least one empty space between each decorated vehicle so groups can gather at a trunk without blocking access to the one beside it. Mark the pedestrian lane with chalk arrows or cones so the route is self-explanatory the moment families enter the lot.
What interactive games work best at a trunk or treat for school-age kids?
The best interactive stations for school-age children complete in 15 to 30 seconds per child and require no explanation from the host. Ring toss, a spinning prize wheel, a candy slide tube, and a magnetic fishing pond all fit that description.
Avoid games with a referee or multiple rounds — they create queues. The goal is a game that a child can start, finish, and collect their prize from in under half a minute, then move on to the next car.
How do you keep lines moving at a trunk or treat with a big crowd?
Three things make the biggest difference: staggered entry windows so not everyone arrives at once, numbered station signs so families can self-navigate without doubling back, and interactive stations that reset in seconds rather than requiring a host to explain rules.
A ticket or stamp card system also helps — give each child a card at entry with one box per trunk, and have the trunk host stamp it when they visit.
Children with a full card can head to a prize table at the exit, which pulls them through the loop instead of lingering at favourite stops.
Your halloween balloon garland does not have to be orange and black. These 13 adult palettes borrow
Halloween activities for kids preschool age, with 12 big-shape printables and 8 no-prep hands-on ide
20 halloween arts and crafts for mixed ages: painting, paper, and building projects that spread acro
Leave a Reply