

Okay, real talk: Halloween decorations can wait until the last minute, but Halloween party appetizers cannot. I learned this the hard way one October when I served literally just a bowl of candy corn and a sad cheese plate. The looks on my guests’ faces still haunt me — and not in the fun way.
So this year, I went all in.
I tested fifteen spooky, shareable, grab-off-the-platter bites that cover every corner of the party table: dips you can make the day before, no-cook skewers that assemble in ten minutes, baked showstoppers that photograph beautifully, and at least one tray so dramatic your guests will stop mid-conversation to stare at it (hi, Skeleton Veggie Tray).
Every recipe here is genuinely cookable — real quantities, real temps, real timings — not one of those vague “season to taste and bake until done” situations I know you’ve rage-quit before.
A quick note on the crowd: this list is 100% alcohol-free, because kids are at this party and everyone deserves to eat well.
If you have guests with dietary needs, I’ve flagged the common allergens (dairy 🧀, egg 🥚, gluten 🌾, nuts 🥜) in each recipe intro so nobody gets surprised.
The University of Nebraska Extension reminds us to keep perishable party foods chilled until serving and never leave them out for more than two hours — which is just good hosting sense, honestly. Now let’s get spooky. 🎃
This post contains affiliate links — if you buy through them, I may earn a small commission at no extra cost to you.
- Salami and Mozzarella Eyeball Bites
- Mummy Pigs in Blankets
- Spider Deviled Eggs
- Witch Finger Breadsticks
- Mini Jack-o’-Lantern Stuffed Peppers
- Graveyard Taco Dip
- Cheesy Bat Quesadillas
- Monster Eye Meatballs
- Pumpkin Cheese Ball
- Skeleton Veggie Tray with Herb Dip
- Ghost Pizza Bites
- Bloody Caprese Skewers
- Bat Wing Drumsticks
- Spiderweb Queso Dip
- Frankenstein Guacamole Cups
- Frequently Asked Questions
Salami and Mozzarella Eyeball Bites
These are the first thing to disappear at every single Halloween party I’ve thrown — and I mean every single one. They’re no-cook, they assemble in about fifteen minutes, and the moment you set them down on a black platter, people shriek (in delight).
Each bite is a little savory eyeball: a ball of fresh mozzarella skewered with a slice of salami, topped with a sliced black olive pupil, and finished with a tiny red-pepper drizzle that looks unmistakably like a bloodshot eye.
The flavour is basically a deconstructed charcuterie board in one pop — salty salami, creamy mozzarella, briny olive, a whisper of heat.
Party-practical to the core: assemble the skewers up to four hours ahead, cover and refrigerate, then add the pimiento drizzle just before serving so it stays vivid.
Contains: dairy. Gluten-free.
Ingredients
- 24 ciliegine (cherry-sized) fresh mozzarella balls (about 340 g / 12 oz), drained and patted dry
- 24 thin rounds of salami (about 85 g / 3 oz)
- 12 pitted black olives, halved crosswise
- 2 tablespoons pimiento or roasted red pepper strips, finely chopped
- 2 tablespoons extra-virgin olive oil
- Flaky sea salt and freshly ground black pepper, to taste
- 24 cocktail picks or short bamboo skewers
Instructions
- Fold each salami slice in half then in half again, so it forms a little cup. Thread a cocktail pick through the folded salami, leaving about 1 cm of the pick above the salami cup.
- Push one mozzarella ball firmly onto the pick so it sits on top of the salami cup, forming the white of the eye.
- Press one black-olive half flat-side down onto the top of each mozzarella ball to create the pupil.
- Drizzle the olive oil over the assembled bites, then scatter a little chopped pimiento around the base of each olive to mimic red veins. Season with flaky salt and pepper.
- Arrange on a dark platter and refrigerate, uncovered, for up to 4 hours. Add the pimiento drizzle just before serving to keep the colour bright.

🛍 Shopping guide
Mummy Pigs in Blankets
Is there any Halloween appetizer more universally beloved than mummy hot dogs? I don’t think so — and tbh, I’ve tried to think of one for years.
There’s something about the tiny wrapped sausage with its little mustard-dot eyes that makes even the most dignified adult go “oh my GOD, so cute” before eating four in a row.
These are a crowd-scale workhorse: the gluten-containing crescent dough wraps around cocktail-sized sausages, and after about twelve minutes in a hot oven they emerge golden, puffy, and undeniably mummy-shaped. The spooky detail (the eyes!)
is piped on after baking with a zip-lock corner — nothing to smudge in the oven. Food Network calls these a party-table essential, and honestly, they are not wrong.
Make-ahead tip: assemble and refrigerate the wrapped, unbaked mummies up to four hours ahead; bake just before the party. They hold at room temperature for about 45 minutes before the pastry starts to soften. Contains: gluten, egg (in the egg wash). Scale up by doubling the dough quantity.
Ingredients
- 2 × 115 g (8 oz) cans refrigerated crescent-roll dough
- 20 cocktail-sized smoked sausages
- 1 large egg, beaten with 1 tablespoon cold water (egg wash)
- 2 tablespoons yellow or Dijon mustard (for the eyes)
- Ketchup or honey-mustard sauce, for dipping
Instructions
- Preheat the oven to 190 °C / 375 °F and line two baking sheets with parchment paper.
- Unroll both cans of dough and press all the perforations and seams together to form two large rectangles. Use a pizza cutter or sharp knife to slice each rectangle into thin strips roughly 5 mm (¼ inch) wide.
- Working with one sausage at a time, wrap a strip of dough tightly around the body, leaving a small gap near one end for the face. Overlap strips in a criss-cross direction to mimic bandage wrapping, stretching the dough slightly as you go.
- Place the wrapped mummies about 3 cm apart on the prepared baking sheets. Brush each lightly with egg wash — this gives them a gorgeous golden finish.
- Bake for 10–12 minutes until the dough is puffed and deep golden brown. Remove from the oven and let cool for 3 minutes.
- Fill a small piping bag or zip-lock bag (snip a tiny corner off) with mustard and pipe two small dots on the exposed sausage face for eyes. Serve with ketchup or honey-mustard sauce.

🛍 Shopping guide
Spider Deviled Eggs
Deviled eggs are already the silent MVP of every party platter — creamy, crowd-pleasing, endlessly snackable. Turn them into black-olive spiders for Halloween and suddenly they become the loud, dramatic MVP that everyone photographs before eating.
Each egg half gets a satiny, tangy yolk filling piped back in, then a black-olive body is placed on top and eight thin olive-strip legs are tucked alongside it to complete the spider.
The effect is genuinely charming rather than gory — even little kids love these. Allergen note: contains egg and mayonnaise.
Make the hard-boiled eggs and filling up to 24 hours ahead and store them separately (egg whites in one container, filling in another); assemble and add the olive spiders on the day of the party so the legs stay crisp and the filling stays smooth.
Ingredients
- 12 large eggs
- 4 tablespoons mayonnaise
- 1 teaspoon Dijon mustard
- 1 teaspoon apple-cider vinegar
- ½ teaspoon smoked paprika, plus extra for dusting
- ¼ teaspoon garlic powder
- Salt and white pepper, to taste
- 1 × 180 g (6 oz) can whole pitted black olives, drained
Instructions
- Place the eggs in a single layer in a large saucepan and cover with cold water by at least 2.5 cm (1 inch). Bring to a full rolling boil over high heat, then immediately cover, remove from the heat, and leave for exactly 11 minutes.
- Transfer the eggs to a bowl of ice water and leave for at least 10 minutes. Peel under cold running water, then halve each egg lengthways and gently pop the yolks into a bowl.
- Mash the yolks with a fork until no large lumps remain. Add the mayonnaise, Dijon, vinegar, paprika, garlic powder, salt and white pepper. Beat with a fork or hand mixer until very smooth and creamy — taste and adjust seasoning.
- Spoon the filling into a piping bag fitted with a large round or star tip (or use a zip-lock bag with a corner snipped off) and pipe the filling generously into each egg-white cavity. Dust lightly with paprika.
- For the spiders: slice 12 olives in half lengthways — one half per egg becomes the spider body. Slice the remaining olive halves into thin strips to make legs (you need 8 legs per spider).
- Place one olive half flat-side down in the centre of each filled egg. Tuck four olive strips on each side, angling outward to mimic spider legs. Refrigerate until ready to serve, up to 4 hours.

Witch Finger Breadsticks
Long, knobbly, almond-tipped, and honestly a little bit disturbing — these breadsticks are the drama queens of the Halloween party appetizer table. They look like they belong to someone who hasn’t been to a nail salon in a few centuries, which is precisely the point.
Flavour-wise they are deeply buttery, garlicky, and Parmesany, and you will absolutely eat three before you remember you were saving them for guests. The almond “fingernail” presses into the raw dough before baking and stays put beautifully.
Allergen note: contains gluten, dairy, egg, and tree nuts (almonds). Make-ahead: shape and refrigerate on the baking sheet for up to two hours before baking; add 1–2 extra minutes to the bake time if going straight from cold to oven.
Ingredients
- 450 g (1 lb) store-bought refrigerated pizza dough, at room temperature
- 1 large egg, beaten (egg wash)
- 16 whole raw almonds (for the fingernails)
- 3 tablespoons unsalted butter, melted
- ¾ teaspoon garlic powder
- ¼ teaspoon fine sea salt
- 40 g (1½ oz / about ½ cup) finely grated Parmesan
- Warm marinara sauce, for dipping
Instructions
- Preheat the oven to 190 °C / 375 °F and line two baking sheets with parchment paper.
- On a lightly floured surface, divide the pizza dough into 16 equal pieces. Roll each piece between your palms into a rope about 12 cm (5 inches) long, then gently pinch it in two places along its length to create “knuckle” bumps. Use a small knife to score two or three faint crosswise lines at each knuckle for extra realism.
- Arrange the shaped fingers on the prepared baking sheets with plenty of space between them (they expand). Brush each one lightly with beaten egg.
- Press one almond firmly into the tip of each breadstick at an angle so the flat side is against the dough and the rounded end sticks up — this is the fingernail. Press firmly so it embeds.
- Bake for 12–14 minutes until the dough is puffed and golden brown and the almonds look toasty.
- While they’re baking, stir the melted butter with the garlic powder and salt. The moment the breadsticks come out of the oven, brush them generously with the garlic butter and immediately shower with grated Parmesan — the heat helps it melt slightly onto the crust. Serve hot with warm marinara.

Mini Jack-o’-Lantern Stuffed Peppers
How cute are these?! (So cute. The answer is so cute.)
Mini sweet peppers — the bag you grab at the supermarket without really planning to — are carved into tiny jack-o’-lanterns with a small sharp knife, then stuffed with a herby cream-cheese filling that takes about four minutes to stir together.
Orange peppers are the obvious star, but a mix of orange, yellow, and red on the platter looks like a genuine pumpkin patch.
The carving is easier than it looks: you’re just cutting tiny triangles for eyes and a wonky grin, nothing that requires artistic talent (speaking from very personal experience). Allergen note: contains dairy.
Make ahead: fill the peppers up to 8 hours in advance, cover and refrigerate. They hold their shape beautifully at room temperature for up to 2 hours during the party.
Ingredients
- 20 mini sweet peppers (about 500 g / 1 lb), a mix of orange, red, and yellow
- 225 g (8 oz) full-fat cream cheese, softened to room temperature
- 60 g (2 oz / ¼ cup) sour cream
- 2 tablespoons finely sliced chives or green onion tops
- 1 tablespoon finely chopped fresh dill
- ½ teaspoon garlic powder
- ½ teaspoon onion powder
- ¼ teaspoon smoked paprika
- Salt and black pepper, to taste
Instructions
- Using a small, sharp paring knife, cut the top off each mini pepper (including the stem — keep the stemmed tops as cute little lids if you like). Run a finger or small spoon inside each pepper to scrape out seeds and membranes.
- On the outside of each pepper, use the tip of the paring knife to carve two small triangle eyes and a jagged smile, cutting cleanly through the pepper wall. Keep the cuts small and simple — triangles about 5 mm wide are plenty dramatic.
- In a medium bowl, beat the cream cheese and sour cream together with a fork until smooth. Stir in the chives, dill, garlic powder, onion powder, paprika, salt and pepper. Taste and adjust seasoning.
- Spoon or pipe the cream cheese filling into each carved pepper, packing it in firmly so the orange filling peeks through the carved eyes and mouth — this creates the glowing jack-o’-lantern effect.
- Stand the filled peppers upright on a platter (use a folded tea towel under the tray to prevent tipping). Refrigerate until ready to serve.

Graveyard Taco Dip
A layered taco dip is already a party essential — the graveyard version just takes the concept and adds a cemetery of tortilla-chip tombstones standing upright in the guacamole “grass” layer.
It looks genuinely dramatic on a table: imagine a landscape of black-bean soil, sour-cream mist, green guacamole sod, and little tombstones etched with “RIP” in black bean sauce. The flavour is exactly what you’d want — zesty, hearty, and extremely dippable.
Food Network’s taco graveyard dip is a perfect reference for the layered technique; our version skips ground beef to keep things quicker and vegetarian-friendly, but you can absolutely brown 250 g of beef with taco seasoning and add it as an extra layer.
Make the dip up to 24 hours ahead; press plastic wrap directly onto the guacamole layer to prevent browning. Add the tombstones just before serving. Allergen note: contains dairy. Gluten-free if you serve with corn chips.
Ingredients
- 1 × 450 g (16 oz) can refried beans
- 1 × 30 g (1 oz) packet taco seasoning, divided
- 225 g (8 oz) full-fat cream cheese, softened
- 240 ml (1 cup) sour cream
- 3 ripe Hass avocados
- 2 tablespoons fresh lime juice
- 1 clove garlic, finely minced
- 240 ml (1 cup) chunky tomato salsa
- 115 g (4 oz / 1 cup) shredded Mexican-blend cheese
- 2 tablespoons sliced black olives
- 2 tablespoons finely sliced green onion tops
- 12–16 corn tortillas (for tombstone chips)
- 2 tablespoons black bean purée (blended canned black beans) for writing on tombstones
- Corn tortilla chips, for serving
Instructions
- Preheat oven to 190 °C / 375 °F. Stack the corn tortillas and cut out rectangular tombstone shapes (about 4 × 6 cm / 1.5 × 2.5 in) with a small sharp knife or cookie cutter. Arrange in a single layer on a parchment-lined baking sheet.
- Bake the tortilla tombstones for 8–10 minutes, flipping once halfway, until crisp and lightly golden. Allow to cool completely. Use a toothpick dipped in black bean purée to write “RIP” on each one; let dry.
- In a bowl, beat the cream cheese, sour cream, and half the taco seasoning together until smooth. Spread evenly across the base of a 23 × 33 cm dish.
- Spread the refried beans (mixed with the remaining taco seasoning) in an even layer over the cream cheese.
- Halve and pit the avocados. Scoop the flesh into a bowl; mash with lime juice, garlic, and a pinch of salt. Spread the guacamole over the bean layer in a smooth, even green “grass” layer.
- Spoon the salsa evenly over the guacamole. Scatter the shredded cheese, olives and green onion over the top.
- Just before serving, press the dried tombstone chips upright into the top layer, leaning at slightly different angles for a realistic cemetery scene.

🛍 Shopping guide
Cheesy Bat Quesadillas
Quesadillas at a party? Only if they’re cut into bat shapes with a cookie cutter — at which point they go from “everyday lunch” to “the most adorable thing on the table.”
The trick is cooking them first, then cutting with a bat-shaped cutter while still warm (easier than cutting raw dough). The filling is a punchy black-bean and Monterey Jack mixture that holds together beautifully so nothing falls out when you stamp the bats.
They’re addictive — warm, cheesy, slightly smoky, with crispy golden edges. Serve them on a dark platter with a small pot of sour cream for dipping and watch them vanish. Allergen note: contains gluten and dairy.
Make-ahead: fill the quesadillas and refrigerate uncooked up to 4 hours ahead; cook in batches just before serving. Keep cooked bats warm in a 90 °C / 200 °F oven on a wire rack for up to 20 minutes.
Ingredients
- 8 × 25 cm (10-inch) flour tortillas
- 1 × 400 g (14 oz) can black beans, drained and rinsed
- 1 teaspoon taco seasoning
- ½ teaspoon smoked paprika
- ½ teaspoon cumin
- 200 g (7 oz / 2 cups) shredded Monterey Jack or medium cheddar cheese
- 2 tablespoons pickled jalapeño slices, finely chopped (optional for adults)
- 2 tablespoons vegetable oil
- Sour cream and salsa, to serve
Instructions
- In a small bowl, roughly mash the drained black beans with a fork until about half are broken down (this helps the filling stick together). Stir in the taco seasoning, smoked paprika, cumin, and jalapeño if using.
- Lay four tortillas out flat. Divide the bean mixture evenly across them, spreading to within about 2 cm of the edge. Scatter the shredded cheese generously over the beans. Top each with a second tortilla.
- Heat a large non-stick skillet or griddle pan over medium heat and brush with a little vegetable oil. Cook two quesadillas at a time: slide one into the pan and cook for 2–3 minutes until the underside is deep golden and crisp. Flip carefully and cook the second side for another 2 minutes until equally golden and the cheese is fully melted.
- Transfer to a cutting board. While still warm, press a 7 cm (2.75 in) bat-shaped cookie cutter firmly through each quesadilla to stamp out bat shapes. You should get 8–10 bats per quesadilla. Repeat with remaining quesadillas.
- Arrange the bat quesadillas on a platter, wings touching for maximum drama. Serve immediately with sour cream and salsa, or keep warm in a low oven on a wire rack.

🛍 Shopping guide
Monster Eye Meatballs
Juicy oven-baked meatballs, finished with a marinara glaze and topped with a candy-eye or an olive-slice eyeball — these are the hearty, meaty anchor your Halloween party table needs.
They look genuinely monstrous in the best possible way, especially arranged in a slow-cooker set to warm so guests can spear them with toothpicks all evening.
The meatball itself is straightforward and reliable: a mix of beef and pork, seasoned with garlic, Parmesan, and herbs, baked until deeply browned, then tossed in sauce.
The spooky detail (one googly candy eye pressed into each ball after saucing) takes about thirty seconds and makes a huge visual impact. Allergen note: contains gluten (breadcrumbs), egg, and dairy (Parmesan).
Make ahead: bake meatballs up to 2 days ahead and refrigerate in the sauce; reheat in the slow cooker on Low for 2 hours.
Ingredients
- 450 g (1 lb) 80/20 ground beef
- 225 g (8 oz) ground pork
- 60 g (½ cup) dried plain breadcrumbs
- 1 large egg
- 40 g (1½ oz / ½ cup) finely grated Parmesan
- 3 cloves garlic, finely minced
- 2 tablespoons finely chopped fresh flat-leaf parsley
- 1 teaspoon dried Italian seasoning
- 1 teaspoon fine salt
- ½ teaspoon black pepper
- 480 ml (2 cups) jarred marinara or tomato pasta sauce
- 30 small candy eyeballs or 30 pitted black-olive halves (for decoration)
Instructions
- Preheat the oven to 220 °C / 425 °F and line a large rimmed baking sheet with foil, then set a wire rack on top and coat with cooking spray.
- In a large bowl, combine the beef, pork, breadcrumbs, egg, Parmesan, garlic, parsley, Italian seasoning, salt, and pepper. Mix with your hands just until everything is evenly combined — do not overwork or the meatballs will be tough.
- Portion the mixture using a tablespoon measure or small ice-cream scoop (about 30 g each) and roll into smooth balls with wet hands. Arrange on the wire rack, leaving a little space between each.
- Bake for 18–22 minutes until the meatballs are browned on the outside and register at least 74 °C / 165 °F on an instant-read thermometer in the centre.
- Warm the marinara sauce in a large saucepan or slow cooker. Add the cooked meatballs and toss gently to coat in sauce.
- Press one candy eyeball or olive half onto the top of each sauced meatball while still warm — it will adhere as the sauce cools slightly. Serve in a slow cooker on the Warm setting with toothpicks alongside.

🛍 Shopping guide
Pumpkin Cheese Ball
This is the centrepiece recipe — the one that gets the “wait, IS that a real pumpkin?!” reaction the moment you set it on the table.
A seasoned cream-cheese ball, shaped and creased into a squat pumpkin with the magic of rubber bands (I know, I know — but it works), rolled in orange-tinted shredded cheddar, and finished with a green bell-pepper stem.
It tastes exactly as good as it looks: tangy, savoury, lightly oniony, and deeply snackable with crackers and veggie sticks.
The fact that it can be made up to three days ahead and actually needs fridge time to firm up properly makes it the perfect no-stress centrepiece. Allergen note: contains dairy. Gluten-free; serve with gluten-free crackers if needed.
Food Network lists the pumpkin cheese ball among its most-loved Halloween appetizers — and after making this one, you’ll see why.
Ingredients
- 2 × 225 g (8 oz) packages full-fat cream cheese, softened to room temperature
- 1 × 30 g (1 oz) packet ranch dressing dry mix
- 1 teaspoon garlic powder
- 1 teaspoon onion powder
- ½ teaspoon smoked paprika
- 200 g (7 oz / 2 cups) finely shredded sharp orange cheddar cheese, divided
- 1 small stem from a green bell pepper (or a short piece of green onion), for the pumpkin stem
- 4 thick rubber bands
- Crackers and sliced vegetables, for serving
Instructions
- In a large bowl, beat the softened cream cheese with an electric hand mixer until smooth and fluffy, about 1 minute. Add the ranch mix, garlic powder, onion powder, and smoked paprika; beat until thoroughly combined.
- Fold in 130 g (1 cup) of the shredded cheddar until evenly distributed. Taste and adjust salt if needed.
- Lay out a large sheet of plastic wrap on your work surface. Transfer the cream cheese mixture into the centre and gather the plastic wrap around it, squeezing and shaping the mixture into a compact, slightly squat ball.
- Stretch the four rubber bands evenly around the outside of the plastic-wrapped ball, spacing them equally to divide the ball into segments — these will create the ribbed “pumpkin ridges” as it chills. Refrigerate for at least 4 hours, or overnight.
- When ready to serve, carefully remove the rubber bands and unwrap the plastic. The ball should now have four ridges and look convincingly pumpkin-shaped. Place on a serving board and press the remaining shredded cheddar all over the outside, patting to adhere — this adds extra orange colour and texture.
- Insert the bell-pepper stem into the top centre. Surround with crackers and sliced vegetables and serve immediately, or return to the fridge for up to 30 minutes.

Skeleton Veggie Tray with Herb Dip
This is the one crowd-sized tray on the list — and I will tell you right now, it always stops people mid-sentence.
You arrange crisp, colourful vegetables across a large platter in the shape of a full skeleton, with a bowl of herb dip standing in as the skull.
Cucumber rounds make the spine, red pepper strips form the rib cage, carrot sticks and celery become the arms and legs, broccoli florets are the hands and feet, and sliced mushrooms form the pelvis.
It’s healthy, no-cook, genuinely dramatic, and kids absolutely love pulling it apart — which is kind of the whole point.
Prep all the veg and make the dip the day before; assemble on the platter up to 2 hours before the party and cover loosely with plastic wrap in the fridge. Contains: dairy (in the dip).
Vegan option: swap the sour cream for a thick coconut yogurt or vegan cream cheese.
Ingredients
For the herb dip (skull):
- 240 ml (1 cup) full-fat sour cream
- 120 g (4 oz / ½ cup) full-fat cream cheese, softened
- 2 tablespoons finely chopped fresh chives
- 1 tablespoon finely chopped fresh dill
- 1 clove garlic, minced
- ½ teaspoon onion powder
- Salt and white pepper, to taste
- 2 black olive slices (for the skull eye sockets)
For the skeleton tray:
- 1 long English cucumber, sliced into 5 mm rounds (spine)
- 2 red bell peppers, cut into thin lengthways strips (ribs)
- 4 large carrots, cut into long batons (arm and leg bones)
- 4 celery stalks, cut into batons (connecting bones)
- 2 cups broccoli or cauliflower florets (hands and feet)
- 6 cremini mushrooms, thickly sliced (pelvis)
- A few romaine lettuce leaves, torn (hair around the skull bowl)
Instructions
- Make the dip: beat the sour cream and cream cheese together until smooth. Stir in the chives, dill, garlic, onion powder, salt, and pepper. Transfer to a small round bowl that will serve as the skeleton’s skull. Press two olive-slice eyes onto the surface of the dip. Refrigerate until needed.
- On a large rectangular serving platter or board (at least 60 cm long), place the dip bowl at the top centre. Tuck a few romaine leaves around the bowl for wild “skull hair.”
- Working downward, lay cucumber rounds in a column below the bowl to form the spine, with a small gap between each round for the vertebra look.
- Fan red-pepper strips out on either side of the spine in a curved rib-cage shape — two to three strips per side, curving slightly inward.
- Position the mushroom slices below the rib cage to form the pelvis, overlapping them in a broad fan shape.
- Arrange carrot and celery batons extending outward from the shoulder level (arms) and hip level (legs). Angle them slightly for natural bone position.
- Cluster broccoli or cauliflower florets at the ends of the arm and leg bones as hands and feet. Serve immediately or cover loosely and refrigerate for up to 2 hours.

Ghost Pizza Bites
Consider this your shortcut hero of the lineup.
English muffin halves spread with pizza sauce, topped with ghost-shaped slices of low-moisture mozzarella (cut with a ghost cookie cutter or a small sharp knife), dotted with black-olive eyes, and baked until the cheese bubbles up into an actual ghostly shape.
The mozzarella puffs as it melts, which only makes the ghosts look more dramatically spectral. Kids go absolutely wild for these, and they take literally fifteen minutes from fridge to table. Allergen note: contains gluten and dairy.
Make-ahead: top the English muffins up to 2 hours before baking; cover loosely and refrigerate. Bake just before serving so the cheese is still warm and stringy.
Ingredients
- 12 English muffins, split in half (24 halves)
- 240 ml (1 cup) pizza sauce or marinara
- 6 slices low-moisture mozzarella cheese (each about 5 mm thick)
- 24 small black-olive rounds (for the ghost eyes)
- 1 tablespoon olive oil (optional, for toasting the muffins)
Instructions
- Preheat the oven to 190 °C / 375 °F and line two baking sheets with parchment paper.
- If you’d like a crispier base, brush the cut side of each muffin half with a little olive oil. Arrange cut-side up on the baking sheets and bake for 3 minutes until lightly toasted. Remove from the oven.
- Spread about 1 tablespoon of pizza sauce over each muffin half, going almost to the edges.
- Using a ghost-shaped cookie cutter (or cutting freehand with a small sharp knife), cut each mozzarella slice into four ghost shapes — each one roughly oval with a wavy bottom edge. You need 24 ghosts total, one per muffin half.
- Place one cheese ghost flat on top of each sauced muffin. Press two small olive rounds onto the ghost for eyes — press them gently so they stay put during baking.
- Return to the oven for 7–9 minutes until the cheese is melted, bubbling, and has puffed slightly into a more dramatic ghost shape. Serve immediately.

🛍 Shopping guide
Bloody Caprese Skewers
These are proof that Halloween party food can be genuinely elegant. Classic Caprese ingredients — ripe cherry tomatoes, fresh mozzarella balls, fragrant basil — threaded onto cocktail skewers and finished with a dramatic drizzle of thick balsamic glaze that looks (intentionally) like dark, glistening blood.
It’s playful spooky, not gory spooky, and the flavour is absolutely beautiful: sweet tomato, milky mozzarella, herbal basil, and that deep sweet-tart balsamic tang.
The colour palette — red, white, and green with black streaks — is actually stunning on a plate, and these are one of the only fully no-cook recipes on this list. Allergen note: contains dairy. Gluten-free.
Make the skewers up to 4 hours ahead and refrigerate covered; drizzle the balsamic glaze only just before serving so it stays vivid and glossy and doesn’t soak into the mozzarella.
Ingredients
- 24 ripe cherry or grape tomatoes
- 24 ciliegine (cherry-sized) fresh mozzarella balls (about 340 g / 12 oz), drained and patted dry
- 24 fresh basil leaves
- 2 tablespoons extra-virgin olive oil
- 3–4 tablespoons thick balsamic glaze (store-bought or reduced from balsamic vinegar)
- Flaky sea salt and freshly cracked black pepper
- 24 × 12 cm (5 in) bamboo cocktail skewers
Instructions
- If making your own balsamic glaze: pour 120 ml (½ cup) balsamic vinegar into a small saucepan and simmer over medium-low heat for 8–10 minutes, stirring occasionally, until reduced by half and thick enough to coat the back of a spoon. Cool completely before using.
- Assemble each skewer by threading one cherry tomato onto the pointed end, then folding a basil leaf in half and threading it through the centre, then pushing on one mozzarella ball. The order can vary — some like mozzarella at the top — but this sequence keeps the skewer balanced.
- Arrange all the assembled skewers on a large serving platter, radiating out or laid in neat rows.
- Drizzle the olive oil over the skewers, then season with flaky salt and cracked pepper.
- Just before serving, use a teaspoon to drizzle the thick balsamic glaze in dramatic dark lines across the skewers — zigzag lines or random drips both look properly spooky. Serve within 30 minutes of glazing.

Bat Wing Drumsticks
Chicken drumsticks look like bat wings anyway — it’s just that nobody had bothered to point it out until Halloween came along.
A sticky soy-honey-ginger glaze darkened with just a touch of black food colouring transforms them into proper Halloween showpieces that look dramatic and taste absolutely extraordinary: caramelised, lacquered, sweet-salty-savoury.
They’re genuinely crowd-pleasing in a way that no other appetizer on this table can match, because they’re a real proper bite of food. Stand them upright in a skull-printed cup or cluster them on a dark platter with the bones pointing up.
Allergen note: contains soy. Make-ahead: marinate overnight (the longer the better) and roast the day of the party. They hold at room temperature for up to 1 hour. Reheat in a 180 °C oven for 10 minutes if needed.
Ingredients
- 12 chicken drumsticks (about 1.4 kg / 3 lb total)
- 60 ml (¼ cup) soy sauce
- 60 ml (¼ cup) honey
- 2 tablespoons hoisin sauce
- 1 tablespoon toasted sesame oil
- 3 cloves garlic, minced
- 1 teaspoon freshly grated ginger
- 1 teaspoon rice vinegar
- 5–8 drops black gel food colouring (optional but dramatic)
- 1 tablespoon sesame seeds, for garnish
Instructions
- In a large zip-lock bag or bowl, whisk together the soy sauce, honey, hoisin, sesame oil, garlic, ginger, rice vinegar, and food colouring. Add the drumsticks, seal or cover, and massage the marinade into the chicken thoroughly. Refrigerate for at least 2 hours, ideally overnight.
- Preheat the oven to 200 °C / 400 °F and line a large rimmed baking sheet with foil (the marinade can burn and stick). Set a wire rack over the baking sheet and coat with cooking spray.
- Lift the drumsticks from the marinade, letting excess drip back into the bag. Reserve the leftover marinade. Arrange the drumsticks in a single layer on the rack, bone end up where possible to mimic wing posture.
- Roast for 25–30 minutes. Meanwhile, pour the reserved marinade into a small saucepan and bring to a boil over medium-high heat; simmer for 3 minutes until slightly thickened and fully safe to use as a glaze.
- Brush the drumsticks generously with the reduced glaze. Return to the oven for a further 10 minutes until the glaze is bubbling, caramelised, and the internal temperature registers 74 °C / 165 °F on a meat thermometer.
- Scatter with sesame seeds and arrange on a dark platter or standing in a tall cup. Serve warm.

Spiderweb Queso Dip
Warm, creamy, just-spicy-enough queso dip is the workhorse of the party snack table — and a sour-cream spiderweb piped on top turns it into an absolute Halloween hero.
The web takes literally one minute to draw with a toothpick once the sour cream is piped in concentric circles, and the visual payoff is completely disproportionate to the effort.
Keep this one in your slow cooker on the Warm setting all night so guests can dip repeatedly without it cooling down. Allergen note: contains dairy. Gluten-free if served with corn chips. Scale up easily: double everything and use a full-size slow cooker.
The web stays crisp on the surface for about 30 minutes before it starts to sink — redraw it with a fresh toothpick if needed.
Ingredients
- 450 g (1 lb) processed cheese block (like a velveeta-style cheese), cubed
- 1 × 280 g (10 oz) can diced tomatoes with green chillies, not drained
- 120 ml (½ cup) whole milk
- ½ teaspoon cumin
- ½ teaspoon smoked paprika
- ¼ teaspoon garlic powder
- 4 tablespoons full-fat sour cream (for the spiderweb)
- Corn tortilla chips, for serving
Instructions
- Combine the cubed cheese, canned diced tomatoes (with their juices), milk, cumin, paprika, and garlic powder in a medium saucepan over medium-low heat.
- Stir constantly with a spatula as the mixture heats, breaking up the cheese cubes. After about 10–12 minutes the cheese should be completely melted and the dip smooth and pourable — do not let it boil or the texture can turn grainy.
- Transfer to a serving bowl or slow-cooker insert. Smooth the surface level with a spatula.
- Fill a small piping bag or a zip-lock bag (with a very small corner snipped off) with the sour cream. Pipe concentric circles of sour cream across the surface of the queso, starting from the centre and working outward, spacing each circle about 1.5 cm apart.
- Drag a toothpick or skewer from the centre circle outward toward the edge in 8 evenly spaced lines, like the spokes of a wheel. This pulls the sour-cream circles into classic spiderweb points. Work quickly before the queso skin forms.
- Set in a slow cooker on the Warm setting or serve immediately with corn chips. Redraw the web as needed.

Frankenstein Guacamole Cups
And finally, the recipe that always makes people burst out laughing — in the best possible way.
Individual avocado-shell cups filled with freshly made guacamole, each one decorated to look like a big green cartoon monster: sour-cream dot eyes topped with black-bean pupils, a pretzel-stick mouth, tortilla-chip “hair” spiked dramatically upward, and two carrot stubs pressed into the sides as bolts.
The guacamole itself is the real deal — ripe avocado, lime, garlic, red onion, cilantro — not a prop but an actual, delicious dip you eat out of the shell with a chip.
Family-friendly, naturally gluten-free (serve with corn chips), and so photogenic it will live on in your camera roll long after the party. Allergen note: contains no common allergens in the base recipe; contains gluten if served with wheat-flour tortilla chips.
Make-ahead: press plastic wrap directly onto the guacamole surface (touching it, no air gaps) and refrigerate for up to 4 hours. Add decorations only at serving time.
Inspired by the creative Halloween appetizer tradition celebrated by Food Network and a great follow-on after a night of putting together a full party spread — speaking of which, if you’re looking for more crowd-pleasing party ideas, our kitchen counter styling guide has brilliant ideas for setting up a buffet station that actually works.
Ingredients
For the guacamole:
- 6 ripe Hass avocados
- 3 tablespoons fresh lime juice (about 2 limes)
- 2 cloves garlic, finely minced
- 3 tablespoons finely diced red onion
- 3 tablespoons finely chopped fresh cilantro
- 1 teaspoon cumin
- 1 teaspoon fine salt, plus more to taste
- Black pepper to taste
For the Frankenstein decorations (per cup):
- 1 teaspoon full-fat sour cream (eyes)
- 2 canned black beans (pupils)
- 2 short pretzel sticks, snapped in half (mouth)
- 2 baby carrot stubs, about 2 cm each (neck bolts)
- 4–5 dark blue or black corn tortilla chips (spiked hair)
- Corn tortilla chips for scooping
Instructions
- Halve all six avocados lengthways; remove the pits and set aside (you’ll use the shells as serving cups). Scoop the flesh into a large bowl with a large spoon.
- Add the lime juice and immediately mash with a fork to your preferred texture — I like mine somewhere between chunky and smooth, so a few small pieces of avocado remain. Add the garlic, red onion, cilantro, cumin, salt and pepper; fold everything together. Taste and adjust lime and salt generously — guacamole needs more seasoning than you think.
- Scoop the guacamole back into the 12 empty avocado shell halves, mounding it generously so it rises above the shell edge.
- Decorate each cup: add two small sour-cream dots for eyes, then press a black bean onto each dot for pupils. Press two pretzel-stick halves in a rough line below the eyes to suggest a stitched mouth. Push a baby-carrot stub into each side of the avocado shell just below the guacamole line for neck bolts. Finally, push 4–5 corn chips upright into the top of the guacamole as wild, spiked hair.
- Arrange the finished cups on a dark serving platter and surround with extra corn chips for scooping. Serve immediately or press plastic wrap gently onto the guacamole surface and refrigerate for up to 1 hour — add the chip hair just before guests arrive so they don’t go soggy.

Frequently Asked Questions
How far ahead can I make Halloween party appetizers?
It depends on the recipe. The Pumpkin Cheese Ball can be made up to 3 days in advance. The Graveyard Taco Dip and Spider Deviled Eggs (components stored separately) can be prepped up to 24 hours ahead.
The Mummy Pigs in Blankets can be assembled and refrigerated up to 4 hours before baking. No-cook items like the Bloody Caprese Skewers and Frankenstein Guacamole Cups should be assembled the day of the party — though you can prep all ingredients the day before.
As a general rule for food safety, keep all assembled perishable appetizers refrigerated until within 2 hours of serving.
Which Halloween appetizers are best for keeping warm throughout a party?
The Monster Eye Meatballs and the Spiderweb Queso Dip are both ideal for a slow cooker set to the Warm setting — they hold beautifully for 2–3 hours.
The Bat Wing Drumsticks can be kept warm in a 90 °C / 200 °F oven on a wire rack for up to 1 hour. Mummy Pigs in Blankets hold at room temperature for about 45 minutes.
Everything else on this list is designed to be served at room temperature or cold, so no warming equipment needed.
How do I stop the spooky decorations from smearing or falling off during the party?
A few tricks: press candy eyes or olive decorations onto bites while the food is still slightly warm so they adhere as it cools. For dips with a sour-cream spiderweb, redraw the web with a fresh toothpick every 30 minutes.
For the Witch Finger Breadsticks, embed the almonds firmly into raw dough before baking — they’ll stay put. For the Frankenstein Guacamole Cups, add the tortilla-chip hair just before guests arrive so it stays crisp.
And for the Bloody Caprese Skewers, drizzle the balsamic glaze only right before serving — it won’t absorb into the mozzarella if it goes on at the last moment.
Which recipes are gluten-free?
Naturally gluten-free recipes on this list include the Salami and Mozzarella Eyeball Bites, Spider Deviled Eggs, Mini Jack-o’-Lantern Stuffed Peppers, Bloody Caprese Skewers, Frankenstein Guacamole Cups (with corn chips), Spiderweb Queso Dip (with corn chips), Pumpkin Cheese Ball, and Skeleton Veggie Tray.
Always double-check packaged ingredients like sauces, seasonings, and cheese for hidden gluten sources if serving guests with coeliac disease.
How do I scale up these Halloween party appetizers for a large crowd?
Most of these recipes double or triple easily.
For the baked items (Mummy Pigs, Witch Finger Breadsticks, Ghost Pizza Bites, Bat Wing Drumsticks), simply multiply ingredients and use extra baking sheets — bake in batches, keeping finished items warm in a 90 °C / 200 °F oven on a wire rack.
For dips, make double batches in the slow cooker. The no-cook recipes (Caprese Skewers, Eyeball Bites, Stuffed Peppers) scale linearly with zero extra effort.
A good rule of thumb for a party where appetizers are the main event: plan for 5–6 pieces per guest per hour.
Are all these Halloween appetizers suitable for children?
Yes — all 15 recipes on this list are entirely alcohol-free and designed for a mixed-age crowd. The spooky details are playful rather than graphic, so they’re appropriate for kids.
A few items include potential allergens (nuts in the Witch Finger Breadsticks, eggs and dairy in several recipes) — check the allergen note in each recipe intro if you’re cooking for children with food allergies.
The Bat Wing Drumsticks use soy sauce, which contains gluten and is a soy allergen. The Spiderweb Queso Dip uses processed cheese — check packaging for any allergen declarations.
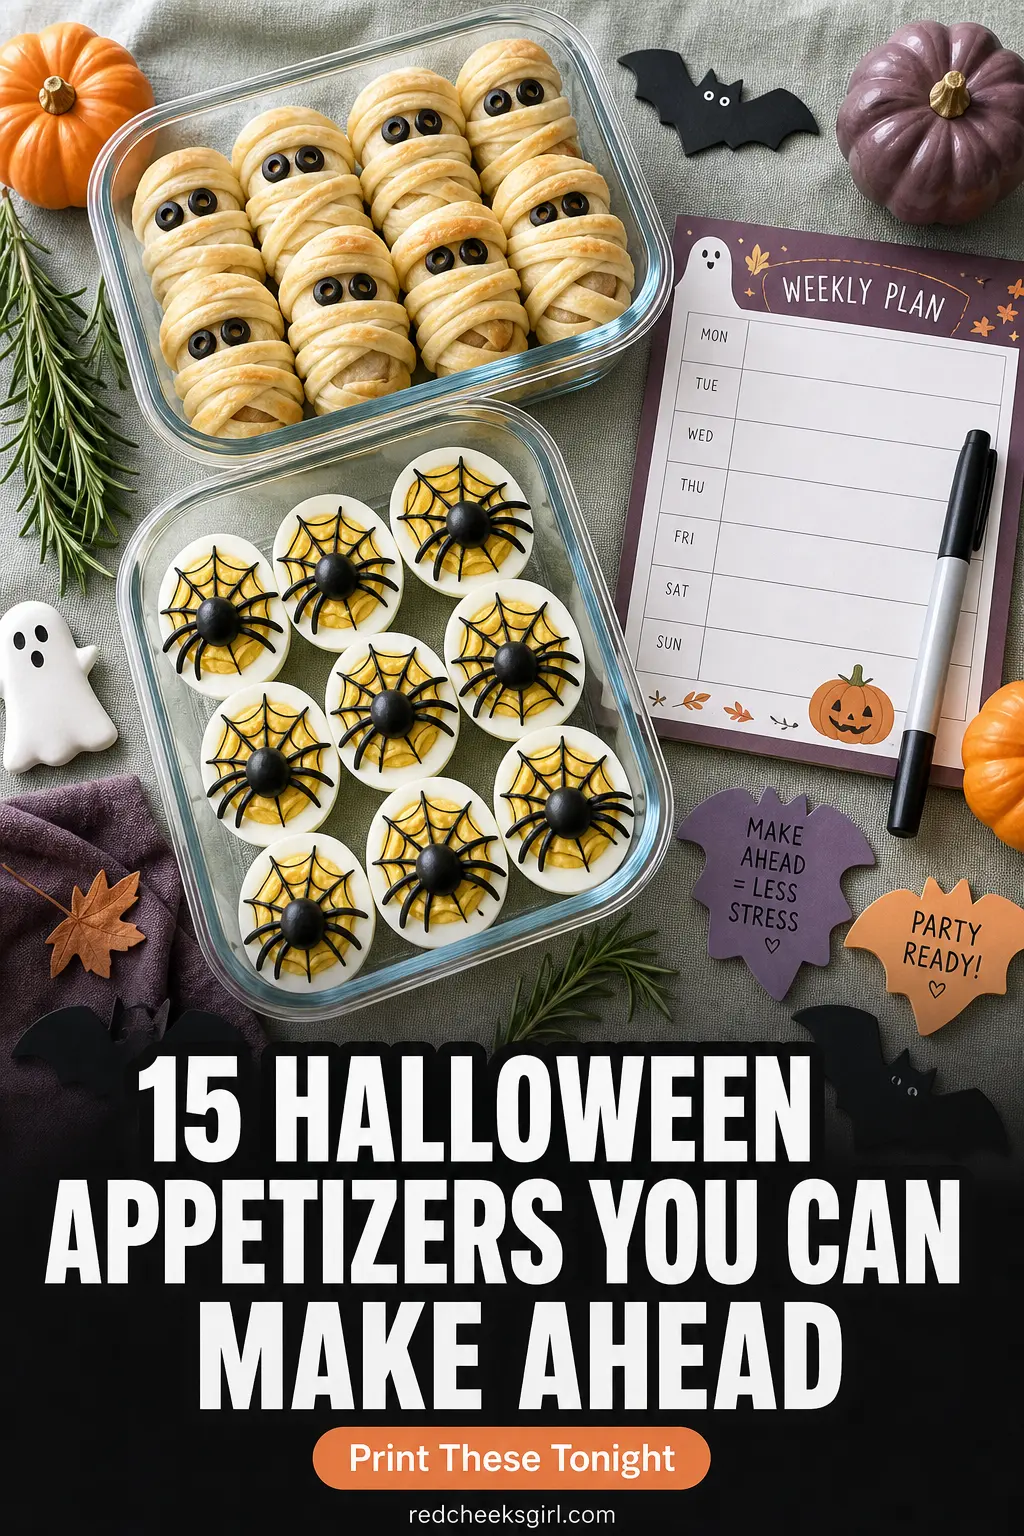
📌 Save These for Later
Loved these? Pin your favorite image below so you can find this list again when you’re planning.

22 Halloween crafts for elementary kids that use real techniques and materials you can grab in one s

16 fabric pumpkin DIY ideas using velvet, boucle, felt and more. Full instructions, materials lists

14 preschool Halloween crafts ranked from zero mess to aprons-on, each with an honest clean-up time
Leave a Reply